2015 MERCEDES-BENZ E-CLASS ESTATE ignition
[x] Cancel search: ignitionPage 119 of 497
Rain-closin
gfeature Whe
nthe key is in position 0in the ignition
lock or is removed ,the sliding sunroof closes
automatically:
R if it starts to rain.
R at extrem eoutsid etemperatures.
R afte rsix hours.
R if there is amalfunction in the power sup-
ply.
The rea rofthe sliding sunroof is then raised in
order to ventilate the vehicl einterior.
i If the sliding sunroof is obstructe
dwhen
being closed by the rain-closing feature ,it
opens agai nslightly. The rain-closing fea-
ture is then deactivated.
The sliding sunroof doe snot close if:
R it is raised at the rear.
R it is blocked.
R no rai nisfalling on the are aofthe wind-
screen being monitored by the rai nsensor.
If the vehicle, for example, is under abridge
or in acarport, the field of the sensor may
be covered.
Resetting !
If the sliding sunroof stil
lcanno tbe
opened or closed fully afte rresetting ,con-
tact aquali fied specialist workshop.
Reset the sliding sunroof if it doe snot operate
smoothly.
X Turn the key to position 1or 2in the ignition
lock.
X Raise the sliding sunroof fully at the rear
(Y page 115).
X Kee pthe 3 switch presse dfor another
second.
X Make sure that the sliding sunroof can be
fully opened and closed again
(Y page 115).
X If this is not the case, repea tthe steps
above again. Operating the panorama sliding sun-
roof
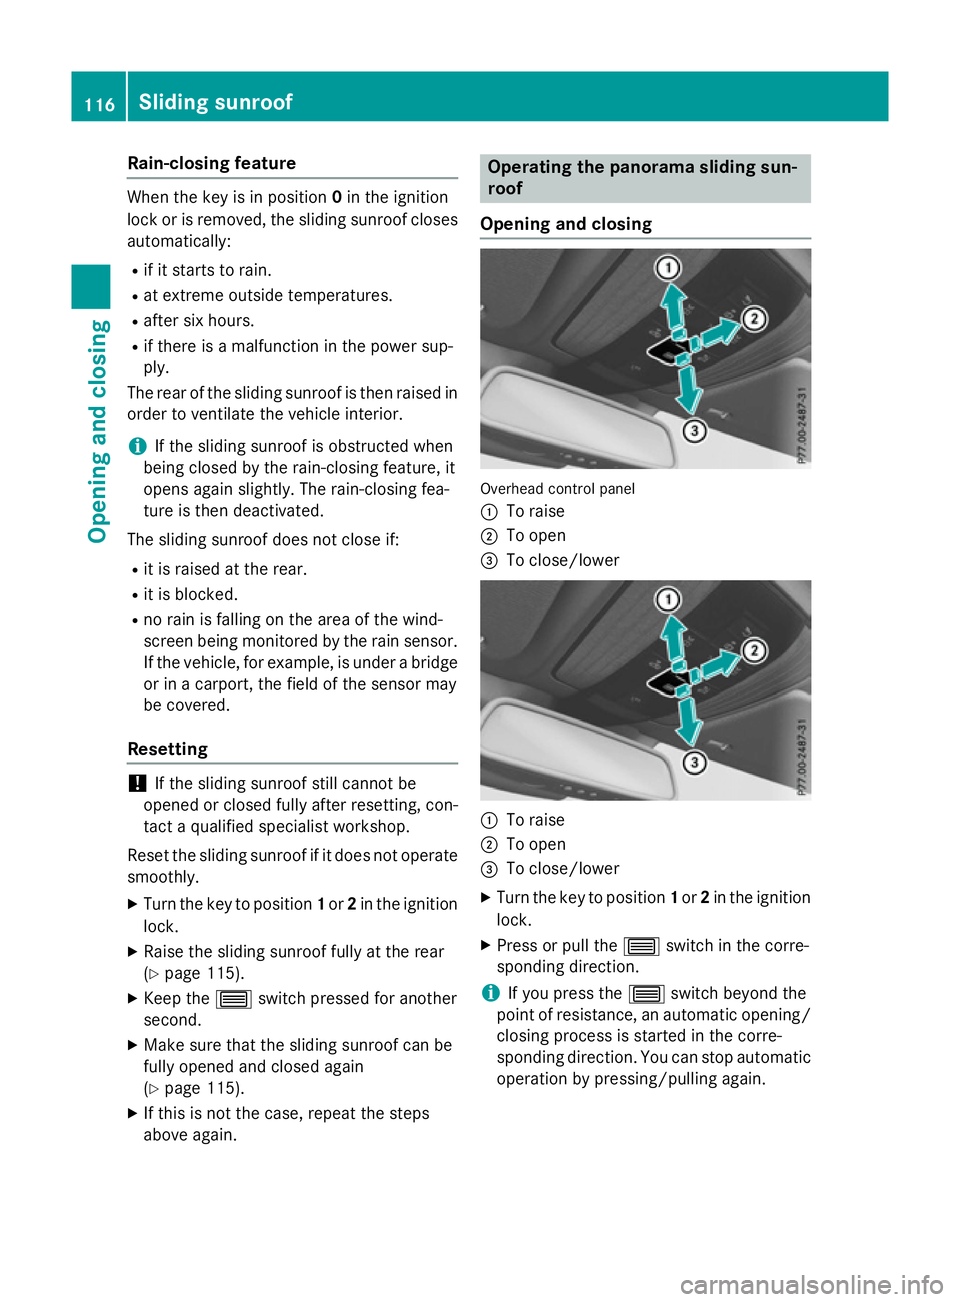
Opening and closing Overhead control panel
:
To raise
; To open
= To close/lower :
To raise
; To open
= To close/lower
X Turn the key to position 1or 2in the ignition
lock.
X Press or pull the 3switch in the corre-
sponding direction.
i If yo
upress the 3switch beyond the
point of resistance, an automatic opening/ closing process is started in the corre-
sponding direction. Yo ucan stop automatic
operation by pressing/pulling again. 116
Sliding sunroofOpening and closing
Page 120 of 497
Rain-closin
gfeature Whe
nthe key is in position 0in the ignition
lock or is removed ,the panorama sliding sun-
roo fcloses automatically:
R if it starts to rain.
R at extrem eoutsid etemperatures.
R afte rsix hours.
R if there is amalfunction in the voltag esup-
ply
The panorama sliding sunroof remains raised
at the rea rinorder to allo wventilation of the
vehicl einterior.
i If the panorama sliding sunroof is obstruc-
ted when being closed by the rain-closing
feature ,itopens agai nslightly. The rain-
closing feature is then deactivated.
The panorama sliding sunroof doe snot close
if:
R it is raised at the rear.
R it is blocked.
R no rai nisfalling on the are aofthe wind-
screen being monitored by the rai nsensor,
e.g. because the vehicl eisunderabridge. Operating the rolle
rsunblin dfor the
panorama sliding sunroof
Important safety notes G
WARNING
Parts of the bod ycould become trapped
between the rolle rsun blind and frame or slid-
ing sunroof during automatic opening or clos-
ing. There is ariskofi njury.
Whe nopening or closing ,make sure that no
bod yparts are in the sweep of the rolle rsun-
blind.
If someone is trapped:
R release the switch immediately or
R press the switch in any direction during the
automatic opening/closing process The opening/closing process is briefl
ystop-
ped .The rolle rsun blind then returns to its ini-
tia lposition.
The rolle rsun blind shields the vehicl einterior
from sunlight. The two rolle rsunblind scan
only be opened and closed together when the panorama sliding sunroof is closed.
Rolle rsunblin dreversin gfeature The rolle
rsunblind is equipped with an auto-
mati creversing feature .Ifanobject blocks or
restricts the rolle rsun blind during the closing
process ,the rolle rsun blind opens agai nauto-
matically .The automatic reversing feature is,
however, only an ai dand is no substitute for
your attention when closing the rolle rsun-
blind. G
WARNING
The reversing function doe snot react in par-
ticula rtosoft, light and thin objects, e.g. small
fingers .Thism eans that the reversing feature
canno tprevent someone being trapped in
thes esituations. There is ariskofi njury.
Whe nclosing the rolle rsunblind ,make sure
that no bod yparts are in the sweep.
If someone is trapped:
R release the switch immediately or
R press the switch in any direction during the
automatic closing process
The closing process is briefl ystopped .The
rolle rsunblind then returns to its initia lposi-
tion. Sliding sunroof
117Opening and closing Z
Page 121 of 497
Opening and closing
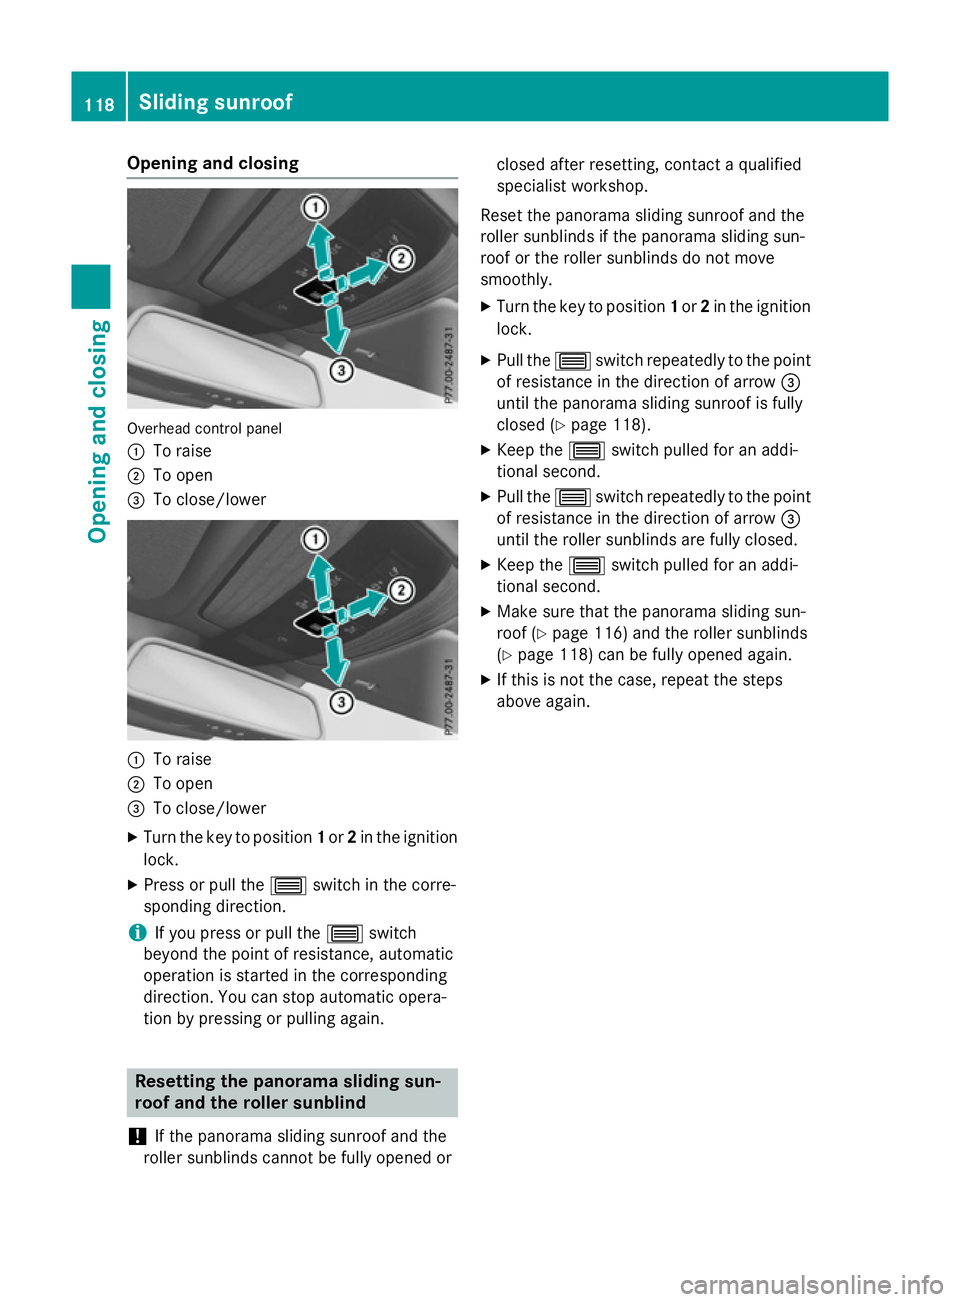
Overhead control panel
:
To raise
; To open
= To close/lower :
To raise
; To open
= To close/lower
X Turn the key to position 1or 2in the ignition
lock.
X Press or pull the 3switch in the corre-
spondin gdirection.
i If you press or pull the
3switch
beyond the point of resistance, automatic
operation is started in the corresponding
direction. You can stop automatic opera-
tion by pressing or pulling again. Resetting the panorama sliding sun-
roof and the roller sunblind
! If the panorama sliding sunroof and the
roller sunblinds cannot be fully opened or closed after resetting, contact
aqualified
specialist workshop.
Reset the panorama sliding sunroof and the
roller sunblinds if the panorama sliding sun-
roof or the roller sunblinds do not move
smoothly. X Turn the key to position 1or 2in the ignition
lock.
X Pull the 3switch repeatedly to the point
of resistance in the direction of arrow =
until the panorama sliding sunroof is fully
closed (Y page 118).
X Keep the 3switch pulled for an addi-
tional second.
X Pull the 3switch repeatedly to the point
of resistance in the direction of arrow =
until the roller sunblinds are fully closed.
X Keep the 3switch pulled for an addi-
tional second.
X Make sure that the panorama sliding sun-
roof (Y page 116) and the roller sunblinds
(Y page 118) can be fully opened again.
X If this is not the case, repeat the steps
above again. 118
Sliding sunroofOpening and closing
Page 126 of 497
The seat belt should:
R fit snugly across your body
R be routed across the middle of your shoul-
der
R be routed across your hips in the pelvic
area
X Before starting off, adjust the rear-view mir-
ror and the exterior mirrors so that you
have agood view of road and traffic condi-
tions (Y page 136).
X Vehicles with amemor yfunction: save
the seat, steerin gwheel and exterior mirror
settings with the memory function
(Y page 139). Seats
Important safety notes
G
WARNING
If children adjust the seats, they could
become trapped, especially if they are unat-
tended. There is arisk of injury.
When leaving the vehicle, alway stake the key
with you and lock the vehicle. Never leave
children unattended in the vehicle.
The seats can still be adjusted when there is
no key in the ignition lock. G
WARNING
The head restraints cannot provide the inten-
ded protection unless they are fitted and
adjusted correctly. There is an increased risk of injury to the head and neck in the event of
an accident or sudden braking, for example.
Always drive with the head restraints fitted.
Ensure that the centre of the head restraints
support the back of each vehicle occupant's
head at eye level before driving off.
Observe the safety notes on "Airbags"
(Y page 50) and "Children in the vehicle"
(Y page 58). G
WARNING
You could lose control of the vehicle while
driving if you:
R adjust the driver's seat, steerin gwheel or
mirrors
R fasten the seat belt
There is arisk of an accident.
Adjust the driver's seat, head restraint, steer-
ing wheel and mirrors and fasten your seat
belt before starting the engine. G
WARNING
If you adjust the seat height carelessly, you or other vehicle occupant scould be trapped and
thereby injured. Children in particular could
accidentally press the electrical seat adjust-
ment button sand become trapped. There is a
risk of injury.
While moving the seats, make sure that your
hands or other body parts do not get under the
lever assembly of the seat adjustmen tsys-
tem. G
WARNING
When adjusting aseat, you or another vehicle
occupant could become trapped by the guide rail of the seat, for instance. There is arisk of
injury.
Make sure that no one has any part of their
body within the sweep of the seat when
adjusting it.
! To avoid damage to the seats and the seat
heating, observe the following information:
R do not spill any liquids on the seats. If
liquid is spilled on the seats, dry them as
soon as possible.
R if the seat covers are damp or wet, do not
switch on the seat heating. The seat
heating should also not be used to dry
the seats.
R clean the seat covers as recommended;
see "Interior care".
R do not transport heavy loads on the
seats. Do not place sharp object sonthe Seats
123Seats, steering wheel and mirrors Z
Page 129 of 497
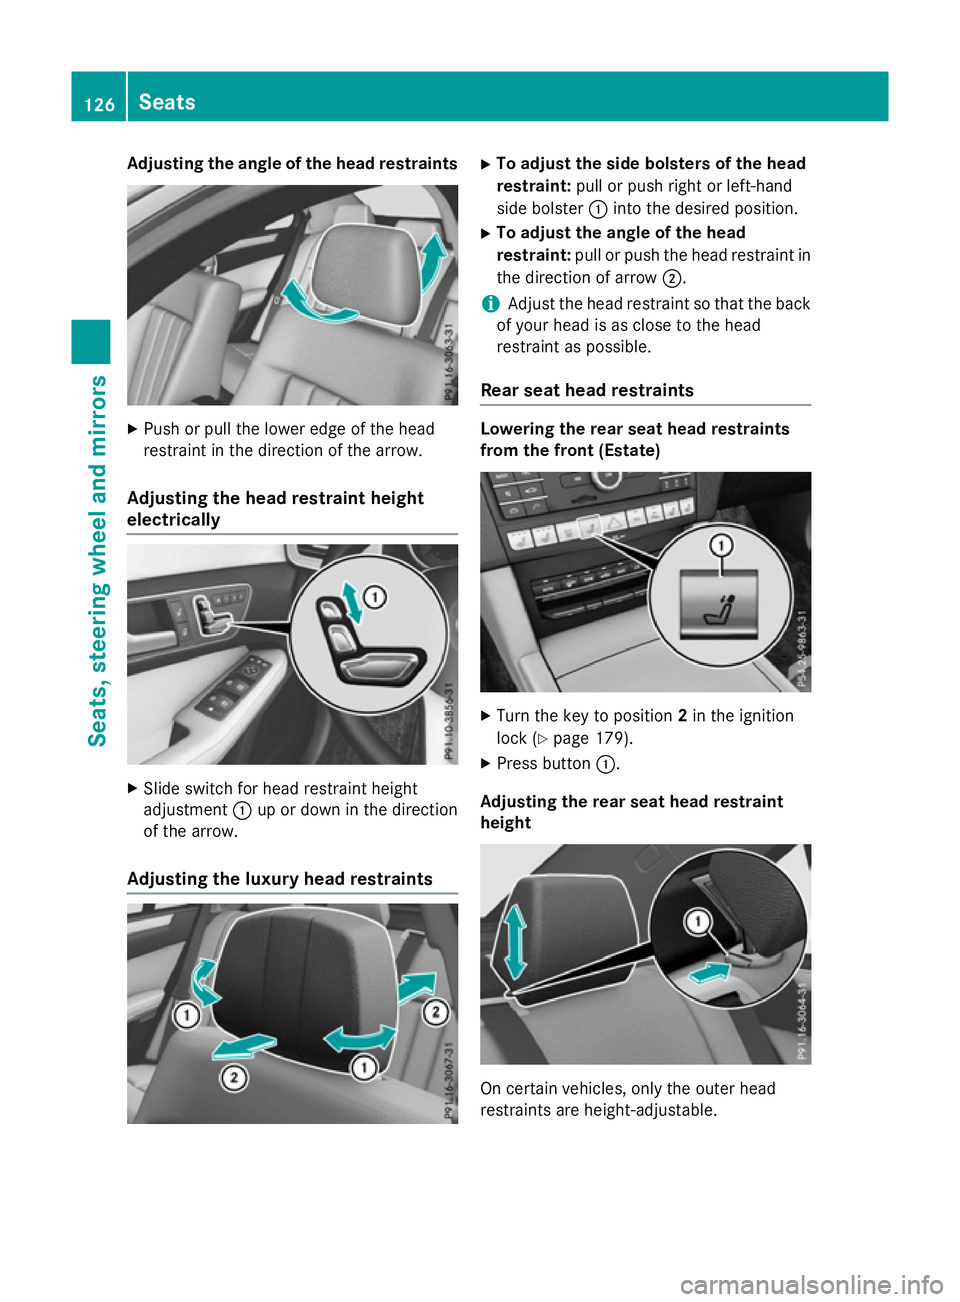
Adjusting th
eangle of th eheadr estraints X
Push or pull th elower edge of th ehead
restraint in th edirection of th earrow.
Adjusting th eheadr estrain theight
electrically X
Slide switch for head restraint height
adjustment :up or down in th edirection
of th earrow.
Adjusting th eluxur yheadr estraints X
To adjust th esideb olsters of th ehead
restraint: pull or push right or left-hand
side bolster :intot he desired position.
X To adjust th eangle of th ehead
restraint: pull or push th ehead restraint in
th ed irection of arrow ;.
i Adjus
tthe head restraint so that th eback
of your head is as close to th ehead
restraint as possible.
Rea rseat hea drestraints Lowering th
erears eat hea drestraints
from th efront (Estate) X
Turn th ekeyto position 2in th eignition
loc k(Ypage 179).
X Press button :.
Adjusting th erears eat hea drestraint
height On certai
nvehicles, only th eouter head
restraint sare height-adjustable. 126
SeatsSeats, steering wheel and
mirrors
Page 131 of 497
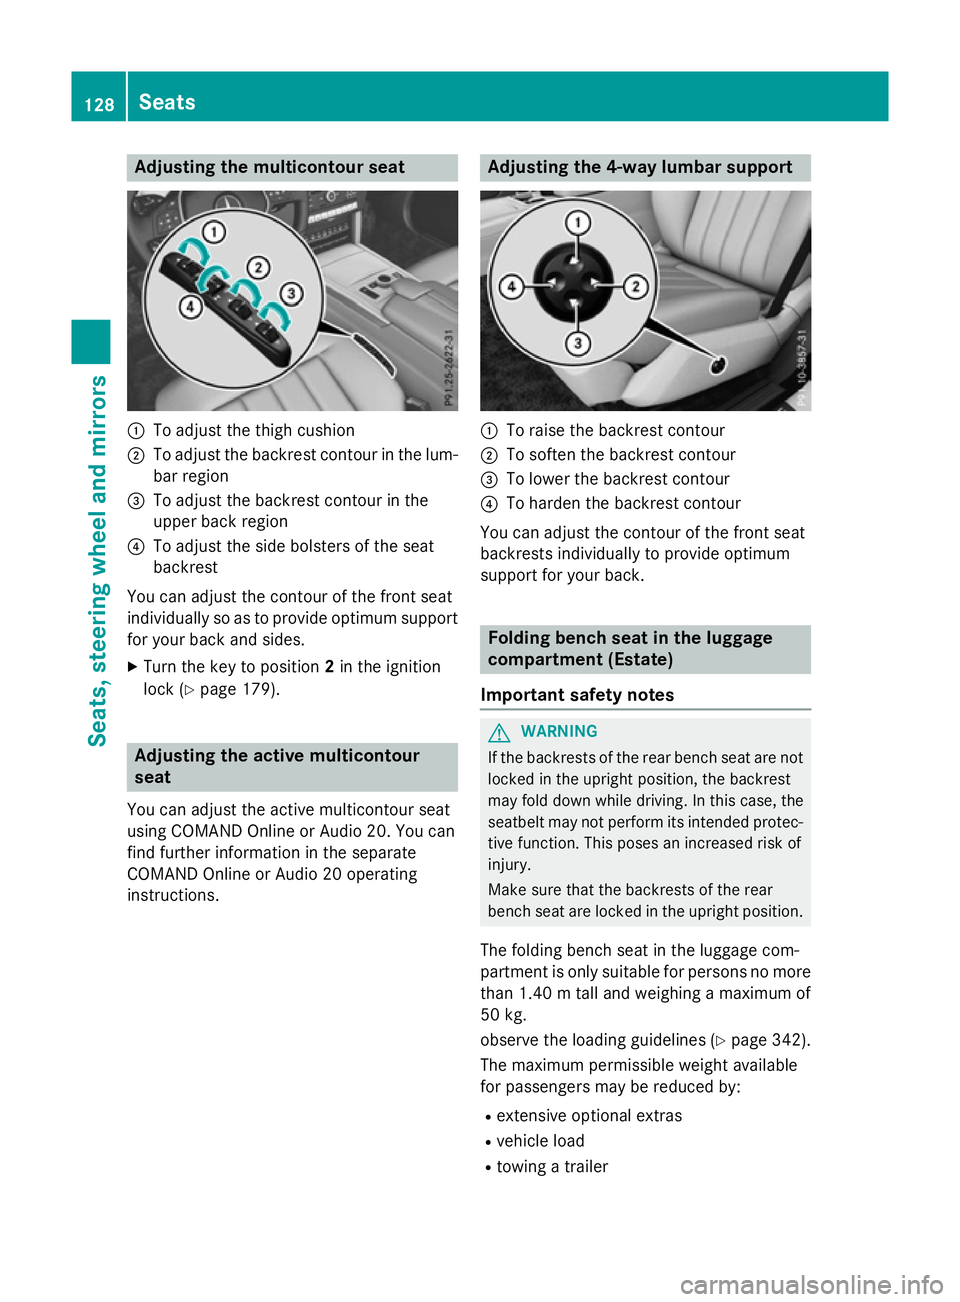
Adjusting th
emulticontour seat :
To adjust th ethigh cushion
; To adjust th ebackrest contour in th elum-
bar region
= To adjust th ebackrest contour in the
upper bac kregion
? To adjust th eside bolsters of th eseat
backrest
You can adjust th econtou rofthefron tseat
individually so as to provide optimum support
for your bac kand sides.
X Turn th ekeyto position 2in th eignition
loc k(Ypage 179). Adjusting th
eactive multicontour
seat
You can adjust th eactive multicontour seat
usin gCOMAND Onlin eorAudio 20 .You can
fin df urther information in th eseparate
COMAND Onlin eorAudio 20 operating
instructions. Adjusting th
e4-wa ylumbar support :
To rais ethe backrest contour
; To softe nthe backrest contour
= To lower th ebackrest contour
? To harden th ebackrest contour
You can adjust th econtou rofthefron tseat
backrest sindividually to provide optimum
support for your back. Folding bench sea
tintheluggage
compartmen t(Estate)
Important safety notes G
WARNING
If th ebackrest softherear bench seat are not
locke dintheupright position ,the backrest
may fol ddown while driving. In this case, the
seatbelt may no tperfor mitsintended protec-
tive function .This poses an increased ris kof
injury.
Mak esuret hatthe backrest softherear
bench seat are locke dintheupright position.
The foldin gbench seat in th eluggag ecom-
partmen tisonlys uitable for person snomore
than 1.40 mtalla nd weighing amaximum of
50 kg.
observ ethe loadin gguidelines (Y page 342).
The maximum permissible weigh tavailable
for passenger smay be reduce dby:
R extensive optional extras
R vehicl eload
R towin gatrailer 128
SeatsSeats
,steering wheel and mirrors
Page 134 of 497
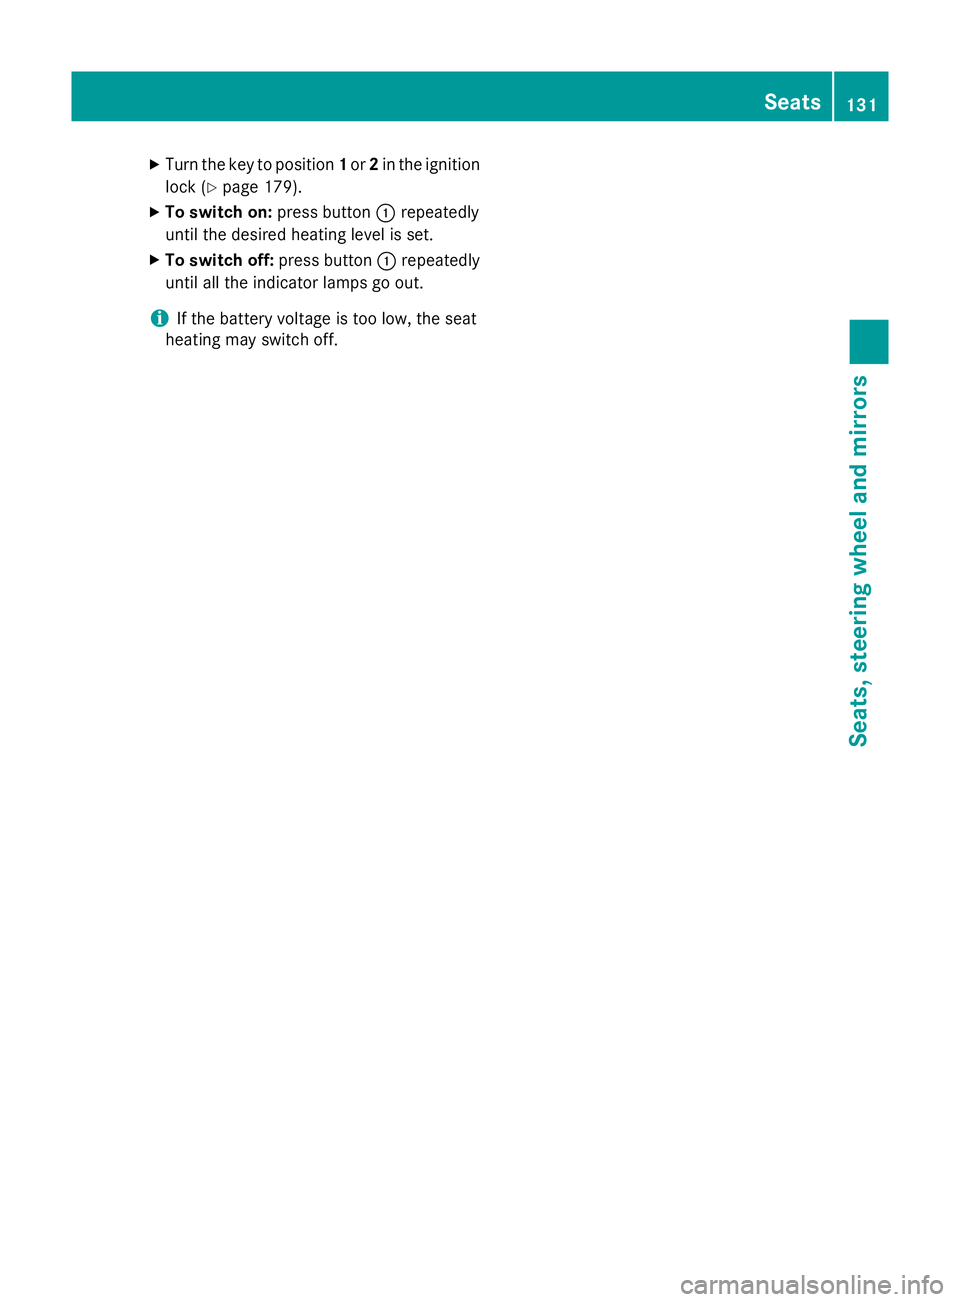
X
Turn the key to position 1or 2in the ignition
lock (Y page 179).
X To switch on: press button:repeatedly
until the desired heating level is set.
X To switch off: press button:repeatedly
until all the indicator lamps go out.
i If the battery voltage is too low, the seat
heating may switch off. Seats
131Seats, steering wheel and mirrors Z
Page 135 of 497
Problems with the seat heating
Problem
Possible causes/consequences and
M
MSolutions The seat heating has
switched off prema-
turely or cannot be
switched on. The on-board voltage is too low because too many electrical con-
sumers are switched on.
X Switch off electrical consumers that you do not need, such as
the rear window heating or interior lighting.
Once the battery is sufficiently charged, the seat heating will
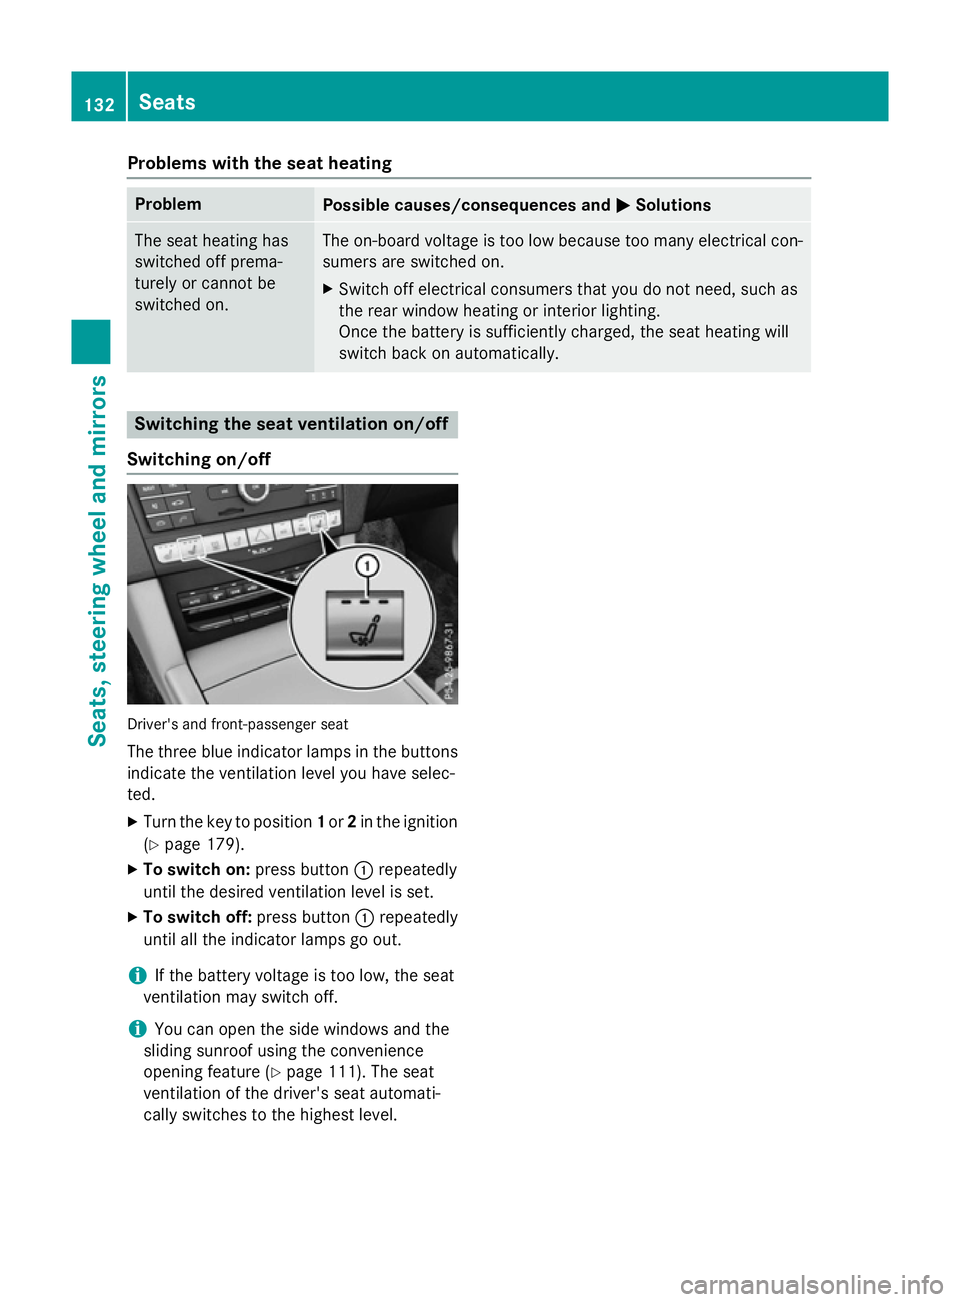
switch back on automatically. Switching the seat ventilation on/off
Switching on/off Driver's and front-passenger seat
The three blue indicator lamps in the buttons
indicate the ventilation level you have selec-
ted.
X Turn the key to position 1or 2in the ignition
(Y page 179).
X To switch on: press button:repeatedly
until the desired ventilation level is set.
X To switch off: press button:repeatedly
until all the indicator lamps go out.
i If the battery voltage is too low, the seat
ventilation may switch off.
i You can open the side windows and the
sliding sunroof using the convenience
opening feature (Y page 111). The seat
ventilation of the driver's seat automati-
cally switches to the highest level. 132
SeatsSeats, steering wheela
nd mirrors