2015 MERCEDES-BENZ E-CLASS ESTATE oil change
[x] Cancel search: oil changePage 181 of 497
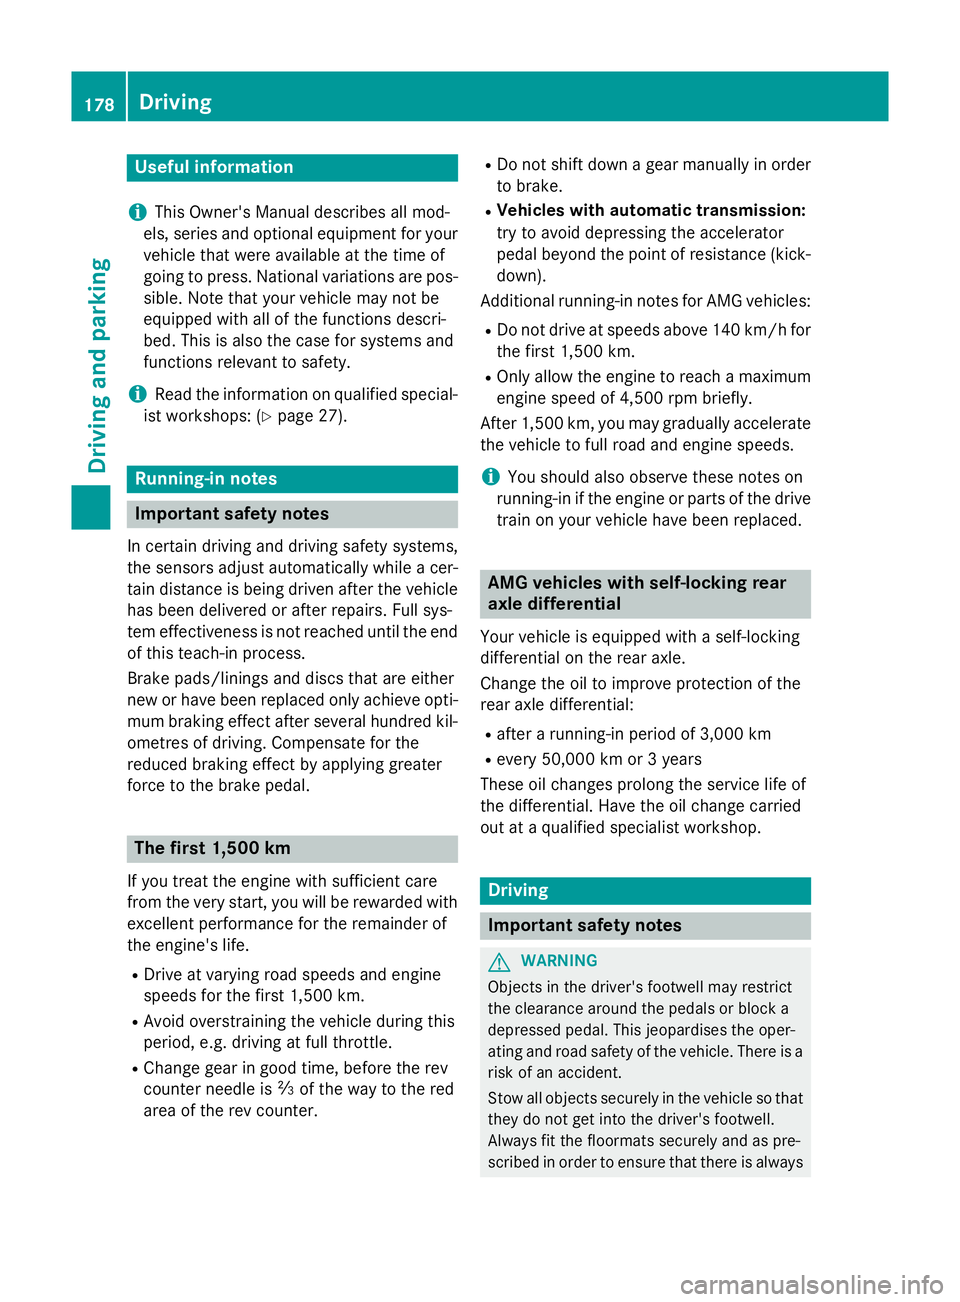
Useful information
i This Owner's Manual describes all mod-
els, series and optional equipment for your
vehicle that were available at the time of
going to press. National variation sare pos-
sible. Not ethat your vehicle may not be
equipped with all of the function sdescri-
bed. This is also the case for system sand
function srelevan ttosafety.
i Read the information on qualified special-
ist workshops: (Y page 27). Running-in notes
Important safet
ynotes
In certain drivin gand drivin gsafet ysystems,
the sensors adjust automatically while acer-
tain distance is being driven after the vehicle has been delivered or after repairs. Full sys-
tem effectiveness is not reached until the end
of this teach-in process.
Brak epads/linings and discs that are either
new or have been replaced only achieve opti- mum brakin geffec tafter several hundred kil-
ometres of driving. Compensate for the
reduced brakin geffec tbya pplying greater
forc etot he brake pedal. The first 1,500 km
If you treat the engin ewith sufficient care
from the very start ,you will be rewarded with
excellent performanc efor the remainder of
the engine's life.
R Driv eatv arying road speeds and engine
speeds for the first 1,50 0km.
R Avoid overstraining the vehicle during this
period, e.g. drivin gatfull throttle.
R Change gear in good time, before the rev
counter needle is Ôof the way to the red
area of the rev counter. R
Do not shift down agear manually in order
to brake.
R Vehicles with automatic transmission:
try to avoid depressin gthe accelerator
pedal beyond the point of resistance (kick-
down).
Additional running-in notes for AMG vehicles:
R Do not drive at speeds above 140 km/ hfor
the first 1,500 km.
R Only allow the engine to reach amaximum
engine speed of 4,500 rpm briefly.
After 1,500 km, you may graduall yaccelerate
the vehicle to full road and engine speeds.
i You should also observe these notes on
running-in if the engine or parts of the drive
train on your vehicle have been replaced. AMG vehicles with self-locking rear
axle differential
Your vehicle is equipped with aself-locking
differential on the rear axle.
Change the oil to improve protection of the
rear axle differential:
R after arunning-in period of 3,000 km
R every 50,000 km or 3years
These oil changes prolong the service life of
the differential. Have the oil change carried
out at aqualified specialist workshop. Driving
Important safety notes
G
WARNING
Object sinthe driver's footwell may restrict
the clearance around the pedals or block a
depressed pedal. This jeopardises the oper-
ating and road safety of the vehicle. There is a risk of an accident.
Stow all object ssecurely in the vehicle so that
they do not get into the driver's footwell.
Always fit the floormats securely and as pre-
scribed in order to ensure that there is always 178
DrivingDriving and parking
Page 203 of 497
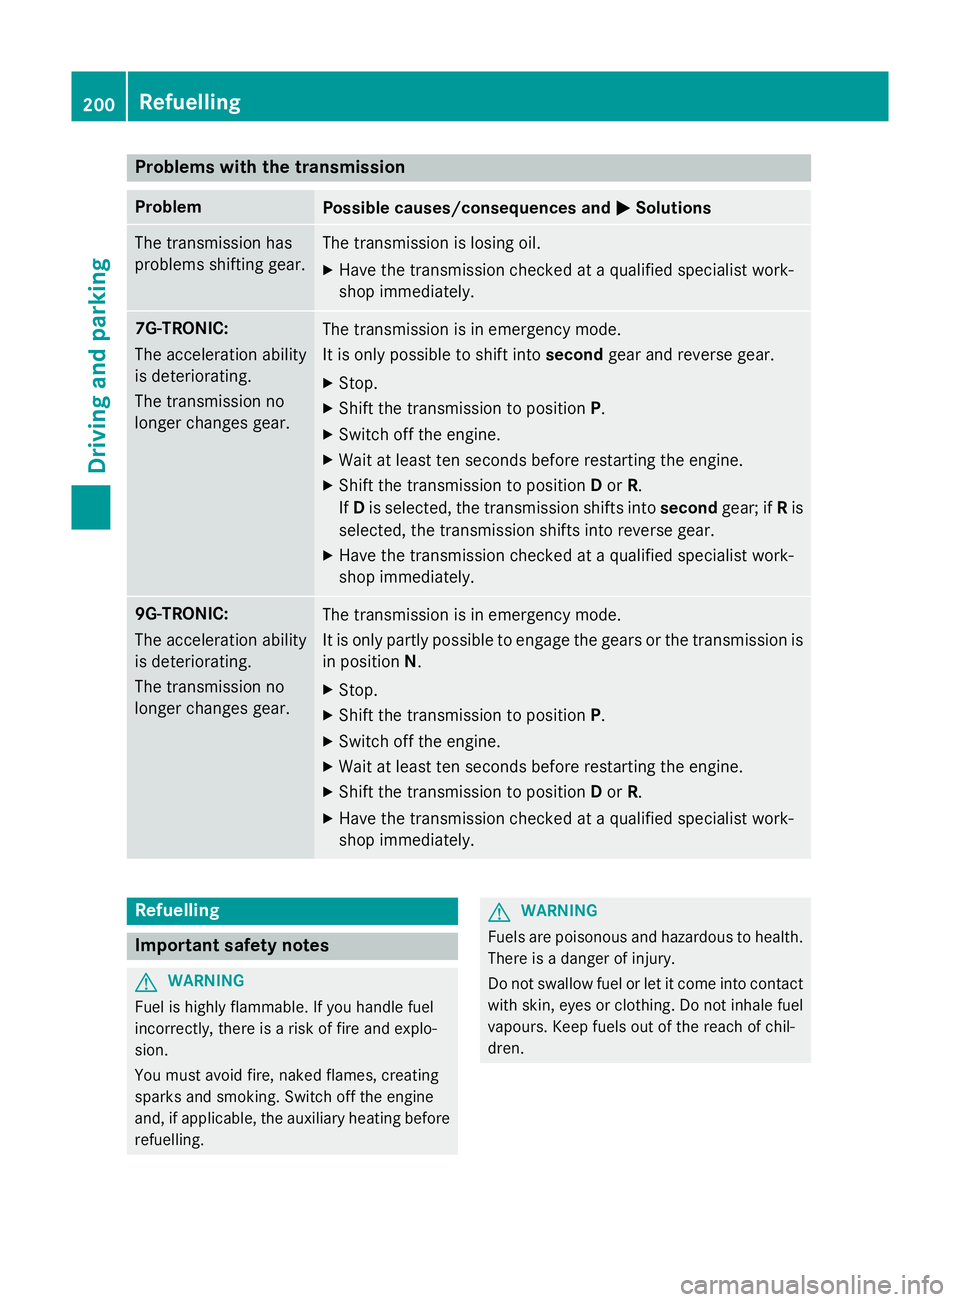
Problems with the transmission
Problem
Possible causes/consequences and
M
MSolutions The transmission has
problems shifting gear. The transmission is losing oil.
X Have the transmission checked at aqualified specialist work-
shop immediately. 7G-TRONIC:
The acceleration ability
is deteriorating.
The transmission no
longer changes gear.
The transmission is in emergency mode.
It is only possible to shift into
secondgear and reverse gear.
X Stop.
X Shift the transmission to position P.
X Switch off the engine.
X Wait at least ten seconds before restarting the engine.
X Shift the transmission to position Dor R.
If D is selected, the transmission shifts into secondgear; ifRis
selected, the transmission shifts into reverse gear.
X Have the transmission checked at aqualified specialist work-
shop immediately. 9G-TRONIC:
The acceleration ability
is deteriorating.
The transmission no
longer changes gear.
The transmission is in emergency mode.
It is only partly possible to engage the gears or the transmission is
in position N.
X Stop.
X Shift the transmission to position P.
X Switch off the engine.
X Wait at least ten seconds before restarting the engine.
X Shift the transmission to position Dor R.
X Have the transmission checked at aqualified specialist work-
shop immediately. Refuelling
Important safety notes
G
WARNING
Fuel is highly flammable. If you handle fuel
incorrectly, there is arisk of fire and explo-
sion.
You must avoid fire, naked flames, creating
sparks and smoking. Switch off the engine
and, if applicable, the auxiliary heating before refuelling. G
WARNING
Fuels are poisonous and hazardous to health. There is adanger of injury.
Do not swallow fuel or let it come into contact
with skin, eyes or clothing. Do not inhale fuel
vapours. Keep fuels out of the reach of chil-
dren. 200
RefuellingDriving and parking
Page 385 of 497
G
WARNING
If engine oil comes into contact with hot com- ponents in the engine compartment, it may
ignite. There is arisk of fire and injury.
Make sure that engine oil does not spil lout
over the filler neck. Allow the engine to cool
downa nd thoroughly clea nthe components
that have come into contact with engine oil
before you start the engine. H
Environmental note
When topping up the oil,t ake care not to spill
any. If oil enters the soil or waterways, it is
harmfu ltothe environment.
! Only use engine oilsa
nd oil filters that
have been approved for vehicles with aser-
vice system. You can obtai nalistoft he
engine oilsa nd oil filters tested and
approved in accordance with the
Mercedes-Benz Specifications for Service
Products at any Mercedes-Benz Service
Centre.
Damag etothe engine or exhaust system is
caused by the following:
R using engine oilsa nd oil filters that have
not been specifically approved for the
service system
R changing the engine oil and oil filter after
missing the change interval required by
the service system
R using engine oil additives
! Do not add too much oil.T
opping up with
too much engine oil can result in damage to
the engine or to the catalytic converter.
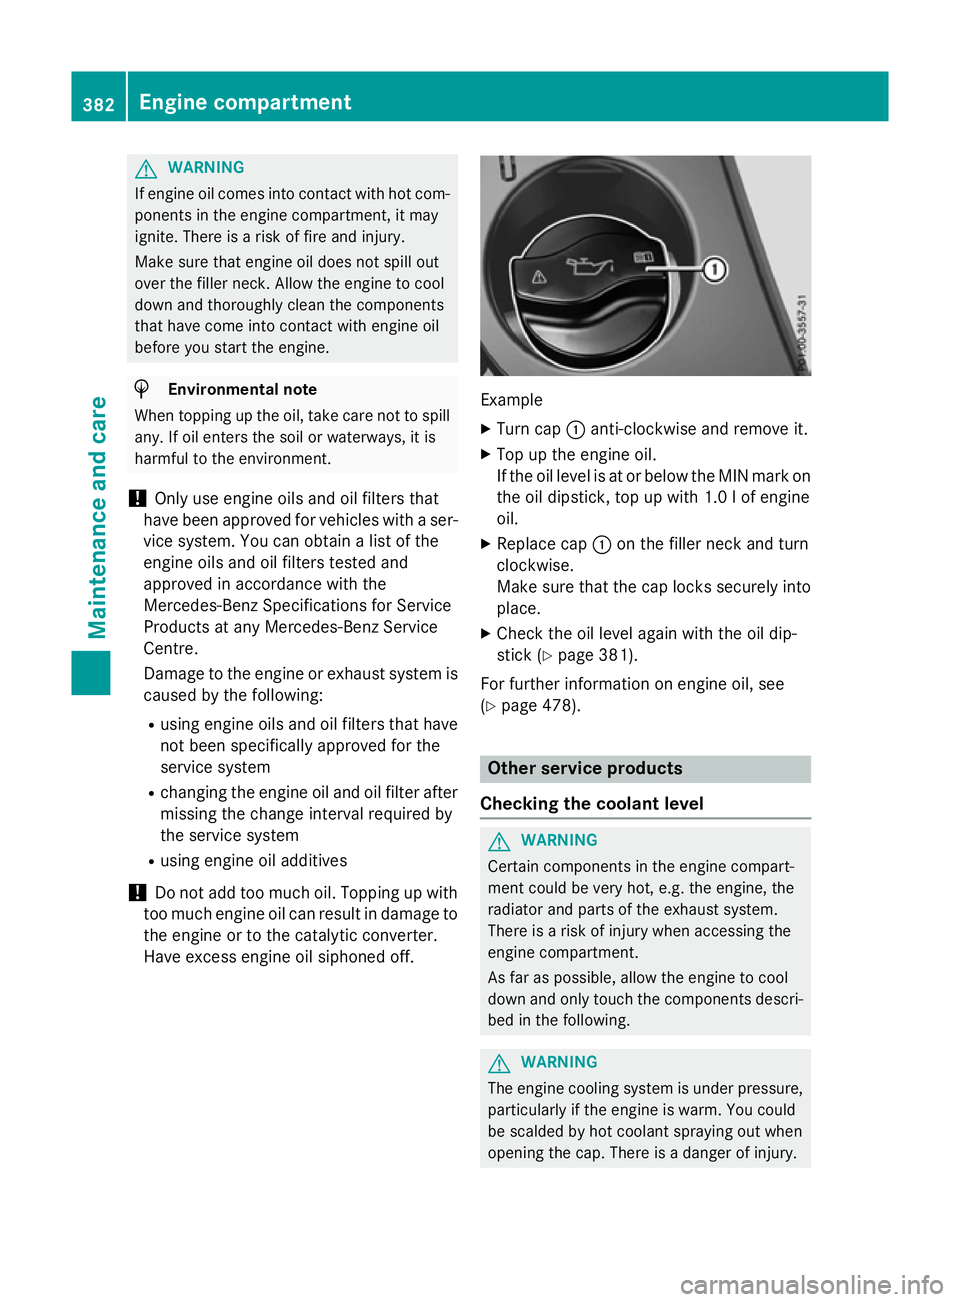
Have excess engine oil siphoned off. Example
X Turn cap :anti-clockwise and remove it.
X Top up the engine oil.
If the oil leve lisatorbelow the MIN mark on
the oil dipstick, top up with 1.0 lofe ngine
oil.
X Replace cap :on the filler neck and turn
clockwise.
Make sure that the cap locks securely into place.
X Check the oil level again with the oil dip-
stick (Y page 381).
For further information on engine oil, see
(Y page 478). Other service products
Checking the coolant level G
WARNING
Certain components in the engine compart-
ment could be very hot, e.g. the engine, the
radiator and parts of the exhaust system.
There is arisk of injury when accessing the
engine compartment.
As far as possible, allow the engine to cool
down and only touch the components descri- bed in the following. G
WARNING
The engine cooling system is under pressure, particularly if the engine is warm. You could
be scalded by hot coolant spraying out when
opening the cap. There is adanger of injury. 382
Engine compartmentMaintenance and care
Page 388 of 497
Special service requirements
The prescribed service interval is based on
normal operation of the vehicle. Service work
will need to be performed more often if the
vehicle is operated under arduousc onditions
or increased loads, for example:
R regular city driving with frequent intermedi-
ate stops
R if the vehicle is primarily used to travel
short distances
R for frequent operation in mountainous ter-
rain or on poor road surfaces
R if the engine is often left idling for long peri-
ods
In these or similar operating conditions, have,
for example, the air filter, engine oil and oil
filter changed more frequently. The tyres
must be checked more frequently if the vehi-
cle is operated under increased loads. Fur-
ther information can be obtained at aquali-
fied specialist workshop, e.g. aMercedes-
Benz Service Centre.
Driving abroad
An extensive Mercedes-Benz Service network is also available in other countries. You can
obtain further information from any
Mercedes-Benz Service Centre. AdBlue
®
service indicator
i For BlueTEC vehicles only.
To function properly, BlueTEC exhaust gas
aftertreatment must be operated with the
reducing agent AdBlue ®
.A dBlue ®
is topped
up as part of the service. Under normal oper-
ating conditions, afull tank of AdBlue ®
should
last until the next service due date.
Depending on how and where the vehicle is
used, there may be an increase in the
AdBlue ®
consumption, resulting in the next
service due date being brought forward.
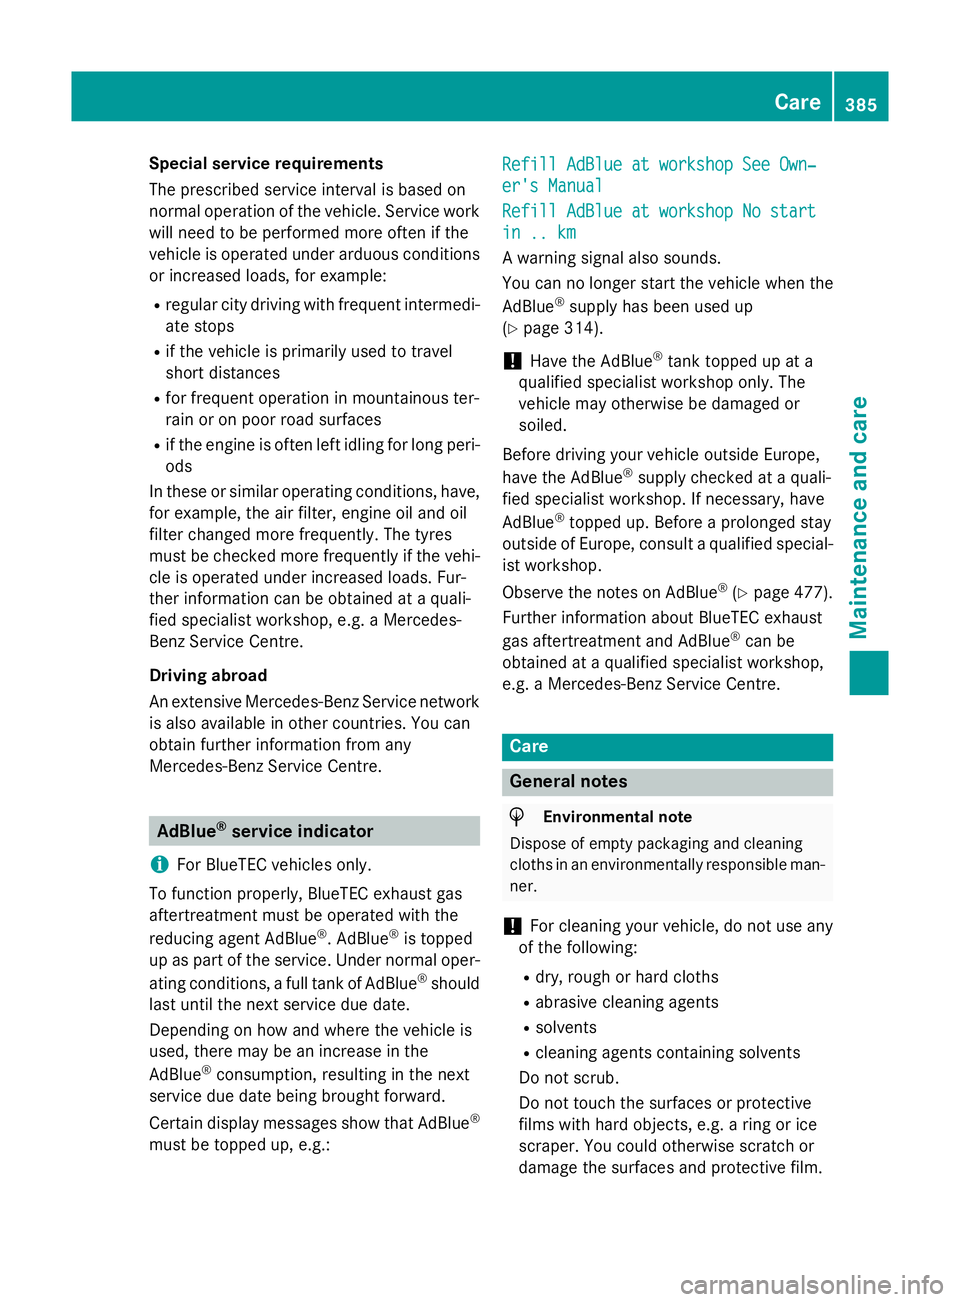
Certain display messages show that AdBlue ®
must be topped up, e.g.: Refill AdBlue at workshop See Own‐ Refill AdBlue at workshop See Own‐
er's Manual er's Manual
Refill AdBlue at workshop No start Refill AdBlue at workshop No start
in .. km in .. km
Aw
arning signal also sounds.
You can no longer start the vehicle when the
AdBlue ®
supply has been used up
(Y page 314).
! Have the AdBlue ®
tank topped up at a
qualified specialist workshop only. The
vehicle may otherwise be damaged or
soiled.
Before driving your vehicle outside Europe,
have the AdBlue ®
supply checked at aquali-
fied specialist workshop. If necessary, have
AdBlue ®
topped up. Before aprolonged stay
outside of Europe, consult aqualified special-
ist workshop.
Observe the notes on AdBlue ®
(Y page 477).
Further information about BlueTEC exhaust
gas aftertreatment and AdBlue ®
can be
obtained at aqualified specialist workshop,
e.g. aMercedes-Benz Service Centre. Care
General notes
H
Environmental note
Dispose of empty packaging and cleaning
cloths in an environmentally responsible man- ner.
! For cleaning your vehicle, do not use any
of the following:
R dry, rough or hard cloths
R abrasive cleaning agents
R solvents
R cleaning agents containing solvents
Do not scrub.
Do not touch the surfaces or protective
films with hard objects, e.g. aring or ice
scraper. You could otherwise scratchor
damage the surfaces and protective film. Care
385Maintenance and care Z
Page 394 of 497
!
Please note the care instructions in the
trailer coupling manufacturer's operating
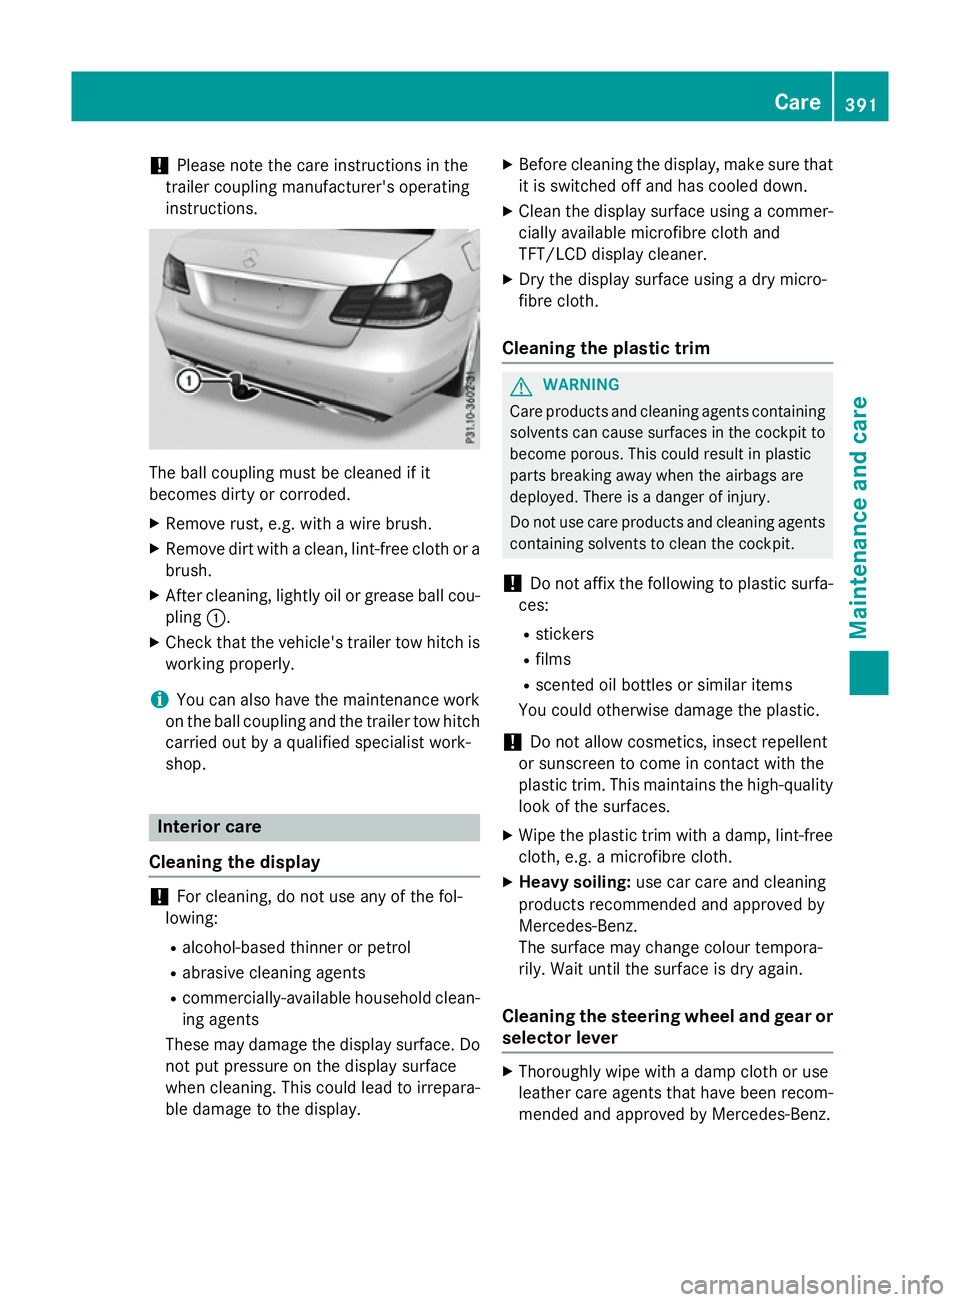
instructions. The ball coupling must be cleaned if it
becomes dirty or corroded.
X Remove rust, e.g. with awire brush.
X Remove dirt with aclean, lint-free cloth or a
brush.
X After cleaning, lightly oil or grease ball cou-
pling :.
X Check that the vehicle's trailer tow hitch is
working properly.
i You can also have the maintenance work
on the ball coupling and the trailer tow hitch
carried out by aqualified specialist work-
shop. Interior care
Cleaning the display !
For cleaning, do not use any of the fol-
lowing:
R alcohol-based thinner or petrol
R abrasive cleaning agents
R commercially-available householdc lean-
ing agents
These may damage the displays urface. Do
not put pressure on the displays urface
when cleaning. This could lead to irrepara-
ble damage to the display. X
Before cleaning the display, make sure that
it is switched off and has cooled down.
X Cleant he displays urface using acommer-
cially available microfibre cloth and
TFT/LCD displayc leaner.
X Dry the displays urface usingadry micro-
fibre cloth.
Cleaning the plastic trim G
WARNING
Care products and cleaning agents containing solvents can cause surfaces in the cockpit to
become porous. This could result in plastic
parts breaking awayw hen the airbags are
deployed. There is adanger of injury.
Do not use care products and cleaning agents containing solvents to clean the cockpit.
! Do not affix the following to plastic surfa-
ces:
R stickers
R films
R scented oil bottles or similari tems
You could otherwise damage the plastic.
! Do not allowc
osmetics, insect repellent
or sunscreen to come in contact with the
plastic trim. This maintains the high-quality look of the surfaces.
X Wipe the plastic trim with adamp, lint-free
cloth, e.g. amicrofibre cloth.
X Heavy soiling: use car care and cleaning
products recommended and approved by
Mercedes-Benz.
The surface may change colour tempora-
rily. Wait until the surface is dry again.
Cleaning the steering wheela nd gear or
selector lever X
Thoroughlyw ipe withadamp cloth or use
leather care agents that have been recom-
mended and approved by Mercedes-Benz. Care
391Maintenance and care Z
Page 429 of 497
Changing
awheel Flat tyre
You can fin dinformatio nonwhat to do in the
event of aflat tyr einthe"Breakdown assis-
tance" sectio n(Ypage 397). Information on
driving wit hMOExtended tyres in th eevent of
af lat tyr ecan be foun dunde r"Breakdown
assistance" (Y page 398).
Vehicles with an emergency spare wheel: in th eevent of aflat tyre, th eemergency
spar ewheel is fitte daccording to th edescrip-
tio nu nde r"Fittin gaw heel" (Y page 426). Interchanging th
ewheels G
WARNING
Interchangin gthe fron tand rear wheel smay
severely impai rthe driving characteristic sif
th ew heel sort yres have different dimensions.
The wheel brakes or suspension components may also be damaged. Ther eisariskofa cci-
dent.
Interchange fron tand rear wheel sonlyift he
wheel sand tyres are of th esame dimensions.
! On vehicle
sfitte dw ithat yrep ressure
monitor, electronic component sare loca-
te dint hewheel.
Tyre-fittin gtools should no tbeapplied in
th ea rea of th evalve, as this could damage
th ee lectronic components.
Only have tyres changed at aqualified spe-
cialist workshop.
Interchangin gthe fron tand rear wheels of
differin gdimension scan render th egeneral
operatin gpermit invalid.
Observ ethe instruction sand safety note sin
th e" Fittin gaw heel" sectio n(Ypage 426).
The wear pattern sonthefron tand rear tyres
differ dependin gontheoperatin gconditions.
Interchange th ewheels before aclear wear
pattern has formed on th etyres. Fron ttyres
typically wear mor eontheshoulder sand the
rear tyres in th ecentre. On vehicle
stha th ave th esame siz efront and
rear wheels ,you can interchange th ewheels
every 5,000 to 10,00 0kmdependin gonthe
degree of tyr ewear. Ensure that th edirection
of rotatio nismaintained.
Clean th econtac tsurfaces of th ewheel and
th eb rak edisc thoroughly every tim eawheel
is interchanged. Chec kthe tyrep ressure and,
if necessary, restar tthe tyrep ressure loss
warning system (Y page 422) or thetyrep res-
sure monito r(Ypage 424). Direction of rotation
Tyres wit haspecifie ddirection of rotation
have additional benefits, e.g .ifthere is arisk
of aquaplaning .Thes eadvantages can only be
gained if th etyres are fitte dcorres ponding to
th ed irection of rotation.
An arrow on th esidewal lofthetyreindicates
its correct direction of rotation. Storing wheels
Store wheels that are no tbein gused in acool,
dry and preferabl ydark place. Protect the
tyres against oil, grease, petrol and diesel. Fitting
awheel
Preparin gthe vehicle X
Stop th evehicle on solid ,non-sl ippery and
leve lground.
X Apply th eparking brake.
X Mov ethe fron twheels to th estraight-
ahead position.
X Vehicles with manua ltra nsmission:
depress th eclutch pedal fully and engage
first or revers egear.
X Vehicles with automatic transmission:
shif tthe transmission to position P.
X Vehicle swithA IRMATIC: mak esure that
"normal" leve lisselecte d(Ypage 231).
X Switch off th eengine. 426
Changing
awheelWheels and tyres
Page 433 of 497
X
Unscrew the remaining wheel bolts fully.
X Remove the wheel.
Fitting anew wheel G
WARNING
Oiled or greased wheel bolts or damaged
wheel bolts/hub threads can cause the wheel bolts to come loose. As aresult, you could
lose awheel while driving. There is arisk of
accident.
Never oil or grease wheel bolts. In the event of damage to the threads, contact aqualified
specialist workshop immediately.H ave the
damagedw heel bolts or hub threads
replaced/renewed. Do not continue driving. G
WARNING
If you tighten the wheel bolts or wheel nuts
when the vehicle is raised, the jack could tip
over. There is arisk of injury.
Only tighten the wheel bolts or wheel nuts
when the vehicle is on the ground.
Observe the instructions and safety notes on "Changing awheel" (Y page 426).
Only use wheel bolts that have been designed
for the wheel and the vehicle. For safety rea-
sons, Mercedes-Benz recommends that you
only use wheel bolts which have been
approved for Mercedes-Benz vehicles and the
respective wheel.
! AMG vehicles:
during removal and repo-
sitioning of the wheel, the wheel rim can
strike the ceramic-brake disc and damage
it. Therefore, take precautions and have a
second person assist you. Alternatively,
you can use asecond centring pin. X
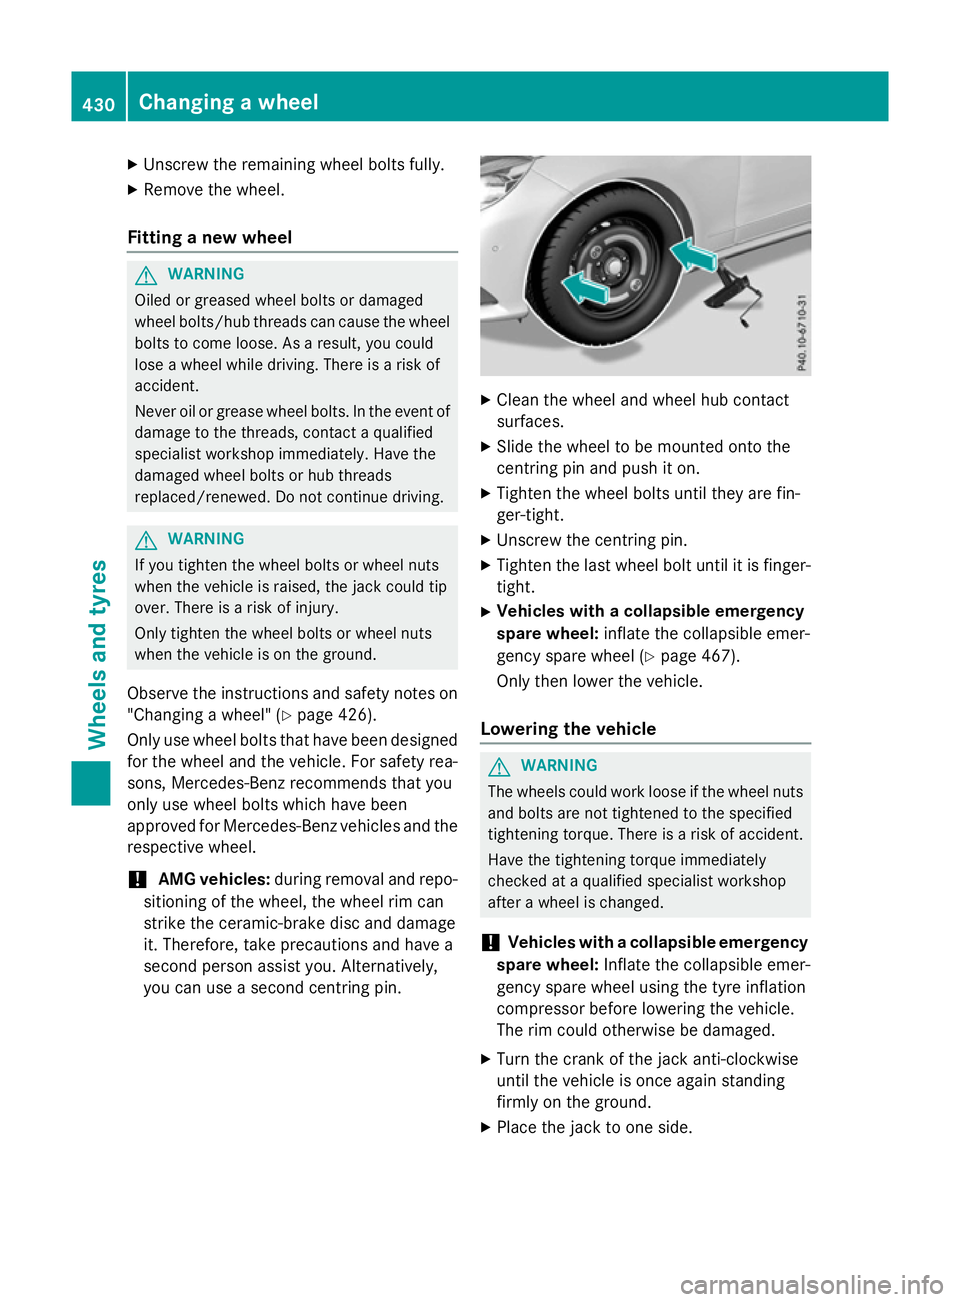
Cleant he wheel and wheel hub contact
surfaces.
X Slide the wheel to be mounted onto the
centring pin and push it on.
X Tighten the wheel bolts until they are fin-
ger-tight.
X Unscrew the centring pin.
X Tighten the last wheel bolt until it is finger-
tight.
X Vehiclesw ithacollapsible emergency
spare wheel: inflate the collapsible emer-
gency spare wheel (Y page 467).
Only then lower the vehicle.
Lowering the vehicle G
WARNING
The wheels could work loose if the wheel nuts and bolts are not tightened to the specified
tightening torque. There is arisk of accident.
Have the tightening torque immediately
checked at aqualified specialist workshop
after awheel is changed.
! Vehiclesw
ithacollapsible emergency
spare wheel: Inflate the collapsible emer-
gency spare wheel using the tyre inflation
compressor before lowering the vehicle.
The rim could otherwise be damaged.
X Turn the crank of the jack anti-clockwise
until the vehicle is once agains tanding
firmly on the ground.
X Place the jack to one side. 430
Changing
awheelWheels and tyres
Page 479 of 497
Mercedes-Ben
zrecommends that you use
fuel brands that have additives.
The quality of the fuel available in some coun- tries may not be sufficient. Residuec ould
build up in the injection system as aresult. In
this case, in consultation with aMercedes-
Benz Service Centre, the petrol may be mixed with the cleaning additive recommended by
Mercedes-Benz. Always observe the notes
and mixing ratios specified on the container.
Diesel Fuel grade
G
WARNING
If you mix diesel fuel with petrol, the flash
point of this fuel mixture is lower than that of pure diesel fuel. When the engine is running,
components in the exhaust system may over-
heat unnoticed. There is arisk of fire.
Never refuel with petrol. Never add petrol to
diesel fuel.
! When refuelling, only use diesel fuel that
conforms to the European standard EN 590
or is of equivalent quality. Fuel that does
not conformtoEN5 90 can lead to
increased wear as well as damage to the
engine and exhaust system.
! Do not use the following:
R marine diesel
R heating oil
R bio-diesel
R vegetable oil
R petrol
R paraffin
R kerosene
Do not mix such fuels with diesel fuel and
do not use any special additives. Other-
wise, engine damage may occur.
! Vehicles with diesel particle filters:
in
countries outside the EU, only use low sul-
phur Euro diesel with asulphurc ontent of under 50 ppm
.Otherwise, the emission
control system could be damaged.
! Vehicles without
adiesel particle fil-
ter: in countries where only diesel fuel with
ah igh sulphurc ontent is available, you will
need to carry out your vehicle's oil change
at shorter intervals. More information
about the interval for oil change can be
obtained from any qualified specialist
workshop.
Usuallyy ou will find information about the
fuel grade on the pump. If you cannot find the
label on the petrol pump, ask the filling sta-
tion staff.
Information on refuelling (Y page 201).
Low outside temperatures
In winter months, diesel fuel with an improved
cold flow quality is available. In Europe, the
EN 590 standard defines various climate-
dependent temperature categories. Malfunc- tions can be avoided by refuelling with diesel
fuel that corresponds to the climatic specifi-
cations outlined in EN 590. At unusually low
outside temperatures, it is possible that the
flow characteristics of the diesel fuel could be insufficient .Accordingly, diesel fuel from
warmer areas may not be suitable for opera-
tion in colder climatic conditions.
i Further information on country-specific
fuel properties and fuel types with low-tem-
perature resistance can be obtained from
oil companies, e.g. at filling stations.
Fuel consumption information H
Environmental note
CO 2(carbon dioxide) is the gas which scien-
tists believe to be principally responsible for
global warming (the greenhouse effect). Your vehicle's CO 2emissions are directly related to
fuel consumption and therefore depend on: 476
Service products and capacitiesTechnical data