Page 9 of 100
12.Audio System pg.44
13.Glove Box
14.Climate Control pg.41
15.Shift Buttons
16.Climate Controls Automatic Operation pg.41
17.Power Windows pg.40
18.Hood Release pg.75
19.Tilt Steering Wheel pg.34
20.Power Mirror Controls
21.Door Locks pg.20
CONTROLS AT A GLANCE
7
Page 10 of 100
INSTRUMENT CLUSTER
1.Speedometer
2.Battery Gauge
3.Messages, Blue & Me and Interface Options
4.Range Projection Indicators
(See page 59 for Instrument Cluster Warning Lights.)
CONTROLS AT A GLANCE
8
Page 11 of 100
5.Drive Mode Indicator
6.Driver Behavior Gauge
7.Driving Range
(See page 63 for Instrument Cluster Indicator Lights.)
CONTROLS AT A GLANCE
9
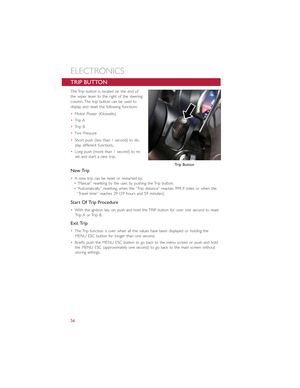
Page 12 of 100

ELECTRIC VEHICLE FEATURES
Auto Park
The Auto Park feature automatically places the vehicle into PARK if there is any indication
that the driver may leave the vehicle while the drive mode indicator is in the D (DRIVE),
N (NEUTRAL) or R (REVERSE) modes.
Auto Park is enabled under the following conditions:
– READY mode (12 Volt ON and High Voltage ON).
– Vehicle speed is below 2 mph (3 km/h).
NOTE:
•Auto Park feature only occurs once per key cycle.
•Auto Park is disabled above 2 mph (3 km/h) and the drive mode range will be
maintained.
The instrument cluster will display an Auto Shift To Park message and chime once when
Auto Park action occurs.
Mode Of Operation With Key ON
Auto Park will be engaged when the drive mode is in DRIVE, NEUTRAL or REVERSE
and the following conditions are detected:
•Seat Belt is unlatched
•Brake pedal is released
•Driver's door is ajar
•Vehicle speed is below 2 mph (3 km/h)
Mode Of Operation With Key OFF
Auto Park will engage as you turn off the key while in gear/neutral and speed is less than
2 mph (3 km/h).
Audible Pedestrian Warning System
Your vehicle is equipped with an Audible Pedestrian Warning System.The Audible Pedestrian
Warning System uses distinct sounds to alert pedestrians that your vehicle is approaching.
The audible warning system uses an in-car sound synthesizer with a speaker located in
the underhood compartment.The warning system is automatically activated when select-
ing D (DRIVE) or R (REVERSE).
In D (DRIVE) range, the system will remain active until the vehicle reaches a speed of
approximately 22 mph (35.5 km/h).At approximately 22 mph (35.5 km/h) the warning
system is deactivated and will automatically be active when the vehicle returns to approxi-
mately 20 mph (32 km/h).
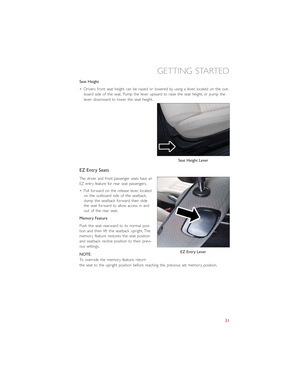
GETTING STARTED
10
Page 13 of 100

Smartphone Features
With the “FIAT Access” smartphone app, you can monitor the state of charge of the high
voltage battery or initiate charging from your phone.You can also turn on your car’s cli-
mate control system remotely.The smartphone app provides the following features:
•Monitor battery charge level
•Display available driving distance
•Check charging status
•Remotely activate vehicle climate control system
•Unlock and lock doors
•Assist with locating your vehicle
•Locate charging stations
•Send a point-of-interest to your vehicle
•Schedule a charge
•View energy consumed
•Notifications for charging and preconditioning events
How Do I Get The “FIAT Access” Smartphone App?
Visit the 500e registration website:
https://www.fiataccess.com/500eSubscribe
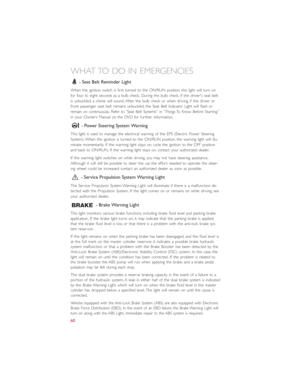
Once in the registration website, you will
need to enter your vehicle’s VIN and Con-
nectivity ID.The connectivity ID is found in
the vehicle's instrument cluster.To locate
the connectivity ID follow the steps below:
1.Push the Menu button on the instru-
ment cluster.
500e Registration Website
GETTING STARTED
11
Page 14 of 100
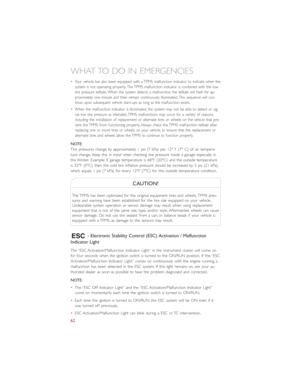
2.Scroll down and select “Connectivity ID”.
After obtaining the connectivity ID and VIN
number return to the vehicle registration
website and perform the following:
1.After entering the VIN (Vehicle Identifi-
cation Number), Connectivity ID and
your email address, click “submit”.
2.You will now be asked to fill in your
contact information and a user name
and password.
3.Once finished with registration you will
be directed to your 500e owner’s site.
4.From the owner’s site you will be able
to download the 500e mobile applica-
tion and learn how to use your con-
nected features.
5.Use your owner’s site username and
password for logging into the mobile
application.
NOTE:
Your smartphone must have a valid data con-
nection to use the 500e mobile application.
Need Help With Registration?
Please call the 500e Call Center Toll Free
number below:
(855) 261-5364
Settings
Connectivity ID
GETTING STARTED
12
Page 15 of 100

Level 1 charging is done by using a conventional 120 Volt AC (Alternating Current) grounded
receptacle along with the")
ELECTRIC SYSTEM OPERATION
Level 1 Charging (120V — Requires NEMA 5–15 Outlet)
Level 1 charging is done by using a conventional 120 Volt AC (Alternating Current) grounded
receptacle along with the NEMA 5–15 Electric Vehicle Supply Equipment (EVSE) that comes
standard with your vehicle.Refer to “Vehicle Charging Cord” for further information.
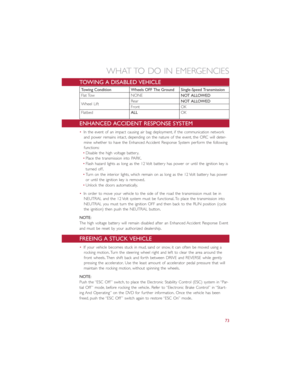
Level 2 Charging (240V — Requires A 40 Amp Circuit Breaker Or Greater)
•Level 2 charging is accomplished by using
a 240V permanently mounted EVSE and
is the preferred method for charging
your vehicle.
•A Level 2 charging station can be in-
stalled at your residence.
•The Level 2 unit and installation service
is available for purchase at your autho-
rized dealer.
Charge Times
Type Of Charge Approximate Time
Level 1 (120V/15A)Approximately 23 hours to fully recharge* 3 hours will restore 10 miles of range *
Level 2 (240V/30A)Approximately 4 hours to fully recharge* 30 minutes will restore 10 miles of range *
The following factors determine how long a battery recharge will take:
•The battery’s current state of charge (percent depleted)
•What recharging device is being used (Level 1 or Level 2)
•Ambient temperatures
NOTE:
•Charging times are estimates based on a completely discharged high voltage battery pack.
•Charging times will vary based on the age, condition state of charge and temperature
of the high voltage battery pack.
Electric Vehicle Supply Equipment (EVSE)
GETTING STARTED
13
Page 16 of 100

EVSE Operation And Status Information
Indicator Description
1 — AC Indicator LEDGreen indicates READYRED Indicates a fault
2 — Fault Indicator LEDGreen indicates READYRED indicates a fault
3 — Charge Level Indicator LED's
All ON indicates system ready and notchargingLED's turning on and off in sequenceindicates vehicle charging
•When the EVSE is first plugged in it will go through an initialization and self test.
For the first three seconds after plugging in your EVSE all the LED's will remain off.
•After approximately three seconds the EVSE performs an internal self test and Ground
Continuity Test.This process takes approximately six seconds.
•During the internal self test the unit turns on one Charge Level Indicator LED every
1.5 seconds until all the Charge Level Indicator LED's are illuminated.
AC LEDFault Indicator
LEDCharge Level Indicator LED's Time
•• •ooo1.5 sec
•• ••oo3.0 sec
•• •••o4.5 sec
•• ••••6.0 sec
Electric Vehicle Supply Equipment (EVSE)
GETTING STARTED
14


CONTROLS AT A GLANCE
8")

CONTROLS AT A GLANCE
9")
