Page 33 of 100
Seat Height
•Drivers front seat height can be raised or lowered by using a lever, located on the out-
board side of the seat.Pump the lever upward to raise the seat height, or pump the
lever downward to lower the seat height.
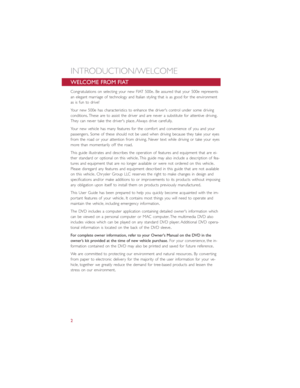
EZ Entry Seats
The driver and front passenger seats have an
EZ entry feature for rear seat passengers.
•Pull forward on the release lever, located
on the outboard side of the seatback,
dump the seatback forward, then slide
the seat forward to allow access in and
out of the rear seat.
Memory Feature
Push the seat rearward to its normal posi-
tion and then lift the seatback upright.The
memory feature restores the seat position
and seatback recline position to their previ-
ous settings.
NOTE:
To override the memory feature, return
the seat to the upright position before reaching the previous set memory position.
Seat Height Lever
EZ Entry Lever
GETTING STARTED
31
Page 34 of 100

WARNING!
•Adjusting a seat while the vehicle is moving is dangerous.The sudden movement
of the seat could cause you to lose control.The seat belt might not be properly
adjusted, and you could be severely injured or killed.Only adjust a seat while the
vehicle is parked.
•Actuating the recliner handle will allow the seatback to swing forward.Do not
stand or lean in front of the seatback while actuating the handle.The seatback
may swing forward and strike you, causing injury.To avoid possible injury, place
your hand on the seatback while actuating the recliner handle.
•Do not ride with the seatback reclined so that the seat belt is no longer resting
against your chest.In a collision, you could slide under the seat belt and be se-
verely injured or killed.Use the recliner only when the vehicle is parked.
REAR SEATS
Folding Rear Seatback
•To fold each rear seatback, push down on the button located on the upper outboard
side of the seat and fold the seatback flat.
NOTE:
Be sure that the front seats are fully up-
right and positioned forward.This will allow
the rear seatback to fold down easily.
Rear Folding Seat Button
GETTING STARTED
32
Page 35 of 100
HEATED SEATS
Front Heated Seats
The heated seat switches are located on the center instrument panel area.
•Push the switch once to turn on the
heated seat.
•Push the switch a second time to turn
off the heated seat.
WARNING!
•Persons who are unable to feel pain to the skin because of advanced age, chronic
illness, diabetes, spinal cord injury, medication, alcohol use, exhaustion or other
physical conditions must exercise care when using the seat heater.It may cause
burns even at low temperatures, especially if used for long periods of time.
•Do not place anything on the seat that insulates against heat, such as a blanket or
cushion.This may cause the seat heater to overheat.Sitting in a seat that has been
overheated could cause serious burns due to the increased surface temperature of
the seat.
Heated Seat Switches
GETTING STARTED
33
Page 36 of 100
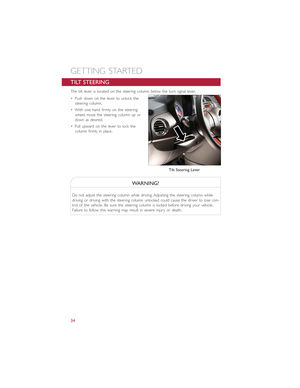
TILT STEERING
The tilt lever is located on the steering column, below the turn signal lever.
•Push down on the lever to unlock the
steering column.
•With one hand firmly on the steering
wheel, move the steering column up or
down as desired.
•Pull upward on the lever to lock the
column firmly in place.
WARNING!
Do not adjust the steering column while driving.Adjusting the steering column while
driving or driving with the steering column unlocked could cause the driver to lose con-
trol of the vehicle.Be sure the steering column is locked before driving your vehicle.
Failure to follow this warning may result in severe injury or death.
Tilt Steering Lever
GETTING STARTED
34
Page 37 of 100

EXTENDING YOUR DRIVING RANGE PER CHARGE
•A little knowledge will go a long way to extend your driving range on the 500e.First
and foremost understand that the drive system and cabin temperature management
features use the most energy from the high voltage battery.Reducing energy draw
from these features are the easiest and most effective way to extend driving range.
•Just like a conventional vehicle, 500e likes to keep things smooth and steady for most
efficient operation.When driving, avoid aggressive driving styles and high speeds for
extended times.When practical, choose surface streets over the highway, work to
maintain a steady speed to extend range.
•The 500e uses high voltage components to heat and cool the cabin, so a little aware-
ness can go a long way to extend range.When using automatic climate control, con-
sider setting temperatures a few degrees higher or lower during hot and cold days.
If your 500e has been soaking in hot or cold temperatures for an extended period, it
is recommended that the car be preconditioned via the FIAT Access smartphone app
while still plugged into a charging source.This will allow 500e to use external power to
establish a comfortable cabin temperature before the drive, and allow the battery to
maintain the temperature using significantly less energy during the drive.
Additional Tips:
•Keep tires properly inflated
•Avoid carrying nonessential cargo
•Be mindful of adding external accessories that may increase aerodynamic drag
•Perform all scheduled maintenance at recommended intervals
Driver Behavior Gauge
To help the driver extend the driving range of the high voltage battery your vehicle is
equipped with a Driver Behavior Gauge.The Driver Behavior Gauge is located on the
right side of the instrument cluster and displays three driving ranges:
Power
The Driver Behavior Gauge will move into
the Power range when under acceleration.
ECO
The Driver Behavior Gauge will move into
the ECO range when you are maximizing
the driving range of the high voltage bat-
tery.
Charge
The Driver Behavior Gauge will move into
the Charge range when battery regenera-
tion is active (either coasting or braking).Driver Behavior Gauge
OPERATING YOUR VEHICLE
35
Page 38 of 100
 will flash three
times to indicate a lane change and auto-
matica")
TURN SIGNAL/LIGHTS/HIGH BEAM LEVER
Turn Signal/Lane Change Assist
•Tap the lever up or down once and the
turn signal (right or left) will flash three
times to indicate a lane change and auto-
matically turn off.
Headlights/Parking Lights
•Rotate the end of the lever to the first
detent for parking lights and headlight
operation.
NOTE:
The ignition switch must be in the ON/RUN
position for the headlights to operate.
High Beams
•Push the lever forward to activate the high beams.
•A high beam symbol will illuminate in the cluster to indicate the high beams are on.
NOTE:
For safe driving, turn off the high beams when oncoming traffic is present to prevent
headlight glare and as a courtesy to other motorists.
Flash To Pass
•Pull the lever toward you to activate the high beams.The high beams will remain on
until the lever is released.
Headlight Delay (Follow Me Home)
•Within two minutes of the ignition switch being turned to the OFF/LOCK position or
the ignition key being removed from the ignition, pull the turn signal lever toward the
steering wheel.
•Each movement of the lever toward the steering wheel will increase the illumination
period by 30 seconds, up to a maximum of 210 seconds.
•To deactivate, pull the multifunction lever toward the steering wheel and hold it for
more than two seconds.
NOTE:
Activation of Follow Me Home is only enabled once per key cycle and the steps outlined
above must be repeated each time you want to activate it.
Turn Signal/Lights Lever
OPERATING YOUR VEHICLE
36
Page 39 of 100
Fog Lights
•Push the fog light switch, located on the
climate controls, once to turn on the fog
lights.
•Push the switch a second time to turn
the fog lights off.
WIPER/WASHER LEVER
Front Wipers
Intermittent, Low And High Operation
•Move the lever downward to the first
detent for intermittent wiper operation,
the second detent for low wiper opera-
tion and to the third detent for high
wiper operation.
Mist
•Move the lever upward and release
when a single wipe is desired.
Washer Operation
•Pull the lever toward you and hold for as
long as spray is desired.
NOTE:
The mist feature does not activate the
washer pump; no washer fluid will be
sprayed on the windshield.The wash func-
tion must be activated to spray the wind-
shield with washer fluid.
Fog Light Switch
Wiper Washer Lever
1 — Pull (Front Washer)2 — Push (Rear Washer)3 — Up/Down (Front Wiper)4 — Rotate (Rear Wiper)
OPERATING YOUR VEHICLE
37
Page 40 of 100

Rear Wiper
Rear Wiper Operation
•Rotate the end of the lever to activate the rear wiper.
Rear Washer Operation
•Push the lever forward and hold for as long as spray is desired.
NOTE:
The rear wiper will automatically operate if the front wipers are on and the vehicle is
placed in reverse.
ELECTRONIC SPEED CONTROL
The Electronic Speed Control switches are located on the steering wheel.
Cruise ON/OFF
•Push the ON/OFF button to activate the
Speed Control.
CRUISE READY will appear on the instru-
ment cluster to indicate the Speed Control
is on.
•Push the ON/OFF button a second time
to turn the system off.
•Speed Control will be disabled if the
front tires lose traction.To restore, push
the Cruise ON/OFF button.
Set
•With the Speed Control on, push and
release the SET – button to set a de-
sired speed.
NOTE:
The set speed will be displayed on the clus-
ter for approximately 2–3 seconds.
Electronic Speed Control Switches
1 — Push ON/OFF2 — Push Resume +/Accel3 — Push Set –/Decel4 — Push Cancel
OPERATING YOUR VEHICLE
38