2015 CADILLAC ATS phone
[x] Cancel search: phonePage 58 of 138
Black plate (58,1)Cadillac CUE Infotainment System (GMNA-Localizing-U.S./Canada-
7639728) - 2015 - CRC - 9/3/14
58 Infotainment System
play. There is a play
position memory feature
for DVD and video CD
only. If the DVD player is
turned off and then turned
back on, the DVD player
resumes playback where
the disc stopped. The play
position memory is erased
if the disc is removed.
12. STOP
c
.Press once to stop playing
a DVD.
There is a pre-stop feature
for DVD and video CD
only. This feature resumes
playback of the disc where
it was stopped. Press the
stop button once during
disc playback and
c
displays on the DVD
startup screen. This icon
disappears after a few
seconds. Press the stop
button a second time,
or eject the disc, to cancel the pre-stop feature and to
clear the disc position
memory.
13. EJECT
X
.Press to eject a disc from
the DVD slot.
If a disc is ejected from
the player, but not
removed, it will
automatically reload into
the player. Another way to
reload a disc that has
been ejected, but not
removed from the DVD
player, is to press the
eject button or the play
button.
Infrared Remote Sensor: Located
in the top center of the video display
screen. Do not block the signal from
the remote to the sensor.
Infrared Transmitters: Located in
the top center of the video display
screen. Do not block the signal from
the headphones to the transmitter.
Using the RSE On-Screen
Display (OSD) Menus
Use the OSD setup display
menus for:
.General Setup
.Audio Setup
.Quality Setup
.Preference Setup
To use the OSD menus while using
the DVD player or an auxiliary
device:
1. Press the SETUP button on the remote control to display the
icons and pages on the display
screen.
2. Select the desired page by using the left/right navigation arrows to
move the cursor.
3. Press the SETUP button again on the remote control to cancel
use of the setup display.
Page 61 of 138
Black plate (61,1)Cadillac CUE Infotainment System (GMNA-Localizing-U.S./Canada-
7639728) - 2015 - CRC - 9/3/14
Infotainment System 61
The Rating settings are:
.Kid SAFE (Children)
.G
.PG
.PG 13
.PG R
.R
.NC 17
.ADULT
4. Press the left navigation arrow to confirm the selection.
If a disc is inserted into the DVD
compartment slot and it exceeds the
Parental Setting, the following
message appears on the display:
The Parental Setting of this player
prohibits play. Would you like to
allow this disc to play? If yes if selected, the six digit
password must be entered for the
disc to play. If the wrong password
is entered, the following message
appears:
This movie will not play due to the
Parental Setting of the player.
To create a six digit password, use
the numeric keypad on the remote
control. Press the ENTER button to
confirm.
The default password is
136900.
To change the Parental Control
Password:
1. Press the SETUP button on the remote control.
2. Navigate to the Password sub-menu under the Preference
Menu and press ENTER.
3. At the Old Password option, enter the old password or the
default password (136900).
4. At the New Password option, enter the new password (six
digits) using numeric buttons. 5. At the Confirm PWD option,
confirm the new password by
entering the new password
again.
6. Scroll to the OK button and press ENTER. The message
“Your password has been
changed” displays.
To reset the system back to the
factory default settings:
1. Press the SETUP button on the remote control.
2. Use the left/right and down navigation arrows on the remote
control to select the Default
sub-menu under the Preference
Page and press the ENTER
button to reset the settings. The
parental settings will not be
affected.
Vehicle Speakers
Audio from the DVD player or an
auxiliary device can be heard
through the vehicle speakers or the
wireless/wired headphones, while
the radio is tuned to one of the
Page 62 of 138
Black plate (62,1)Cadillac CUE Infotainment System (GMNA-Localizing-U.S./Canada-
7639728) - 2015 - CRC - 9/3/14
62 Infotainment System
many frequencies selected on the
Sound Around portion of the
system’s remote control. See
“Remote Control” later in this
section.
Only one audio source can be heard
through the vehicle’ s speakers at a
time. The audio source being used
is specified by the A/V (audio/video)
source selected on the driver side
head restraint video display screen.
To turn the RSE system audio
output to the vehicle’s speakers,
press Sound Around ON, on the
system’ s remote control. The audio
from the RSE system can be heard
through the wireless/wired
headphones and the vehicle’s
speakers at the same time. The
volume on the radio can vary when
switching between the radio, CD,
DVD, MP3, or an auxiliary device.
Wired Headphones
VOL0(Volume): Use to adjust
the volume on the headphones. 100 Channel FM-Modulation
Control
For Monitor
“A”Only:
To activate the FM modulation
feature, press the “Sound Around
On/Off ”button on the remote until
the text “FM CH XX.XMH2” is
dislpayed on the monitor.
On the remote, press the “Sound
Around Select” button to cycle
through a pre-established list of
6 channels (88.3MHz, 88.7MHz,
89.1MHz, 89.5MHz, 89.9MHz,
90.3MHz.)
If none of these stations are suitable
for FM Modulation, use the “Fine
Tune” Option. To “Fine Tune” the
modulator to a specific target station
while the display is active, press the
“Up” or“Down” keys on the remote
to change the channel by 0.2MHz.
Hold down the “Up or“Down” keys
to cycle quickly through the stations.
When the end (107.9MHz) or
beginning (87.5MHz) of the FM
band is reached, the channels will continue from the beginning
(87.5MHz) or end (107.9MHz),
respectively.
To deactivate the FM modulation
feature, press the
“Sound Around
On/Off ”button on the remote until
the text “FM OFF” is displayed on
the monitor.
{Caution
Do not store the headphones in
heat or direct sunlight. This could
damage the headphones and
repairs will not be covered by the
warranty. Storage in extreme cold
can weaken the batteries. Keep
the headphones stored in a cool,
dry place.
Remote Control
To use the remote control, aim at
the remote sensor on top center of
the video display screen and press
the desired button.
Page 64 of 138
Black plate (64,1)Cadillac CUE Infotainment System (GMNA-Localizing-U.S./Canada-
7639728) - 2015 - CRC - 9/3/14
64 Infotainment System
DVD-Video Screen 4:Press the
DVD button located under 4 to
transmit IR codes for DVD mode on
Video Screen 4.
TV-Video Screen 4: This button is
not used with the system.
SOUND AROUND ON/OFF: Press
to turn the FM Transmitter power on
or off.
MUTE
>(For DVD Only): Press to
turn off the headphone sound. Press
again to turn the sound on again.
PIX (Picture Selection): Press to
adjust the picture’s On Screen
Display (OSD). Each time this
button is pressed, the picture
adjustment OSD cycles through
bars for BRIGHTNESS,
CONTRAST, COLOR, and TINT.
Use the right/left navigation arrows
to adjust the setting. This feature
automatically shuts off if another
button is pressed or adjustments
are not made within six seconds. SOUND AROUND SELECT:
Press
to select an FM transmitter channel.
The SOUND AROUND SELECT
lets the DVD audio play over the
vehicle’s sound system by tuning
the radio to one of the many FM
frequencies.
MENU: Press to enter the DVD
disc menu while the disc is playing.Q,R,q,r(Navigation Arrows):
Press to navigate through menus.
CH + (Channel): Press to change
the channel to a higher level in
sequential order.
CH −(Channel): Press to change
the channel to a lower level in
sequential order.
VOL +: Press to adjust the sound
louder.
VOL −:Press to adjust the sound
lower.
ENTER: Press to enter a selected
function or to begin playback of
the disc. REPEAT
7:
Press to repeat part
or all of a chapter, title, track, or the
entire disc after using the A-B
button to setup repeat preset
sections.
TITLE: Press to enter the disc title
mode. The title feature is
disc-specific, and may not be
available on all discs.
SUBTITLE: Press to change the
subtitle language to another
available language or to turn
subtitles off.
ANGLE: Press to select a different
viewing angle for discs that are
recorded with different camera
angles.
AUDIO: Press to select a different
language for discs that are recorded
with different languages.
0-9 (Numbers): The numbers
located on the lower left side of the
remote control can be used to enter
numbered menu options, channels,
or track numbers.
Page 69 of 138
Black plate (69,1)Cadillac CUE Infotainment System (GMNA-Localizing-U.S./Canada-
7639728) - 2015 - CRC - 9/3/14
Infotainment System 69
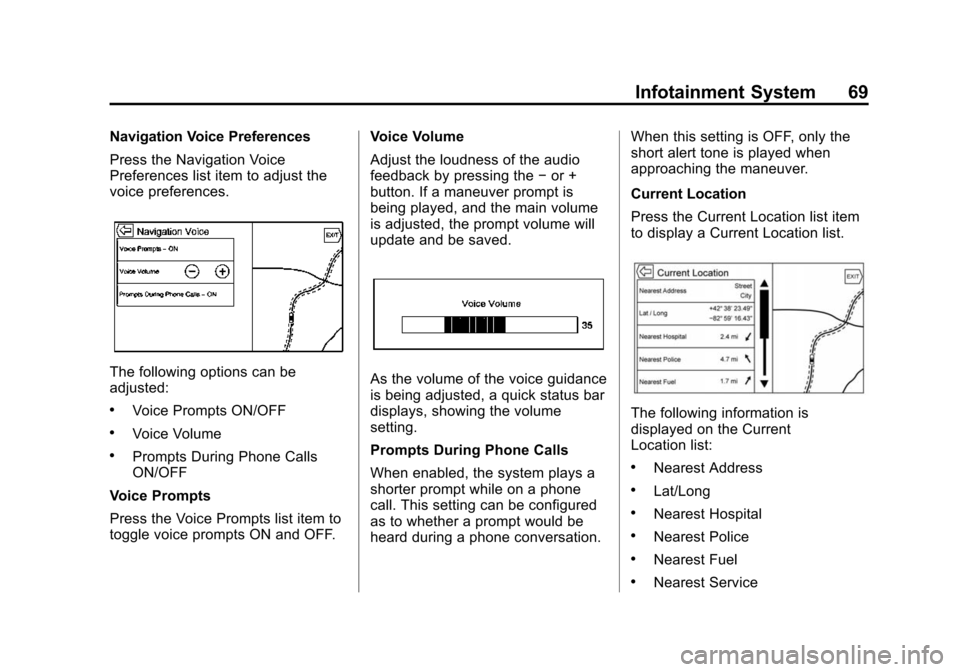
Navigation Voice Preferences
Press the Navigation Voice
Preferences list item to adjust the
voice preferences.
The following options can be
adjusted:
.Voice Prompts ON/OFF
.Voice Volume
.Prompts During Phone Calls
ON/OFF
Voice Prompts
Press the Voice Prompts list item to
toggle voice prompts ON and OFF. Voice Volume
Adjust the loudness of the audio
feedback by pressing the
−or +
button. If a maneuver prompt is
being played, and the main volume
is adjusted, the prompt volume will
update and be saved.
As the volume of the voice guidance
is being adjusted, a quick status bar
displays, showing the volume
setting.
Prompts During Phone Calls
When enabled, the system plays a
shorter prompt while on a phone
call. This setting can be configured
as to whether a prompt would be
heard during a phone conversation. When this setting is OFF, only the
short alert tone is played when
approaching the maneuver.
Current Location
Press the Current Location list item
to display a Current Location list.
The following information is
displayed on the Current
Location list:
.Nearest Address
.Lat/Long
.Nearest Hospital
.Nearest Police
.Nearest Fuel
.Nearest Service
Page 86 of 138

Black plate (86,1)Cadillac CUE Infotainment System (GMNA-Localizing-U.S./Canada-
7639728) - 2015 - CRC - 9/3/14
86 Infotainment System
If a POI icon is pressed on while
in the full expanded map, a
callout for that location displays.
Press the callout to display the
destination details view.
7. Press the map reset button to return the map to automatic
zooming and searching. It is
recentered around the vehicle’s
position, the route, the
destination, or another location
that was specified for the
search. The map RESET button
is only displayed if the map was
manually adjusted.Press the List All screen button to
display all of the matching results in
a particular category with its
subcategories.
Using the Keyboard
The POI can be searched by
entering a POI name, category,
name and category, or phone
number on the keyboard.
For example, enter the
information as:
POI Name: Worldwide Food
POI Category: Restaurants
POI Name and Category:
Worldwide Food Restaurants
POI Phone Number: 0001222555
Additionally, a location may be
entered if the POI is not nearby.
This search will then be made
around the location that is given. For example, enter the
information as:
POI Name and Location:
Worldwide Food Chicago IL
The POI keyboard search results
will display in the order in which
they were found. Press the Sort
button to change the sorting order
by Confidence, Alphabetical,
or Distance.
Page 88 of 138

Black plate (88,1)Cadillac CUE Infotainment System (GMNA-Localizing-U.S./Canada-
7639728) - 2015 - CRC - 9/3/14
88 Infotainment System
Recalling a POI Category or
Chain
If a POI category or chain favorite is
recalled, the system displays a list
of matching results defaulting to
Nearby, but allows a search of other
locations. Press the Search Options
button to specify a different location.
Creating and Downloading
Predefined POIs (My POIs)
In addition to the POIs already
stored in the infotainment system,
predefined POIs can be created.
While creating a predefined POI, the
GPS coordinates for longitude and
latitude of the POI’s location and a
descriptive name will need to be
entered.
After creating the predefined POIs,
they can be downloaded to the
infotainment system from either a
USB stick or SD card.
Once downloaded, the POI data
becomes a selectable destination in
the My POIs menu.Creating a Text File with
Information
Create a text file by using a simple
text editor software. Save this file
with a name and extension of .csv,
for example,
“TomsPOI.csv.”
Enter the POI information into the
text file in the following format:
.Longitude coordinate, Latitude
coordinate, “Name of POI,”
“Additional information,” “Phone
number.”
Example: 7.0350000,
50.6318040, “Michaels Home,”
“123 Maple Lane,”
“02379234567.”
.The GPS coordinates must be
expressed in decimal degrees
and can be taken from a
geographical map. The
additional information and phone
number strings are optional.
.The POI name and the
additional information string may
not exceed 60 characters.
.POI information for each
destination address must be
entered in a single separate line.
Storing the POI on a USB Drive
In the root directory of a USB drive,
create a folder name “myPOIs”; for
example, “F:\”is the root directory of
the USB drive.
In the “myPOIs” folder, store the text
file with your POIs; for example,
“F:\myPOIs\TomsPOIs.csv.”
Downloading the POI to the
Infotainment System
Connect the USB drive or SD card
containing the POI information to
the USB port or SD card slot of the
infotainment system. A message
displays prompting whether or not to
download the POI information from
the USB stick. All POIs found are
saved even if they are in multiple
folders.
Subfolders can also be created to
organize the POIs into categories;
for example, “F:\myPOIs\
Restaurants\TomsPOIs.csv.”
Page 91 of 138
Black plate (91,1)Cadillac CUE Infotainment System (GMNA-Localizing-U.S./Canada-
7639728) - 2015 - CRC - 9/3/14
Infotainment System 91
Favorite Destinations
.Destinations can be saved as
Favorites for recall later.
Depending on the favorite, when
an address or POI favorite is
recalled, the Destination Details
View is shown.
.When a favorite address is being
routed to, it is shown active.
Press on the active favorite to
suspend that route.
.Save locations as Favorites for
recall later in the Destination
Details View.
.Save trips from the
Address Book.Storing Favorites from the Contact
Details List
A contact name or any of the
contact’
s information such as phone
number, e-mail address, or address
from Contact Details can be stored
as a Favorite.
.Press and drag up on the row of
Interaction Selector buttons to
reveal the Favorite buttons.
.Press and hold on the favorite
location while viewing a contact
on the Contact Details List. The
contact name and all contact
information can be stored.
.Press to save as a favorite. The
favorite label will be the name of
the contact.
.Press on the Favorite to display
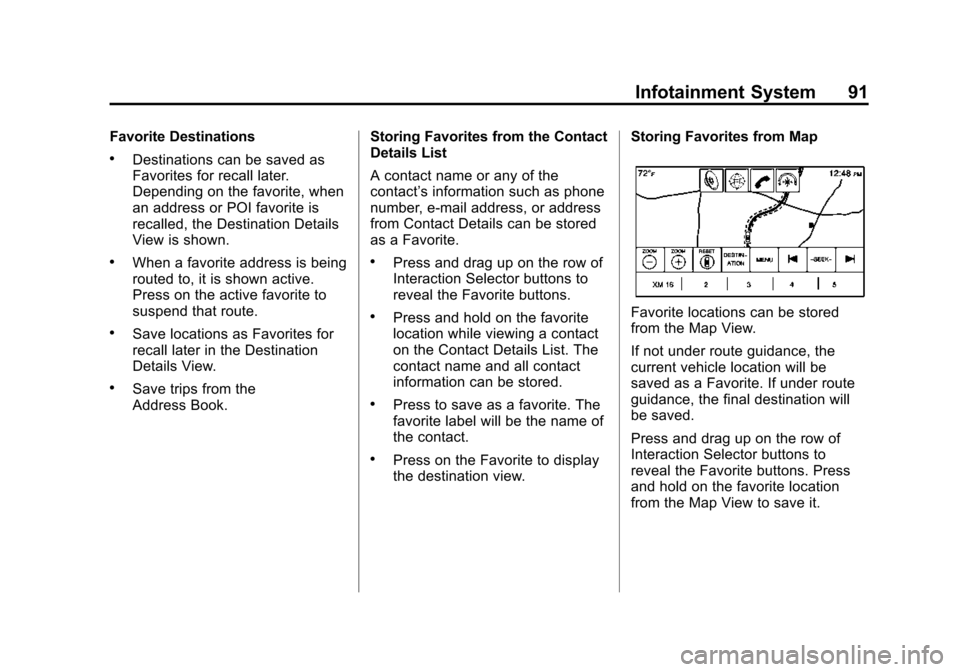
the destination view. Storing Favorites from Map
Favorite locations can be stored
from the Map View.
If not under route guidance, the
current vehicle location will be
saved as a Favorite. If under route
guidance, the final destination will
be saved.
Press and drag up on the row of
Interaction Selector buttons to
reveal the Favorite buttons. Press
and hold on the favorite location
from the Map View to save it.