2014 SUBARU TRIBECA warning
[x] Cancel search: warningPage 177 of 426
3-44Instruments and controls
Tilt steering wheel
WARNING
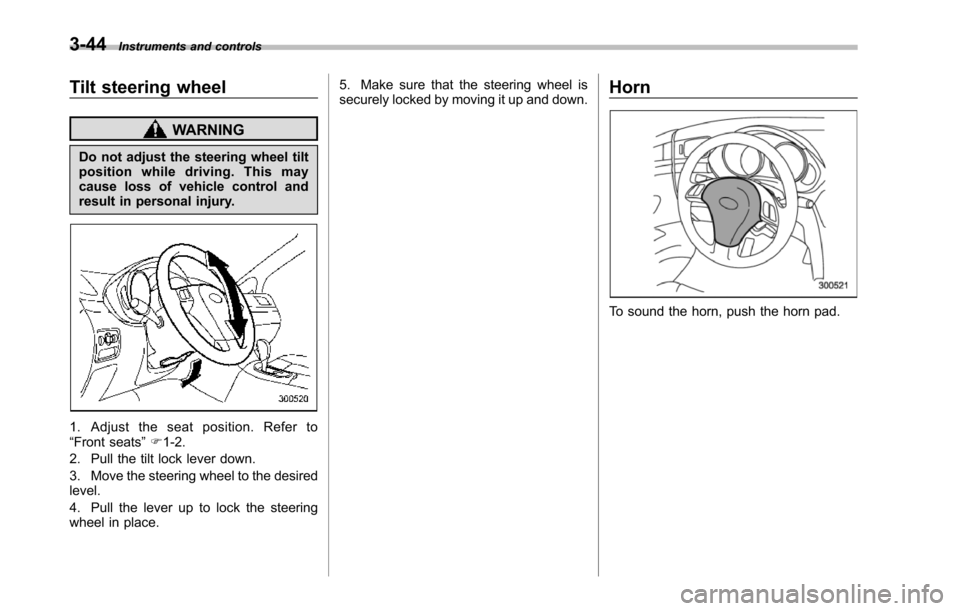
Do not adjust the steering wheel tiltposition while driving. This maycause loss of vehicle control andresult in personal injury.
1. Adjust the seat position. Refer to“Front seats”F1-2.
2. Pull the tilt lock lever down.
3. Move the steering wheel to the desiredlevel.
4. Pull the lever up to lock the steeringwheel in place.
5. Make sure that the steering wheel issecurely locked by moving it up and down.Horn
To sound the horn, push the horn pad.
Page 185 of 426
4-8Climate control
NOTE
For efficient defogging or dehumidify-ing in cold weather, turn on the airconditioner. However, if the ambienttemperature decreases to approxi-mately 328F(08C), the air conditionercompressor may stop operating.
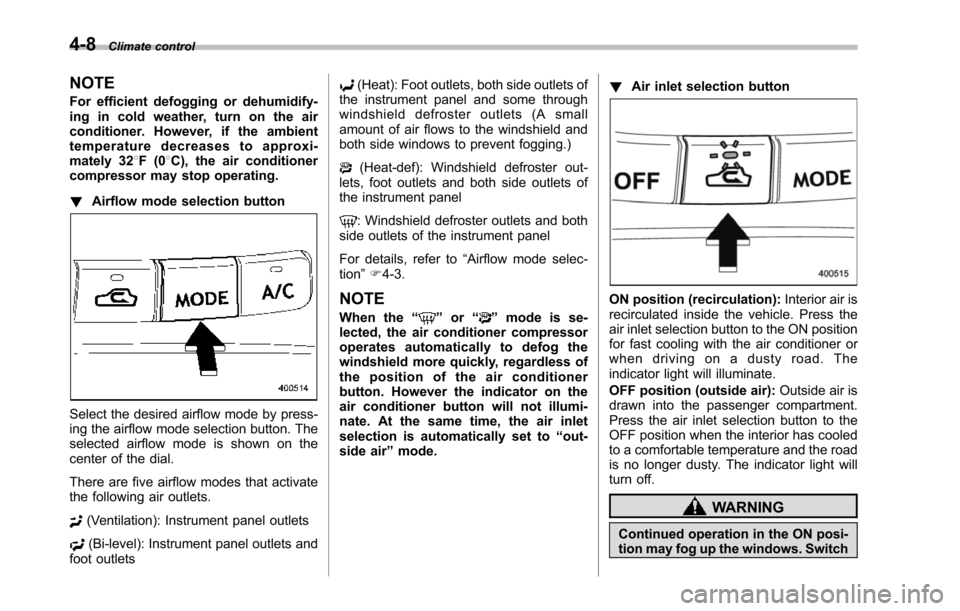
!Airflow mode selection button
Select the desired airflow mode by press-ing the airflow mode selection button. Theselected airflow mode is shown on thecenter of the dial.
There are five airflow modes that activatethe following air outlets.
(Ventilation): Instrument panel outlets
(Bi-level): Instrument panel outlets andfoot outlets
(Heat): Foot outlets, both side outlets ofthe instrument panel and some throughwindshield defroster outlets (A smallamount of air flows to the windshield andboth side windows to prevent fogging.)
(Heat-def): Windshield defroster out-lets, foot outlets and both side outlets ofthe instrument panel
: Windshield defroster outlets and bothside outletsof the instrument panel
For details, refer to“Airflow mode selec-tion”F4-3.
NOTE
When the“”or“”mode is se-lected, the air conditioner compressoroperates automatically to defog thewindshield more quickly, regardless ofthe position of the air conditionerbutton. However the indicator on theair conditioner button will not illumi-nate. At the same time, the air inletselection is automatically set to“out-side air”mode.
!Air inlet selection button
ON position (recirculation):Interior air isrecirculated inside the vehicle. Press theair inlet selection button to the ON positionfor fast cooling with the air conditioner orwhen driving on a dusty road. Theindicator light will illuminate.
OFF position (outside air):Outside air isdrawninto the passenger compartment.Press the air inlet selection button to theOFF position when the interior has cooledto a comfortable temperature and the roadis no longer dusty. The indicator light willturn off.
WARNING
Continued operation in the ON posi-tion may fog up the windows. Switch
Page 233 of 426
6-12Interior equipment
compartment) and the lid. It is alsopossible to pass the cord through agroove in the lid and up to the centerconsole (upper compartment).
Coat hook
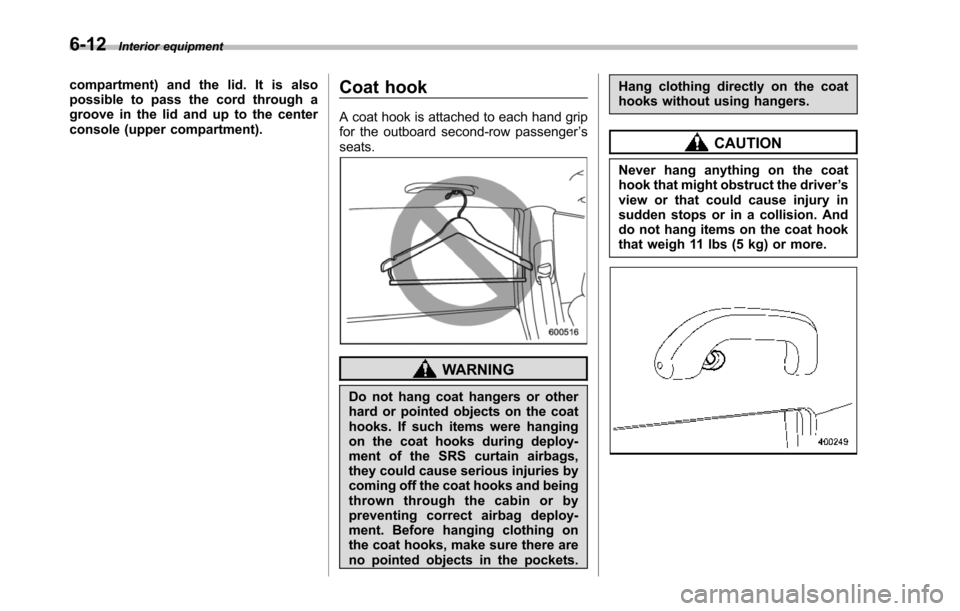
A coat hook is attached to each hand gripfor the outboard second-row passenger’sseats.
WARNING
Do not hang coat hangers or otherhard or pointed objects on the coathooks. If such items were hangingon the coat hooks during deploy-ment of the SRS curtain airbags,they could cause serious injuries bycoming off the coat hooks and beingthrown through the cabin or bypreventing correct airbag deploy-ment. Before hanging clothing onthe coat hooks, make sure there areno pointed objects in the pockets.
Hang clothing directly on the coathooks without using hangers.
CAUTION
Never hang anything on the coathook that might obstruct the driver’sview or that could cause injury insudden stops or in a collision. Anddo not hang items on the coat hookthat weigh 11 lbs (5 kg) or more.
Page 235 of 426
6-14Interior equipment
.Do not use more than one floormat.Cargo area cover (if
equipped)
The cargo area cover is provided forcovering the cargo area and to protect itscontents from direct sunlight. This cover isdetachable to make room for additionalcargo.
&Using the cover
1) Holder
1. Insert the seatbelt webbing into theholder of the third-row seat.
2. Fold down the seatback of the third-row seat. Refer to“Folding down theseatback”F1-15.
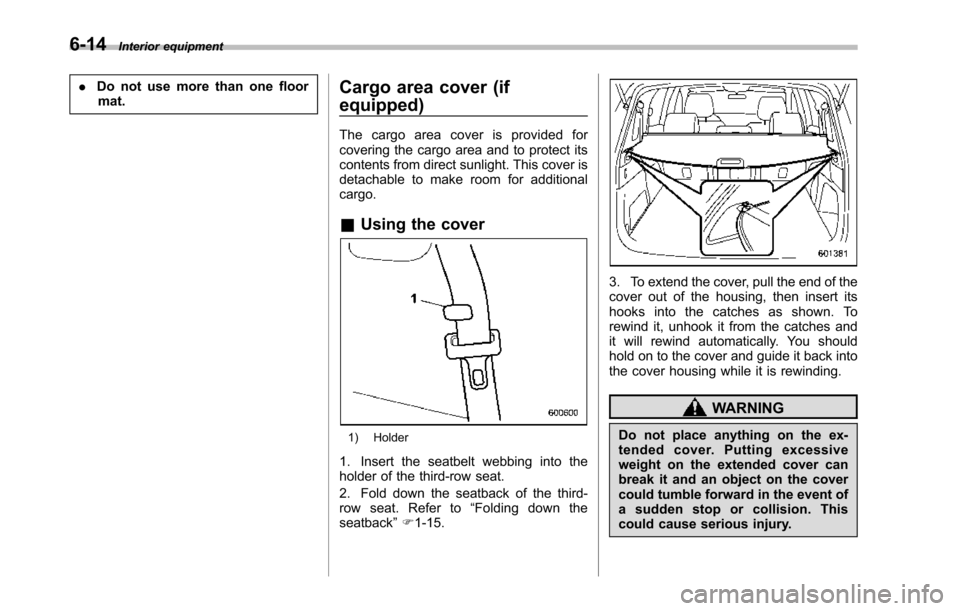
3. To extend the cover, pull the end of thecover out of the housing, then insert itshooks into the catches as shown. Torewind it, unhook it from the catches andit will rewind automatically. You shouldhold on to the cover and guide it back intothe cover housing while it is rewinding.
WARNING
Do not place anything on the ex-tended cover. Putting excessiveweight on the extended cover canbreak it and an object on the covercould tumble forward in the event ofasuddenstoporcollision.Thiscould cause serious injury.
Page 238 of 426
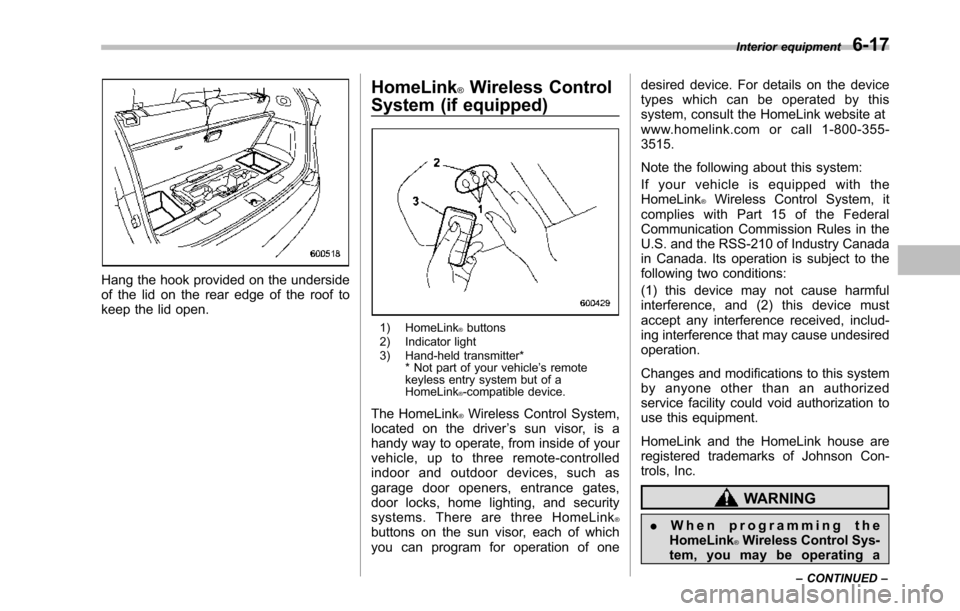
Hang the hook provided on the undersideof the lid on the rear edge of the roof tokeepthe lid open.
HomeLink®Wireless Control
System (if equipped)
1) HomeLink®buttons2) Indicator light3) Hand-held transmitter** Not part of your vehicle’s remotekeyless entry system but of aHomeLink®-compatible device.
The HomeLink®Wireless Control System,located on the driver’s sun visor, is ahandy way to operate, from inside of yourvehicle, up to three remote-controlledindoor and outdoor devices, such asgarage door openers, entrance gates,door locks, home lighting, and securitysystems. There are three HomeLink®buttons on the sun visor, each of whichyou can program for operation of one
desired device. For details on the devicetypes which can be operated by thissystem, consult the HomeLink website atwww.homelink.com or call 1-800-355-3515.
Note the following about this system:
If your vehicle is equipped with theHomeLink®Wireless Control System, itcomplies with Part 15 of the FederalCommunication Commission Rules in theU.S. and the RSS-210 of Industry Canadain Canada. Its operation is subject to thefollowing two conditions:
(1) this device may not cause harmfulinterference, and (2) this device mustaccept any interference received, includ-ing interference that may cause undesiredoperation.
Changes and modifications to this systemby anyone other than an authorizedservice facility could void authorization touse this equipment.
HomeLink and the HomeLink house areregistered trademarks of Johnson Con-trols, Inc.
WARNING
.When programming theHomeLink®Wireless Control Sys-tem, you may be operating a
Interior equipment6-17
–CONTINUED–
Page 242 of 426
opener by pressing the programmedHomeLink®button.
&Programming other devices
To program other devices such as doorlocks, home lighting and security systems,contact HomeLink at www.homelink.comor call 1-800-355-3515.
&Operating the HomeLink®
Wireless Control System
Once programmed, the HomeLink®Wire-less Control System can be used toremote-controlthe devices to which itsbuttons are programmed. To activate adevice, simply press the appropriate but-ton.The indicator light illuminates, indicat-ing that the signal is being transmitted.
&Erasing HomeLink®button
memory
NOTE
.Performing this procedure erasesthe memory of all the preprogrammedbuttons simultaneously. The memoryof individual buttons cannot be erased..It is recommended that upon thesale of the vehicle, the memory of allprogrammed HomeLink®buttons beerased for security purposes.
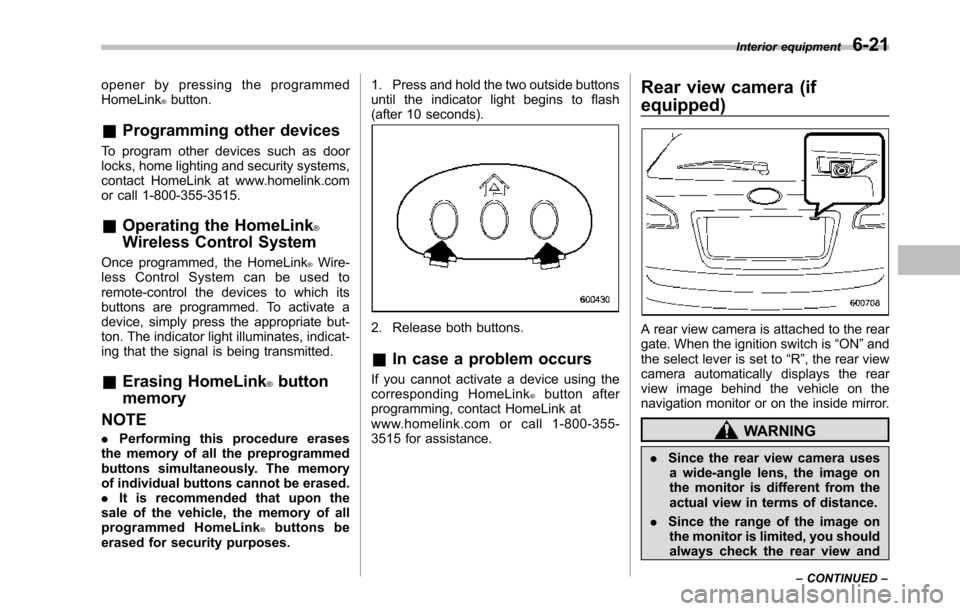
1. Press and hold the two outside buttonsuntil the indicator light begins to flash(after 10 seconds).
2. Release both buttons.
&In case a problem occurs
If you cannot activate a device using thecorresponding HomeLink®button afterprogramming, contact HomeLink atwww.homelink.com or call 1-800-355-3515 for assistance.
Rear view camera (if
equipped)
A rear view camera is attached to the reargate. When the ignition switch is“ON”andthe select lever is set to“R”, the rear viewcamera automatically displays the rearview image behind the vehicle on thenavigation monitor or on the inside mirror.
WARNING
.Since the rear view camera usesa wide-angle lens, the image onthe monitor is different from theactual view in terms of distance.
.Since the range of the image onthe monitor is limited, you shouldalways check the rear view and
Interior equipment6-21
–CONTINUED–
Page 248 of 426
Fuel...................................................................... 7-2Fuel requirements............................................... 7-2Fuel filler lid and cap........................................... 7-3
State emission testing (U.S. only)...................... 7-5
Preparing to drive............................................... 7-7
Starting the engine.............................................. 7-7
Stopping the engine............................................ 7-8
Remote engine start system (dealer option)..... 7-8Starting your vehicle........................................... 7-9Remote start safety features................................ 7-9Entering the vehicle while it is running via remotestart.................................................................. 7-9Entering the vehicle following remote engine startshutdown.......................................................... 7-9Pre-heating or pre-cooling the interior of thevehicle............................................................. 7-10Service mode..................................................... 7-10Remote engine start transmitter programmingand programmable feature option..................... 7-10System maintenance.......................................... 7-11
Automatic transmission..................................... 7-12Select lever........................................................ 7-13Shift lock function.............................................. 7-14Selectionof manual mode.................................. 7-16Driving tips........................................................ 7-17SPORT mode..................................................... 7-18
Power steering................................................... 7-18
Braking............................................................... 7-19Braking tips....................................................... 7-19Brake system.................................................... 7-19Disc brake pad wear warning indicators............. 7-20
ABS (Anti-lock Brake System).......................... 7-20ABS system self-check...................................... 7-21ABS warning light.............................................. 7-21
Electronic Brake Force Distribution (EBD)system............................................................. 7-22Steps to take if EBD system malfunctions.......... 7-22
Vehicle Dynamics Control system.................... 7-23Vehicle Dynamics Control system monitor.......... 7-25Traction Control system OFF switch................... 7-25
Tire pressure monitoring system (TPMS)........ 7-27
Parking your vehicle......................................... 7-28Parking brake.................................................... 7-28Parking tips....................................................... 7-29
Cruise control.................................................... 7-29To set cruise control.......................................... 7-30To temporarily cancel the cruise control............. 7-31To turn off the cruise control.............................. 7-31To change the cruising speed ............................ 7-31Cruise control indicator light.............................. 7-32Cruise control set indicator light........................ 7-32
Starting and operating
7
Page 249 of 426
7-2Starting and operating
Fuel
CAUTION
Use of a fuel which is low in qualityor use of an inappropriate fueladditive may cause engine damage.
&Fuel requirements
The engine is designed to operate usingunleaded gasolinewith an octane ratingof87 AKI (90 RON) or higher.
!Fuel octane rating
This octane rating is the average of theResearch Octane and Motor Octanenumbers andis commonly referred to asthe Anti Knock Index (AKI).
Using a gasoline with a lower octanerating can causepersistent and heavyknocking, which can damage the engine.Do not be concerned if your vehiclesometimes knocks lightly when you driveup a hill or when you accelerate. Contactyour SUBARU dealer if you use a fuel withthe specified octane rating and yourvehicle knocks heavily or persistently.
!Unleaded gasoline
The neck of the fuel filler pipe is designedto accept only an unleaded gasoline filler
nozzle. Under no circumstances shouldleaded gasoline be used because it willdamage the emission control system andmay impair driveability and fuel economy.
!California fuel
If your vehicle was certified to CaliforniaEmission Standards as indicated on theunderhood tune-up label, it is designed tooptimize engine and emission controlsystem performance with gasoline thatmeets the clean burning low-sulfur Cali-fornia gasoline specifications. If you live inany other state than California, yourvehicle will operate on gasoline meetingFederal specifications. Gasoline sold out-side California is permitted to have highersulfur levels, which may affect the perfor-mance of your vehicle’s catalytic converterand may produce a sulfur exhaust odor orsmell. SUBARU recommends that you trya different brand of unleaded gasolinehaving lower sulfur to determine if theproblem is fuel related before returningyour vehicle to an authorized dealer forservice. The CHECK ENGINE warninglight/Malfunction indicator light may alsoilluminate. If this occurs, return to yourauthorized SUBARU dealer for diagnosis.If it is determined that the condition iscausedby the type of fuel used, repairsmay not be covered by your warranty.
!MMT
Some gasoline contains an octane-en-hancing additive called MMT (Methylcy-clopentadienyl Manganese Tricarbonyl). Ifyou use such fuels, your emission controlsystem performance may deteriorate andthe CHECK ENGINE warning light/Mal-function indicator light may illuminate. Ifthis happens, return to your authorizedSUBARU dealer for service. If it isdetermined that the condition is causedby the type of fuel used, repairs may notbe covered by your warranty.
!Gasoline for cleaner air
CAUTION
Do not let fuel spill on the exteriorsurfaces of the vehicle. Fuels con-taining alcohol may cause paintdamage, which is not covered underthe SUBARU Limited Warranty.
Yo u r u s e o f g a s o l i n e w i t h d e t e r g e n tadditives will help prevent deposits fromforming in your engine and fuel system.This helps keepyour engine in tune andyour emission control system workingproperly, and is a way of doing your partfor cleaner air. If you continuously use ahigh quality fuel with the proper detergentand other additives, you should never