2014 SUBARU TRIBECA engine overheat
[x] Cancel search: engine overheatPage 7 of 426
2
Chapter 4: Climate control
This chapter informs you how to operatethe climate control.
Chapter 5: Audio
This chapter informs you how to operateyour audio system.
Chapter 6: Interior equipment
This chapter informs you how to operateinterior equipment.
Chapter 7: Starting and operating
This chapter informs you how to start andoperate your SUBARU.
Chapter 8: Driving tips
This chapterinforms you how to drive yourSUBARU in various conditions and ex-plains some safety tips on driving.
Chapter 9: In case of emergency
This chapter informs you what to do if youhave a problem while driving, such as aflat tire or engine overheating.
Chapter 10: Appearance care
This chapter informs you how to keep yourSUBARU looking good.
Chapter 11: Maintenance and service
This chapter informs you when you needto take your SUBARU to the dealer forscheduled maintenance and informs youhow to keep your SUBARU runningproperly.
Chapter 12: Specifications
This chapter informs you about the dimen-sions and capacities of your SUBARU.
Chapter 13: Consumer information andReporting safety defects
This chapter informs you about Tireinformation, Uniform tire quality gradingstandards and Reporting safety defects.
Chapter 14: Index
This is an alphabetical listing of all that’sinthis manual. You can use it to quickly findsomething you want to read.
&Safety warnings
You will find a number of WARNINGs,CAUTIONs and NOTEs in this manual.
These safety warnings alert you to poten-tial hazards that could result in injury toyou or others.
Please read these safety warnings as wellas all other portions of this manual care-fully in order to gain a better understand-ing of how to use your SUBARU vehiclesafely.
WARNING
A WARNING indicates a situation inwhich serious injury or death couldresult if the warning is ignored.
CAUTION
A CAUTION indicates a situation inwhich injury or damage to yourvehicle, or both, could result if thecaution is ignored.
NOTE
A NOTE gives information or sugges-tions how to make better use of yourvehicle.
&Safety symbol
You will find a circle with a slash through itin this manual. This symbol means“Donot”,“Do not do this”,or“Do not let thishappen”, depending upon the context.
Page 38 of 426
&Lumbar support
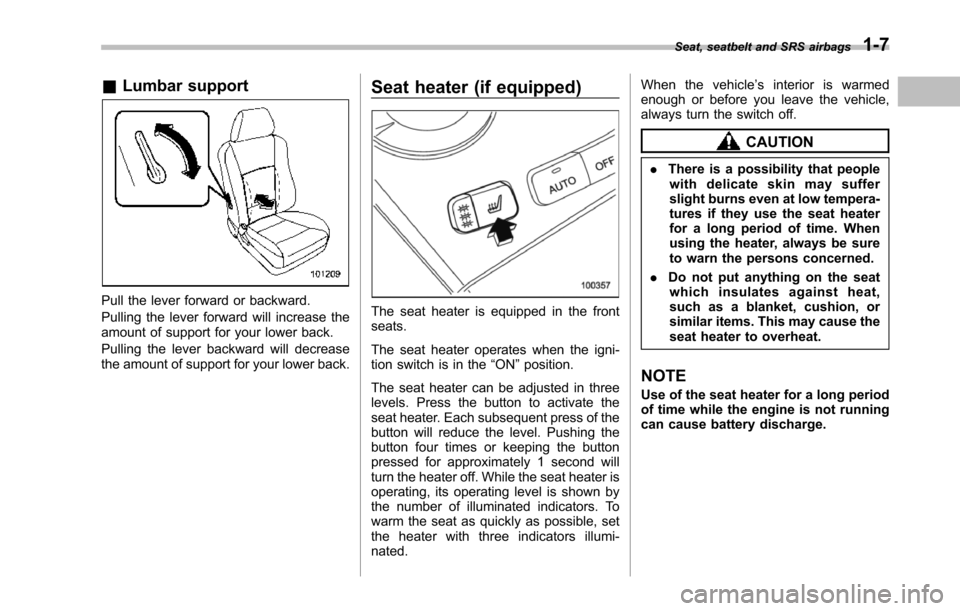
Pull the lever forward or backward.
Pulling the lever forward will increase theamountof support for your lower back.
Pulling the lever backward will decreasethe amount of support for your lower back.
Seat heater (if equipped)
Theseat heater is equipped in the frontseats.
Theseat heater operates when the igni-tion switch is in the“ON”position.
The seat heater can be adjusted in threelevels. Press the button to activate theseat heater. Each subsequent press of thebutton will reduce the level. Pushing thebutton four times or keeping the buttonpressed for approximately 1 second willturn the heater off. While the seat heater isoperating, its operating level is shown bythe number of illuminated indicators. Towarm the seat as quickly as possible, setthe heater with three indicators illumi-nated.
When the vehicle’s interior is warmedenough or before you leave the vehicle,always turn the switch off.
CAUTION
.There is a possibility that peoplewith delicate skin may sufferslightburns even at low tempera-tures if they use the seat heaterfor a long period of time. Whenusing the heater, always be sureto warn the persons concerned.
.Do not put anything on the seatwhich insulates against heat,such as a blanket, cushion, orsimilaritems. This may cause theseat heater to overheat.
NOTE
Use of the seat heater for a long periodof time while the engine is not runningcan cause battery discharge.
Seat, seatbelt and SRS airbags1-7
Page 142 of 426
CAUTION
If the pointer exceeds the normaloperating range, safely stop thevehicle as soon as possible.
Refer to“Engine overheating”F9-14.
Warning and indicator lights
Several of the warning and indicator lightsilluminate momentarily and then turn offwhen the ignition switch is initially turnedto the“ON”position. This permits check-ing the operation of the bulbs.
Apply the parking brake and turn theignition switch to the“ON”position. Forthe system check, the following lightsilluminate and turn off after several sec-onds or after the engine has started:
: Driver’s seatbelt warning light(The seatbelt warning light turns offonly when the driver fastens theseatbelt.)
: Front passenger’s seatbelt warninglight(The seatbelt warning light turns offonly when the front seat passengerfastens the seatbelt.)
: SRS airbag system warning light
: CHECK ENGINE warning light/Mal-function indicator light
: Charge warning light
: Oil pressure warning light
: AT OIL TEMP warning light
/: ABS warning light
: Vehicle Dynamics Control warning light(U.S.-spec. models and Canada-spec.models)/Vehicle Dynamics Control op-eration indicator light (all models)
: Traction Control system OFF indicatorlight (U.S.-spec. models and Canada-spec. models)
: Vehicle Dynamics Control warning light(Latin America-spec. models)/TractionControl system OFF indicator light(Latin America-spec. models)
/: Brake system warning light
: AWD warning light
: Low tire pressure warning light
: SPORT mode indicator light
: Front passenger’s frontal airbag ONindicator light
: Front passenger’s frontal airbag OFFindicator light
: Low fuel warning light
: Cruise control indicator light
: Cruise control set indicator light
: Rear differential oil temperature warn-ing light
: Windshield washer fluid warning light
Instruments and controls3-9
–CONTINUED–
Page 259 of 426
7-12Starting and operating
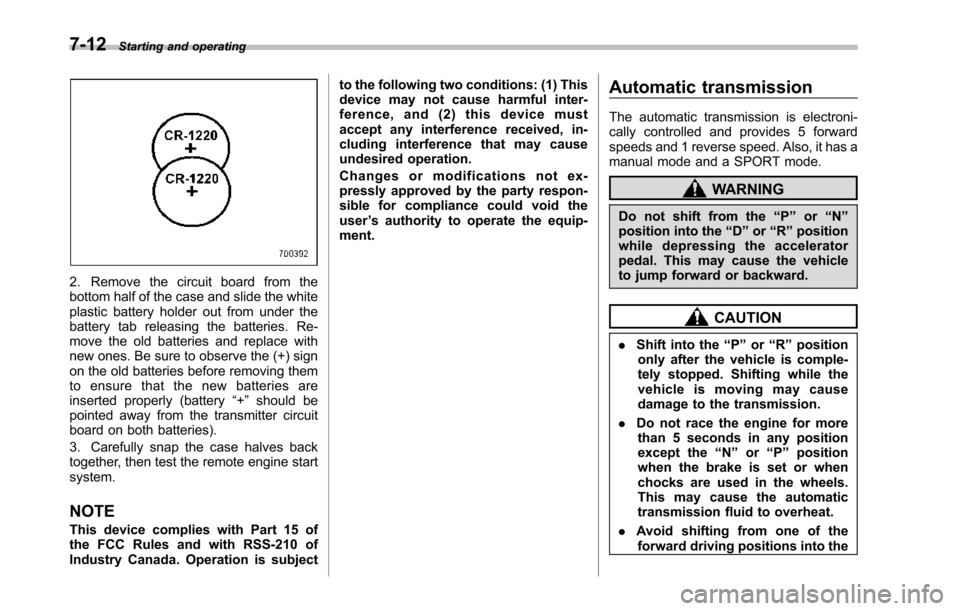
2. Remove the circuit board from thebottom half of the case and slide the whiteplastic battery holder out from under thebattery tab releasing the batteries. Re-move the old batteries and replace withnew ones. Be sure to observe the (+) signon the old batteries before removing themto ensure that the new batteries areinserted properly (battery“+”should bepointed away from the transmitter circuitboard on both batteries).
3. Carefully snap the case halves backtogether, then test the remote engine startsystem.
NOTE
This device complies with Part 15 ofthe FCC Rules and with RSS-210 ofIndustry Canada. Operation is subject
to the following two conditions: (1) Thisdevice may not cause harmful inter-ference, and (2) this device mustaccept any interference received, in-cluding interference that may causeundesired operation.
Changes or modifications not ex-pressly approved by the party respon-sible for compliance could void theuser’s authority to operate the equip-ment.
Automatic transmission
The automatic transmission is electroni-cally controlled and provides 5 forwardspeeds and 1 reverse speed. Also, it has amanual mode and a SPORT mode.
WARNING
Do not shift from the“P”or“N”position into the“D”or“R”positionwhile depressing the acceleratorpedal.This may cause the vehicleto jump forward or backward.
CAUTION
.Shift into the“P”or“R”positiononly after the vehicle is comple-tely stopped. Shifting while thevehicle is moving may causedamage to the transmission.
.Do not race the engine for morethan 5 seconds in any positionexcept the“N”or“P”positionwhen the brake is set or whenchocks are used in the wheels.This may cause the automatictransmission fluid to overheat.
.Avoid shifting from one of theforward driving positions into the
Page 266 of 426
Braking
&Braking tips
WARNING
Never rest your foot on the brakepedal whiledriving. This can causedangerous overheating of thebrakes and needless wear on thebrake pads and linings.
!When the brakes get wet
When driving in rain or after washing thevehicle, the brakes may get wet. As aresult, brake stopping distance will belonger. To dry the brakes, drive the vehicleat a safe speed while lightly depressingthe brake pedal to heat up the brakes.
!Use of engine braking
Remember to make use of engine brakingin addition to foot braking. When descend-ing a grade, if only the foot brake is used,the brakes may start working improperlybecause of brake fluid overheating,caused by overheated brake pads. Tohelp prevent this, shift into a lower gear toget stronger engine braking.
!Brakingwhen a tire is punctured
Do not depress the brake pedal suddenlywhen a tire is punctured. This could cause
a loss of control of the vehicle. Keepdriving straight ahead while graduallyreducing speed. Then slowly pull off theroad to a safe place.
&Brake system
!Two separate circuits
Your vehicle has a dual circuit brakesystem. Each circuit works diagonallyacross the vehicle. If one circuit of thebrake system should fail, the other half ofthe system still works. If one circuit fails,the brake pedalwill go down much closerto the floor than usual and you will need todepress it down much harder. And a muchlonger distance will be needed to stop thevehicle.
!Brake booster
The brake booster uses engine manifoldvacuum to assist braking force. If enginemanifold vacuum becomes insufficient,such as when driving at high altitude, avacuum pump assures a sufficient va-cuum to operate the brake booster. Do notturn off the engine while driving becausethat will turn off the brake booster, result-ing in poor braking power.
The brakes will continue to work evenwhen the brake booster completely stopsfunctioning. If this happens, however, youwill have to depress the pedal much
harder than normal and the braking dis-tance will increase.
NOTE
Some sound accompanying operationof the vacuum pump may be heardfrom the engine compartment duringdriving. This does not indicate a mal-function.
!Brake assist system
WARNING
Do not be overconfident about thebrake assist. It is not a system thatbrings more braking ability to thevehicle beyond its braking capabil-ity. Always use the utmost carewhen driving regarding vehiclespeed and safe distance.
CAUTION
When you need to brake suddenly,continue depressing the brake pedalstrongly to bring the effect of thebrake assist.
Starting and operating7-19
–CONTINUED–
Page 306 of 426
–all cargo in the trailer is securedsafely in position.–the side mirrors provide a goodrearward field of view without a sig-nificant blind spot..Sufficient time should be taken to learnthe“feel”of the vehicle/trailer combinationbefore starting out on a trip. In an area freeof traffic, practice turning, stopping andbacking up.
!Driving with a trailer
.You should allow for considerably morestopping distance when towing a trailer.Avoid sudden braking because it mayresult in skidding or jackknifing and loss ofcontrol.
.Avoid uneven steering, sharp turns andrapid lane changes.
.Slow down before turning. Make alonger than normal turning radius becausethe trailer wheels will be closer than thevehicle wheels to the inside of the turn. Ina tight turn, the trailer could hit yourvehicle.
.Crosswinds will adversely affect thehandling of your vehicle and trailer, caus-ing sway. Crosswinds can be due toweather conditions or the passing of largetrucks or buses. If swaying occurs, firmlygrip the steering wheel and slow downimmediately but gradually.
.When passing other vehicles, consid-erable distance is required because of theadded weight and length caused byattaching the trailer to your vehicle.
1) Left turn2) Right turn
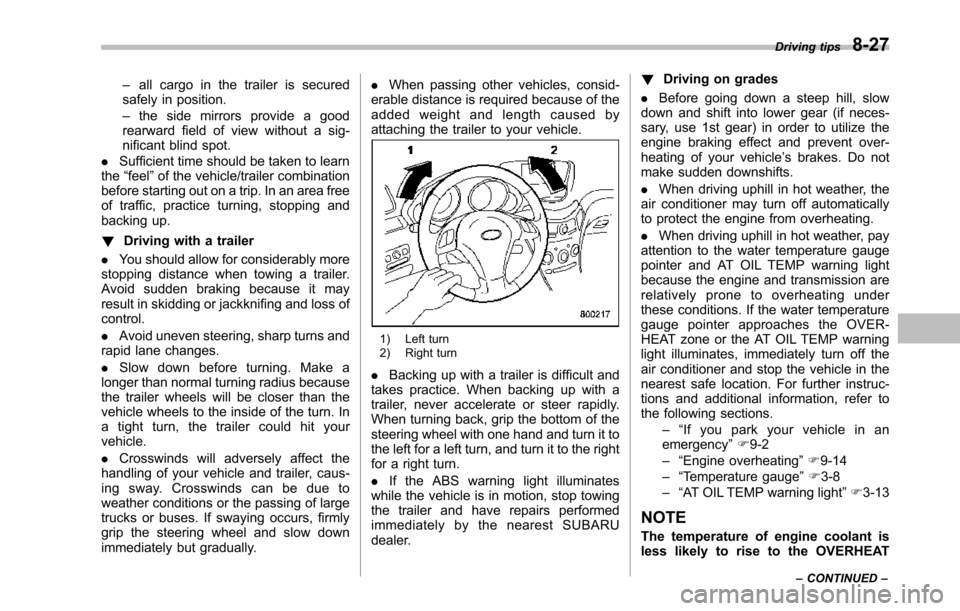
.Backing up with a trailer is difficult andtakes practice. When backing up with atrailer, never accelerate or steer rapidly.When turning back, grip the bottom of thesteering wheel with one hand and turn it tothe left for a left turn, and turn it to the rightfor a right turn.
.If the ABS warning light illuminateswhile the vehicle is in motion, stop towingthe trailer and have repairs performedimmediately by the nearest SUBARUdealer.
!Driving on grades
.Before going down a steep hill, slowdown and shift into lower gear (if neces-sary, use 1st gear) in order to utilize theengine braking effect and prevent over-heating of your vehicle’s brakes. Do notmake sudden downshifts.
.When driving uphill in hot weather, theair conditioner may turn off automaticallyto protect the engine from overheating.
.When driving uphill in hot weather, payattention to the water temperature gaugepointer and AT OIL TEMP warning lightbecause the engine and transmission arerelatively prone to overheating underthese conditions. If the water temperaturegauge pointer approaches the OVER-HEAT zone or the AT OIL TEMP warninglight illuminates, immediately turn off theair conditioner and stop the vehicle in thenearest safe location. For further instruc-tions and additional information, refer tothe following sections.–“If you park your vehicle in anemergency”F9-2–“Engine overheating”F9-14–“Temperature gauge”F3-8–“AT OIL TEMP warning light”F3-13
NOTE
The temperature of engine coolant isless likely to rise to the OVERHEAT
Driving tips8-27
–CONTINUED–
Page 307 of 426
8-28Driving tips
zone in the“D”position than in themanual mode position.
.Avoid using the accelerator pedal tostay stationary on an uphill slope insteadof using the parking brake or foot brake.That may cause the transmission fluid tooverheat.
!Parking on a grade
Always block the wheels under bothvehicle and trailer when parking. Applythe parking brake firmly. You should notpark on a hill or slope. But if parking on ahill or slope cannot be avoided, youshould take the following steps.
1. Apply the brakes and hold the pedaldown.
2. Have someone place wheel blocksunder both the vehicle and trailer wheels.
3. When the wheel blocks are in place,release the regular brakes slowly until theblocks absorb theload.
4. Apply the regular brakes and thenapply the parking brake; slowly releasethe regular brakes.
5. Shift into“P”and shut off the engine.
Page 308 of 426
If you park your vehicle in an emergency......... 9-2
Spare tire............................................................. 9-2Removing the spare tire...................................... 9-3Re-storage of spare tire....................................... 9-4
Temporary spare tire........................................... 9-5
Flat tires............................................................... 9-6Changing a flat tire.............................................. 9-6Tire pressure monitoring system (TPMS) ............ 9-10
Jump starting..................................................... 9-11How to jump start............................................... 9-12
Engine overheating........................................... 9-14If steam is coming from the enginecompartment................................................... 9-14If no steam is coming from the enginecompartment................................................... 9-14
Towing................................................................ 9-14Towing and tie-down hooks................................ 9-15Using a flat-bed truck......................................... 9-17Towing with all wheels on the ground................. 9-17
Reargate–if the rear gate cannot beunlocked.......................................................... 9-18
Maintenance tools............................................. 9-19Jack and jack handle......................................... 9-19
In case of emergency
9