2014 SUBARU TRIBECA warning
[x] Cancel search: warningPage 94 of 426

Ahands-freemicrophoneorother accessory in such a loca-tion could be propelled throughthe cabin with great force by thecurtain airbag, or it could preventcorrect deployment of the curtainairbag. In either case, the resultcould be serious injuries.
WARNING
Do not hang coat hangers or otherhard or pointed objects on the coathooks. If such items were hangingon the coat hooks during deploy-ment of the SRS curtain airbags,they could cause serious injuries bycoming off the coat hooks and beingthrown through the cabin or by
preventing deployment of the cur-tain airbags.
Before hanging clothing on the coathooks, make sure there are no sharpobjects in the pockets. Hang cloth-ing directly on the coat hooks with-out using hangers.
WARNING
Do not put any kind of cover orclothes or other objects over eitherfront seatback and do not attachlabels or stickers to the front seatsurface on or near the SRS sideairbag. They could prevent properdeployment of the SRS side airbag,reducingprotection available to the
front seat’s occupant.
!Operation
The SRS side airbag and SRS curtainairbag can function only when the ignitionswitch is in the“ON”position.
The driver’s and front passenger’s SRSside airbags and SRS curtain airbagsdeploy independently of each other be-cause each has its own impact sensor.Therefore, they may not both deploy in thesame accident. Also, the SRS side airbagand SRS curtain airbag deploys indepen-dently of the driver’s and front passen-ger’s SRS frontal airbags in the steeringwheel and instrument panel.
An impact sensor, which senses impactforce, is located in each of the left and
Seat, seatbelt and SRS airbags1-63
–CONTINUED–
Page 102 of 426
&SRS airbag system monitors
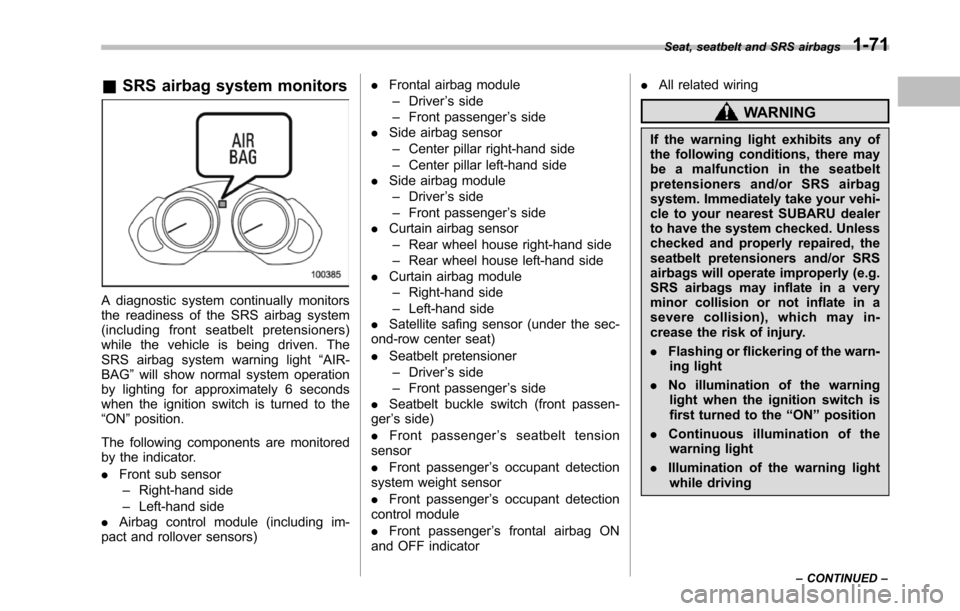
A diagnostic system continually monitorsthe readiness of the SRS airbag system(including front seatbelt pretensioners)while the vehicle is being driven. TheSRS airbag system warning light“AIR-BAG”will show normal system operationby lighting for approximately 6 secondswhen the ignition switch is turned to the“ON”position.
The following components are monitoredby the indicator.
.Front sub sensor–Right-hand side–Left-hand side.Airbag control module (including im-pact and rolloversensors)
.Frontal airbag module–Driver’s side–Front passenger’s side.Side airbag sensor–Center pillar right-hand side–Center pillar left-hand side.Side airbag module–Driver’s side–Front passenger’s side.Curtain airbag sensor–Rear wheel house right-hand side–Rear wheel house left-hand side.Curtain airbag module–Right-hand side–Left-hand side.Satellite safing sensor (under the sec-ond-row center seat)
.Seatbelt pretensioner–Driver’s side–Front passenger’s side.Seatbelt buckleswitch (front passen-ger’s side)
.Front passenger’sseatbelttensionsensor
.Front passenger’s occupant detectionsystem weight sensor
.Front passenger’s occupant detectioncontrolmodule
.Front passenger’s frontal airbag ONand OFF indicator
.All related wiring
WARNING
If the warning light exhibits any ofthe following conditions, there maybe a malfunction in the seatbeltpretensioners and/or SRS airbagsystem. Immediately take your vehi-cle to your nearest SUBARU dealerto have the system checked. Unlesschecked and properly repaired, theseatbelt pretensioners and/or SRSairbags will operate improperly (e.g.SRS airbags may inflate in a veryminor collision or not inflate in asevere collision), which may in-crease the risk of injury.
.Flashing or flickering of the warn-ing light
.No illumination of the warninglight when the ignition switch isfirst turned to the“ON”position
.Continuous illumination of thewarning light
.Illumination of the warning lightwhile driving
Seat, seatbelt and SRS airbags1-71
–CONTINUED–
Page 103 of 426
1-72Seat, seatbelt and SRS airbags
&SRS airbag system servicing
WARNING
.When discarding an airbag mod-ule or scrapping the entire vehi-cle damaged by a collision, con-sult your SUBARU dealer.
.The SRS airbag has no user-serviceable parts. Do not useelectrical test equipment on anycircuit related to the SRS airbagsystem. For required servicing ofthe SRS airbag, consult yournearest SUBARU dealer. Tamper-ing with or disconnecting thesystem’s wiring could result inaccidental inflation of the SRSairbag or could make the systeminoperative, which may result inserious injury.
CAUTION
If you need service or repair in areasindicated in the following list, havethe work performed by an author-ized SUBARU dealer. The SRS air-bag control module, impact sensorsand airbag modules are stored inthese areas.
.Under the center console
.Inside each front fender
.Steering wheel and column andnearby areas
.Top of the dashboard on frontpassenger’ssideandnearbyareas
.Each front seat and nearby area
.Inside each center pillar
.In each roof side (from the frontpillar to a point over the second-row seat)
.Between the second-row seatcushion and rear wheel houseon each side
.Under the second-row centerseat
In the event that the SRS airbag isdeployed, replacement of the systemshould be performed only by an author-ized SUBARU dealer. When the compo-nents of the SRS airbag system arereplaced, use only genuine SUBARUparts.
NOTE
In the following cases, contact yourSUBARU dealer as soon as possible.
.The front part of the vehicle was
involved in an accident in which onlythe driver’s SRS frontal airbag or bothdriver’sandfrontpassenger’sSRSfrontal airbags did not deploy..The pad of the steering wheel, thecover over the front passenger’s SRSfrontal airbag, or either roof side (fromthe front pillar to a point over thesecond-row seat) is scratched,cracked, or otherwise damaged..Center pillar, rear wheel house orrearfloor pan, or an area near theseparts, was involved in an accident inwhich the SRS side airbag and SRScurtain airbag did not deploy..The fabric or leather of either frontseatback is cut, frayed, or otherwisedamaged..The rear part of the vehicle wasinvolved in an accident in which noSRS airbag was deployed.
&Precautions against vehicle
modification
WARNING
To avoid accidental activation of thesystem or rendering the systeminoperative, which may result inserious injury, no modificationsshould be made to any components
Page 108 of 426
Immobilizer
CAUTION
FCC WARNING
Changes or modifications not ex-pressly approved by the party re-sponsible for compliance could voidthe user’s authority to operate theequipment.
The immobilizer system is designed toprevent an unauthorized person fromstarting the engine. Only keys registeredwith your vehicle’s immobilizer system canbe used to operate your vehicle. Even ifan unregistered key fits into the ignitionswitchand can be turned to the“START”position, the engine will automatically stopafter several seconds.
Each immobilizer key contains a trans-ponder in which the key’s ID code isstored. When a key is inserted into theignition switch and turned to the“ON”position, the transponder transmits thekey’s ID code to the immobilizer system’sreceiver. If the transmitted ID codematches the ID code registered in theimmobilizer system, the system allows theengine to be started. Since the ID code istransmitted and acted upon almost in-
stantly, the immobilizer system does notimpede normal starting of the engine.
If the engine does not start, pull out thekey once before trying again. Refer to“Ignition switch”F3-3.
This device complies with Part 15 ofthe FCC Rules and RSS-Gen of ICRules. Operation is subject to thefollowing two conditions: (1) this de-vice may not cause harmful interfer-ence, and (2) this device must acceptany interference received, includinginterference that may cause undesiredoperation.
CAUTION
.Do not place the key under directsunlight or anywhere it maybecomehot.
.Do not get the key wet. If the keygets wet, wipe it dry with a clothimmediately.
NOTE
To p r o t e c t y o u r v e h i c l e f r o m t h e f t ,please pay close attention to the fol-lowing security precautions.
.Never leaveyour vehicle unattendedwith its keys inside..Before leaving your vehicle, close all
windows and lock the doors and reargate..Do not leave spare keys or anyrecord of your key number in thevehicle.
&Security ID plate
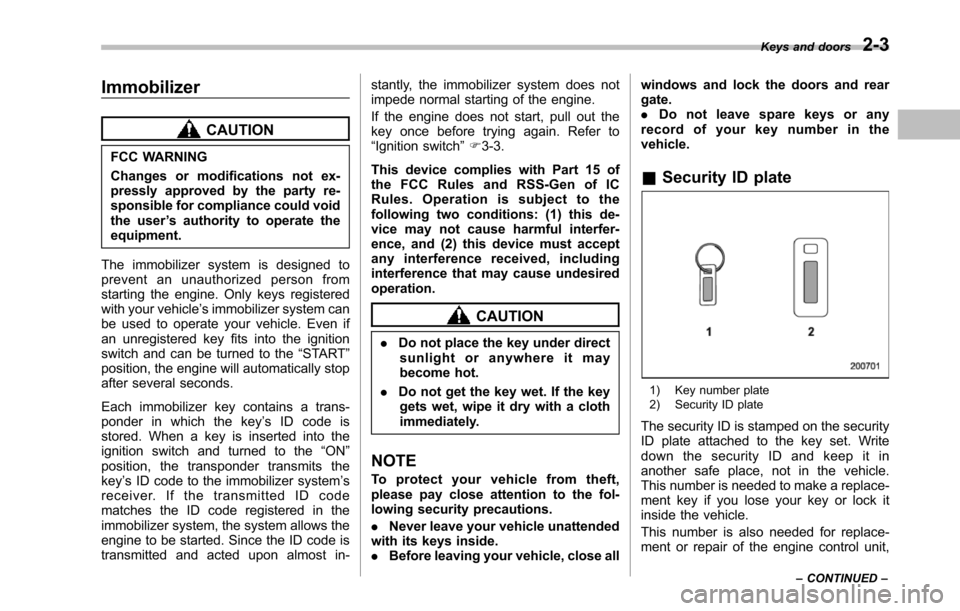
1) Key number plate2) Security ID plate
The security ID is stamped on the securityID plate attached to the key set. Writedown the security ID and keep it inanother safe place, not in the vehicle.This number is needed to make a replace-ment key if you lose your key or lock itinside the vehicle.
This number is also needed for replace-ment or repair of the engine control unit,
Keys and doors2-3
–CONTINUED–
Page 110 of 426
Door locks
&Locking and unlocking from
the outside
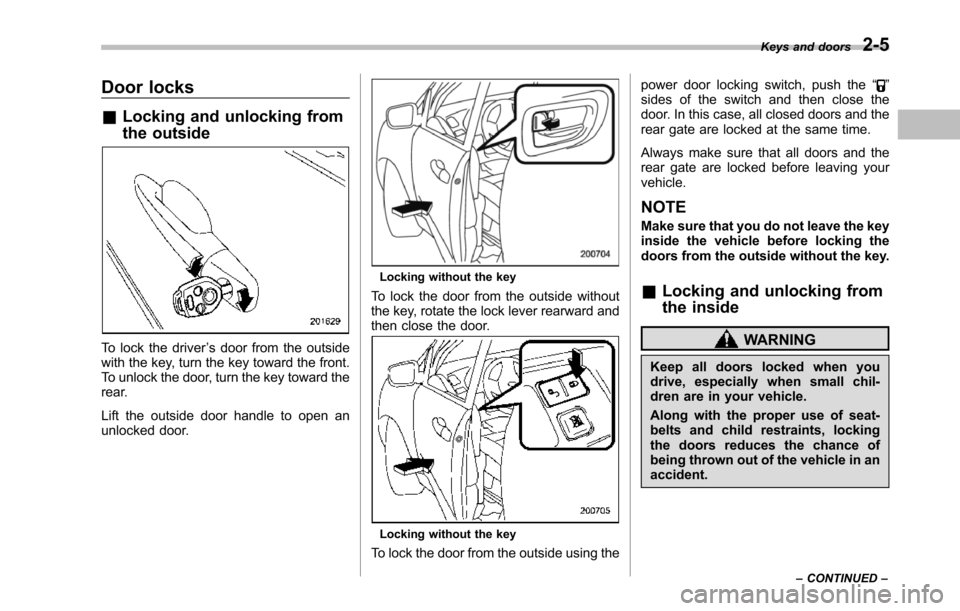
To lock the driver’s door from the outsidewith the key, turn the key toward the front.To unlock the door, turn the key toward therear.
Lift the outside door handle to open anunlocked door.
Locking without the key
To lock the door from the outside withoutthe key, rotate the lock lever rearward andthen close the door.
Locking without the key
To lock the door from the outside using the
power door locking switch, push the“”sides of the switch and then close thedoor. In this case, all closed doors and therear gate are locked at the same time.
Always make sure that all doors and therear gate are locked before leaving yourvehicle.
NOTE
Make sure that you do not leave the keyinside the vehicle before locking thedoors from theoutside without the key.
&Locking and unlocking from
the inside
WARNING
Keep all doors locked when youdrive, especially when small chil-dren are in your vehicle.
Along with the proper use of seat-belts and child restraints, lockingthe doors reduces the chance ofbeing thrown out of the vehicle in anaccident.
Keys and doors2-5
–CONTINUED–
Page 126 of 426
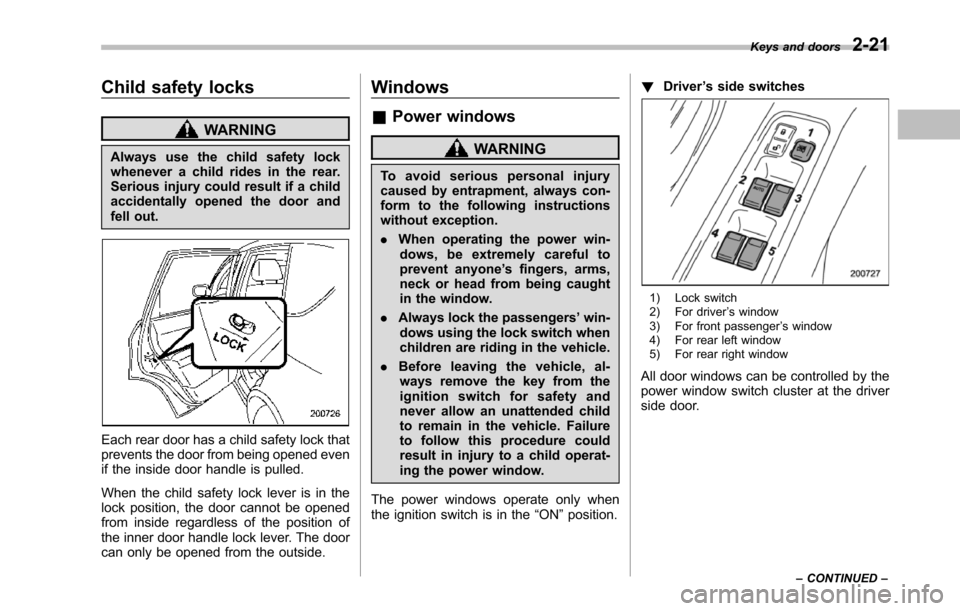
Child safety locks
WARNING
Always use the child safety lockwhenever a child rides in the rear.Serious injury could result if a childaccidentally opened the door andfell out.
Each rear door has a child safety lock thatprevents the door from being opened evenif the inside door handle is pulled.
When the child safety lock lever is in thelock position, the door cannot be openedfrom inside regardless of the position ofthe inner door handle lock lever. The doorcan only be opened from the outside.
Windows
&Power windows
WARNING
To a v o i d s e r i o u s p e r s o n a l i n j u r ycausedby entrapment, always con-form to the following instructionswithout exception.
.When operating the power win-dows, be extremely careful toprevent anyone’s fingers, arms,neck or head from being caughtin the window.
.Always lockthe passengers’win-dows using the lock switch whenchildren are riding in the vehicle.
.Before leaving the vehicle, al-ways remove the key from theignition switch for safety andnever allow an unattended childto remain in the vehicle. Failureto follow this procedure couldresult in injury to a child operat-ing the power window.
The power windows operate only whentheignition switch is in the“ON”position.
!Driver’s side switches
1) Lock switch2) For driver’s window3) For front passenger’s window4) For rear left window5) For rear right window
All door windows can be controlled by thepower window switch cluster at the driverside door.
Keys and doors2-21
–CONTINUED–
Page 129 of 426
2-24Keys and doors
Rear gate
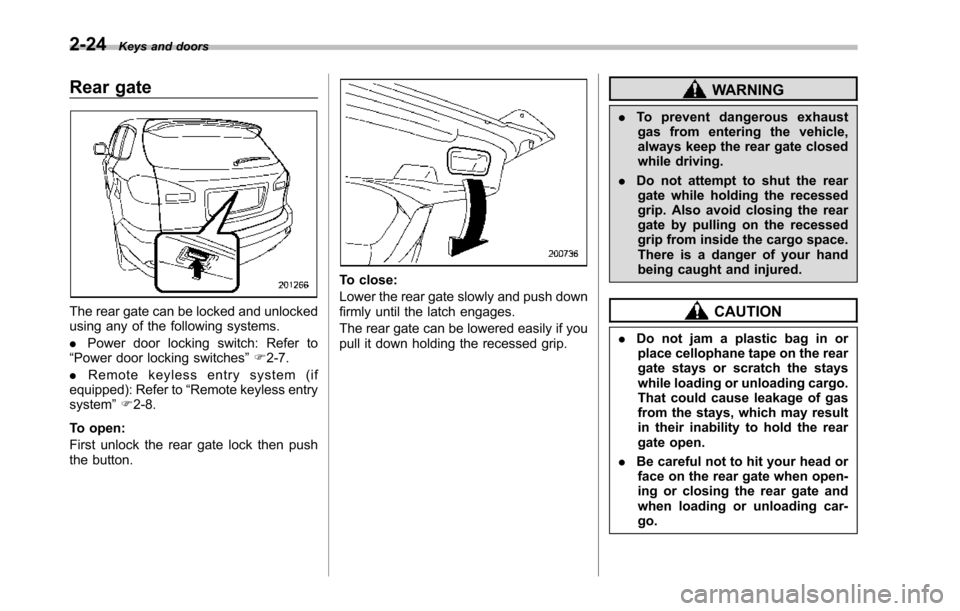
The rear gate can be locked and unlockedusing any of the following systems.
.Power door locking switch: Refer to“Power door locking switches”F2-7.
.Remote keyless entry system (ifequipped):Refer to“Remote keylessentrysystem”F2-8.
To open:
First unlock the rear gate lock then pushthe button.
To close:
Lower the rear gate slowly and push downfirmly until the latch engages.
The rear gate can be lowered easily if youpull it down holding the recessed grip.
WARNING
.To prevent dangerous exhaustgas from entering the vehicle,always keep the rear gate closedwhile driving.
.Do not attempt to shut the reargate while holding the recessedgrip. Also avoid closing the reargate by pulling on the recessedgrip from inside the cargo space.There is a danger of your handbeing caught and injured.
CAUTION
.Do not jam a plastic bag in orplace cellophane tape on the reargate stays or scratch the stayswhile loading or unloading cargo.That could cause leakage of gasfrom the stays, which may resultin their inability to hold the reargate open.
.Be careful not to hit your head orface on the rear gate when open-ing or closing the rear gate andwhen loading or unloading car-go.
Page 130 of 426
NOTE
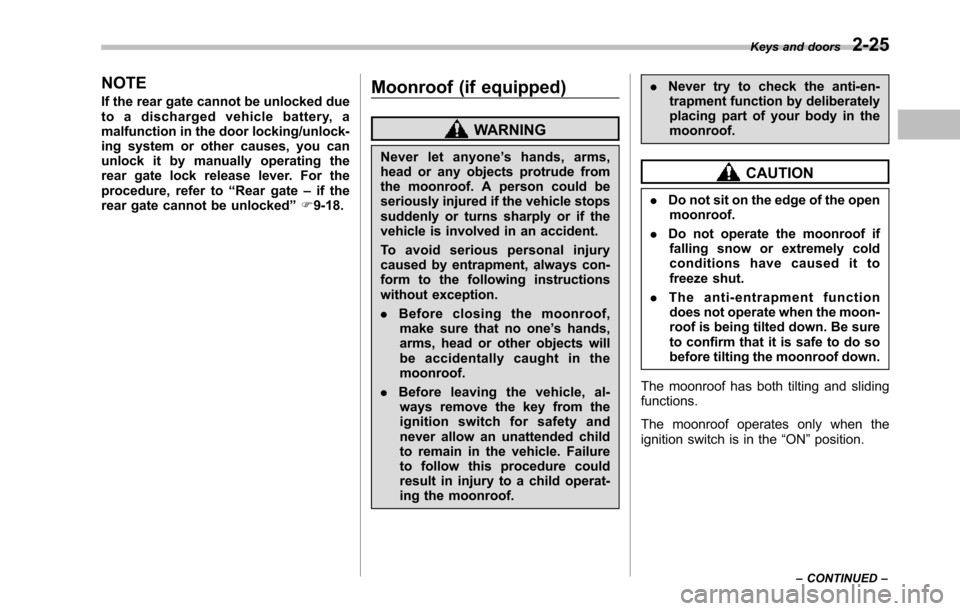
If the rear gate cannot be unlocked dueto a discharged vehicle battery, amalfunction in the door locking/unlock-ing system or other causes, you canunlock it by manually operating therear gate lock release lever. For theprocedure, refer to“Rear gate–if therear gate cannot be unlocked”F9-18.
Moonroof (if equipped)
WARNING
Never let anyone’shands,arms,head or any objects protrude fromthe moonroof. A person could beseriously injured if the vehicle stopssuddenly or turns sharply or if thevehicle is involved in an accident.
To a v o i d s e r i o u s p e r s o n a l i n j u r ycaused by entrapment, always con-form to the following instructionswithoutexception.
.Before closing the moonroof,make sure that no one’s hands,arms, head or other objects willbe accidentally caught in themoonroof.
.Before leaving the vehicle, al-ways remove the key from theignition switch for safety andnever allow an unattended childto remain in the vehicle. Failureto follow this procedure couldresult in injury to a child operat-ingthe moonroof.
.Never try to check the anti-en-trapment function by deliberatelyplacing part of your body in themoonroof.
CAUTION
.Do not sit on the edge of the openmoonroof.
.Do not operate the moonroof iffalling snow or extremely coldconditions have caused it tofreeze shut.
.The anti-entrapment functiondoes not operate when the moon-roof is being tilted down. Be sureto confirm that it is safe to do sobeforetilting the moonroof down.
The moonroofhas both tilting and slidingfunctions.
The moonroof operates only when theignition switch is in the“ON”position.
Keys and doors2-25
–CONTINUED–