2014 SUBARU TRIBECA change key battery
[x] Cancel search: change key batteryPage 29 of 426

24
Function settings
A SUBARU dealer can change the settings of the functions shown in the following table to meet your personal requirements. Contactthe nearest SUBARU dealer for details. If your vehicle is equipped with the genuine SUBARU navigation system, the settings for someof these functions can be changed using the navigation monitor. For details, please refer to the Owner’s Manual supplement for thenavigation system.
Item Function Possible settings Default setting Page
Alarm system Alarm system Operation/Non-operation Operation 2-16
Monitoring start delay time (after closure of doors) 0 second/30 seconds 30 seconds 2-17
Impact sensor operation (only models with shocksensors (dealer option))Operation/Non-operation Non-operation 2-20
Passive arming Operation/Non-operation Non-operation 2-19
Dome light/map lights illuminationON/OFFOFF 2-16
Remote keyless entry sys-temHazard warning flasher Operation/Non-operation Operation 2-8
Audible signal Operation/Non-operation Operation 2-11
Key lock-in prevention Key lock-in preventionOperation/Non-operationOperation2-7
Remote engine start system(dealer option)Horn chirp confirmation ON/OFF ON 7-10
Rear window defogger Rear window defoggerOperation for 15 minutes/Continuous operationOperation for 15 minutes 3-37
Windshield wiper deicer Windshield wiper deicer Operation for 15 minutes/Continuous operationOperation for 15 minutes 3-36
Map lights/Dome light Operation of map lights/dome light OFF delaytimerOFF/Short/Normal/Long Normal 6-2/6-3
Map lights Illumination in conjunction with a door open Operation/Non-operation Operation(Illumination - ON)6-3
Battery drainage preventionfunctionBattery drainage prevention function Operation/Non-operation Operation 2-6
Page 111 of 426
2-6Keys and doors
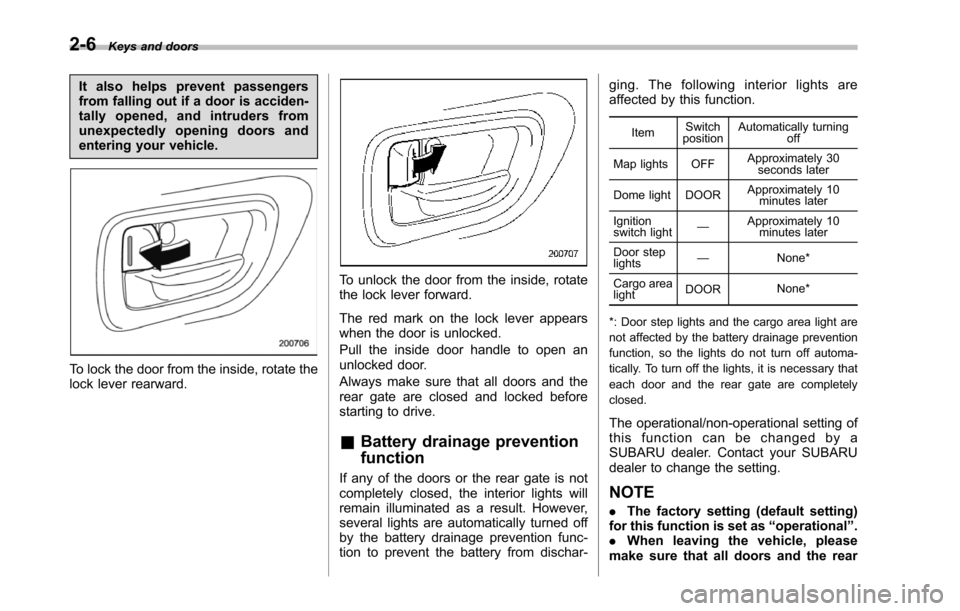
It also helps prevent passengersfrom falling out if a door is acciden-tally opened, and intruders fromunexpectedly opening doors andentering your vehicle.
To lock the door from the inside, rotate thelock lever rearward.
To unlock the door from the inside, rotatethe lock lever forward.
The red mark on the lock lever appearswhen the door is unlocked.
Pull the inside door handle to open anunlocked door.
Always make sure that all doors and therear gate are closed and locked beforestarting to drive.
&Battery drainage prevention
function
If any of the doors or the rear gate is notcompletely closed, the interior lights willremain illuminated as a result. However,several lights are automatically turned offby the battery drainage prevention func-tion to prevent the battery from dischar-
ging. The following interior lights areaffected by this function.
ItemSwitchpositionAutomatically turningoff
Map lights OFFApproximately 30seconds later
Dome light DOORApproximately 10minutes later
Ignitionswitch light—Approximately 10minutes later
Door steplights—None*
Cargo arealightDOORNone*
*: Door step lights and the cargo area light arenot affected by the battery drainage preventionfunction, so the lights do not turn off automa-tically. To turn off the lights, it is necessary thateach door and the rear gate are completelyclosed.
The operational/non-operational setting ofthis function can be changed by aSUBARU dealer. Contact your SUBARUdealer to change the setting.
NOTE
.The factory setting (default setting)for this function is set as“operational”..When leaving the vehicle, pleasemakesure that all doors and the rear
Page 113 of 426
2-8Keys and doors
door locking switches.
&Key lock-in prevention func-
tion
This function prevents the doors frombeing locked with the key still in theignition switch.
!Behavior with key lock-in preven-tion function operational
.With either the driver’s or front passen-ger’s door open, the doors automaticallyremain unlockedeven if the“”side of thedoor locking switch is pushed.
.It is possible to lock the all doors andthe rear gate by holding the“”side of thedoor locking switch pushed for 3 secondswith the driver’sdooropenandthenclosing the driver’s door.
!Behavior with key lock-in preven-tion function non-operational
.If the lock lever is turned to the rear(“LOCK”) position with the driver’s dooropen and the driver’s door is then closedwith the lock lever in that position, thedriver’s door is locked.
.If the spare key is used to lock thedriver’sdoorfromtheoutsideofthevehicle, the door is locked.
This function’soperational/non-opera-
tional setting can be changed by aSUBARU dealer. Contact a SUBARUdealer for details.
NOTE
When leaving the vehicle, make sureyou are holding the key before lockingthe doors.
Remote keyless entry system
CAUTION
.Do not expose the remote trans-mitter to severe shocks, such asthose experienced as a result ofdroppingor throwing.
.Do not take the remote transmit-ter apart except when replacingthe battery.
.Do not get the remote transmitterwet. If it gets wet, wipe it dry witha cloth immediately.
.When you carry the remote trans-mitter on an airplane, do notpress the button of the remotetransmitter whilein the airplane.When any button of the remotetransmitter is pressed, radiowaves are sent and may affectthe operation of the airplane.When you carry the remote trans-mitter in a bag on an airplane,take measures to prevent thebuttons of the remote transmitterfrom being pressed.
This device complies with Part 15 ofthe FCC Rules and with RSS-210 ofIndustry Canada. Operation is subject
Page 123 of 426
2-18Keys and doors
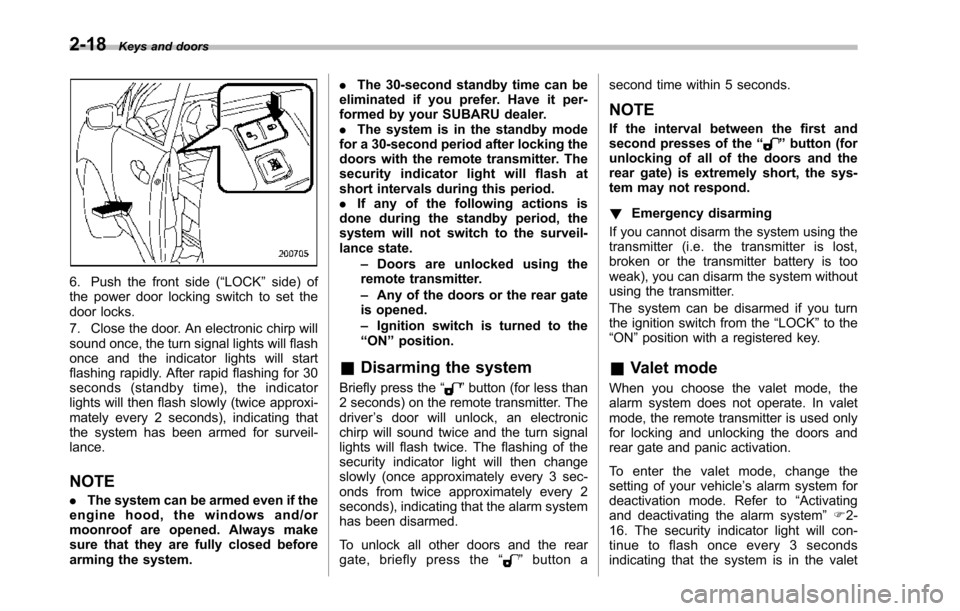
6. Push the front side (“LOCK”side) ofthe power door locking switch to set thedoor locks.
7. Close the door. An electronic chirp willsound once,the turn signal lights will flashonce and the indicator lights will startflashing rapidly. After rapid flashing for 30seconds (standby time), the indicatorlights will then flash slowly (twice approxi-mately every 2 seconds), indicating thatthe system has been armed for surveil-lance.
NOTE
.The system can be armed even if theengine hood, the windows and/ormoonroof are opened. Always makesure that they are fully closed beforearming the system.
.The 30-second standby time can beeliminated if you prefer. Have it per-formed by your SUBARU dealer..The system is in the standby modefor a 30-second period after locking thedoors with the remote transmitter. Thesecurity indicator light will flash atshort intervals during this period..If any of the following actions isdoneduring the standby period, thesystem will not switch to the surveil-lance state.–Doors are unlocked using theremote transmitter.–Any of the doors or the rear gateis opened.–Ignition switch is turned to the“ON”position.
&Disarming the system
Briefly press the“”button (for less than2 seconds) on the remote transmitter. Thedriver’s door will unlock, an electronicchirp will sound twice and the turn signallights willflash twice. The flashing of thesecurity indicator light will then changeslowly (once approximately every 3 sec-onds from twice approximately every 2seconds), indicating that the alarm systemhas been disarmed.
To unlock all other doors and the reargate, briefly press the“”button a
second time within 5 seconds.
NOTE
If the interval between the first andsecond presses of the“”button (forunlocking of all of the doors and therear gate) is extremely short, the sys-tem may not respond.
!Emergency disarming
If you cannot disarm the system using thetransmitter (i.e. the transmitter is lost,broken or the transmitter battery is tooweak), you can disarm the system withoutusing the transmitter.
The system can be disarmed if you turnthe ignition switch from the“LOCK”to the“ON”position with a registered key.
&Valet mode
When you choose the valet mode, thealarm system does not operate. In valetmode, the remote transmitter is used onlyfor locking and unlocking the doors andrear gate and panic activation.
To enter the valet mode, change thesetting of your vehicle’s alarm system fordeactivation mode. Refer to“Activatingand deactivatingthe alarm system”F2-16. The security indicator light will con-tinue to flash once every 3 secondsindicating that the system is in the valet
Page 223 of 426
6-2Interior equipment
Interior light
When leaving your vehicle, make sure thelights are turned off to avoid batterydischarge.
&Dome light
Models with Rear Seat Entertainment
Models without Rear Seat Entertainment1) ON2) DOOR3) OFF
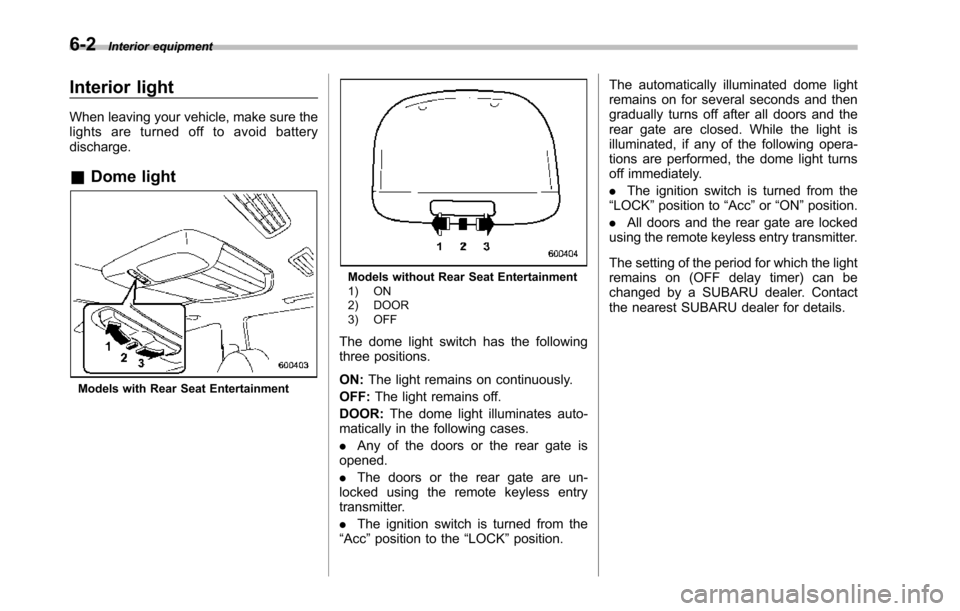
The dome light switch has the followingthree positions.
ON:The light remains on continuously.
OFF:The light remains off.
DOOR:The dome light illuminates auto-matically in the following cases.
.Any of the doors or the rear gate isopened.
.The doors or the rear gate are un-locked using the remote keyless entrytransmitter.
.The ignition switch is turned from the“Acc”position to the“LOCK”position.
The automatically illuminated dome lightremains on for several seconds and thengradually turns off after all doors and therear gate are closed. While the light isilluminated, if any of the following opera-tions are performed, the dome light turnsoff immediately.
.The ignition switch is turned from the“LOCK”positionto“Acc”or“ON”position.
.All doors and the rear gate are lockedusing the remote keyless entry transmitter.
The setting of the period for which the lightremains on (OFF delay timer) can bechanged by a SUBARU dealer. Contactthe nearest SUBARU dealer for details.
Page 225 of 426

6-4Interior equipment
(automatic illumination - ON)..The doors are unlocked using theremote keyless entry transmitter.
.The ignition switch is turned from the“Acc”position to the“LOCK”position.
The automatically illuminated map lightsremain illuminated for several secondsand then gradually turn off after all doorsare closed.
While the lights are illuminated, if any ofthe following operations are performed,the map lights turn off immediately.
.The ignition switch is turned from the“LOCK”position to the“Acc”or“ON”position.
.All doors and the rear gate are lockedusing the remote keyless entry transmitter.
The setting of the period for which the lightremains illuminated (OFF delay timer) canbe changed by a SUBARU dealer. Con-tact your SUBARU dealer for details.
NOTE
If any of the doors or the rear gate isnot completely closed, the map lightswill remain illuminated as a result.However, the map lights are automati-cally turned off by the battery drainageprevention function to prevent thebattery from discharging. For details,
refer to“Battery drainage preventionfunction”F2-6.
&Automatic ambient light for
center console area (if
equipped)
The automatic ambient light illuminateswhen the ignition switch is in the“ON”position and the light control switch is inthe“”position or“”position. Thelight dimly illuminates the area around thecenter console. The light turns off whenthe light control switch is in the“OFF”position. Also, the brightness of the light isadjusted by the illumination brightnesscontrol dial.
Sun visors
To block out glare, swing down the visors.
To use the sun visor at a side window,swing it down and move it sideways.
Page 258 of 426
sing the brake pedal repeatedly will togglethe feature ON or OFF each time.
7. To exit the remote transmitter andfeature programming mode, turn the igni-tion switch to the“LOCK”position, removethe key from the ignition switch and testoperation of the remote transmitter(s) andhorn confirmation feature.
&System maintenance
!Changing the batteries
CAUTION
.Do not let dust, oil or water get onor in the remote engine starttransmitter when replacing thebattery.
.Be careful not to damage theprinted circuit board in the re-mote engine start transmitterwhen replacing the battery.
.Be careful not to allow children totouch the battery and any re-moved parts; children couldswallowthem.
.There is a danger of explosion ifan incorrect replacement batteryis used. Replace only with thesame or equivalent type of bat-tery.
.Batteries should not be exposedto excessive heat such as sun-shine, fire or the like.
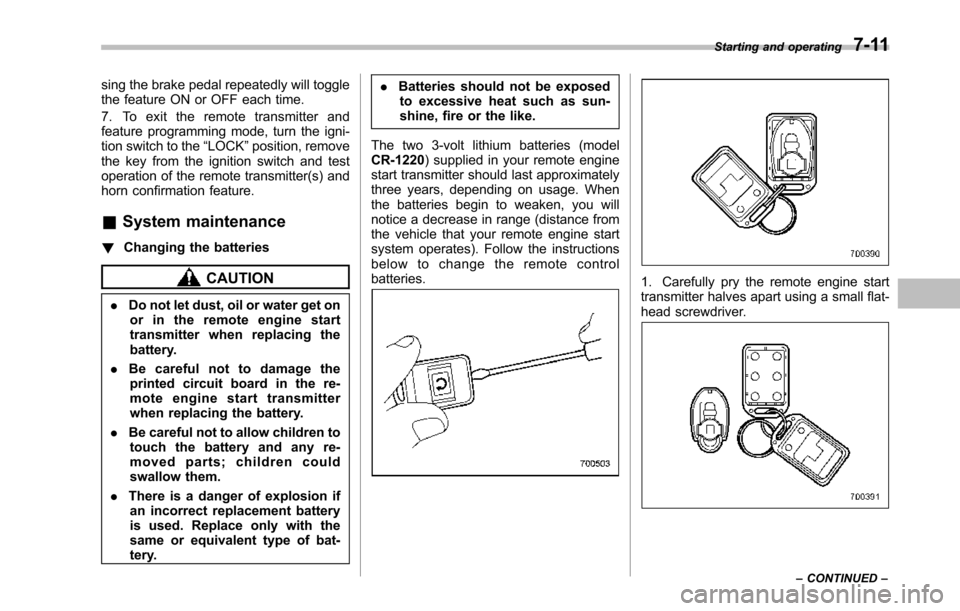
The two 3-volt lithium batteries (modelCR-1220) supplied in your remote enginestart transmitter should last approximatelythree years, depending on usage. Whenthebatteries begin to weaken, you willnotice a decrease in range (distance fromthe vehicle that your remote engine startsystem operates). Follow the instructionsbelow to change the remote controlbatteries.1. Carefully pry the remote engine starttransmitter halves apart using a small flat-head screwdriver.
Starting and operating7-11
–CONTINUED–