Page 33 of 83
 Columbus Infotinment Navigation System Manual The following information is displayed:
■ Free: - Amount of memory used
■ In use: - Amount of memory free
■ Free files: - Number of files that can be imported (maximum 3000)
The current memor")
The following information is displayed:
■ Free: - Amount of memory used
■ In use: - Amount of memory free
■ Free files: - Number of files that can be imported (maximum 3000)
The current memory capacity is displayed on the screen when files are being imported or deleted.
Import files
Supported audio/video files » page 29 can be imported from the sources cur-
rently connected into the internal memory.
› Press the button
→ Manage Jukebox → Import .
› A menu of available sources is displayed.
› Select the source desired.
› Select folders B
or files
C
.
› Press the symbol button
D
.
› The
Import completed. (... from ... file (s)) . Import completed successfully.
message indicates that import of the folder or files selected has been com-
pleted.
› Press the button
and close the file import window.
Delete files
The function is available if there are any audio or video files in the Jukebox.
› Press the button
→ Manage Jukebox → Delete .
› A menu of available media is displayed.
› Select the available medium for deletion.
› Select folders
B
or files
C
.
› Press the symbol button
.
› Press
Delete .
› The
Files have been deleted. message indicates that the folders/files selec-
ted were successfully deleted.
› Press the button
and close the delete files window.
Note
■
It is not possible to copy the contents of copyright protected CDs or DVDs to
the Jukebox.■
Files that have already been copied are recognized and cannot be copied
again (shown in grey).
■
It is not possible to copy files while simultaneously playing back audio or vid-
eo files in the CD/DVD drive.
Bluetooth ®
player
Read and observe
and on page 29 first.
The device makes a wireless connection (pairing) to the Bluetooth ®
player pos-
sible.
›
Follow the same instructions as for pairing the device with a tele-
phone » page 40 .
CAUTION
Do not connect an Apple device to the device via Bluetooth ®
and USB at the
same time, as this may result in a malfunction.
Note
■ We recommend adjusting the volume on the portable player to the maximum
level.■
The volume can also be adjusted by setting the input sensitivity of the unit
for Bluetooth ®
player » page 18 , Sound settings .
■
The supported media functions are dependent on the type of Bluetooth ®
player used.
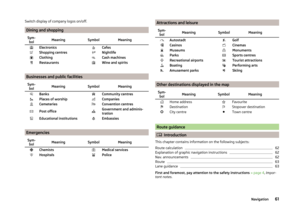
CD/DVD
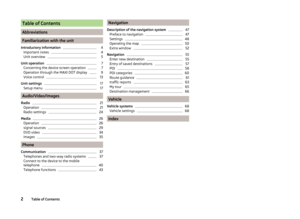
Fig. 21
CD/DVD case
Read and observe
and on page 29 first.
The CDslot is located in the glove box on the front passenger side.
Inserting/ejecting a CD/DVD
›
Insert a CD/DVD into the CD slot with the label facing up until it is automati-
cally drawn in. The play function will start automatically.
31Media
Page 34 of 83
 Columbus Infotinment Navigation System Manual ›Press the symbol button
- the CD/DVD is ejected.
If the ejected medium is not taken out within 10 seconds, it will be retracted again for safety reasons. However, the unit will not change to t")
›Press the symbol button
- the CD/DVD is ejected.
If the ejected medium is not taken out within 10 seconds, it will be retracted again for safety reasons. However, the unit will not change to the CD/DVD
source.WARNING■ The CD/DVD player is a laser product.■On the manufacturing date, this unit was classified as a class 1 laser prod-
uct in accordance with the national/international standards
DIN EN 60825-1: 2008-05 and DHHS Rules 21 CFR, Subchapter J classed as a class 1 laser product. The laser used in this class 1 laser product is so weak
that there is no risk of danger when operated correctly.■
This product is designed such that the laser is restricted to the inside of
the unit. However, the installed laser could be classified in a higher class
were the housing to be removed. For this reason, never remove the hous-
ing of the unit.
CAUTION
■ Be sure to wait until the CD/DVD has been fully ejected before you try to in-
sert a new CD/DVD. Otherwise you can damage the drive inside the unit.■
Only insert in the CD/DVD drive original audio CDs/video DVDs or standard
CD-R/RWs or DVD±R/RWs.
■
Do not affix anything to the CD/DVDs!
■
Outside temperatures that are either too high or too low might cause the
playback unit to turn off temporarily. The unit switches to the last active
menu.
Note
■ After pressing the symbol key it takes a few seconds for the CD / DVD to
be ejected.■
Poor or unsealed road surfaces and severe vibrations may cause the CD to
jump.
■
Damp (condensation) may affect the device in cold weather or after showers.
This can lead to playback jumps or impair the play function. Wait until the
moisture has evaporated if this happens.
■
If the CD/DVD is physically damaged, is not readable or is inserted incorrectly,
the following message is displayed: Error: CD/DVD. Check the CD/DVD and in-
sert properly into the drive.
■
It is possible under certain circumstances that copyright-protected CD/DVDs
and home-burnt CD/DVDs will not be played back at all or only in a limited way.
■
The national copyright laws that apply in your country must be observed.
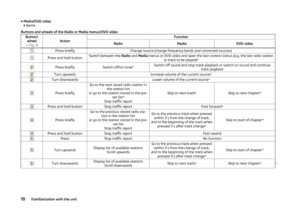
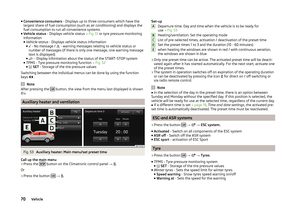
SD memory cardFig. 22
SD memory card slots
Read and observe
and on page 29 first.
The device makes it possible to play audio files from the SD memory card.
The SD memory card slots are located in the storage compartment on the front
passenger side.
Insert the SD memory card
›
Push the SD memory card into the SD memory card slot with the cut-off edge
to the front right until it “locks into place”. The play function will start auto-
matically.
Remove the SD memory card
Depending on equipment fitted:
›
Press the button
→
→ Remove SD card 1 safely or Remove SD card 2
safely .
›
Press the inserted SD memory card. The SD memory card “jumps” into the
eject position.
SD memory card empty or data not readable
If an SD memory card is inserted, on which no data or no readable data is stor-
ed, then nothing is played back from the SD memory card.
Due to differing quality requirements from different card manufacturers, it is
not always possible to guarantee the playback from SD memory cards.
Some files on the SD memory card or the complete SD memory cards cannot
be replayed or their playback may be limited.
32Audio/Video/Images
Page 35 of 83
 Columbus Infotinment Navigation System Manual CAUTION■Only use standard sizeSD cards. When using smaller SD cards with the adapt-
er the SD memory card can fall out of the adapter while driving due to vehicle
vibrations.■
We recommend using S")
CAUTION■Only use standard sizeSD cards. When using smaller SD cards with the adapt-
er the SD memory card can fall out of the adapter while driving due to vehicle
vibrations.■
We recommend using SD memory cards of class 4 and higher. This guaran-
tees the fastest possible access to the audio files.
■
Always store the SD cards in suitable cases to protect them from dirt, dust
and other forms of damage.
USB-, AUX inputs
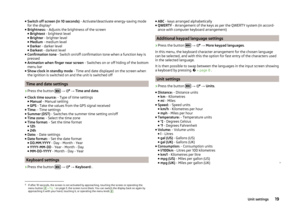
Fig. 23
USB and AUX inputs
Read and observe and on page 29 first.
The device enables files from USB storage media as well as from external devi-
ces connected to the USB input such as Apple devices 1)
to be played.
The device allows you to play the analog audio signal from external devices
connected to the AUX input.
The USBand AUXinputs are located above the storage compartment at the
front of the centre console » Fig. 23.
An external device or data media can be connected to the USB/AUX input ei-
ther directly or via a connection cable from the ŠKODA range of original acces-
sories.
AUX input
External signal sources connected to the AUX input cannot be operated from
your device.
The standard 3.5 mm stereo jack plug is used for the AUXinput. If the external
audio source does not have this jack plug, you must use an adapter.
It is also possible to adjust the input sensitivity setting on the AUX input de- pending on the signal source connected » page 18, Sound settings .
If an external audio source is connected to the AUX input, which is equipped
with an adapter for external power supply, the sound may be impaired. This
depends on the quality of the adapter which is used.
USB input
External devices such as Apple devices connected to the USB input cannot be
operated from your device 2)
.
Before removing the USBdevice, proceed as follows:›
Press the button
→
→ Remove USB device safely .
USB extension cables or adapters may affect the operation of the connected
external device.
USB hubs are not supported.
Charge USB audio source
With the ignition on after connecting the USB audio source, the charging proc-
ess is automatically started (applies for audio sources where charging via the
USB connector is possible).
The charging efficiency can be different compared to the charging from the
usual mains power supply. Connected audio sources can be supplied / loaded
with a current of max. 500 mA.
Some connected audio sources may not be recognised and cannot be charged.
The charging of the connected audio source is automatically stopped after
switching off the ignition.
CAUTION
■ The AUX input must only be used for audio sources!■Do not connect an Apple device to the device via Bluetooth ®
and USB at the
same time, as this may result in a malfunction.
1)
The video playback from an Apple device is not supported.
2)
Some operating options from an external device may not be supported.
33Media
Page 36 of 83
 Columbus Infotinment Navigation System Manual NoteThe operation of the external device and its connection with other devices can
be seen in the operating instructions of the respective manufacturer.
DVD video
Introduction
This chapter contain")
NoteThe operation of the external device and its connection with other devices can
be seen in the operating instructions of the respective manufacturer.
DVD video
Introduction
This chapter contains information on the following subjects:
Main menu
34
video playback
34
Operation of DVD video
34
DVD video menu
35
Settings
35
First and foremost, pay attention to the safety instructions » page 4 , Impor-
tant notes .
Main menu
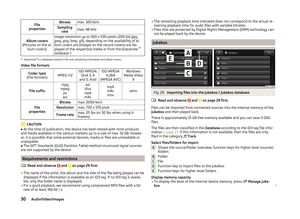
Fig. 24
DVD video: Main menu
The DVD video main menu is displayed when you select a source that contains
playable video files.
Explanation of graphic Select the video source
Display of the playing time / remaining time and the playing time axis is
possible within the video by moving the slider or by touching the desired
location on the time axis
Information for the selected video file (e.g., video title, chapter)
Video display area
ABCDOpen the DVD menu
Video settings
CAUTION
■ For safety reasons, the video display is switched off at speeds over 5 km/h
and the following message is displayed: The vehicle is in motion. The display
has been switched off for your safety. The unit continues to play the sound-
track.■
The regional code of the player corresponds to the location of sale. If the fol-
lowing is displayed: Does not play. The DVD's country code does not match
the system settings. Number of changes by the dealer possible: .... , consult a
ŠKODA Service partner.
video playback
›
Video playback starts automatically once the medium is inserted in the CD/
DVD slot.
or
›
Press the button
→
→
A
» Fig. 24 on page 34 .
■
CD/DVD - Select the DVD inserted
Supported media and formats › DVD video
› DVD audio
› DVD A/V
Operation of DVD video
But-
ton
» Fig. 24 on
page 34
ActionFunction
/PressPlay / PausePress briefly (within 3 seconds
of the start of the video play- back)Play the previous videoPress briefly (3 seconds after
the start of the video playback)Play the current video from the
startPress and hold button a)Fast video reverse
34Audio/Video/Images
Page 37 of 83
 Columbus Infotinment Navigation System Manual But-ton
» Fig. 24 on
page 34
ActionFunction
Press brieflyPlay the next videoPress and hold button a)Fast video forwarda)
The longer the button is pressed, the faster the fast forward/reverse.
D")
But-ton
» Fig. 24 on
page 34
ActionFunction
Press brieflyPlay the next videoPress and hold button a)Fast video forwarda)
The longer the button is pressed, the faster the fast forward/reverse.
DVD video menu
Fig. 25
DVD menu
Explanation of graphic
Function keys for the DVD menu
The displayed DVD menu
The DVD menu is displayed after the inserted DVD video medium has been
read
or
after pressing displayed automatically during playback.
Settings
›
Press the button
→
→
.
Depending on the selected source, the following setup menu can be displayed.
■ Sound - Sound setup
■ Format: - Set the screen width/height ratio
■ Automatic - Adjustment of the aspect ratio to the screen size
■ 16:9 - 16:9 format
■ 4:3 - 4:3 format
AB■
14:9 - 14:9 format
■ 47:20 - 47:20 format
■ Audio channel: - Select the audio channel from the menu displayed
■ Subtitles: - Select the subtitles from the menu displayed
■ No selection - No subtitles
■ - Select the subtitles from the DVD menu
Images
Introduction
This chapter contains information on the following subjects:
Main menu
35
Operation
36
Select source
36
Settings
36
First and foremost, pay attention to the safety instructions » page 4 , Impor-
tant notes .
Main menu
Fig. 26
Images: Main menu
Explanation of graphic
Select the image source
Select the images or folder from the list
Image settings
Call up the main menu
›
Press the button
→
.
A35Media
Page 38 of 83
 Columbus Infotinment Navigation System Manual Supported file typesFile typeSupported formatsImagesjpg, jpeg, png, bmp, gif
Operation
Displaying images
But- ton
» Fig. 26
on page 35
ActionFunction
PressDisplay the previous image /PressSw")
Supported file typesFile typeSupported formatsImagesjpg, jpeg, png, bmp, gif
Operation
Displaying images
But- ton
» Fig. 26
on page 35
ActionFunction
PressDisplay the previous image /PressSwitch on/off slideshow a)PressDisplay the next imagePressRotate the image 90° anticlock-
wisePressRotate the image 90° clockwisePressDisplay the maximum image size
while retaining the aspect ratioPressguidance to GPS coordinates that
are stored in the image EXIF met-
adata » page 662 » Fig. 1
on page 5Rotate the image clockwise or anticlockwiseEnlarge/reduce the size of an im-
agea)
Presentation of selected photographs shown in succession at defined intervals.
You can adjust the size of the image by touching the screen with two fingers
and pulling the fingers together or apart. You can move the image in the de-
sired direction by touching and dragging it with your finger. By finger tapping
on the screen image magnification or size reductions takes place.
Select source
›
Press the button
→
→
A
» Fig. 26 on page 35 .
■
CD/DVD - Changes to a CD/DVD in the player
■
USB - Changes to a data medium connected to the USB input
■
SD card 1 - Changes to a memory card inserted in SD 1
■
SD card 2 - Changes to a memory card inserted in SD 2
Settings›
Press the button
→
→
.
■ Image view: - Image view settings
■ Full - Display the maximum image size while retaining the aspect ratio
■ Automatic - Full screen display
■ Display time: - Set the display time for the slideshow
■ 5 sec.
■ 10 sec.
■ 15 sec.
■ 30 sec.
■ Repeat slide show - Switch on/off the slideshow repeat function. (After the
last image is displayed, the slideshow restarts from the beginning.)
36Audio/Video/Images
Page 39 of 83
 Columbus Infotinment Navigation System Manual Phone
Communication
Telephones and two-way radio systems
Introduction
This chapter contains information on the following subjects:
Introductory information
38
Main menu
38
Problems with the Telepho")
Phone
Communication
Telephones and two-way radio systems
Introduction
This chapter contains information on the following subjects:
Introductory information
38
Main menu
38
Problems with the Telephone function
38
Phonebox
39
Settings
39
The Telephone menu is available when the following conditions are met.
The ignition is switched on.
The Bluetooth ®
function on the device is switched on.
The visibility of the mobile phone is switched on » page 20.
The visibility of the telephone is switched on.
The phone is within range of the Bluetooth ®
signal.
The phone is supported by the device.
After the device is switched on, the system attempts to connect to the most
recently connected telephone 1)
.
If a telephone is connected to the device and the device is turned off, the con-
nection to the telephone is not lost. The connection is only lost after switching
off the ignition (for vehicles with the system KESSY after switching off the ig-
nition and opening the driver's door).
WARNING■ The national regulations for using a mobile phone in a vehicle must be
observed.■
If a mobile phone or a two-way radio system is operated in a vehicle with-
out an external aerial or an external aerial which has been installed incor-
rectly, this can increase the strength of the electromagnetic field inside the
vehicle.
■
Two-way radio systems, mobile phones or mounts must not be installed
on airbag covers or within the immediate deployment range of the airbags.
■
Never leave a telephone in the deployment area of an airbag, on a seat,
on the dash panel or in another area, from which it can be thrown during a
sudden braking manoeuvre, an accident or a collision - risk of injury. There
are storage compartments with lids and if necessary there is the multime-
dia storage compartments to hold this » Vehicle owner's manual , chap-
ter Practical equipment.
■
Before transport of the vehicle by air, the Bluetooth ®
function must be
switched off by a specialist company.
CAUTION
■ In areas with no signal and possibly in tunnels, garages and subways a tele-
phone conversation can be interrupted and no telephone connection can be
established - not even in an emergency!■
The range of the Bluetooth ®
connection to the hands-free system is limited
to the vehicle interior. The range is dependent on local factors, e.g. obstacles
between the devices and mutual interferences with other devices. If your tele-
phone is in a jacket pocket, for example, this can lead to difficulties when es-
tablishing a connection with the device or transferring data.
Note
Available updates for Bluetooth ®
devices as well as information about the
phone support can be obtained from the ŠKODA website www.infotain-
ment.skoda-auto.com .1)
With some phones, it is necessary to set the connection to the device as "authorised" in order for the
automatic connection to be successful. If this is not set, the system will prompt you for a confirmation
each time you attempt to connect to the telephone.
37Communication
Page 40 of 83
 Columbus Infotinment Navigation System Manual Introductory informationRead and observe
and on page 37 first.
The device allows for a wireless connection to the telephone. Your telephonecan be operated from the device.
ŠKODA permits the operat")
Introductory informationRead and observe
and on page 37 first.
The device allows for a wireless connection to the telephone. Your telephonecan be operated from the device.
ŠKODA permits the operation of telephones and two-way radio systems with a
professionally installed external aerial and a maximum transmission power of
up to 10 watts.
Please ask at a specialist workshop about installing and operating telephones
and two-way radio systems that have a transmission power of more than 10 W.
Operating telephones or two-way radio systems may interfere with the func-
tionality of the electronic systems in your vehicle.
The reasons for this are as follows:
› no external aerial;
› external aerial incorrectly installed;
› transmission power greater than 10 watts.
Note
■
We recommend that the installation of telephones and two-way radio sys-
tems in a vehicle be carried out by a specialist garage.■
The telephone functions are dependent on the mobile network operators, as
well as the telephone being used. Further information is available from the
mobile network operator or to refer to the manual of the telephone.
■
In signal-free areas reception can be disturbed or a call may be disconnected.
■
Most modern electronic equipment is shielded from RF signals. In exceptional
cases, electronic equipment may not be shielded against the RF signals and
telephone service may be disrupted.
Main menu
Fig. 27
Phone: Main menu
Read and observe and on page 37 first.
Explanation of graphic
Name of the mobile network provider
Name of the connected telephone, press to open a list of paired tele-
phones
Speed dial favourite telephone numbers » page 43
Direct entry of a telephone number » page 44
Display the telephone book » page 44
Display of call list (there are new missed calls, the icon will appear here
with the information about the number of missed calls) » page 45
Menu settings for the Telephone » page 39
Call up the main menu
›
Press the button.
If a telephone is connected to the device, the telephone mode main menu is
displayed » Fig. 27.
Symbols in the display
SymbolMeaningCharge status of the telephone battery a)Signal strengtha)Roaming (before the name of the mobile network provid-
er) a)Missed callCurrent calla)
This function is only supported by some telephones.
Problems with the Telephone function
Read and observe
and on page 37 first.
If there are problems with the availability of the network or with the Blue-
tooth ®
function, the following messages appear on the device display screen.
ABC38Phone