Page 33 of 84
.
● Press the inserted memory card. The")
Audio and Media Mode
SD Card1, SD Card 2 and USB. After correctly
ejecting the memory card from the system,
the function button becomes inactive (grey
colour).
● Press the inserted memory card. The mem-
ory card “jumps” to the eject position.
● Remove the memory card.
Unreadable memory card
If a memory card is inserted and the data
cannot be read, the following warning ap-
pears: There are no playable files.
External data storage device
connected to USB port Depending on the equipment and the coun-
try, there may be a USB port in the glove box
(car instruction manual)
Audio files on an external data storage de-
vice connected to the USB port
can be
played and controlled via the Infotainment
system.
Where this manual refers to external data
storage devices, this means USB mass stor-
age devices containing supported audio
files, such as MP3 players, iPods™ and USB
sticks.
Only supported audio files are displayed and
played. Other files are ignored. Playback starts automatically if there are sup-
ported and readable audio files on the data
storage device.
Further operation of the external data medi-
um (changing track, selecting tracks and
playback modes) is described in the appro-
priate chapters of this manual
››› page 23.
Notes and restrictions
Compatibility with Apple™ devices and other
media players depends on the unit.
The USB port supplies the usual USB volt-
age of 5 volts for a USB connection.
External hard disks with a capacity greater
than 32 GB must be reformatted for the
FAT32 file system in some circumstances. You
will find the necessary software and informa-
tion on the Internet.
Take into account all other instructions and
limitations regarding requirements for media
sources ››› page 23 . R
equir ements
Compatible data me-
diaReadable files and for-
mats
Data storage device with
specification compliant
with USB 2.0.
Data storage device
FAT16 (< 2 GB) or FAT32 (> 2 GB) file system.
iPods™ a)
, iPads™ a)
and
iPhones™ a)
from differ-
ent generations.
MTP players with the
“PlaysForSure” or “Ready-
ForVista” trademarks.– MP3 files (.mp3) with bit
rates of between
32 and 320 kbit/s or with
variable transfer rates.
– WMA files(.wma) up to
9.2 mono/stereo without
copy protection.
– AAC files
(.m4a, .m4b, .mp4
and .aac).
– Playlists in M3U, PLS,
ASX and WPL formats.
– Playlists must not exceed
20 kB or more than 1000
entries.
– File names and paths
must not exceed 256 char-
acters.
Read and bear in mind the manufacturer's instruction
manual for the external data storage device.
a) iPod™, iPad™ and iPhone™ are registered trademarks of Ap-
ple Inc.
iPod™, iPad™ and iPhone™
Depending on the country and the equip-
ment, iPods™, iPads™ or iPhones™ can be
connected using the device's USB cable to
the USB port
of the vehicle and used as
audio sources.
After connecting an iPod™, iPad™ or
iPhone™, the specific list views of the iPod »
31
Page 34 of 84
.
Files cannot be imported from an iPod™,
iPa
d™ or an")
Audio and Media Mode
are displayed in the upper selection level
( Playlists,
Ar
ti sts, Albums, Tracks,
P
odcasts etc.).
Files cannot be imported from an iPod™,
iPa
d™ or an iPhone™.
Possible error messages after connecting an
external data storage device
Error mes-
sageCauseProcedure
The device is
not compati-
bleThe external
data carrier
cannot be
played or com-
munication is
not possible
with the adapt-
er cable being
used.Check the connec-
tion and make sure
the external data
medium is working
correctly.
If possible, update
the data storage de-
vice software.
The device
does not workCommunication
fault.Check the connec-
tion and make sure
the external data
medium is working
correctly.
Due to the large number of different data storage devi-
ces and various iPod™, iPad™ and iPhone™ genera-
tions available, it is not possible to guarantee fault-free
operation of all functions described here. Disconnecting
Any connected data storage devices
must be
prepared before their disconnection in order
to remove them. ●
From the main Media menu, press the
SETUP button to open the
Media Setup
menu
or pr e
ss the Infotainment MENU button and
then press Setup to open the System setup
menu.
● Press the Remove safely function button. A
dropdown menu appears with three options:
SD Card1, SD Card 2 and USB. After correctly
ejecting the data storage device from the sys-
tem, the function button becomes inactive
(grey colour).
● Now the data storage device can be discon-
nected. Note
● Do not connect an external media player at
the same time to play music via Bluetooth ®
and via the USB port with the Infotain-
ment system, as this could cause playback
limitations.
● If the external player is an Apple device™,
it cannot be simultaneously connected by
USB and by Bluetooth.
● If a connected device is not recognised, dis-
connect all the connected devices and try
connecting the device again.
● Do not use memory card adaptors, USB ex-
tension cords or USB hubs! External audio source connected to
the AUX-IN multimedia socket
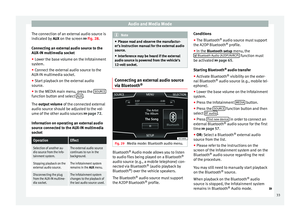
Fig. 28
Media mode: external audio source
connected to the AUX-IN socket. Depending on the equipment and the coun-
try, there may be an AUX-IN multimedia sock-
et in the glove box (car instruction manual).
››› Booklet Instruction manual, chapter Prac-
tical equipment .
In order to connect the external audio source
to the AUX-IN socket, a suitable cable is re-
quired with a 3.5 mm jack that is inserted in-
to the AUX-IN socket of the vehicle.
Ensure that the AUX-IN connection is ena-
bled
›
›› p
age 36.
The connected external audio source is
played over the vehicle speakers and cannot
be controlled via the Infotainment system
controls.
32
Page 35 of 84

Audio and Media Mode
The connection of an external audio source is
indicated by AUX on the screen ››› Fig. 28 .
Connecting an external audio source to the
AUX-IN multimedia socket
● Lower the base volume on the Infotainment
system.
● Connect the external audio source to the
AUX-IN multimedia socket.
● Start playback on the external audio
source.
● In the MEDIA main menu, press the SOURCEfunction button and select
AUX .
The output volume
of
the c onnected external
audio source should be adjusted to the vol-
ume of the other audio sources ››› page 72.
Information on operating an external audio
source connected to the AUX-IN multimedia
socket
OperationEffect
Selection of another au-
dio source from the Info-
tainment system.The external audio source
continues to run in the
background.
Stopping playback on the
external audio source.The infotainment system
remains in the AUX menu.
Disconnecting the plug
from the AUX-IN multime-
dia socket.The Infotainment system
changes to the playback of
the last audio source used. Note
● Please read and observe the manufactur-
er's instruction manual for the external audio
source.
● Interference may be heard if the external
audio source is powered from the vehicle’s
12-volt socket. Connecting an external audio source
via Bluetooth
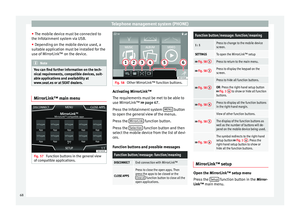
® Fig. 29
Media mode: Bluetooth audio menu. Bluetooth
®
Audio mode allows you to listen
to audio files being played on a Bluetooth ®
audio source (e.g., a mobile telephone) con-
nected via Bluetooth ®
(audio playback by
Bluetooth ®
) over the vehicle speakers.
The Bluetooth ®
audio source must support
the A2DP Bluetooth ®
profile. Conditions
●
The Bluetooth ®
audio source must support
the A2DP Bluetooth ®
profile.
● In the Bluetooth setup menu, the
Bluet
ooth Audio (A2DP/AVRCP) function must
be activated ››› page 65 .
St ar
ting Bluetooth ®
audio transfer
● Activate Bluetooth ®
visibility on the exter-
nal Bluetooth ®
audio source (e.g., mobile tel-
ephone).
● Lower the base volume on the Infotainment
system.
● Press the Infotainment MEDIA button.
● Press the SOURCE function button and then
select BT audio .
● Press Find new device in order to connect an
external Bluetooth ®
audio source for the first
time ››› page 57 .
● OR: Select a Bluetooth ®
e xt
ernal audio
source from the list.
● Please refer to the instructions on the
screen of the Infotainment system and on the
Bluetooth ®
audio source regarding the rest
of the procedure.
You may still need to manually start playback
on the Bluetooth ®
source.
When playback on the Bluetooth ®
audio
source is stopped, the Infotainment system
remains in Bluetooth ®
Audio mode. »
33
Page 36 of 84

Audio and Media Mode
Controlling playback
The extent to which the Bluetooth ®
audio
source can be controlled via the Infotainment
system depends on the connected Blue-
tooth ®
audio source.
The available functions will depend on the
Bluetooth ®
Audio profile that the connected
external player supports.
With media players that support the AVRCP
Bluetooth ®
profile, playback on the Blue-
tooth ®
audio source can be automatically
started or stopped when the unit is switched
to Bluetooth ®
Audio mode or to a different
audio source. In addition, it is possible to
view or change the track via the Infotainment
system. Note
● Due to the large number of possible Blue-
tooth ®
audio sources, it is not possible to
guarantee fault-free operation of all descri-
bed functions.
● Always switch off the warning and service
tones on a connected Bluetooth ®
audio
source, e.g. key tones on a mobile telephone,
to prevent possible interference noise and
malfunctions.
● Do not connect an external media player to
play music via Bluetooth ®
and via the USB
port ››› page 31 at the same time with the Infotainment system, as this could cause
playback limitations.
● If the external player is an Apple device™,
it cannot be simultaneously connected by
USB and by Bluetooth. Jukebox (SSD)
Fig. 30
Manage Jukebox The “jukebox” is located on the hard drive of
the Infotainment system (SSD
1)
).
Compressed audio files (MP3 and WMA) and
some video files (Podcasts, AVIs, etc.) can be
imported from different data storage devices
to the jukebox and this used to play them. The files will only be copied when the engine
is running. Copying copy-protected CDs and
DVDs is prohibited Importing files
● In Media mode, press the SETUP function
button and then select Manage jukebox .
● Press the IMPORT function button.
● Select the desired source from the Select
source menu.
The data storage device is prepared. This op-
eration may take a few seconds.
● Activate the check boxes to the right of the
files or folders to be imported.
● If Select all is activated, all files and folders
on the data storage device will be imported.
● Press the IMPORT function button.
Depending on the selection, all files and fold-
ers will be imported with the indicated name
to the Jukebox. If no track information is available, the audio
files will be placed in the following folders:
Audio data CD
■ Album
■ Unknown albums 1)
Solid-State-Drive (SSD).
34
Page 37 of 84

■ Artists
■Unknown artists
■ Unknown albums
■ Track. mp3 1)
Functions and progress display during the
copying operation
While copying, an animation is di")
Audio and Media Mode
■ Track. mp3 1)
■ Artists
■Unknown artists
■ Unknown albums
■ Track. mp3 1)
Functions and progress display during the
copying operation
While copying, an animation is displayed
along with the progress percentage on the
import screen.
Audio data CD : It is not possible to copy and
p l
ay files at the same time.
● Press the Cancel function button to end the
import of the whole track that is currently be-
ing imported.
● To obtain information on the status of the
import, press the Information function button.
● Press the BACK function button to close
the import screen with the progress informa-
tion.
● When the file import ends, the following
message will appear: All files imported.
Deleting files
● In Media mode, press the SETUP function
button and then select Manage jukebox .●
Press the DELETE function button.
● Activate the check boxes to the right of the
files or folders to be deleted.
● If Select all is activated, all the files and
folders on the data storage device will be de-
leted.
● Press the DELETE function button. The files
and folders will be deleted according to the
selection made.
● When the files have been deleted, the fol-
lowing message will appear: All files deleted.
● Press the BACK function button to close
the menu.
Opening stored audio and video files
● Change to Jukebox (SSD) content
››› page 28 .
When s t
oring the tracks, they are stored un-
der different categories and lists according to
the information available.
The tracks saved can be checked and opened
from these lists according to different catego-
ries.
Jukebox
● Track list
● Artist ●
Album
● Music genre
● Title
● Video
● Unreadable files (an unsupported file has
been imported). Note
● If the Infotainment system cancels a copy-
ing operation, check the storage space on the
internal hard drive and check the data stor-
age device.
● Due to copyright laws, before any change in
ownership of the Infotainment system, all
files stored on the jukebox must be deleted. 1)
The name and extension of the file are examples.
35
Page 38 of 84

Audio and Media Mode
Connecting an external audio source
via WLAN Fig. 31
MEDIA menu: WLAN mode In WLAN audio mode, audio files being
played on an external audio source connec-
ted via WLAN (for example a smartphone),
can be played over the vehicle speakers. The
connected audio source must have a compat-
ible application (App) or allow media to be
enabled in accordance with the UPnP (Univer-
sal Plug and Play) standard.
Conditions
● There is a compatible application (App) in-
stalled on the WLAN audio source (for exam-
ple, a Smartphone).
● The WLAN function of the WLAN audio
source and the Infotainment system are acti-
vated and a network connection has been
configured, see ››› page 71, WLAN setup. ●
Pair the device to the Infotainment system
using a password generated by the system.
Starting the WLAN audio transfer
● Lower the base volume on the Infotainment
system.
● Press the Infotainment MEDIA button.
● Start the UPnP server application or the ap-
plication for the playback of the WLAN audio
source.
● Press the SOURCE function button and then
select WLAN .
● Please refer to the instructions on the
screen of the Infotainment system and on the
WLAN audio source regarding the rest of the
procedure.
Controlling playback
The extent to which the WLAN audio source
can be controlled via the Infotainment sys-
tem depends on the connected WLAN audio
source and the application used. Note
● The Infotainment system does not provide
an internet connection, it only establishes a
wireless connection between the mobile de-
vice and said system.
● Via the WLAN, only the connection between
the device and the Infotainment system can
be guaranteed, its operation depends on the
application itself. Media setup
●
Select the MEDIA main menu by pressing
the Inf ot
ainment MEDIA button.
● Press the SETUP function button to open
the Media Setup menu.
Function button: effect
Sound: Sound setup ››› page 72.
Manage jukebox: To import files to the jukebox or delete
stored files ››› page 34.
Mix/Repeat including subfolders: Subfolders will be inclu-
ded in the selected playback mode ››› page 23.
Bluetooth: Bluetooth ®
setup ››› page 65
WLAN: WLAN setup ››› page 71.
Video setup (files): Setup for video files.
Remove safely: In order to prepare the external data stor-
age devices for their removal or disconnection. See also
››› page 30, Insert or eject a memory card and
››› page 31, External data storage device connected to
USB port
.
Traffic Program (TP): The TP function (traffic news station
monitoring) is active ››› page 20.
External AUX device: Enable/disable AUX-IN socket.
36
Page 39 of 84

Audio and Media Mode
DVD video mode Fig. 32
DVD main menu. Fig. 33
DVD mode control menu. DVD video regional code
Quite often, the playback of DVD video is
limited to certain regions (for example, to the
US and Canada) by so-called “region codes”.
These DVDs can only be played on units that
are coded for the same region. The unit's DVD drive is configured to read the
regional code for the region in which the ve-
hicle was originally sold.
Start DVD mode
● Insert a compatible DVD in the DVD drive.
The reading of DVD data may take a few sec-
onds.
The DVD's “intro” (short initial sequence) is
played. Next, the different DVD menus are
displayed.
Controlling the DVD menu
● Briefly touch the screen to activate the
function buttons in the DVD mode main
menu ›
›
› Fig. 32.
Function button: effect
SOURCEDisplay and selection of the source.
DVD
MENUTo display the control menu and return to the
main DVD screen ››› Fig. 33.
AChapter display.
BDisplays play time duration and remaining
play time.
C
: Move the control menu window.
: Minimise or maximise the control menu
window.
: Close the control menu.
Function button: effect
DUse the arrow buttons to browse the DVD
menu. Confirm the selection by pressing
OK.
EPress to open the DVD main menu.
/ To move to the next or previous chapter.
Playback stops. The function button
changes to .
Playback is resumed. The function button
changes to .
SET-
TINGSThis menu contains the Video (DVD) setup
››› page 38. Note
● The visual appearance of the DVD film me-
nus and the menu options which it offers are
the responsibility of the DVD manufacturer.
● The difference in behaviour of some films
when using the same mode is the responsi-
bility of the DVD manufacturer.
● You may not be able to play video DVDs
which you have burned yourself.
● The Infotainment system screen only dis-
plays the image when the vehicle is stopped.
Whilst in motion, the screen disconnects (the
image), but the audio remains active. 37
Page 40 of 84
.
Function button: effect
Format: To select the screen format. I")
Audio and Media Mode
DVD video setup On the DVD mode
main menu, press the
S
ETUP function and then select the option
Video setup (DVD).
Function button: effect
Format: To select the screen format. If Automatic is selec-
ted, it adjusts automatically to the optimal format for the
screen.
Audio channel: select language for acoustic voice output.
Subtitles: To select the subtitle language.
Enter/change PIN for parental settings: Parental settings pass-
word.
Parental settings: To select the level of protection for DVD
playback. The options in the Video setup (DVD) menu
may vary depending on the DVD or the chap-
ter currently being played.
The available audio language channels and
subtitles depend on the inserted DVD.
All or a part of the DVD video content may be
protected by means of a password (PIN) if the
DVD is compatible with parental settings. Fur-
thermore, the level of protection can be set
according to age with 1 being the least re-
strictive (appropriate for all audiences) and
8, the most restrictive (adults). Images
Fig. 34
Images main menu. Using the
Images
menu, image files can be
v
iewed (e.g. photos) individually or as a sli-
deshow.
The image files must be stored on a compati-
ble data storage device (e.g., a
CD or an SD
card).
● Press the Infotainment MENU button and
then press the Images function button.
● Press the SOURCE function button to select
the source where the pictures in question are
located.
Function button: effect
SOURCEViewing and selecting the source.
SELEC-
TIONOpens a list of image files.
Function button: effect
The image viewed was obtained via GPS lo-
calisation and upon pressing this function
button, the navigator menu opens to start a
route to this destination.
/ Rotate the view of the image to the left or the
right.
Reset the view of the image.
To stop the playback of a slideshow. The function button changes to .
To continue the playback of a slideshow. The function button changes to .
/ To change to the PREVIOUS or NEXT image.
SET-
TINGSOpen the Image setup menu.
Enlarging or reducing the view
To enlarge or reduce the view of the image
displayed:
●
Turn the setting knob.
● OR: Stretch or reduce the image on the
s c
reen using 2 fingers.
38