Page 3202 of 4801

MA-18
< PERIODIC MAINTENANCE >
ENGINE MAINTENANCE (QR25DE)
• Prolonged and repeated contact with used engine oil may cause skin cancer: try to avoid direct skin
contact with used oil. If skin contact is made, wash thoroughly with soap or hand cleaner as soon as
possible.
1. Position the vehicle so it is level on the hoist.
2. Warm up the engine and check for oil leaks from the engine.
3. Stop engine and wait for 10 minutes.
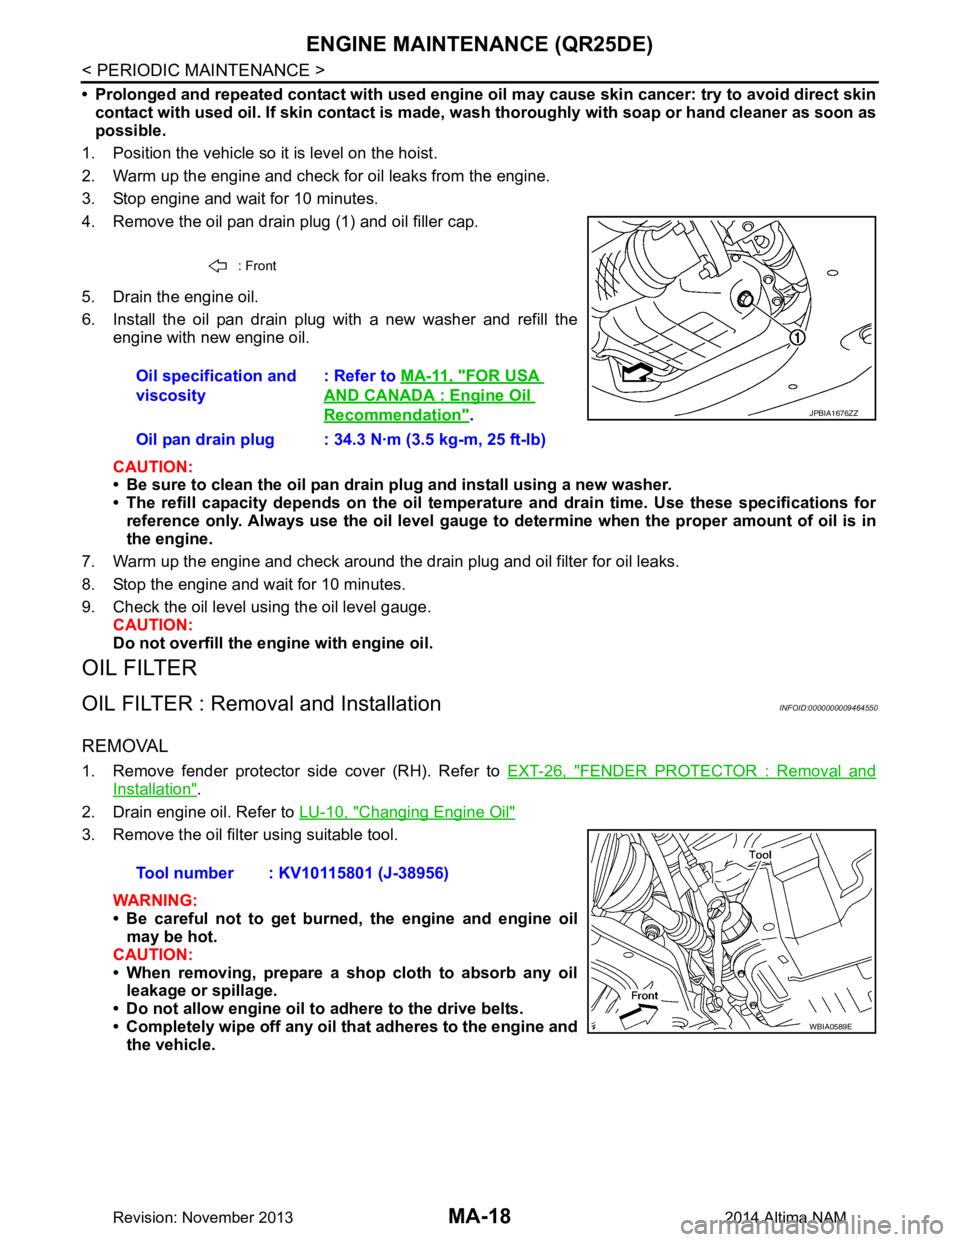
4. Remove the oil pan drain plug (1) and oil filler cap.
5. Drain the engine oil.
6. Install the oil pan drain plug with a new washer and refill the engine with new engine oil.
CAUTION:
• Be sure to clean the oil pan drain plug and install using a new washer.
• The refill capacity depends on the oil temper ature and drain time. Use these specifications for
reference only. Always use the oil level gauge to determine when the proper amount of oil is in
the engine.
7. Warm up the engine and check around the drain plug and oil filter for oil leaks.
8. Stop the engine and wait for 10 minutes.
9. Check the oil level using the oil level gauge. CAUTION:
Do not overfill the engine with engine oil.
OIL FILTER
OIL FILTER : Removal and InstallationINFOID:0000000009464550
REMOVAL
1. Remove fender protector side cover (RH). Refer to EXT-26, "FENDER PROTECTOR : Removal and
Installation".
2. Drain engine oil. Refer to LU-10, "Changing Engine Oil"
3. Remove the oil filter using suitable tool.
WARNING:
• Be careful not to get burned, the engine and engine oil may be hot.
CAUTION:
• When removing, prepare a shop cloth to absorb any oil leakage or spillage.
• Do not allow engine oil to adhere to the drive belts.
• Completely wipe off any oil that adheres to the engine and
the vehicle.
: Front
Oil specification and
viscosity : Refer to
MA-11, "FOR USA
AND CANADA : Engine Oil
Recommendation".
Oil pan drain plug : 34.3 N·m (3.5 kg-m, 25 ft-lb)JPBIA1676ZZ
Tool number : KV10115801 (J-38956)
WBIA0589E
Revision: November 20132014 Altima NAM
Page 3203 of 4801
ENGINE MAINTENANCE (QR25DE)MA-19
< PERIODIC MAINTENANCE >
C
D E
F
G H
I
J
K L
M B
MA
N
O A
• The oil filter has a built in pressure relief valve. Use a Gen-
uine NISSAN oil filter or equivalent.
INSTALLATION
1. Remove foreign materials adhering to the oil filter installation surface.
2. Apply clean engine oil to the oil seal contact surface of the new oil filter.
3. Screw the oil filter manually unt il it touches the installation sur-
face, then tighten it by 2/3 turn. Or tighten to specification below.
4. Refill engine with new engine oil. Refer to LU-10, "Changing Engine Oil"
.
5. After warming up the engine, check for engine oil leaks. Repair as necessary.
6. Install fender protector side cover (RH). Refer to EXT-26, "FENDER PROTECTOR : Removal and Installa-
tion".
SPARK PLUG
ALC094
SMA010
Oil filter : 18.0 N·m (1.8 kg-m, 13 ft-lb)
SMA229B
Revision: November 20132014 Altima NAM
Page 3210 of 4801

MA-26
< PERIODIC MAINTENANCE >
ENGINE MAINTENANCE (VQ35DE)
AIR CLEANER FILTER : Removal and Installation
INFOID:0000000009464558
REMOVAL
CAUTION:
It is not necessary to remove the front air duct to replace the air cleaner filter.
NOTE:
Replace the air cleaner filter per the periodic maintenance schedule or as necessary. Refer to MA-7, "FOR
USA AND CANADA : Introduction of Periodic Maintenance".
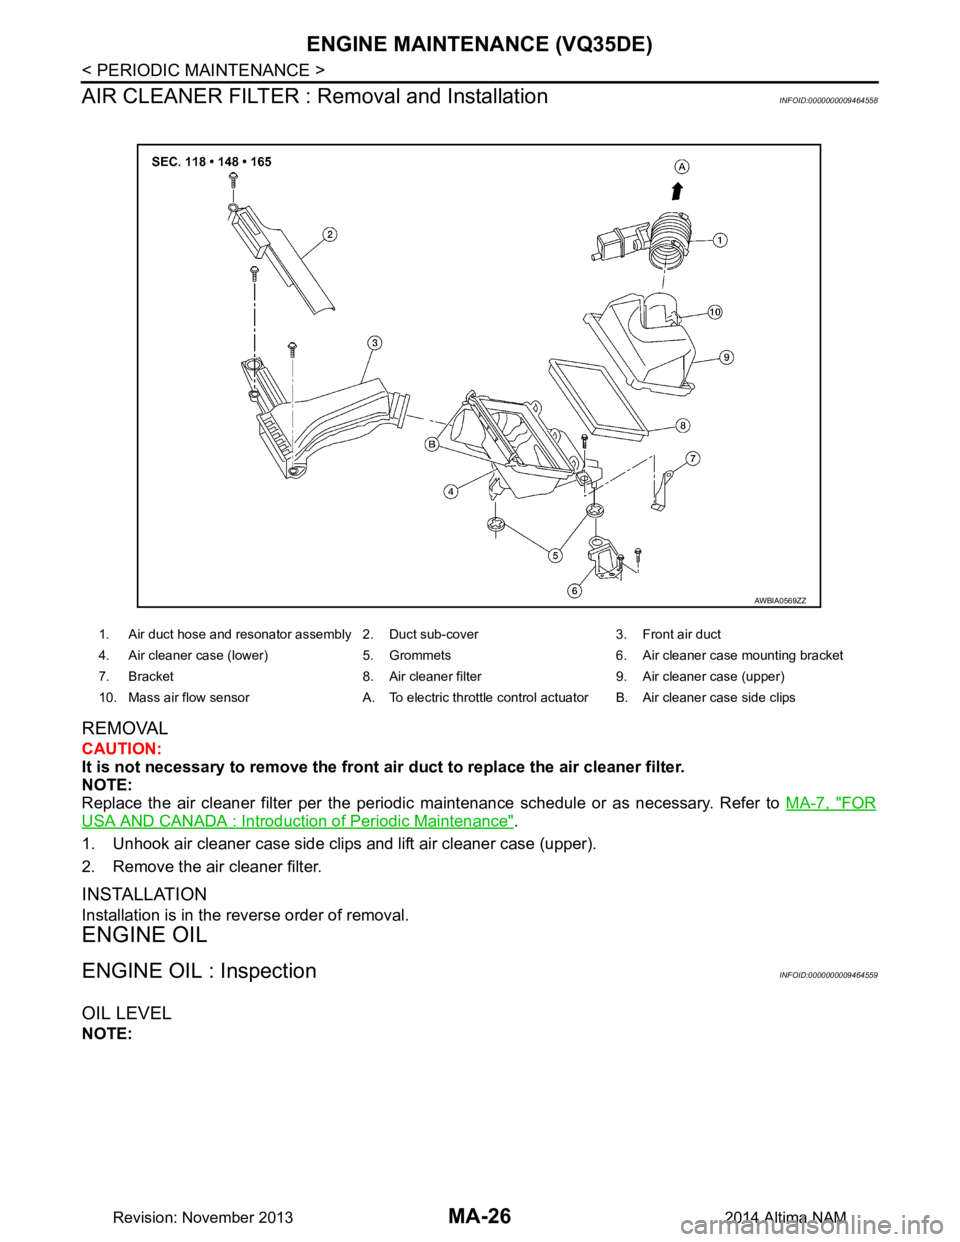
1. Unhook air cleaner case side clips and lift air cleaner case (upper).
2. Remove the air cleaner filter.
INSTALLATION
Installation is in the reverse order of removal.
ENGINE OIL
ENGINE OIL : InspectionINFOID:0000000009464559
OIL LEVEL
NOTE:
1. Air duct hose and resonator assembly 2. Duct sub-cover 3. Front air duct
4. Air cleaner case (lower) 5. Grommets 6. Air cleaner case mounting bracket
7. Bracket 8. Air cleaner filter 9. Air cleaner case (upper)
10. Mass air flow sensor A. To electric throttle control actuator B. Air cleaner case side clips
AWBIA0569ZZ
Revision: November 20132014 Altima NAM
Page 3211 of 4801

ENGINE MAINTENANCE (VQ35DE)MA-27
< PERIODIC MAINTENANCE >
C
D E
F
G H
I
J
K L
M B
MA
N
O A
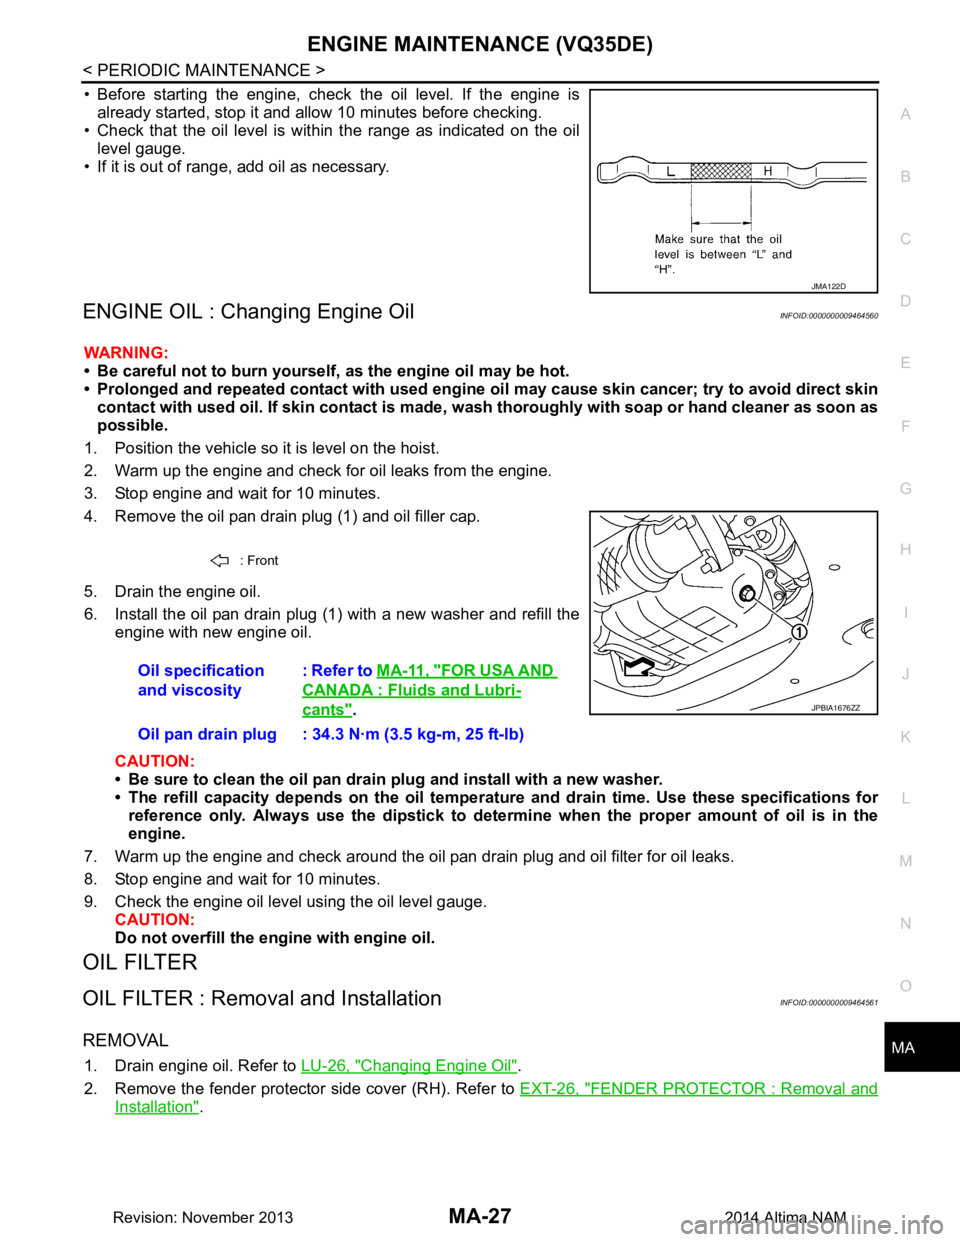
• Before starting the engine, check the oil level. If the engine is
already started, stop it and a llow 10 minutes before checking.
• Check that the oil level is within the range as indicated on the oil
level gauge.
• If it is out of range, add oil as necessary.
ENGINE OIL : Changing Engine OilINFOID:0000000009464560
WARNING:
• Be careful not to burn yourself, as the engine oil may be hot.
• Prolonged and repeated contact with used engine oil may cau se skin cancer; try to avoid direct skin
contact with used oil. If skin contact is made, w ash thoroughly with soap or hand cleaner as soon as
possible.
1. Position the vehicle so it is level on the hoist.
2. Warm up the engine and check for oil leaks from the engine.
3. Stop engine and wait for 10 minutes.
4. Remove the oil pan drain plug (1) and oil filler cap.
5. Drain the engine oil.
6. Install the oil pan drain plug (1) with a new washer and refill the engine with new engine oil.
CAUTION:
• Be sure to clean the oil pan drain plug and install with a new washer.
• The refill capacity depends on the oil temper ature and drain time. Use these specifications for
reference only. Always use the dipstick to determin e when the proper amount of oil is in the
engine.
7. Warm up the engine and check around the oil pan drain plug and oil filter for oil leaks.
8. Stop engine and wait for 10 minutes.
9. Check the engine oil level using the oil level gauge. CAUTION:
Do not overfill the en gine with engine oil.
OIL FILTER
OIL FILTER : Removal and InstallationINFOID:0000000009464561
REMOVAL
1. Drain engine oil. Refer to LU-26, "Changing Engine Oil".
2. Remove the fender protector side cover (RH). Refer to EXT-26, "FENDER PROTECTOR : Removal and
Installation".
JMA122D
: Front
Oil specification
and viscosity : Refer to
MA-11, "FOR USA AND
CANADA : Fluids and Lubri-
cants".
Oil pan drain plug : 34.3 N·m (3.5 kg-m, 25 ft-lb)JPBIA1676ZZ
Revision: November 20132014 Altima NAM
Page 3212 of 4801

MA-28
< PERIODIC MAINTENANCE >
ENGINE MAINTENANCE (VQ35DE)
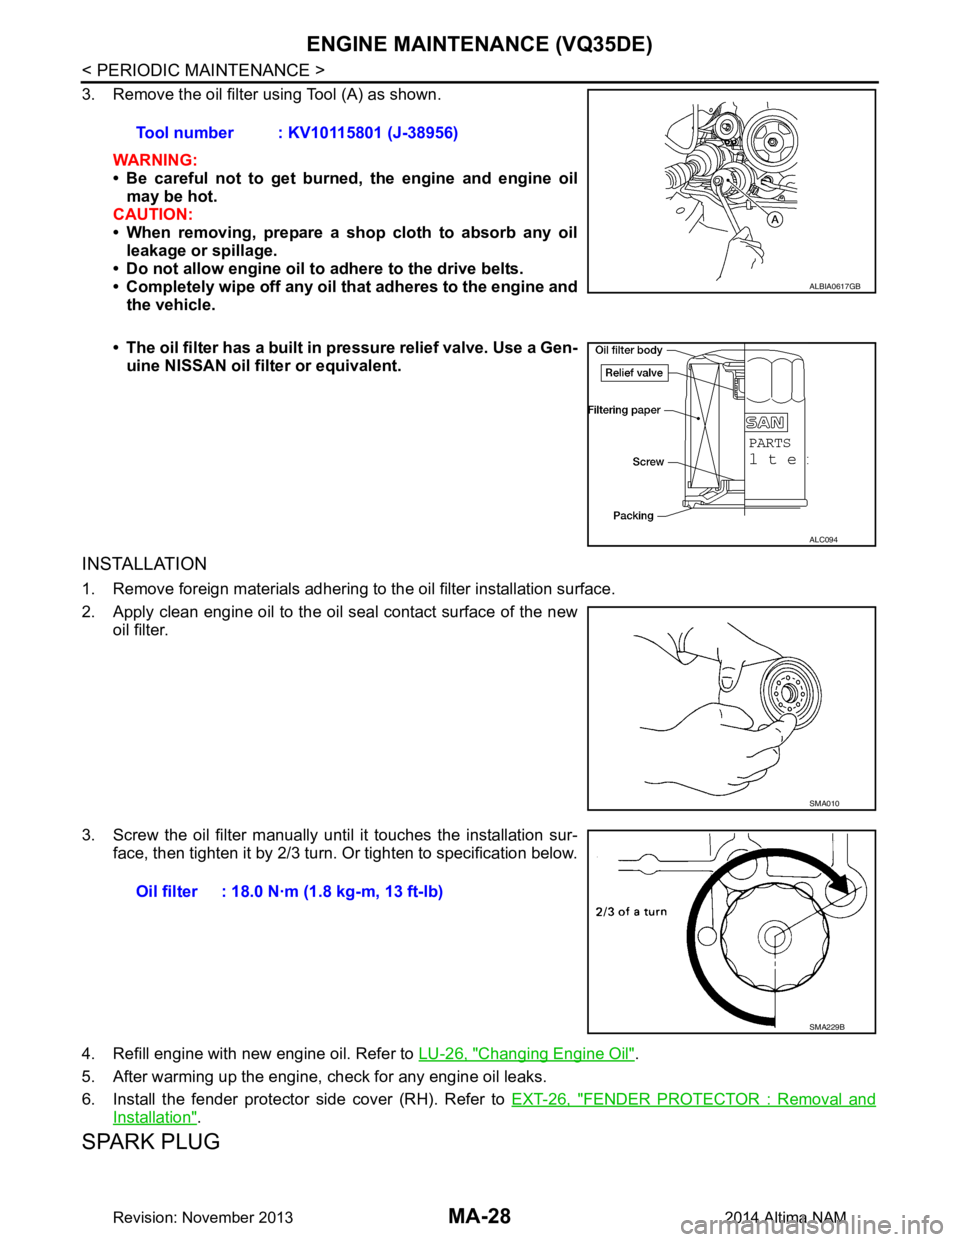
3. Remove the oil filter using Tool (A) as shown.WARNING:
• Be careful not to get burned, the engine and engine oil
may be hot.
CAUTION:
• When removing, prepare a shop cloth to absorb any oil
leakage or spillage.
• Do not allow engine oil to adhere to the drive belts.
• Completely wipe off any oil that adheres to the engine and
the vehicle.
• The oil filter has a built in pressure relief valve. Use a Gen-
uine NISSAN oil filter or equivalent.
INSTALLATION
1. Remove foreign materials adhering to the oil filter installation surface.
2. Apply clean engine oil to the oil seal contact surface of the new oil filter.
3. Screw the oil filter manually until it touches the installation sur- face, then tighten it by 2/3 turn. Or tighten to specification below.
4. Refill engine with new engine oil. Refer to LU-26, "Changing Engine Oil"
.
5. After warming up the engine, check for any engine oil leaks.
6. Install the fender protector side cover (RH). Refer to EXT-26, "FENDER PROTECTOR : Removal and
Installation".
SPARK PLUG
Tool number : KV10115801 (J-38956)
ALBIA0617GB
ALC094
SMA010
Oil filter : 18.0 N·m (1.8 kg-m, 13 ft-lb)
SMA229B
Revision: November 20132014 Altima NAM