2014 MITSUBISHI OUTLANDER change time
[x] Cancel search: change timePage 326 of 451
Automatic climate cont
rol air conditioner
7-10 Comfort controls
7
automatically goes back
to the outside posi-
tion.If high cooling performanc
e is desired, or if
the outside air is dusty
or contaminated in
some way, use the
recirculat
ion position.
Switch to the outside position every now and then to keep the windows from fogging up.
N00712300023
You can change the following functions to match your preference.
Enable automatic air control: When the AUTO switch is pressed, the airselection switch will also be automatically controlled. Disable automatic air control: Even when the AUTO switch is pressed,the air selection switch will not be auto- matically controlled. Changing the settings Press the air selection switch for approxi- mately 10 seconds or longer. When the setting has changed, the systemwill beep and the indi
cator light will flash.
• When the setting has changed from enabled to disabled,
the system will beep
three times and the indicator light will flash three times. • When the setting has changed from dis-abled to enabled, the system will beep two times and the indicator light will flash three times.On vehicles equippe
d with Mitsubishi
Multi-Communication System, screen operations can also be
used to change the
setting. Refer to the separate owner’s manual for details.
N00737301353
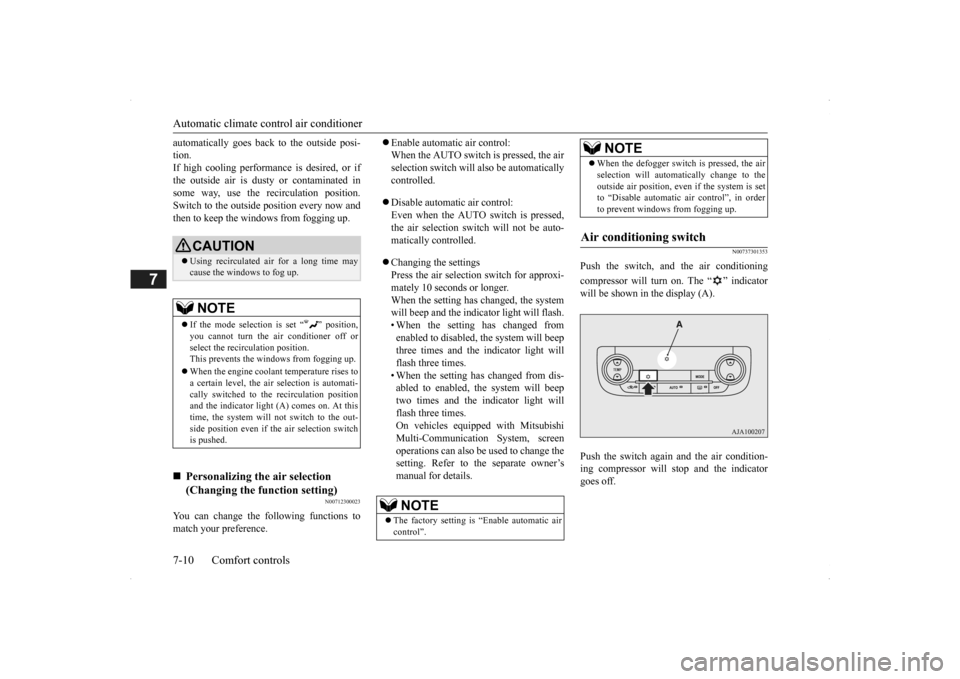
Push the switch, and the air conditioning compressor will turn on. The “ ” indicator will be shown in the display (A). Push the switch again and the air condition- ing compressor will stop and the indicatorgoes off.
CAUTION Using recirculated air for a long time may cause the windows to fog up.NOTE
If the mode selection
is set “ ” position,
you cannot turn the ai
r conditioner off or
select the recirc
ulation position.
This prevents the windows from fogging up. When the engine coolan
t temperature rises to
a certain level, the air selection is automati-cally switched to the
recirculation position
and the indicator light
(A) comes on. At this
time, the system will not switch to the out-side position even if
the air selection switch
is pushed.
Personalizing the air selection (Changing the function setting)
NOTE
The factory setting is
“Enable automatic air
control”.
When the defogger switch is pressed, the air selection will automati
cally change to the
outside air position, even if the system is setto “Disable automatic air control”, in order to prevent windows from fogging up.
Air conditioning switch
NOTE
BK0200500US.book 10 ページ 2013年2月12日 火曜日 午前9時46分
Page 327 of 451

Automatic climate cont
rol air conditioner
Comfort controls 7-11
7
N00712200022
You can change the following functions to match your preference.
Enable automatic air conditioning control: When the AUTO switch is pressed, orwhen the temperature control switch has been set to the minimum temperature, the air conditioning switch is automaticallycontrolled. Disable automatic air conditioning con- trol: The air conditioning switch is not auto-matically controlled,
unless the air condi-
tioning switch is used. Changing the settings Press the air conditioning switch for about 10 seconds or longer. When the setting has changed, the systemwill beep and the indi
cator light will flash.
• When the setting has changed from enabled to disabled, the system will beepthree times and the indicator light will flash three times. • When the setting has changed from dis-abled to enabled, the system will beep two times and the i
ndicator light will
flash three times.On vehicles equippe
d with Mitsubishi
Multi-Communication System, screen operations can also be used to change thesetting. Refer to th
e separate owner’s
manual for details.
N00703501026
When the AUTO switch is pressed, the indi- cator light (A) comes on and the mode selec- tion (except for “ ”), blower speed adjustment, recirculated/outside air selection,temperature adjustment
, and air conditioner
ON/OFF status are all controlled automati- cally.
CAUTION Using the air conditioni
ng slightly increases
the engine idle speed. Therefore, make sureyour foot is firmly on the brake pedal whenshifting the transaxle into drive.NOTE
If a problem is detect
ed in the air condition-
ing compressor, the “ ” indicator blinks. Press the air conditioning
switch once to turn
it off, then once more to turn it back on. If the“ ” indicator does not blink, there is no problem. If it does blink,
have it checked at
an authorized Mitsubish
i Motors dealer or a
repair facility of your choice. For example, sometimes after using a high- pressure car wash, the
condenser can get wet,
and the “ ” indicator blinks temporarily. Wait for a while, pres
s the air conditioning
switch once to turn the system off, then once more to turn it back on. Once the water evap- orates, the blinking will stop.
Personalizing the
air conditioning
switch (Changing the function set-ting)
NOTE
The factory setting is
“Enable automatic air
conditioning control”. When the defogger switch
is pressed, the air
conditioner will run au
tomatically, even if
the system is set to “Disable automatic airconditioning control”, in order to prevent windows from fogging up.
AUTO switch
BK0200500US.book 11 ページ 2013年2月12日 火曜日 午前9時46分
Page 356 of 451
Display Indicator 7-40 Comfort controls
7
N00717700022
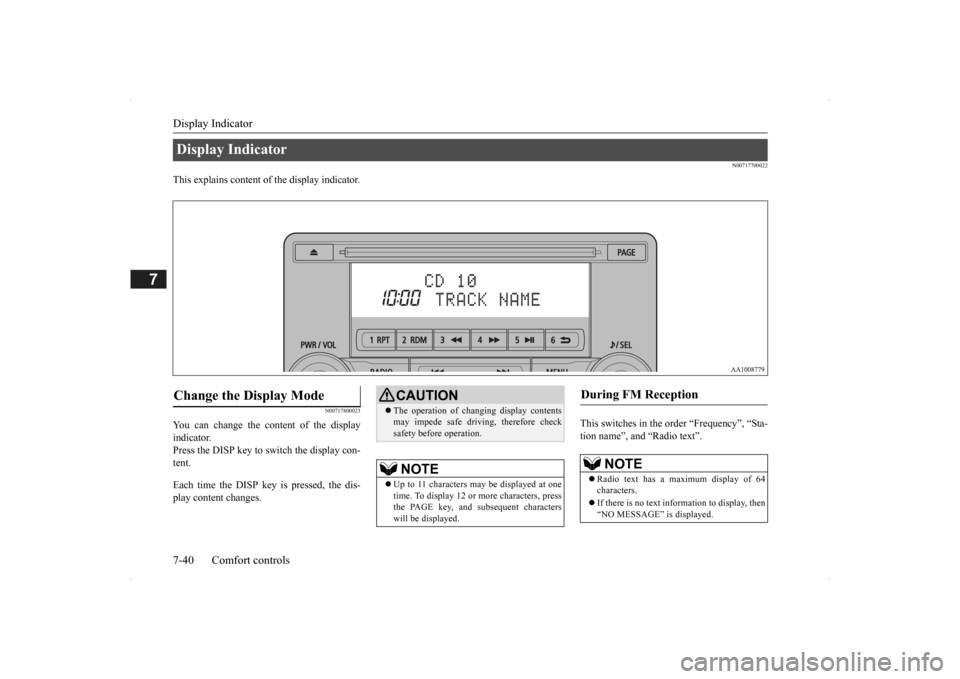
This explains content of the display indicator.
N00717800023
You can change the content of the display indicator. Press the DISP key to switch the display con-tent. Each time the DISP ke
y is pressed, the dis-
play content changes.
This switches in the order “Frequency”, “Sta- tion name”, and “Radio text”.
Display Indicator Change the Display Mode
CAUTION The operation of changing display contents may impede safe driving, therefore checksafety before operation.NOTE
Up to 11 characters
may be displayed at one
time. To display 12 or more characters, press the PAGE key, and s
ubsequent characters
will be displayed.
During FM Reception
NOTE
Radio text has a ma
ximum display of 64
characters. If there is no text information to display, then “NO MESSAGE” is displayed.
BK0200500US.book 40 ページ 2013年2月12日 火曜日 午前9時46分
Page 357 of 451
Audio Quality and Volume Balance Adjustment
Comfort controls 7-41
7
This switches in the order “Channel name”, “Category name”, “Artist name”, “Track name”, and “C
omposer name”.
This switches in the order “Disc title”, “Track title”, and “Operating status”. This switches in the order “Folder title”, “File title”, and “Operating status”.
Hold down the DISP key. This switches the ID3tag display. [DISP] Each time the key is pressed, thisswitches in the order “Album name”, “Track name”, “Artist name”, “Genre name”*, and “Operating status”.
N00718200024
This switches in the order “Albums”, “Track name”, “Artist name”, “Genre name”, and “Operating status”.
N00718300025
Operating details are the same as in “DuringiPod Playback” (P.7-41).
N00718400026
Change audio
quality settings.
1. Press the /SEL key to select settings items. Each time the /SEL
key is pressed, this
switches in the order BASS, TREBLE, FADER, BALANCE,
SCV, and Cancel.
2. Turn the /SEL key to adjust.
During Satellite Radio Reception
(if so equipped)
NOTE
The channel and cate
gory have a maximum
display of 8 characters
. The other items have
a maximum display
of 36 characters.
During CD-DA playback
NOTE
If there is no text information to display, then “NO TITLE” is displayed.
During MP3/WMA/AAC Play- back
NOTE
If there is no text information to display, then “NO TITLE” is displayed.
Display the ID3tag
*:Displayed when playing back audio files on a USB device
(vehicles with a
Bluetooth
® 2.0 interface).
NOTE
During display of the ID3tag, hold down the DISP key to switch to the folder title display. The genre name displa
y may not be possible.
During iPod Playback
NOTE
If there is no text information to display, then “NO TITLE” is displayed. Displayed genre name
in equipment by type
(vehicles with a Bluetooth
® 2.0 interface).
The genre name displa
y may not be possible.
During Bluetooth
® 2.0 Audio Play-
back
(if so equipped)
Audio Quality and Volume Balance Adjustment Adjust Audio Quality and Vol- ume Balance
BK0200500US.book 41 ページ 2013年2月12日 火曜日 午前9時46分
Page 358 of 451

System Settings 7-42 Comfort controls
7
N00718500043
Change system settings
such as product time.
1. Press the MENU key.
2. Press the /SEL key to select settings items. Each time the /SEL key is pressed, this switches in the order Satellite radio set- tings*
1, Gracenote DB*
2, PHONE set-
tings, Adjust time, and Cancel. 3. Turn the /SEL key to set.4. Press the /SEL key to determine. This completes settings, and displays the next setti
ngs item.
Adjust- ment items
Turn counter- clockwise
Turn clockwise
BASS -6 to 0
(low low-pass volume)
0 to +6 (high low-pass volume)
TRE- BLE
-6 to 0 (Low high-pass volume)
0 to +6 (High high-pass volume)
FADER CENTER to
REAR 11 (emphasize REAR)
FRONT 11 to CENTER (emphasize FRONT)
BAL- ANCE
LEFT 11 to CENTER (emphasize LEFT)
CENTER to RIGHT 11 (emphasize RIGHT)
SCV OFF, LOW
(Low vehicle compensated volume effect)
MID, HIGH (High vehicle compensated volume effect)
System Settings
*1: Displayed when a sate
llite tuner is con-
nected.
*2: Displayed when playi
ng back audio files
(vehicles with a Bluetooth
® 2.0 interface).
BK0200500US.book 42 ページ 2013年2月12日 火曜日 午前9時46分
Page 359 of 451
System Settings
Comfort controls 7-43
7
Change each satel
lite radio setting.
Satellite Radio Settings
(if so equipped)
Settings name
Settings item
Settings value
Settings content
SIRIUS ID — — This displays the SIRIUS ID. SKIP SETTING SKIP SETTING
SELECT CH*
1
ON SKIP can be set for each channel. Channels for which SKIP is set are excluded
from the search during up/down
channel selecting and scanning.
They can be received when selecting chan
nels using the preset keys or searching
for a station.
OFF
SKIP SETTING ALL RESET
— When “YES” is selected, the SKIP sett
ings for all channels are turned off.
LOCK SETTING LOCK SETTING
SELECT CH*
2
ON LOCK can be set for each channel.
Channels for which LOCK is set are
excluded from the search during up/dow
n channel selecting and scanning.
If a channel for which LOCK is set is sele
cted when selecting
channels using the
preset keys or searching for a station,
“CH LCKED” is displayed within about 2
seconds after the channel text is
displayed. The sound is muted.
OFF
LOCK SETTING ALL RESET
— When “YES” is selected and the CODE fo
r settings is input
, the LOCK settings
for all channels are turned off.
LOCK SETTING EDIT CODE
— The CODE required for the LOCK settings
is changed. (The
factory setting is
“1111”.) If the input code is incorrect, “L
OCK SETTING WRG LC
” is displayed.
*1: Each time the /SET key is pressed, this switches in the orde
r Settings channel select, Change SKIP settings, and Complete setti
ngs.
To return to “each channel SK
IP setting”, press the 6 key.
BK0200500US.book 43 ページ 2013年2月12日 火曜日 午前9時46分
Page 360 of 451
System Settings 7-44 Comfort controls
7
Set the time manually. 1. Select “YES” at the “Adjust time” screen, and press the /SEL key. The hour can be adjusted. Press the
/SEL key again to adjust the minutes.
2. Turn the /SEL key to adjust the time.3. Press the /SEL key. This completes the adjustment.
Change the mobile phone voice cut- in set- tings and the Bluetooth
® 2.0 interface lan-
guage.
Depending on the vehi
cle, PHONE settings
may not be possible.
Supported profiles A hands-free kit (available separately) is required. (“Set value” bold typefa
ce indicates factory
default settings.)
*2:Once the CODE (passcode) of your
choice is entered, each time th
e /SET key is pressed, this swit
ches in the order Settings chan
nel select,
Change LOCK settings, a
nd Complete settings.
To return to “each channel LOCK setting”, press the
6 key. Input the CODE from the 1 RPT key to the 6 key.
Time Setting
NOTE
In order to finish ad
justing the time, hold
down the /SEL key unt
il the seconds are
reset to “00”.
PHONE Settings
NOTE
Cancel functions such as the mobile phone “dial lock”, and connect while on thestandby screen. While connected, mobile phone (receiving calls, etc.) operations
may not function cor-
rectly. Depending on the distance between the prod- uct and the mobile
phone, the conditions
within the vehicle, and types of screening,connection may not be
possible. In these
cases, situate the mobile phone as close as possible to the product. Even though a Bluet
ooth-capable mobile
phone, characteristics a
nd specifications may
mean that correct ope
ration may not be pos-
sible. For safety’s sake, do
not operate the mobile
phone while driving.
When operating the
mobile phone, first stop the vehicle in a safelocation. Even though a Bluet
ooth-capable mobile
phone, phone specifications
and settings may
result in differences in display, or prevent correct operation.
Some models may not
be confirmed as con-
nected, or may not connect.Hands-free
HFP(v1.5)
Phonebook transfer
OPP(v1.1), PBAP(v1.0)
Vehicles without a Bluetooth
® 2.0 Inter-
faceSettings value
Settings content
PHONE OFF
Do not use mobile phone voice cut-in.
PHONE MUTE
During mobile phone voice cut- in, mute the audio.
PHONE AT T
During mobile phone voice cut- in, output audio from all speak- ers.
NOTE
BK0200500US.book 44 ページ 2013年2月12日 火曜日 午前9時46分
Page 373 of 451

How to change a tire
For emergencies 8-7
8
5. To prevent the vehicle from rolling when it is raised on the jack, place chocks orblocks (A) at the tire that is diagonally opposite from the tire (B) you are chang- ing.
6. Get the jack, bar and wheel nut wrench ready.(Refer to “Jack and tools” on page 8-5.)
N00849600315
The compact spare tire is stowed below the luggage compartment fl
oor. It is designed to
save space in the luggage compartment. Itslighter weight makes it easier to use if a flat tire occurs.
WA R N I N G Be sure to apply choc
ks or blocks to the
correct tire when jacking up the vehicle. If the vehicle moves while jacked up, the jack could slip out of
position, leading to
an accident.NOTE
The chocks shown in the illustration do not come with your vehicl
e. It is recommended
that you purchase chocks or blocks and keep them in the vehicle for use if needed. If chocks or blocks
are not available, use
stones or any other obj
ects that are large
enough to hold the wheel in position.
Spare tire information Compact spare tire
WA R N I N G Tires, including spar
e tire, degrade over
time with age even when they are notbeing used. It is recommended that tires over 6 years generally
be replaced even if
damage is not obvious.CAUTION While the compact spare tire is stowed, the inflation pressure shoul
d be checked at least
once a month to assure that it remains at the recommended inflation pressure. See the tire and loading informati
on placard attached to
the driver’s door sill. Refer to “Tire and load- ing information placard” on page 11-3.
Driving with an imprope
rly inflated tire can
cause an accident. If
you have no choice but
to drive with an under-inflated tire, keepyour speed down and avoid sudden steering or braking, if possible. Inflate the tire to the correct pressure as s
oon as possible. Refer to
“Tire inflation pressures” on page 9-18. The compact spare tire should be used only temporarily. While the compact spare tire is being used, the tire pr
essure monitoring sys-
tem will not function pr
operly. Have the tire
replaced or repaired at an authorized Mit- subishi Motors dealer or
a repair facility of
your choice as soon as possible. Do not go over 50 mph (80 km/h) when driv- ing with the compact spare tire. Avoid sudden starting and braking when driving with the compact spare tire. Do not drive through automatic car washes and over obstacles that
could possibly dam-
age the underside of your vehicle. Because the compact spare tire is smaller than the original tire, there is less clearance betweenthe ground and your vehicle. Because the compact spare tire is designed only for your vehicle, do not use it on any other vehicle. Do not put the compact spare tire on a differ- ent wheel, and do not put standard tires, snow tires, wheel covers
or trim rings on the
compact spare wheel. Otherwise, you could damage these parts or other parts on your vehicle.CAUTION
BK0200500US.book 7 ページ 2013年2月12日 火曜日 午前9時46分