2014 MITSUBISHI OUTLANDER change time
[x] Cancel search: change timePage 225 of 451

Multi Information display - Type 2
Features and controls 5-147
5
N00557101179
The fuel consumpti
on display unit can be
changed. The distance
and amount units are
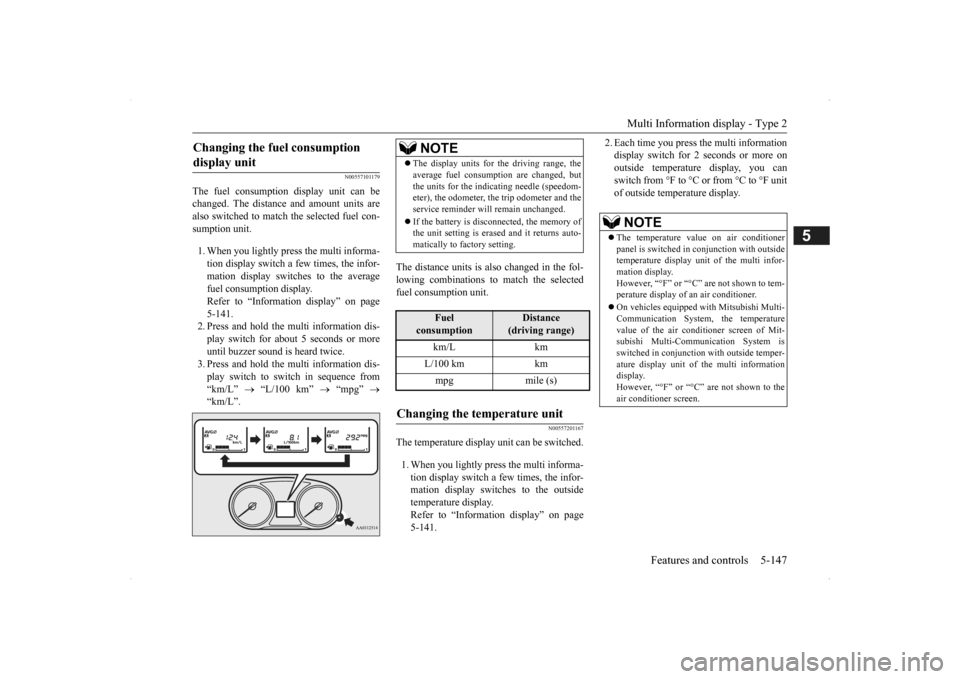
also switched to match the selected fuel con- sumption unit. 1. When you lightly press the multi informa- tion display switch a few times, the infor- mation display switches to the average fuel consumption display. Refer to “Information display” on page 5-141.2. Press and hold the mu
lti information dis-
play switch for about 5 seconds or more until buzzer sound is heard twice.3. Press and hold the mu
lti information dis-
play switch to switch in sequence from “km/L”
“L/100 km”
“mpg”
“km/L”.
The distance units is al
so changed in the fol-
lowing combinations to match the selected fuel consumption unit.
N00557201167
The temperature display unit can be switched. 1. When you lightly press the multi informa- tion display switch a few times, the infor- mation display switches to the outsidetemperature display. Refer to “Information display” on page 5-141.
2. Each time you press the multi information display switch for 2 seconds or more onoutside temperature display, you can switch from °F to °C or from °C to °F unit of outside temperature display.
Changing the fuel consumption display unit
NOTE
The display units for the driving range, the average fuel consumption are changed, butthe units for the indicating needle (speedom-eter), the odometer, the trip odometer and the service reminder will
remain unchanged.
If the battery is disconnected, the memory of the unit setting is erased and it returns auto- matically to factory setting.
Fuel
consumption
Distance
(driving range)
km/L km L/100 km km mpg mile (s)
Changing the temperature unit
NOTE
The temperature value on air conditioner panel is switched in
conjunction with outside
temperature display unit of the multi infor- mation display.However, “°F” or “°C” are not shown to tem- perature display of an air conditioner. On vehicles equipped
with Mitsubishi Multi-
Communication System, the temperature value of the air conditioner screen of Mit-subishi Multi-Communication System is switched in conjunction
with outside temper-
ature display unit of the multi informationdisplay. However, “°F” or “°C”
are not shown to the
air conditioner screen.
BK0200500US.book 147 ページ 2013年2月12日 火曜日 午前9時46分
Page 244 of 451

Indicators 5-166 Features and controls
5
N00519900127 N00520000216
The arrows will flash in time with the corre- sponding exterior turn signals when the turnsignal lever is used. Both arrows will flash
when the hazard warn-
ing flasher swit
ch is pressed.
N00520100086
A blue light comes on when the headlights are on high beam.
N00520200175
This indicator comes on while the front foglights are on.
N00551300026
This indicator light illuminates while the position lights are on.
N00575601020
This indicator comes on in blue while thecoolant temperature is low.
N00579200027
This function displays
how fuel-efficiently
you are driving under different driving condi- tions. The ECO drive assist di
splay will change as
follows if you do fuel-efficient driving using the accelerator in a way well matched with the vehicle speed.
Indicators Turn signal indicators/Hazard warning lights
NOTE
If the indicator flashes faster than usual or if the indicator stays on wi
thout flashing, check
for a malfunctioning turn signal light bulb orturn signal connection.
High beam indicator
Front fog light indicator
(if so
equipped)Position indicator Low coolant temperature indi- cator - blue (Vehicle equipped with the multi information dis- play - Type 2)
NOTE
When the indicator goes out, this should be used as a rough indication of when the heat-ing starts working.
ECO Drive Assist (Vehicle equipped with the multi infor-mation display - Type 2)
ECO drive level Low High
BK0200500US.book 166 ページ 2013年2月12日 火曜日 午前9時46分
Page 249 of 451

Combination headlights and dimmer switch
Features and controls 5-171
5
N00522501746
Rotate the switch to operate the lights. The combinations of
switch operations and
illuminated lights differ in accordance withthe following conditions.
[When the engine is started, and the parking brake is released] The daytime running light
s will be illumi-
nated: [When the engine is not running, or when the engine is running but the parking brake is not released] The engine starts when the lights are off.
Combination headlights and dimmer switch Headlights
NOTE
Do not leave the head
lights and ot
her lights
on for a long period of time when the engineis not running. The battery will run down. When it rains, or wh
en the vehicle has been
washed, the inside of the lens sometimes becomes foggy. This is the same as when window glass mists up
on a humid day, and
does not indicate a problem. When the light is switched on, the heat
will dry out the fog.
However, if water collects inside the light,have it checked by an
authorized Mitsubishi
Motors dealer or a repair facility of your choice.
Ty p e 1 Except for vehicles equipped with day- time running lights OFF All lights off
Parking, tail, front and rear side- marker lights, license plate, instru- ment panel lights and downlight on Headlights and other lights on
Vehicles equipped with daytime running lights OFF
The daytime running lights illumi- nated The daytime running lights illumi- nated Parking, tail, front and rear side- marker lights, licen
se plate, instru-
ment panel lights
and downlight on
Headlights and other lights onNOTE
Once the daytime running light come on, they do not go out until the ignition switch is turned to the “OFF” or “ACC” position orthe operation mode is changed to OFF or ACC.
BK0200500US.book 171 ページ 2013年2月12日 火曜日 午前9時46分
Page 250 of 451

Combination headlights and dimmer switch 5-172 Features and controls
5
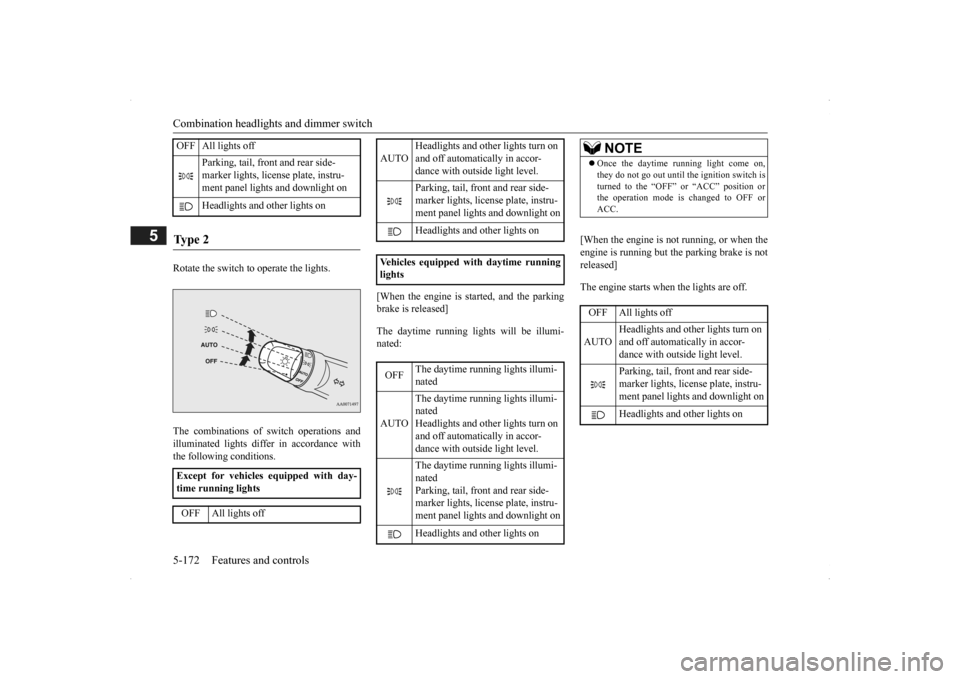
Rotate the switch to operate the lights. The combinations of
switch operations and
illuminated lights differ in accordance with the following conditions.
[When the engine is started, and the parking brake is released] The daytime running light
s will be illumi-
nated:
[When the engine is not running, or when the engine is running but the parking brake is not released] The engine starts when the lights are off.
OFF All lights off
Parking, tail, front and rear side- marker lights, license plate, instru- ment panel lights and downlight on Headlights and
other lights on
Ty p e 2 Except for vehicles equipped with day- time running lights OFF All lights off
AUTO
Headlights and other lights turn on and off automatically in accor- dance with outside light level. Parking, tail, front
and rear side-
marker lights, license plate, instru- ment panel lights
and downlight on
Headlights and other lights on
Vehicles equipped
with daytime running
lights OFF
The daytime runni
ng lights illumi-
nated
AUTO
The daytime runni
ng lights illumi-
natedHeadlights and other lights turn on and off automatically in accor- dance with outside light level. The daytime runni
ng lights illumi-
nated Parking, tail, front
and rear side-
marker lights, license plate, instru- ment panel lights
and downlight on
Headlights and other lights on
NOTE
Once the daytime running light come on, they do not go out until the ignition switch isturned to the “OFF” or “ACC” position orthe operation mode is changed to OFF or ACC.OFF All lights off AUTO
Headlights and other lights turn on and off automatically in accor- dance with outside light level. Parking, tail, front
and rear side-
marker lights, license plate, instru-ment panel lights and downlight on Headlights and other lights on
BK0200500US.book 172 ページ 2013年2月12日 火曜日 午前9時46分
Page 254 of 451

Headlight leveling swit
ch (if so equipped)
5-176 Features and controls
5
4. The headlights will come on in the low beam setting for about
30 seconds. After
the headlights go off, the headlights can be turned on again in the low beam setting for about 30 seconds by pulling the turnsignal lever toward you within 60 seconds of turning the ignition switch to the “OFF” or “LOCK” pos
ition or putting the
operation mode in OFF. To turn on the headlights again after 60 seconds of turn- ing the ignition switch to the “OFF” or “LOCK” position or putting the operation mode in OFF, repeat the process from step1.
N00537101115
The direction of the headlight beam (the direction in which th
e light shines) alters
according to the number of people and theload in the vehicle. Lo
wer the headlight angle
if it is too high due to the number of people and/or the load in the vehicle so that the head-lights’ glare does not distract the drivers of approaching vehicles
. First set the light
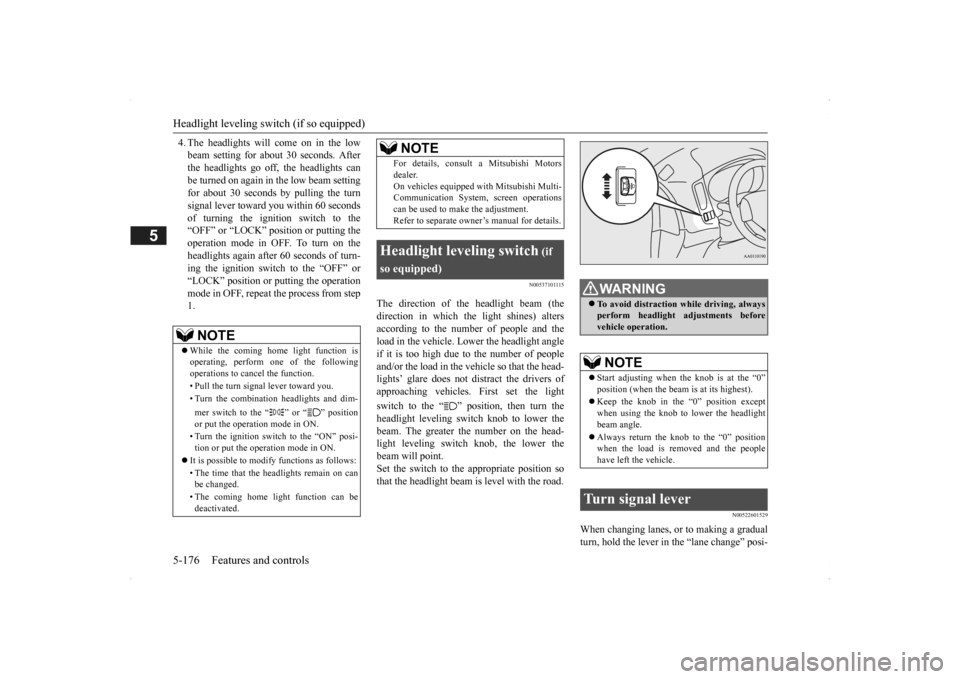
switch to the “ ” position, then turn the headlight leveling switch knob to lower the beam. The greater the number on the head-light leveling switch knob, the lower the beam will point. Set the switch to the appropriate position sothat the headlight beam is level with the road.
N00522601529
When changing lanes, or to making a gradual turn, hold the lever in the “lane change” posi-
NOTE
While the coming home light function is operating, perform one of the following operations to cancel the function. • Pull the turn signal lever toward you. • Turn the combination headlights and dim- mer switch to the “ ” or “ ” position or put the operation mode in ON. • Turn the ignition switch to the “ON” posi- tion or put the operation mode in ON.
It is possible to modify functions as follows: • The time that the he
adlights remain on can
be changed. • The coming home light function can be deactivated.
For details, consult a Mitsubishi Motorsdealer.On vehicles equipped
with Mitsubishi Multi-
Communication System,
screen operations
can be used to make the adjustment. Refer to separate owne
r’s manual for details.
Headlight leveling switch
(if
so equipped)
NOTE
WA R N I N G To avoid distraction wh
ile driving, always
perform headlight adjustments beforevehicle operation.NOTE
Start adjusting when the knob is at the “0” position (when the beam
is at its highest).
Keep the knob in the “0” position except when using the knob to lower the headlight beam angle. Always return the knob to the “0” position when the load is removed and the people have left the vehicle.
Turn signal lever
BK0200500US.book 176 ページ 2013年2月12日 火曜日 午前9時46分
Page 255 of 451

Hazard warning flasher switch Features and controls 5-177
5
tion (1). It will return to the neutral position when you let go. Use the full position (2)when making a normal turn. The lever will return to the neutral position when the turn is complete. There may be times when the leverdoes not return to th
e neutral position. This
usually happens when
the steering wheel is
turned only slightly. You
can easily return the
lever by hand. Also, when you move the lever to (1) slightly then release it, the turn signal lights and the indicator light in the instrument cluster will flash three times.
N00522701328
If you press the flasher switch, the front and rear turn signals will flash intermittently, and so will the hazard warning lights. This is anemergency warning system and should not be
NOTE
A light in the instrument panel flashes to show when the front and rear turn signallights are working properly.If this light flashes fast
er than usual, check
for a burned out turn signal light bulb or mal- functioning connecti
on in the signal.
If the panel light does not come on when the lever is moved, check
for a blown fuse or a
burned out bulb in the panel.Have the system inspected by your autho- rized Mitsubishi Motors
dealer or a repair
facility of your choice. It is possible to modify functions as follows: • Deactivate the turn signal light 3-flash function for lane changes. • Adjust the time required to operate the lever for the 3-flash function. See your authorized Mitsubishi Motors dealer for details. For vehicles equipped
with the Mitsubishi
Multi-Communication System, adjustments can be made using sc
reen operations. For
further details, refer to the separate owner’smanual.
It is possible to change the tone of a sound- ing buzzer as the turn signal lights flash.[Vehicle equipped with the multi informationdisplay - type 1] Refer to “Changing the turn-signal sound” on page 5-139.[Vehicle equipped with the multi information display - type 2] See your authorized Mitsubishi Motorsdealer for details.
Hazard warning flasher switch
NOTE
BK0200500US.book 177 ページ 2013年2月12日 火曜日 午前9時46分
Page 264 of 451

Bluetooth® 2.0 interface (if so equipped) 5-186 Features and controls
5
Steering control switch and microphone
P.5-186Voice recognition function
P.5-188
Useful voice commands
P.5-189
Speaker enrollment function
P.5-190
Connecting the Bluetooth
® 2.0 interface and
the Bluetooth
® device
P.5-192
Operating a music player connected via Blue- tooth
® P.5-196
How to make or receive hands-free calls
P.5-196Phonebook function
P.5-199
N00564001109
Press this button to increase the volume.
NOTE
If the ignition switch
or the operation mode
is left in ACC, the accessory power willautomatically turn off after a certain periodof time and you will no longer be able to use the Bluetooth
® 2.0 interface. The accessory
power comes on again if
the ignition switch
or the engine switch is operated. Refer to“ACC power auto-cut
out function” on page
5-18 and 5-57. The Bluetooth
® 2.0 interface cannot be used
if the Bluetooth
® device has a dead battery
or the device power is turned off. Hands-free calls
will not be possible if your
phone does not have
service available.
If you place the Bluetooth
® device in the
vehicle’s third seat or
luggage compartment,
you may not be able to
use the Bluetooth
®
2.0 interface. Some Bluetooth
® devices are not compatible
with the Bluetooth
® 2.0 interface.
You can confirm the Link System software version by pressing the HANG-UP button 3times (press and hold 2 times and then press briefly) within 10 seconds.
For detail of the Bluetooth
® 2.0 interface,
refer to the following web site: [For vehicles sold in U.S.A.] You can access the MITSUBISHI MOTORSNORTH AMERICA web site. [For vehicles sold in Canada and Mexico] You can access the MITSUBISHI MOTORSweb site. Please read and agree to the “Warning about Links to the Web Sites of Other Companies”,the websites mentioned above may connect you to websites other
than the MITSUBISHI
MOTORS web site.http://www.mitsubishi-motors.com/en/prod- ucts/index.html Software updates by ce
llular phone/digital
audio device manufacturers may change/alter devi
ce connectivity.
NOTE
Steering control switch and microphone
1- Volume up button 2- Volume down button 3- SPEECH button4- PICK-UP button 5- HANG-UP button 6- MicrophoneVolume up button
BK0200500US.book 186 ページ 2013年2月12日 火曜日 午前9時46分
Page 266 of 451

Bluetooth® 2.0 interface (if so equipped) 5-188 Features and controls
5
N00564101113
The Bluetooth
® 2.0 interface is equipped
with a voice recognition function. Simply say voice commands and you can per- form various operations
and make or receive
hands-free calls. With the Bluetooth
® 2.0 interface, voice rec-
ognition is possible for
US English, North
American Spanish, Canadian French and Jap-anese. The factory setting is “English.”
1. Press the SPEECH button (except for vehicles with Mitsubishi Multi-Commu- nication System) or PICK-UP button (for vehicles with Mitsubishi Multi-Commu-nication System). 2. Say “Setup.” 3. Say “Language.”4. The voice guide will
say “Select a lan-
guage: English, Spanish, French or Japa- nese.” Say the desired language.(Example: “English”)
5. The voice guide wi
ll say “English (Span-
ish, French or Japanese) selected. Is thiscorrect?” Say “Yes.” If you say “No,” the system will return to Step 4. 6. When the voice guide says “English (Spanish, French or Japanese) selected,” the language change process will be com- pleted and the system will return to themain menu.
NOTE
If a cellular phone is
within close proximity
of the microphone, it may distort the soundquality. In this case,
place the cellular phone
as far as possible from the microphone.
Voice recognition function
NOTE
If the voice command th
at you say differs
from the predefined command or cannot be recognised due to ambient noise or some other reason, the Bluetooth
® 2.0 interface
will ask you for the voice command again up to 3 times.
For best performance and further reduction of ambient noise, the vehicle windowsshould be closed, lower the blower speed andrefrain from conversation with your passen- gers while engaging
the voice recognition
function. Some voice commands have alternative commands. Depending on the sele
cted language, some
functions may not
be available.
Language can be change
d by using the audio
control panel besides
the following proce-
dure. For details, refer to “System settings” on page 7-42. For DISPLAY AUDIO and Mit-subishi Multi-Communication System, refer to the separate owner’s manuals.
Selecting the language
NOTE
NOTE
The voice guide will repeat the same mes- sage twice. The first message is in the cur- rent language, and th
e second message is in
the selected
language.
If many entries are regist
ered in the vehicle
phonebook, changing the language will take a longer time. Changing the language
deletes the mobile
phonebook imported to the Bluetooth
® 2.0
interface. If you wish to use it, you will have to import it again.
BK0200500US.book 188 ページ 2013年2月12日 火曜日 午前9時46分