2014 MITSUBISHI OUTLANDER change time
[x] Cancel search: change timePage 108 of 451
Free-hand Advanced
Security Transmitter (F.A.S
.T.-key) (if so equipped)
5-30 Features and controls
5
N00544601095
The door and liftgate
unlock function can be
set to the following two conditions.Each time the door and
liftgate unlock func-
tion is set, a chime wi
ll sound to tell you the
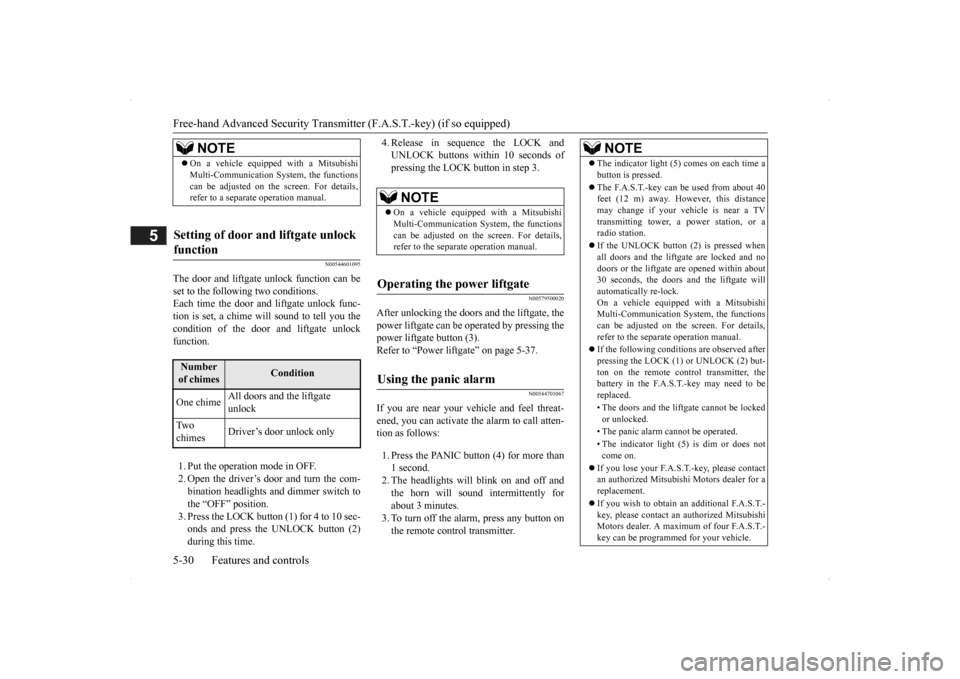
condition of the door and liftgate unlockfunction. 1. Put the operation mode in OFF. 2. Open the driver’s door and turn the com-bination headlights and dimmer switch to the “OFF” position. 3. Press the LOCK button (1) for 4 to 10 sec-onds and press the UNLOCK button (2) during this time.
4. Release in sequence the LOCK and UNLOCK buttons within 10 seconds ofpressing the LOCK button in step 3.
N00579500020
After unlocking the doors and the liftgate, thepower liftgate
can be operated
by pressing the
power liftgate button (3). Refer to “Power li
ftgate” on page 5-37.
N00544701067
If you are near your vehicle and feel threat- ened, you can activate the alarm to call atten- tion as follows: 1. Press the PANIC button (4) for more than 1 second. 2. The headlights will blink on and off and the horn will sound intermittently forabout 3 minutes. 3. To turn off the alarm, press any button on the remote control transmitter.
NOTE
On a vehicle equippe
d with a Mitsubishi
Multi-Communication System, the functionscan be adjusted on the screen. For details,refer to a separa
te operation manual.
Setting of door and liftgate unlock function
Number of chimes
Condition
One chime
All doors and the liftgate unlock
Tw o chimes
Driver’s door unlock only
NOTE
On a vehicle equippe
d with a Mitsubishi
Multi-Communication System, the functionscan be adjusted on the screen. For details, refer to the separa
te operation manual.
Operating the power liftgate
Using the panic alarm
NOTE
The indicator light (5) comes on each time a button is pressed. The F.A.S.T.-key can be used from about 40 feet (12 m) away. However, this distance may change if your vehicle is near a TVtransmitting tower, a power station, or a radio station. If the UNLOCK button (2) is pressed when all doors and the liftgate are locked and no doors or the liftgate
are opened within about
30 seconds, the doors a
nd the liftgate will
automatically re-lock. On a vehicle equippe
d with a Mitsubishi
Multi-Communication System, the functions can be adjusted on the screen. For details, refer to the separate operation manual. If the following conditi
ons are observed after
pressing the LOCK (1) or UNLOCK (2) but-ton on the remote control transmitter, the battery in the F.A.S.T.-key may need to be replaced. • The doors and the lift
gate cannot be locked
or unlocked. • The panic alarm
cannot be operated.
• The indicator light
(5) is dim or does not
come on.
If you lose your F.A.S.T.
-key, please contact
an authorized Mitsubish
i Motors dealer for a
replacement. If you wish to obtain an
additional F.A.S.T.-
key, please contact an
authorized Mitsubishi
Motors dealer. A maximu
m of four F.A.S.T.-
key can be programmed for your vehicle.
BK0200500US.book 30 ページ 2013年2月12日 火曜日 午前9時46分
Page 135 of 451
Ignition switch
Features and controls 5-57
5
All accessories can be used. Engages the starter. Release the key when the engine starts.It will automatically return to the “ON” position.
N00539601071
After about 30 minutes has elapsed with the ignition switch in the “ACC” position, thefunction automatically cuts out the power for the audio system and ot
her electric devices
that can be operated with that position.When the ignition switch is turned from the “ACC” position, the pow
er is supplied again
to those devices.
N00550901211
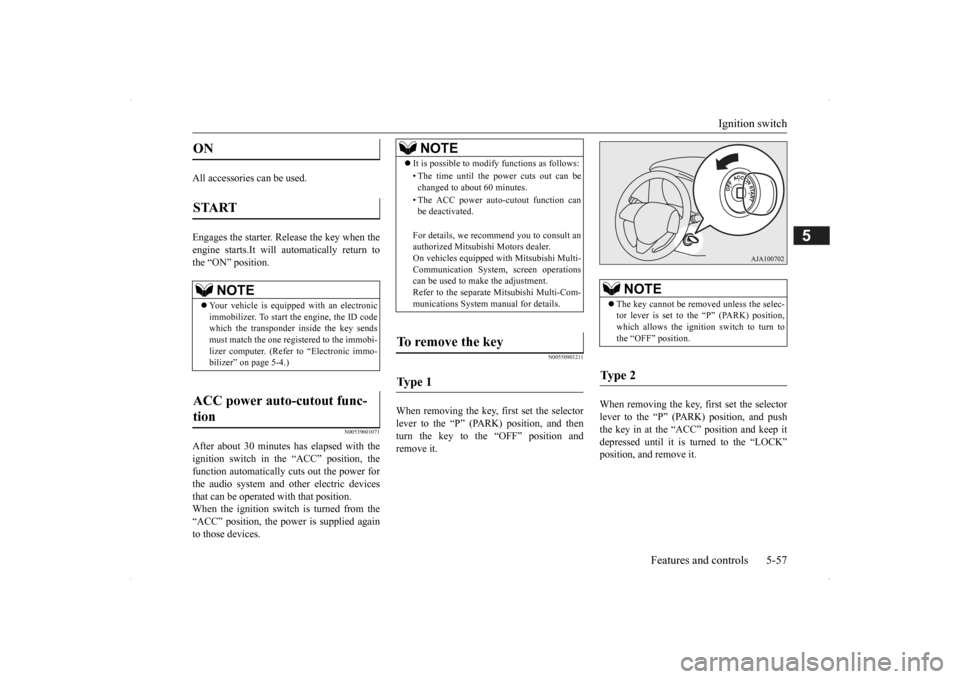
When removing the key,
first set the selector
lever to the “P” (PARK) position, and then turn the key to the “OFF” position and remove it.
When removing the key, first set the selector lever to the “P” (PARK) position, and push the key in at the “ACC” position and keep it depressed until it is turned to the “LOCK”position, and remove it.
ON START
NOTE
Your vehicle is equippe
d with an electronic
immobilizer. To start
the engine, the ID code
which the transponder inside the key sendsmust match the one registered to the immobi- lizer computer. (Refer to “Electronic immo- bilizer” on page 5-4.)
ACC power auto-cutout func- tion
NOTE
It is possible to modify functions as follows: • The time until the power cuts out can be changed to about 60 minutes. • The ACC power auto
-cutout function can
be deactivated. For details, we reco
mmend you to consult an
authorized Mitsubishi Motors dealer. On vehicles equipped
with Mitsubishi Multi-
Communication System, screen operations can be used to ma
ke the adjustment.
Refer to the separate Mitsubishi Multi-Com-munications System manual for details.
To remove the key Ty p e 1
NOTE
The key cannot be rem
oved unless the selec-
tor lever is set to the “P” (PARK) position,which allows the ignition switch to turn to the “OFF” position.
Ty p e 2
BK0200500US.book 57 ページ 2013年2月12日 火曜日 午前9時46分
Page 142 of 451
Automatic transaxle (if so equipped) 5-64 Features and controls
5
N00514201395
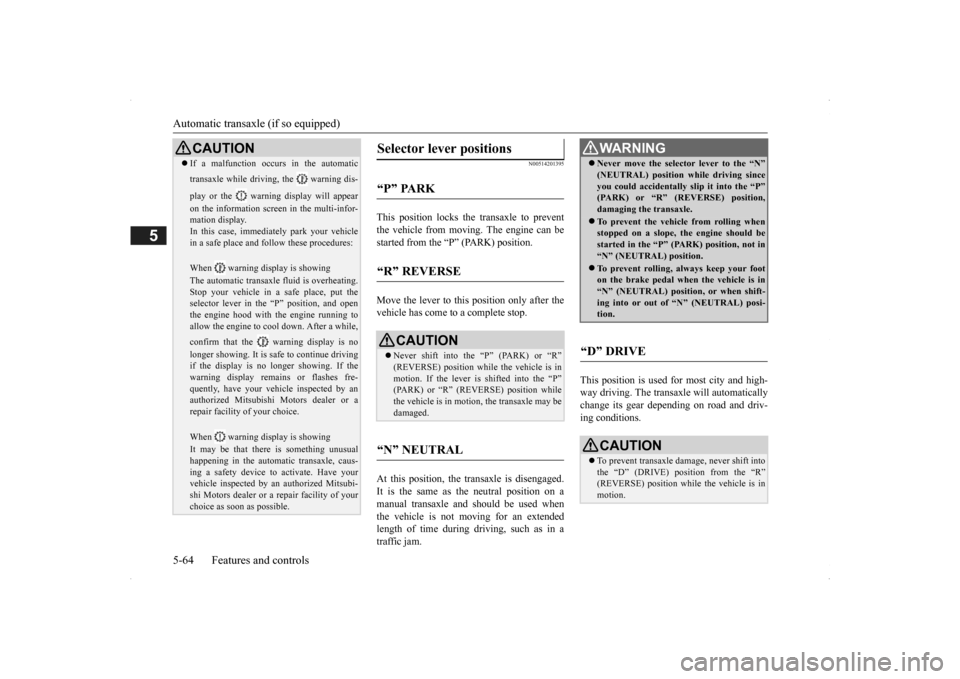
This position locks the transaxle to prevent the vehicle from moving.
The engine can be
started from the “P” (PARK) position. Move the lever to this position only after the vehicle has come to a complete stop. At this position, the tr
ansaxle is disengaged.
It is the same as th
e neutral position on a
manual transaxle and should be used when the vehicle is not moving for an extended length of time during driving, such as in atraffic jam.
This position is used for most city and high- way driving. The transaxle will automatically change its gear depe
nding on road and driv-
ing conditions.
CAUTION If a malfunction occurs in the automatic transaxle while driving, the warning dis- play or the warni
ng display will appear
on the information screen in the multi-infor- mation display. In this case, immediat
ely park your vehicle
in a safe place and fo
llow these procedures:
When warning display is showing The automatic transaxle
fluid is overheating.
Stop your vehicle in a
safe place, put the
selector lever in the
“P” position, and open
the engine hood with the engine running to allow the engine to c
ool down. After a while,
confirm that the warning display is no longer showing. It is sa
fe to continue driving
if the display is no longer showing. If thewarning display remains or flashes fre- quently, have your vehicle inspected by an authorized Mitsubishi Motors dealer or arepair facility of your choice. When warning display is showing It may be that there is something unusual happening in the automa
tic transaxle, caus-
ing a safety device to
activate. Have your
vehicle inspected by an
authorized Mitsubi-
shi Motors dealer or a repair facility of yourchoice as soon as possible.
Selector lever positions
“P” PARK
“R” REVERSE
CAUTION Never shift into the “P” (PARK) or “R” (REVERSE) position while the vehicle is in motion. If the lever is shifted into the “P” (PARK) or “R” (REVERSE) position whilethe vehicle is in moti
on, the transaxle may be
damaged.
“N” NEUTRAL
WA R N I N G Never move the selector lever to the “N” (NEUTRAL) position while driving sinceyou could accidentally
slip it into the “P”
(PARK) or “R” (REVERSE) position, damaging the transaxle. To prevent the vehicle from rolling when stopped on a slope,
the engine should be
started in the “P” (P
ARK) position, not in
“N” (NEUTRAL) position. To prevent rolling, always keep your foot on the brake pedal when the vehicle is in “N” (NEUTRAL) positi
on, or when shift-
ing into or out of
“N” (NEUTRAL) posi-
tion.
“D” DRIVE
CAUTION To prevent transaxle damage, never shift into the “D” (DRIVE) position from the “R” (REVERSE) position while the vehicle is in motion.
BK0200500US.book 64 ページ 2013年2月12日 火曜日 午前9時46分
Page 144 of 451
Automatic transaxle (if so equipped) 5-66 Features and controls
5
N00538801180
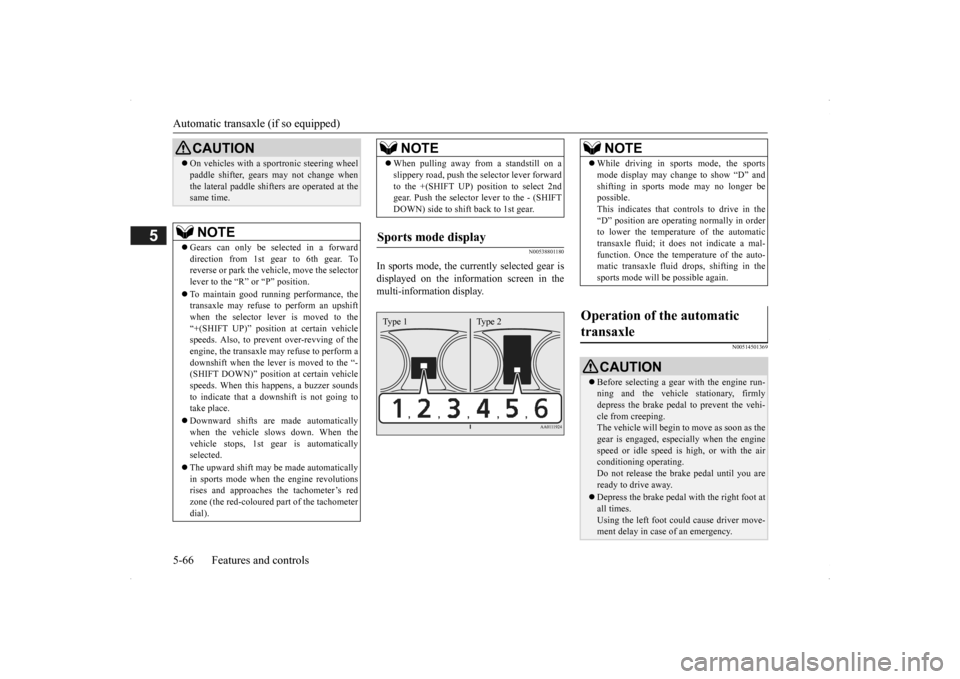
In sports mode, the curre
ntly selected gear is
displayed on the information screen in the multi-information display.
N00514501369
On vehicles with a s
portronic steering wheel
paddle shifter, gears
may not change when
the lateral paddle shifters are operated at thesame time. NOTE
Gears can only be selected in a forward direction from 1st gear to 6th gear. To reverse or park the vehi
cle, move the selector
lever to the “R” or “P” position. To maintain good running performance, the transaxle may refuse to perform an upshiftwhen the selector lever is moved to the “+(SHIFT UP)” positi
on at certain vehicle
speeds. Also, to prevent over-revving of theengine, the transaxle may refuse to perform a downshift when the lever is moved to the “- (SHIFT DOWN)” position
at certain vehicle
speeds. When this happens, a buzzer sounds to indicate that a dow
nshift is not going to
take place. Downward shifts are made automatically when the vehicle slows down. When thevehicle stops, 1st ge
ar is automatically
selected. The upward shift may be
made automatically
in sports mode when the engine revolutions rises and approaches
the tachometer’s red
zone (the red-coloured
part of the tachometer
dial).CAUTION
When pulling away from a standstill on a slippery road, push the
selector lever forward
to the +(SHIFT UP) pos
ition to select 2nd
gear. Push the selector lever to the - (SHIFT DOWN) side to shift back to 1st gear.
Sports mode display
NOTE
Type 1 Type 2
NOTE
While driving in sports mode, the sports mode display may change to show “D” andshifting in sports
mode may no longer be
possible. This indicates that controls to drive in the “D” position are operati
ng normally in order
to lower the temperature of the automatic transaxle fluid; it doe
s not indicate a mal-
function. Once the temperature of the auto-matic transaxle fluid drops, shifting in the sports mode will be possible again.
Operation of the automatic transaxle
CAUTION Before selecting a gear
with the engine run-
ning and the vehicle
stationary, firmly
depress the brake pedal to prevent the vehi-cle from creeping. The vehicle will begin to
move as soon as the
gear is engaged, espe
cially when the engine
speed or idle speed is
high, or with the air
conditioning operating. Do not release the br
ake pedal until you are
ready to drive away. Depress the brake pedal with the right foot at all times.Using the left foot c
ould cause driver move-
ment delay in case of an emergency.
BK0200500US.book 66 ページ 2013年2月12日 火曜日 午前9時46分
Page 151 of 451
Continuously variable transmission (CVT) (if so equipped)
Features and controls 5-73
5
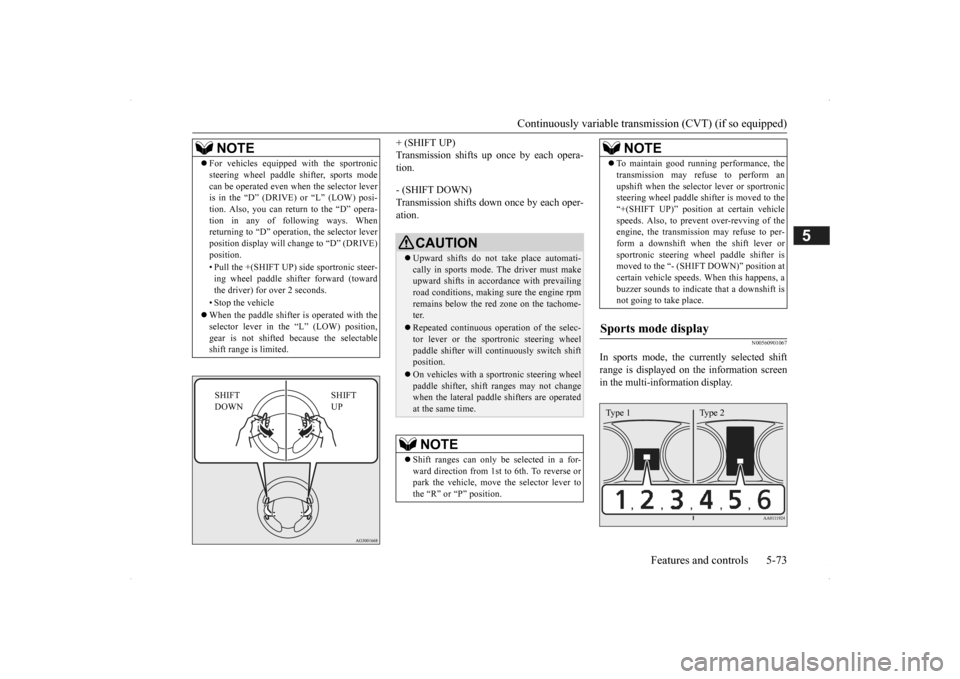
+ (SHIFT UP) Transmission shifts up once by each opera-tion. - (SHIFT DOWN) Transmission shifts down once by each oper- ation.
N00560901067
In sports mode, the currently selected shiftrange is displayed on
the information screen
in the multi-information display.
NOTE
For vehicles equipped
with the sportronic
steering wheel paddle sh
ifter, sports mode
can be operated even wh
en the selector lever
is in the “D” (DRIVE) or “L” (LOW) posi- tion. Also, you can return to the “D” opera- tion in any of following ways. Whenreturning to “D” operati
on, the selector lever
position display will ch
ange to “D” (DRIVE)
position. • Pull the +(SHIFT UP) side sportronic steer- ing wheel paddle shifter forward (towardthe driver) for over 2 seconds. • Stop the vehicle When the paddle shifter is operated with the selector lever in th
e “L” (LOW) position,
gear is not shifted
because the selectable
shift range is limited.
SHIFT UP
SHIFT DOWN
CAUTION Upward shifts do not take place automati- cally in sports mode. The driver must make upward shifts in accordance with prevailing road conditions, making
sure the engine rpm
remains below the red zone on the tachome- ter. Repeated continuous op
eration of the selec-
tor lever or the spor
tronic steering wheel
paddle shifter will cont
inuously switch shift
position. On vehicles with a s
portronic steering wheel
paddle shifter, shift ranges may not change when the lateral paddle shifters are operated at the same time.NOTE
Shift ranges can only be
selected in a for-
ward direction from 1st to 6th. To reverse orpark the vehicle, move
the selector lever to
the “R” or “P” position.
To maintain good running performance, the transmission may refuse to perform anupshift when the select
or lever or sportronic
steering wheel pa
ddle shifter is moved to the
“+(SHIFT UP)” positi
on at certain vehicle
speeds. Also, to prevent over-revving of theengine, the transmission
may refuse to per-
form a downshift when the shift lever or sportronic steering wh
eel paddle shifter is
moved to the “- (SHIFT DOWN)” position at certain vehicle speeds.
When this happens, a
buzzer sounds to
indicate that a downshift is
not going to take place.
Sports mode display
NOTE
Type 1 Type 2
BK0200500US.book 73 ページ 2013年2月12日 火曜日 午前9時46分
Page 155 of 451
Electronically controlled 4WD system (if so equipped)
Features and controls 5-77
5
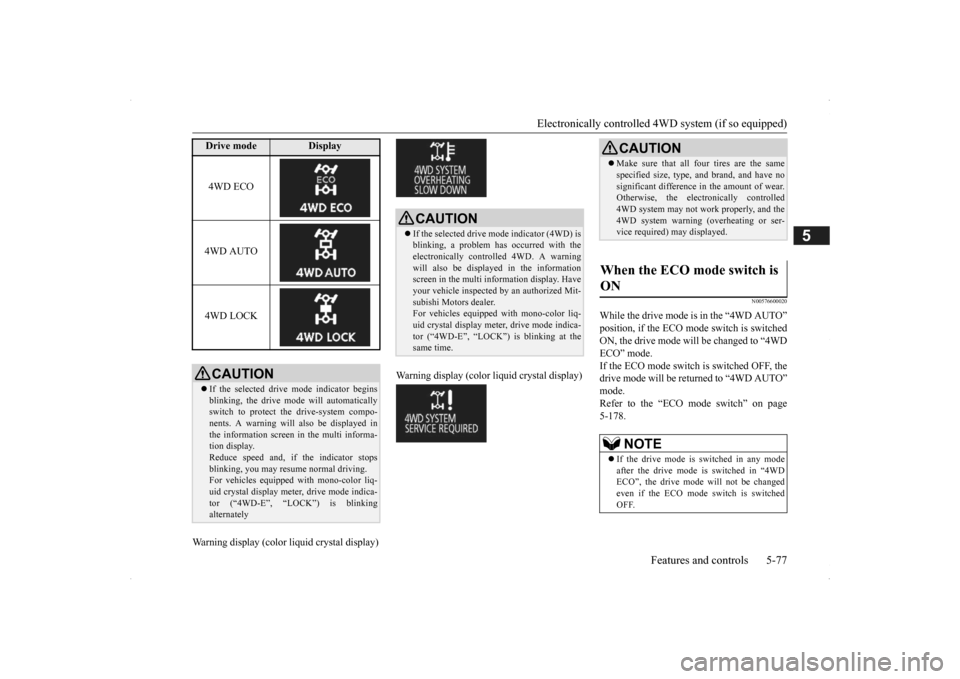
Warning display (color
liquid crystal display)
Warning display (color liquid crystal display)
N00576600020
While the drive mode is in the “4WD AUTO” position, if the ECO mode switch is switched ON, the drive mode will be changed to “4WDECO” mode. If the ECO mode switch is switched OFF, the drive mode will be returned to “4WD AUTO”mode. Refer to the “ECO
mode switch” on page
5-178.
Drive mode
Display
4WD ECO 4WD AUTO 4WD LOCKCAUTION If the selected drive
mode indicator begins
blinking, the drive m
ode will automatically
switch to protect the drive-system compo- nents. A warning will
also be displayed in
the information screen in the multi informa-tion display. Reduce speed and, if
the indicator stops
blinking, you may resume normal driving.For vehicles equipped with mono-color liq- uid crystal display mete
r, drive mode indica-
tor (“4WD-E”, “LOCK”) is blinkingalternately
CAUTION If the selected drive mode indicator (4WD) is blinking, a problem has occurred with the electronically
controlled 4WD. A warning
will also be displayed in the information screen in the multi information display. Have your vehicle inspected
by an authorized Mit-
subishi Motors dealer. For vehicles equipped
with mono-color liq-
uid crystal display mete
r, drive mode indica-
tor (“4WD-E”, “LOCK”) is blinking at the same time.
CAUTION Make sure that all four tires are the same specified size, type, a
nd brand, and have no
significant difference
in the amount of wear.
Otherwise, the elec
tronically controlled
4WD system may not work properly, and the 4WD system warning (overheating or ser-vice required) may displayed.
When the ECO mode switch is ON
NOTE
If the drive mode is switched in any mode after the drive mode is switched in “4WD ECO”, the drive mode will not be changed even if the ECO mode switch is switchedOFF.
BK0200500US.book 77 ページ 2013年2月12日 火曜日 午前9時46分
Page 177 of 451
Adaptive Cruise Control System (ACC) (if so equipped)
Features and controls 5-99
5
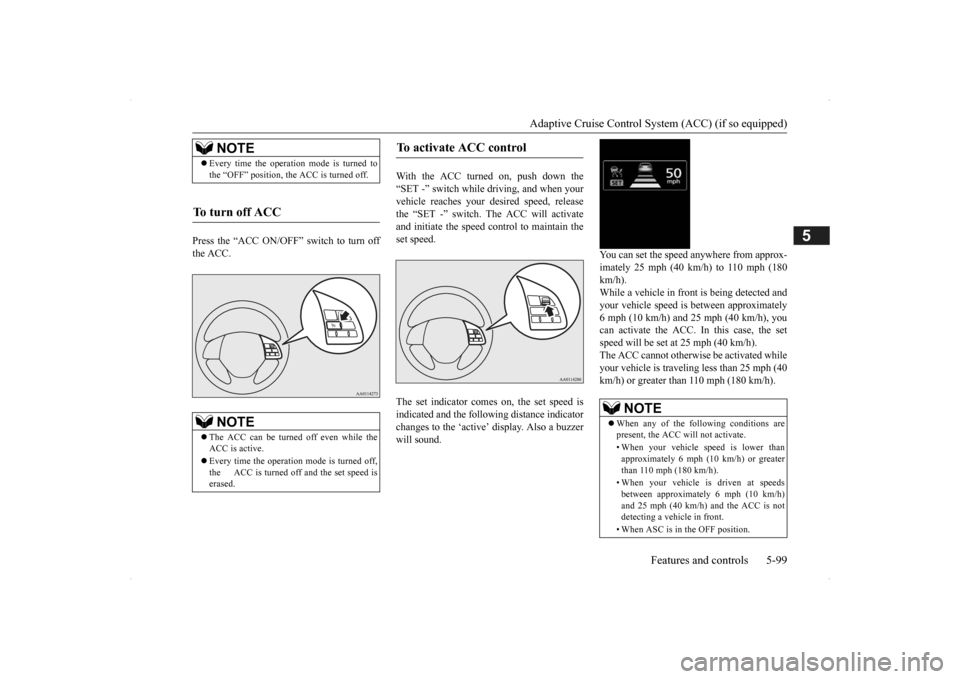
Press the “ACC ON/OFF” switch to turn off the ACC.
With the ACC turned on, push down the “SET -” switch while
driving, and when your
vehicle reaches your de
sired speed, release
the “SET -” switch. The ACC will activate and initiate the speed control to maintain the set speed. The set indicator comes on, the set speed is indicated and the follow
ing distance indicator
changes to the ‘active’
display. Also a buzzer
will sound.
You can set the speed anywhere from approx- imately 25 mph (40 km/h) to 110 mph (180 km/h). While a vehicle in front
is being detected and
your vehicle speed is
between a
pproximately
6 mph (10 km/h) and 25 mph (40 km/h), youcan activate the ACC. In this case, the set speed will be set at 25 mph (40 km/h). The ACC cannot otherwis
e be activated while
your vehicle is traveling less than 25 mph (40 km/h) or greater than 110 mph (180 km/h).
NOTE
Every time the operation mode is turned to the “OFF” position, the ACC is turned off.
To turn off ACC
NOTE
The ACC can be turned off even while the ACC is active. Every time the operation mode is turned off, the ACC is turned off and the set speed is erased.
To activate ACC control
NOTE
When any of the following conditions are present, the ACC will not activate. • When your vehicle speed is lower than approximately 6 mph (10 km/h) or greaterthan 110 mph (180 km/h). • When your vehicle is driven at speeds between approximately 6 mph (10 km/h) and 25 mph (40 km/h) and the ACC is not detecting a vehi
cle in front.
• When ASC is in the OFF position.
BK0200500US.book 99 ページ 2013年2月12日 火曜日 午前9時46分
Page 180 of 451

Adaptive Cruise Control System (ACC) (if so equipped) 5-102 Features and controls
5
N00581500027
There are two ways to increase the set speed. The set speed will increase by 1 mph (1 km/h) every time you push up the “RES +” switch while the ACC is activated. If you hold the switch pushed up, the set speedincreases in 5 mph (5 km/h) increments.
When the accelerator
pedal is depressed
while driving with the ACC control working, you can accelerate th
e vehicle beyond the
presently set speed. When the vehicle spee
d reaches your desired
speed, push down and
release the “SET -”
switch and release the accelerator pedal; the new speed is then set in the system.
• On winding roads.• On slippery roads, su
ch as icy or snow-
covered roads.• In adverse weather
conditions, such as
rain, snow or fog.• On steep downslopes.• When the inclination of a road fre-quently changes.• When the approach alarm frequentlysounds.• When your vehicle is towed or is towinganother vehicle.• When your vehicle is on a chassis dyna-mometer or free rollers.• When tire inflation pressures are notadequate.• When the temporary spare tire is beingused.• When the radar sensor and/or its sur-rounding area are damaged or deformed.CAUTION To maintain proper performance of the ACC:• Always clean the surface of the radar sen- sor.• Avoid impacting the radar sensor or its sur-rounding area.• Do not put a sticker on the radar sensor orits surrounding area.• Do not paint the radar sensor.• Do not install a grill guard.WA R N I N G
• Do not modify the radar sensor or its sur-rounding area.• Always use tires of the same size, same type, and same brand,
and which have no
significant wear differences.• Do not modify the vehicle’s suspension.
To increase the set speed
By using the “RES +” switch:
CAUTION
NOTE
There is some time lag until the vehicle begins accelera
ting to the new set speed after
the set speed has been changed. The set speed can be changed even while your vehicle is follow
ing a vehicle in front
using the ACC. In this case, however, although the set speed it
self is increased,
your vehicle will
not accelerate.
When the switch is held, a buzzer will sound every time the set speed changes
By using the accelerator pedal:
BK0200500US.book 102 ページ 2013年2月12日 火曜日 午前9時46分