2014 MITSUBISHI OUTLANDER steering
[x] Cancel search: steeringPage 264 of 451

Bluetooth® 2.0 interface (if so equipped) 5-186 Features and controls
5
Steering control switch and microphone
P.5-186Voice recognition function
P.5-188
Useful voice commands
P.5-189
Speaker enrollment function
P.5-190
Connecting the Bluetooth
® 2.0 interface and
the Bluetooth
® device
P.5-192
Operating a music player connected via Blue- tooth
® P.5-196
How to make or receive hands-free calls
P.5-196Phonebook function
P.5-199
N00564001109
Press this button to increase the volume.
NOTE
If the ignition switch
or the operation mode
is left in ACC, the accessory power willautomatically turn off after a certain periodof time and you will no longer be able to use the Bluetooth
® 2.0 interface. The accessory
power comes on again if
the ignition switch
or the engine switch is operated. Refer to“ACC power auto-cut
out function” on page
5-18 and 5-57. The Bluetooth
® 2.0 interface cannot be used
if the Bluetooth
® device has a dead battery
or the device power is turned off. Hands-free calls
will not be possible if your
phone does not have
service available.
If you place the Bluetooth
® device in the
vehicle’s third seat or
luggage compartment,
you may not be able to
use the Bluetooth
®
2.0 interface. Some Bluetooth
® devices are not compatible
with the Bluetooth
® 2.0 interface.
You can confirm the Link System software version by pressing the HANG-UP button 3times (press and hold 2 times and then press briefly) within 10 seconds.
For detail of the Bluetooth
® 2.0 interface,
refer to the following web site: [For vehicles sold in U.S.A.] You can access the MITSUBISHI MOTORSNORTH AMERICA web site. [For vehicles sold in Canada and Mexico] You can access the MITSUBISHI MOTORSweb site. Please read and agree to the “Warning about Links to the Web Sites of Other Companies”,the websites mentioned above may connect you to websites other
than the MITSUBISHI
MOTORS web site.http://www.mitsubishi-motors.com/en/prod- ucts/index.html Software updates by ce
llular phone/digital
audio device manufacturers may change/alter devi
ce connectivity.
NOTE
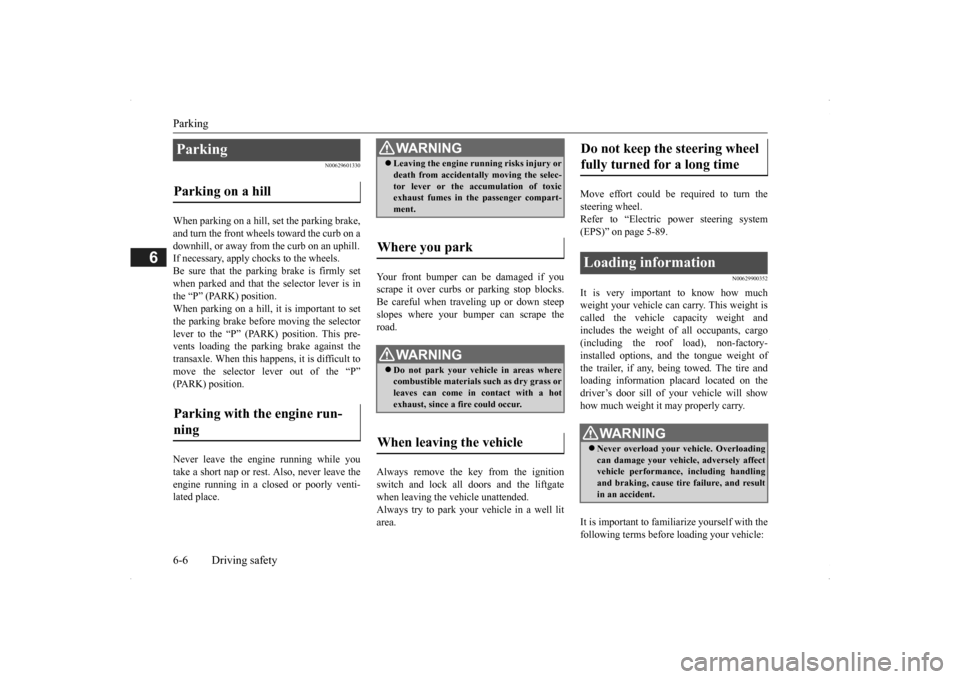
Steering control switch and microphone
1- Volume up button 2- Volume down button 3- SPEECH button4- PICK-UP button 5- HANG-UP button 6- MicrophoneVolume up button
BK0200500US.book 186 ページ 2013年2月12日 火曜日 午前9時46分
Page 277 of 451

Bluetooth® 2.0 interface (if so equipped)
Features and controls 5-199
5
“
a call you need to sim-
ulate the pressing of a phone button as a response to an automated system, press theSPEECH button and speak “1 2 3 4 pound send” and the 1234# will be sent via your cel- lular phone.
N00565801045
If an incoming phone call is received whilethe ignition switch or
the operation mode is in
ON or ACC, the audio sy
stem will be auto-
matically turned on and switched to theincoming call, even when the audio system was originally off. The voice guide announcement for theincoming call will be output from the front passenger’s seat speaker. If the CD player or radio was playing whenthe incoming call was received, the audio sys- tem will mute the sound from the CD player or radio and output only the incoming call. To receive the call, press the PICK-UP button on the steering wheel control switch. When the call is over, the audio system willreturn to its previous state.
N00565900010
At any time during a ca
ll, you can mute the
vehicle microphone. Pressing the SPEECH button and then saying“Mute” during a call will turn ON the mute function and mute the microphone. Saying “Mute off” in the same way will turnoff the mute function and cancel the mute on the microphone.
N00566600014
The Bluetooth
® 2.0 interface
can switch
between hands-free mode
(hands-free calls)
and private mode (calls
using cellular phone).
If you press the SPEECH button and say “Transfer call” during a hands-free call, you can stop the hands-free mode and talk in pri-vate mode. To return to hands-free mode, press the SPEECH button again and say “Transfercall.”
N00566000018
The Bluetooth
® 2.0 interface
has 2 types of
unique phonebooks that are different from the phonebook stored in the cellular phone. They
are the vehicle phonebook and the mobile phonebook.These phonebooks are used to register tele- phone numbers and make
calls to desired
numbers via voice recognition function.
N00566101120
This phonebook is used when making callswith the voice re
cognition function.
Up to 32 names can be registered in the vehi- cle phonebook per language. Also, each entry has 4 locations associatedwith: home, work, mobile
and other. You can
register one telephone number for each loca- tion. You can register a desire
d name as a name for
any phonebook entry register
ed in the vehicle
phonebook. Names and telephone numbers can bechanged later on. The vehicle phonebook ca
n be used with all
paired cellular phones.
Receiving calls
Mute function
Switching between hands-free mode and private mode
Phonebook function
NOTE
Disconnecting the batt
ery cable will not
delete information regi
stered in the phone-
book.
Vehicle phonebook
BK0200500US.book 199 ページ 2013年2月12日 火曜日 午前9時46分
Page 304 of 451

Vehicle preparation before driving 6-4 Driving safety
6
N00629001709
For a safer and more enjoyable trip, always check for the following: Before starting the vehicle, make certain that you and all passengers are seated and wearing their seat
belts properly (with
children in the rear seat, in appropriate restraints), and that all the doors and the liftgate are locked. Move the driver’s seat as far backward as possible, while keep
ing good visibility,
and good control of the steering wheel,brakes, accelerator,
and controls. Check
the instrument panel
indicators and multi-
information display for any possible prob-lem. Similarly, the front
passenger seat should
also be moved as far back as possible. Make sure that infa
nts and small children
are properly restrained in accordance with all laws and regulations.
Check these by selecting the defroster mode, and set the blower swit
ch on high. You should
be able to feel the air blowing against thewindshield. Refer to “Defrosti
ng or defogging (wind-
shield, door windows)” on page 7-13 Check all the tires for heavy tread wear or uneven wear patterns. Look for stones, nails, glass, or other objects
stuck in the tread. Look
for any tread cuts or
sidewall cracks. Check
the wheel nuts for tightness, and the tires (including spare tire) for proper pressure. Replace your tires before they are heavilyworn out. As your vehicle is equi
pped with a tire pres-
sure monitoring system, there is a risk ofdamage to the tire inflation pressure sensors when the tire is replaced on the rim. Tire replacement should, only, be performed by anauthorized Mitsubishi Motors dealer. Have someone watch while you turn all the exterior lights on and off. Also check the turn
signal indicators and hi
gh-beam indicators on
the instrument panel. Check the ground under the vehicle after parking overnight, for
fuel, water, oil, or
other leaks. Make sure
all the fluid levels are
correct. Also, if you
can smell fuel, you need
to find out why imme
diately and have it
fixed.
N00629201134
Even this vehicle’s sa
fety equipment, and
your safest driving, ca
nnot guarantee that you
can avoid an accident or injury. However, ifyou give extra attention to the following areas, you can better protect yourself and your passengers: Drive defensively. Be aware of traffic, road and weather conditions. Leave plenty of stopping distance between your vehicle and the vehicle ahead. Before changing lanes, check your mir- rors, blind spots, and use your turn-signal light. While driving, watch the behavior of other drivers, bicyc
lists, and pedestrians.
Vehicle preparation before driving Seat belts and seats
Defrosters Tires Lights
Fluid leaks Safe driving techniques
BK0200500US.book 4 ページ 2013年2月12日 火曜日 午前9時46分
Page 306 of 451

Parking 6-6 Driving safety
6
N00629601330
When parking on a hill, set the parking brake, and turn the front wheels toward the curb on a downhill, or away from
the curb on an uphill.
If necessary, apply chocks to the wheels. Be sure that the parki
ng brake is firmly set
when parked and that the selector lever is in the “P” (PARK) position. When parking on a hill, it
is important to set
the parking brake before moving the selector lever to the “P” (PARK) position. This pre- vents loading the parking brake against thetransaxle. When this ha
ppens, it is difficult to
move the selector lever out of the “P” (PARK) position. Never leave the engine running while you take a short nap or rest. Also, never leave the engine running in a closed or poorly venti- lated place.
Your front bumper can be damaged if you scrape it over curbs or parking stop blocks.Be careful when traveling up or down steep slopes where your bumper can scrape the road. Always remove the key from the ignition switch and lock all doors and the liftgate when leaving the
vehicle unattended.
Always try to park your vehicle in a well lit area.
Move effort could be required to turn the steering wheel.Refer to “Electric power steering system (EPS)” on page 5-89.
N00629900352
It is very important to know how much weight your vehicle can carry. This weight iscalled the vehicle ca
pacity weight and
includes the weight of
all occupants, cargo
(including the roof load), non-factory-installed options, and the tongue weight of the trailer, if any, being towed. The tire and loading information placard located on thedriver’s door sill of
your vehicle will show
how much weight it may properly carry. It is important to familiarize yourself with the following terms before
loading your vehicle:
Parking Parking on a hill Parking with the engine run- ning
WA R N I N G Leaving the engine ru
nning risks injury or
death from accidentally moving the selec-tor lever or the accumulation of toxicexhaust fumes in the passenger compart- ment.
Where you park
WA R N I N G Do not park your vehicle in areas where combustible materials
such as dry grass or
leaves can come in contact with a hotexhaust, since a fire could occur.
When leaving the vehicle
Do not keep the steering wheel fully turned for a long time Loading information
WA R N I N G Never overload your ve
hicle. Overloading
can damage your vehicle, adversely affectvehicle performance, including handling and braking, cause tire failure, and result in an accident.
BK0200500US.book 6 ページ 2013年2月12日 火曜日 午前9時46分
Page 307 of 451

Loading information Driving safety 6-7
6
Vehicle maximum load on the tire: load on an individual tire that is determined bydistributing to each axle its share of the maximum loaded vehicle weight and dividing by two. Vehicle normal load on the tire: load on an individual tire that is determined by dis- tributing to each axle its share of the curbweight, accessory weight, and normal occupant weight and dividing by two. Maximum loaded vehicle weight: the sum of - (a) Curb weight;(b) Accessory weight; (c) Vehicle capacity weight; and (d) Production options weight. Curb weight: the weight of a motor vehi- cle with standard e
quipment including the
maximum capacity of fuel, oil, and cool-ant. Accessory weight: the combined weight (in excess of those
standard items which
may be replaced) of automatic transmis- sion, power steering, power brakes, power windows, power seats, radio, and heater,to the extent that these items are available as factory- installed equipment (whether installed or not). Vehicle capacity weight: the rated cargo and luggage load plus 150 lbs (68 kg) * times the vehicle’s
designated seating
capacity.
Production options weight: the combined weight of those installed regular produc-tion options weighing over 5 lbs (2.3 kg) in excess of those standard items which they replace, not prev
iously considered in
curb weight or accessory weight, includ- ing heavy duty brakes,
ride levelers, roof
rack, heavy duty battery, and special trim. Normal occupant weight: 150 lbs (68 kg) * times the number of
specified occupants
(3 in the case of your vehicle) Occupant distribution:
Occupant distribu-
tion within the passenger compartment (Inyour vehicle the distribution is 2 in front, 1 in second row seat)
N00630101407
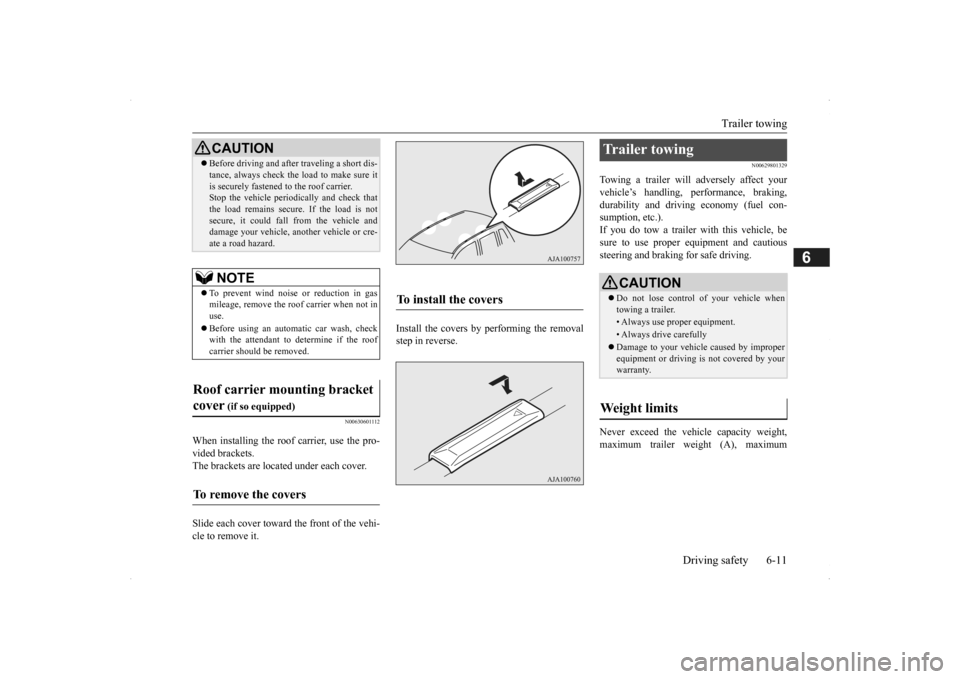
The tire and loading information placard is located on the inside sill of the driver’s door.
This placard shows the maximum number of occupants permitted to
ride in your vehicle as
well as “the combined
weight of occupants
and cargo” (A), which
is called the vehicle
capacity weight. The weight of any non-fac-tory installed options, as well as the tongue weight of a trailer being towed and roof load is included in the defi
nition of “cargo” when
determining the vehicle
capacity weight. This
placard also tells you the size and recom- mended inflation pressure for the originalequipment tires on your vehicle. For more information, refer to
“Tires” on page 9-14.
* :150 lbs (68 kg) is th
e weight of one per-
son as defined by U.S.A. and Canadian regulations.
Tire and loading information placard
BK0200500US.book 7 ページ 2013年2月12日 火曜日 午前9時46分
Page 311 of 451

Trailer towing
Driving safety 6-11
6
N00630601112
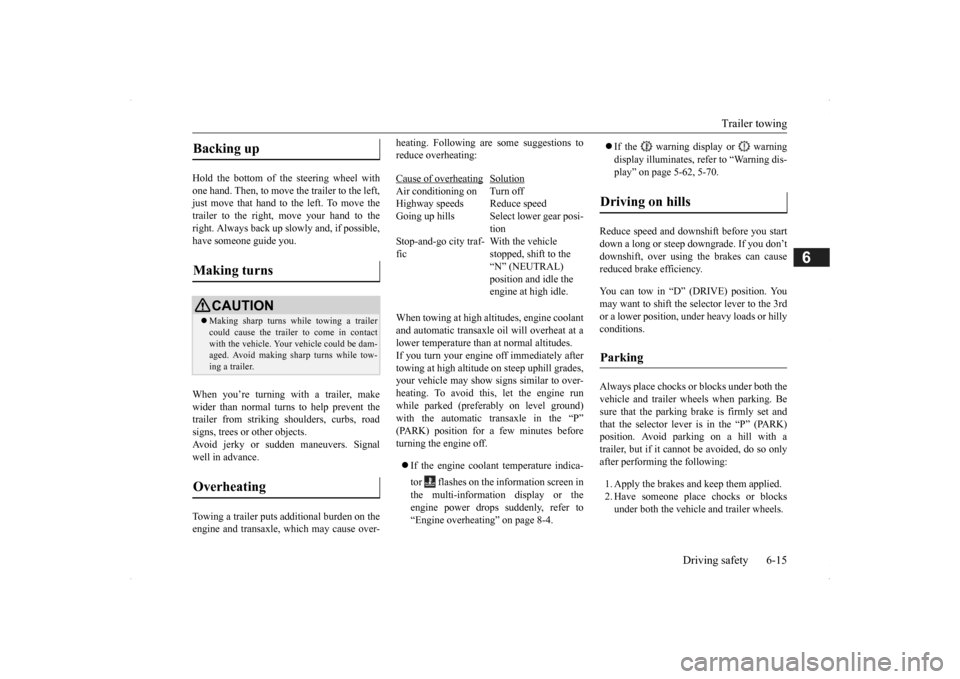
When installing the roof carrier, use the pro- vided brackets. The brackets are located under each cover. Slide each cover toward
the front of the vehi-
cle to remove it.
Install the covers by performing the removal step in reverse.
N00629801329
Towing a trailer will adversely affect your vehicle’s handling, performance, braking, durability and driving economy (fuel con-sumption, etc.). If you do tow a trailer
with this vehicle, be
sure to use proper e
quipment and cautious
steering and braking for safe driving. Never exceed the vehi
cle capacity weight,
maximum trailer weight (A), maximum
Before driving and after traveling a short dis- tance, always check the load to make sure itis securely fastened to the roof carrier.Stop the vehicle periodi
cally and check that
the load remains secure. If the load is not secure, it could fall from the vehicle anddamage your vehicle,
another vehicle or cre-
ate a road hazard.NOTE
To prevent wind noise or reduction in gas mileage, remove the roof carrier when not in use. Before using an automatic car wash, check with the attendant to determine if the roofcarrier should be removed.
Roof carrier mounting bracket cover
(if so equipped)
To remove the covers
CAUTION
To install the covers
Trailer towing
CAUTION Do not lose control of your vehicle when towing a trailer.• Always use proper equipment.• Always drive carefully Damage to your vehicle caused by improper equipment or driving is not covered by your warranty.
Weight limits
BK0200500US.book 11 ページ 2013年2月12日 火曜日 午前9時46分
Page 315 of 451

Trailer towing
Driving safety 6-15
6
Hold the bottom of the steering wheel with one hand. Then, to move the trailer to the left, just move that hand to the left. To move thetrailer to the right, move your hand to the right. Always back up sl
owly and, if possible,
have someone guide you. When you’re turning with a trailer, make wider than normal turns to help prevent the trailer from striking shoulders, curbs, roadsigns, trees or other objects. Avoid jerky or sudde
n maneuvers. Signal
well in advance. Towing a trailer puts a
dditional burden on the
engine and transaxle,
which may cause over-
heating. Following ar
e some suggestions to
reduce overheating: When towing at high al
titudes, engine coolant
and automatic transaxle oil will overheat at a lower temperature than at normal altitudes.If you turn your engine off immediately after towing at high altitude
on steep uphill grades,
your vehicle may show
signs similar to over-
heating. To avoid this
, let the engine run
while parked (preferably on level ground) with the automatic transaxle in the “P”(PARK) position for a few minutes before turning the engine off. If the engine coolant temperature indica- tor flashes on the in
formation screen in
the multi-information display or the engine power drops suddenly, refer to “Engine overheating” on page 8-4.
If the warning display or warning display illuminates, re
fer to “Warning dis-
play” on page 5-62, 5-70.
Reduce speed and downshift before you start down a long or steep downgrade. If you don’t downshift, over using the brakes can cause reduced brake efficiency. You can tow in “D” (DRIVE) position. You may want to shift the selector lever to the 3rd or a lower position, under heavy loads or hillyconditions. Always place chocks or blocks under both the vehicle and trailer wheels when parking. Be sure that the parking brake is firmly set and that the selector lever is in the “P” (PARK)position. Avoid parki
ng on a hill with a
trailer, but if it cannot be avoided, do so only after performing the following: 1. Apply the brakes and keep them applied. 2. Have someone plac
e chocks or blocks
under both the vehicle
and trailer wheels.
Backing up Making turns
CAUTION Making sharp turns while towing a trailer could cause the
trailer to come in contact
with the vehicle. Your
vehicle could be dam-
aged. Avoid making sharp turns while tow- ing a trailer.
Overheating
Cause of overheating
Solution
Air conditioning on Turn off Highway speeds Reduce speed Going up hills Select lower gear posi-
tion
Stop-and-go city traf- fic
With the vehicle stopped, shift to the “N” (NEUTRAL) position and idle the engine at high idle.
Driving on hills Parking
BK0200500US.book 15 ページ 2013年2月12日 火曜日 午前9時46分
Page 341 of 451

Operation Keys
Comfort controls 7-25
7
N00716300021 N00716400022
1. Press the PWR/VOL key. Turn the power on, and resume playback from the previous status.2. Press the PWR/VOL key. Turn the power OFF.
N00716500023
1. Turn the PWR/VOL key to adjust the vol-ume. Turn the PWR/VOL key clockwise to increase, and counter- clockwise to decrease the volume.
N00716600024
1. Insert the disc into the disc slot with thelabel surface up. Push the disc in a certain amount, and the product will pull the disc in, and playback will start. 2. Press the key. This will eject the disc from the product,so remove the disc.
Operation Keys Turn the Power ON/ OFF
NOTE
Hold down the steering MODE key to also turn the audio function ON/OFF.
Adjust Volume
NOTE
The maximum value for volume is 45, and the minimum is 0. The initial setting for volume is “17”.
Insert/Eject Discs
CAUTIONWhen replacing discs, first ensure that the vehicle is stopped in an
area in which stop-
ping is permitted. Do not insert your hand, fingers, or foreign objects into the disc slot. This may lead to injury, smoking, or fire. 3 inches (8 cm) CDs are not supported.Disc * Label side
Disc slot
BK0200500US.book 25 ページ 2013年2月12日 火曜日 午前9時46分