2014 FIAT 500L LIVING climate control
[x] Cancel search: climate controlPage 2 of 420
We really know your car because we invented, designed and built it: we really know every single detail.
At Fiat Service authorised workshopsyou can find technicians directly trained by us,
offering quality and professionalism for all service operations.
Fiat workshops are always close to you for the regular servicing operations, season checks
and practical recommendations by our experts.
With Fiat Genuine Parts you keep the reliability, comfort and performance features
of your new car unchanged in time: that's why you bought it for.
Always ask for Genuine Parts for the components used on our cars; we recommend them because
they come from our steady commitment in research and development of highly innovative technologies.
For all these reasons: rely on Genuine Parts, because they are the only ones designed
by Fiat for your car.
SAFETY:
BRAKING SYSTEMENVIRONMENT: PARTICULATE FILTERS,
CLIMATE CONTROL MAINTENANCECOMFORT: SUSPENSION
AND WINDSCREEN WIPERS PERFORMANCE: SPARK PLUGS,
INJECTORS AND BATTERIESLINEACCESSORI
ROOF RACK BARS, WHEEL RIMS
WHY CHOOSING
GENUINE PARTS
COP 500L UM GB SISTEMA 15-06-2012 8:30 Pagina 2
Page 7 of 420

GETTING TO KNOW YOUR CAR
DASHBOARDThe presence and position of the controls, instruments and indicators may vary according to the different
versions.1. Adjustable and directable air diffusers 2. Radio controls on the steering wheel (for versions/markets, where provided)
3. Exterior light control stalk 4. Instrument panel 5. Windscreen wiper/rear window wiper/trip computer control stalk
6. Adjustable and directable centre air vents 7. Fixed upper air vent 8. Passenger front airbag 9. Upper glove
compartment (for versions/markets, where provided the compartment may be conditioned) 10. Storage compartment
11. Lower glove compartment 12. Control buttons 13. Heating/ventilation system or manual climate control (for
versions/markets, where provided) or automatic dual zone climate control (for versions/markets, where provided)
14. USB port/AUX socket (for versions/markets, where provided) 15.
UConnect
vided) or radio system setup 16. Ignition switch 17. Driver front airbag 18. Cruise Control/Speed Limiter lever (for
versions/markets, where provided)
fig. 1
F0Y0042
3GETTING TO
KNOW YOUR CARSAFETY
STARTING AND
DRIVING
WARNING LIGHTS
AND MESSAGES
IN AN EMERGENCY
SERVICING AND
MAINTENANCE
TECHNICAL
SPECIFICATIONS
INDEX
™ (for versions/markets, where pro-
Page 16 of 420
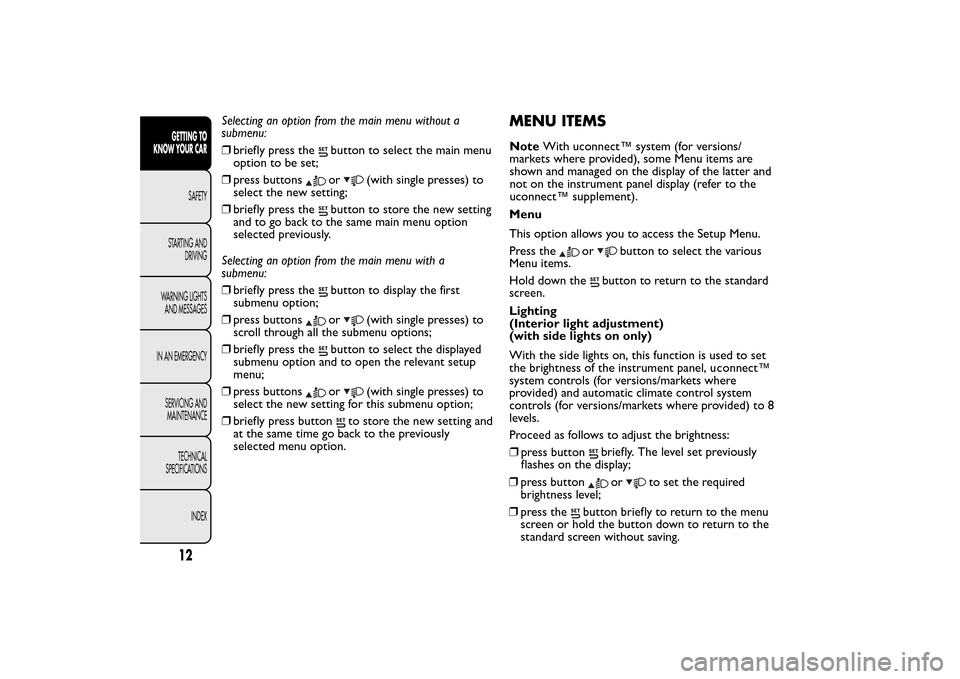
Selecting an option from the main menu without a
submenu:
❒briefly press the
button to select the main menu
option to be set;
❒press buttonsor
(with single presses) to
select the new setting;
❒briefly press the
button to store the new setting
and to go back to the same main menu option
selected previously.
Selecting an option from the main menu with a
submenu:
❒briefly press thebutton to display the first
submenu option;
❒press buttonsor
(with single presses) to
scroll through all the submenu options;
❒briefly press the
button to select the displayed
submenu option and to open the relevant setup
menu;
❒press buttonsor
(with single presses) to
select the new setting for this submenu option;
❒briefly press button
to store the new setting and
at the same time go back to the previously
selected menu option.
MENU ITEMSMenu
This option allows you to access the Setup Menu.
Press the
or
button to select the various
Menu items.
Hold down the
button to return to the standard
screen.
Lighting
(Interior light adjustment)
(with side lights on only)
With the side lights on, this function is used to set
the brightness of the instrument panel, uconnect™
system controls (for versions/markets where
provided) and automatic climate control system
controls (for versions/markets where provided) to 8
levels.
Proceed as follows to adjust the brightness:
❒press buttonbriefly. The level set previously
flashes on the display;
12GETTING TO
KNOW YOUR CAR
SAFETY
STARTING AND
DRIVING
WARNING LIGHTS
AND MESSAGES
IN AN EMERGENCY
SERVICING AND
MAINTENANCE
TECHNICAL
SPECIFICATIONS
INDEX
❒press button
or
to set the required
brightness level;
❒press the
button briefly to return to the menu
screen or hold the button down to return to the
standard screen without saving. NoteWith uconnect™ system (for versions/
markets where provided), some Menu items are
shown and managed on the display of the latter and
not on the instrument panel display (refer to the
uconnect™ supplement).
Page 45 of 420
CLIMATE CONTROLSIDE AIR DIFFUSERS
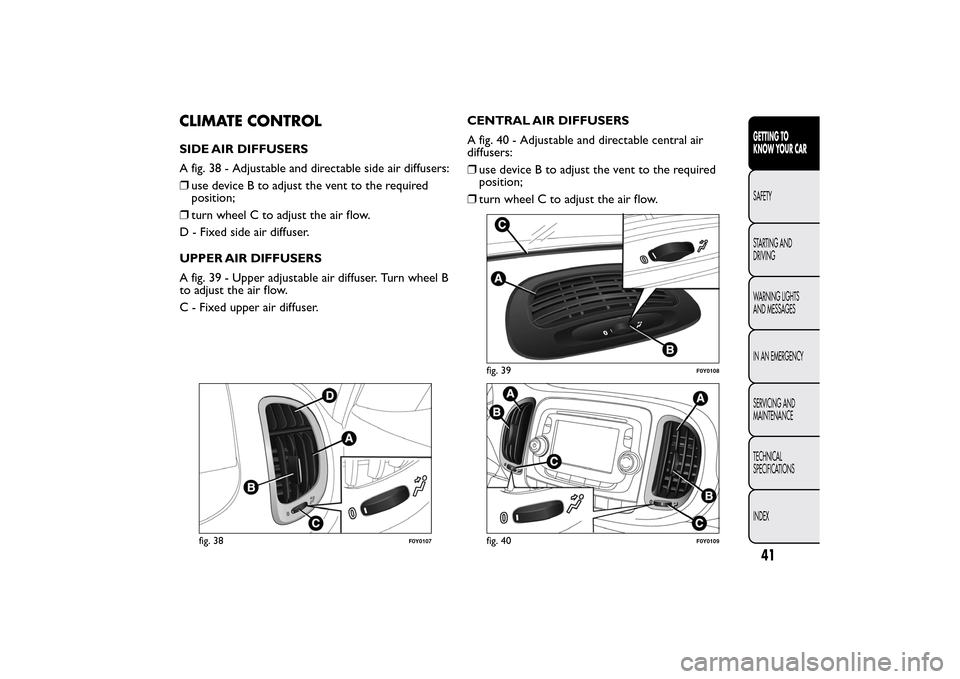
A fig. 38 - Adjustable and directable side air diffusers:
❒use device B to adjust the vent to the required
position;
❒turn wheel C to adjust the air flow.
D - Fixed side air diffuser.
UPPER AIR DIFFUSERS
A fig. 39 - Upper adjustable air diffuser. Turn wheel B
to adjust the air flow.
C - Fixed upper air diffuser.CENTRAL AIR DIFFUSERS
A fig. 40 - Adjustable and directable central air
diffusers:
❒use device B to adjust the vent to the required
position;
❒turn wheel C to adjust the air flow.
fig. 38
F0Y0107
fig. 39
F0Y0108
fig. 40
F0Y0109
41GETTING TO
KNOW YOUR CARSAFETY
STARTING AND
DRIVING
WARNING LIGHTS
AND MESSAGES
IN AN EMERGENCY
SERVICING AND
MAINTENANCE
TECHNICAL
SPECIFICATIONS
INDEX
Page 51 of 420
MANUAL CLIMATECONTROL SYSTEMCONTROLS
fig. 43
F0Y0041
47GETTING TO
KNOW YOUR CARSAFETY
STARTING AND
DRIVING
WARNING LIGHTS
AND MESSAGES
IN AN EMERGENCY
SERVICING AND
MAINTENANCE
TECHNICAL
SPECIFICATIONS
INDEX
Page 52 of 420
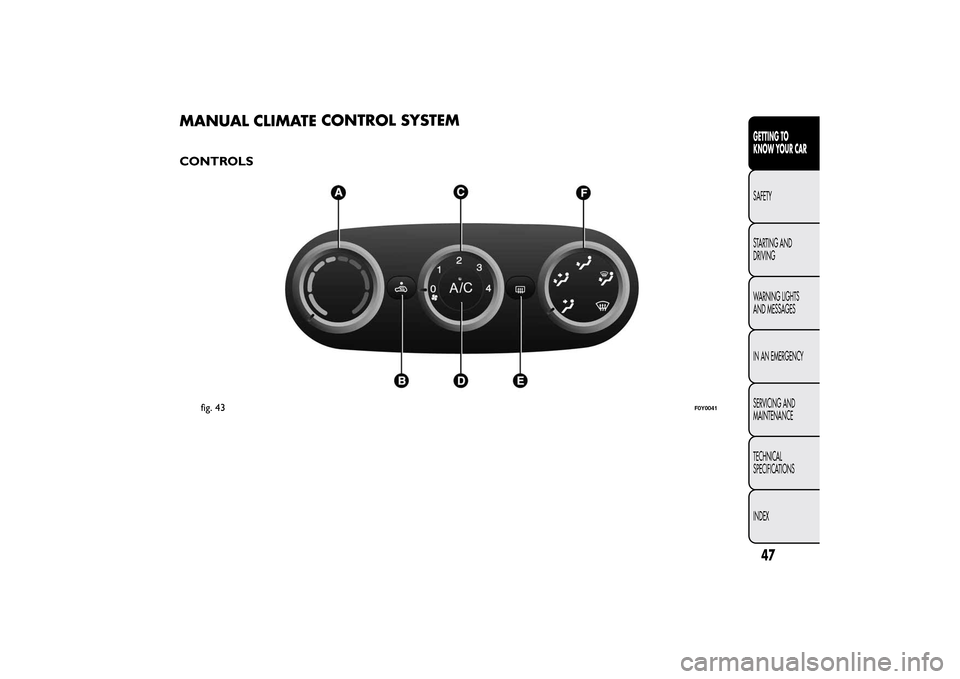
A - Air temperature adjustment knob:
❒blue section = cold air
❒red section = hot air
B - air recirculation on/off button;
C - fan activation/adjustment knob:
❒0 = fan off
❒1-2-3-4 = fan speed
D - climate control system compressor on/off
button;
E - heated rear window on/off button;
F - air distribution knob:
air from central outlets and side ventsair from central outlets, side vents and front and
rear footwell ventsair only from front and rear footwell ventsair from front and rear footwell vents, to
windscreen and side windowsair outlet to windscreen and side windows
CLIMATE CONTROL SYSTEM (cooling)
To cool the passenger compartment, proceed as
follows:
❒turn knob A to the blue section;
❒press button B to enable internal air recirculation
(LED on button on);❒turn knob F to
;
❒press button D to activate climate control system
and turn knob C to at least 1 (1
stspeed). For
rapid cooling, turn knob C to 4 (maximum fan
speed).
IMPORTANT According to particular outside
environmental conditions, the climate control system
activates recirculation automatically (for versions/
markets, where additional heater provided).
Reduction in cooling
❒turn knob A clockwise to increase the
temperature;
❒press button B to deactivate internal air
recirculation (LED on button off );
❒turn knob C to reduce the fan speed.
PASSENGER COMPARTMENT HEATING
To heat the passenger compartment, proceed as
follows:
❒turn knob A to the red section;
❒press button B to enable internal air recirculation
(LED on button on);
❒turn knob F to
;
❒turn knob C to at least 1 (1
stspeed). For rapid
heating, turn knob C to 4 (maximum fan speed).
48GETTING TO
KNOW YOUR CAR
SAFETY
STARTING AND
DRIVING
WARNING LIGHTS
AND MESSAGES
IN AN EMERGENCY
SERVICING AND
MAINTENANCE
TECHNICAL
SPECIFICATIONS
INDEX
Page 53 of 420
Reduction in heating
❒turn knob A anticlockwise to decrease the
temperature;
❒press button B to deactivate internal air
recirculation (LED on button off );
❒turn knob C to reduce the fan speed.
IMPORTANT When the engine is cold, it takes a few
minutes to achieve optimum passenger compartment
heating.
RAPID DEMISTING/DEFROSTING
This operation allows the windscreen and front side
windows to be rapidly demisted/defrosted.
For rapid demisting/defrosting, proceed as follows:
❒turn knob A to the red section;
❒turn knob C to 4 (maximum fan speed);
❒turn knob F to
.
IMPORTANT In this condition, the climate control
system deactivates the recirculation function (LED
on button B off ) and activates the compressor (LED
on button D on). The purpose of this automatic
operation is to prevent the window misting up.
Window demisting
The climate control system is very useful in
preventing the windows from misting up in the event
of high levels of humidity.In the event of considerable external humidity and/or
rain and/or large differences in temperature inside
and outside the passenger compartment, perform
the following preventive window demisting
procedure:
❒turn knob A to the red section;
❒turn knob F to
with the possibility of moving it
to position
if misting does not occur;
❒turn knob C to the 2
nd
speed.
HEATED REAR WINDOW
DEMISTING/DEFROSTING
Press button E (
) to turn the function on/off.
Warning lighton the instrument panel comes on
to show that the function has been activated. The
function is automatically deactivated after 20
minutes.
For versions/markets where provided, press the
button to activate demisting/defrosting of door
mirrors and heated windscreen (for versions/
markets, where provided).
IMPORTANT Do not affix stickers to the inside of
the heated rear window over the heating filaments,
to avoid damage that might cause them to stop
working properly.
49GETTING TO
KNOW YOUR CARSAFETY
STARTING AND
DRIVING
WARNING LIGHTS
AND MESSAGES
IN AN EMERGENCY
SERVICING AND
MAINTENANCE
TECHNICAL
SPECIFICATIONS
INDEX
Page 54 of 420
INTERNAL AIR RECIRCULATION
Press button B (
) so that the LED on the
button switches on. It is advisable to switch internal
air recirculation on while standing in traffic or in
tunnels to prevent the introduction of polluted air.
Do not use the function for a long time, particularly
if there are many passengers on board, to prevent
the windows from misting up.
IMPORTANT Internal air recirculation makes it
possible to reach the required heating or cooling
conditions more quickly depending on the mode
selected. Do not use the internal air recirculation
function on rainy/cold days as it would considerably
increase the possibility of the windows misting.AIR DISTRIBUTION SELECTION
Turn knob F to manually select one of the five
possible air distribution settings in the passenger
compartment:
Air flow to the windscreen, front side window
and front/rear footwell diffusers.Air flow to the front/rear footwell diffusers. This
air distribution allows the passenger
compartment to be heated quickly.Air flow distributed between central and side
dashboard diffusers and front/rear footwell
diffusers.Air flow to central/side dashboard vents
(passenger’s body).Air flow to windscreen and side windows.
Selecting the footwell/windscreen or only windscreen
distribution activates the climate control system
compressor (LED on A/C button on) and the air
recirculation is set to "outside air" (LED on button B
off ). This logic guarantees optimum visibility at the
windows. The user can always set air recirculation
and climate control system compressor.
50GETTING TO
KNOW YOUR CAR
SAFETY
STARTING AND
DRIVING
WARNING LIGHTS
AND MESSAGES
IN AN EMERGENCY
SERVICING AND
MAINTENANCE
TECHNICAL
SPECIFICATIONS
INDEX