2014 FIAT 500L LIVING headlights
[x] Cancel search: headlightsPage 11 of 420

DISPLAYThe car may be provided with a multifunction or
reconfigurable multifunction display that shows useful
information, according to the previous settings,
when driving.
With the ignition key removed, the display activates
and shows the time and total milometer reading
(in km or miles) for a few seconds when a front door
is opened/closed.
NOTE With a very low outside temperature (below
0°C) it may take longer than normal for information
to appear on the display.MULTIFUNCTION DISPLAY "STANDARD"
SCREEN
The following information is shown on the display
fig. 5:
A
Date
BActivation of Dualdrive electric power steering
(CITY indication) or of ECO driving mode (ECO
indication)C
Gear Shift Indicator (for versions/markets, where
provided)
D
Headlight alignment position (only with dipped
headlights on)
EOdometer (display of distance travelled in
kilometres/miles)FTime (always displayed, even with key removed and
doors closed)G
Start&Stop function indication (for versions/
markets where provided)
H
Outside temperature (for versions/markets, where
provided)
I"Speed limiter" display (for versions/markets, where
provided)
fig. 5
F0Y1101
7GETTING TO
KNOW YOUR CARSAFETY
STARTING AND
DRIVING
WARNING LIGHTS
AND MESSAGES
IN AN EMERGENCY
SERVICING AND
MAINTENANCE
TECHNICAL
SPECIFICATIONS
INDEX
Page 12 of 420

RECONFIGURABLE MULTIFUNCTION
DISPLAY "STANDARD" SCREEN
Versions without "Speed Limiter"
The following information appears on the display
fig. 6:A
Time
BDate or trip distance display in kilometres
(or miles)C
Outside temperature (for versions/markets, where
provided)
D
Gear Shift Indicator (for versions/markets, where
provided)
EOdometer (display of distance travelled in
kilometres/miles)FHeadlight alignment position (only with dipped
headlights on)G
Car status indication (e.g. doors open, possible ice
on road, etc.)
On some versions the display shows the turbine
pressure fig. 7.
fig. 6
F0Y1102
fig. 7
F0Y0186
8
GETTING TO
KNOW YOUR CAR
SAFETY
STARTING AND
DRIVING
WARNING LIGHTS
AND MESSAGES
IN AN EMERGENCY
SERVICING AND
MAINTENANCE
TECHNICAL
SPECIFICATIONS
INDEX
Page 13 of 420

Versions with "Speed Limiter"
(for versions/markets, where provided)
The following information appears on the display
fig. 8:A
Time
BDate or trip distance display in kilometres
(or miles)C
Gear Shift Indicator (for versions/markets, where
provided) or Start&Stop function indication (for
versions/markets, where provided)
D
"Speed limiter" display (for versions/markets,
where provided)
EOdometer (display of distance travelled in
kilometres/miles)
FHeadlight alignment position (only with dipped
headlights on)G
Outside temperature (for versions/markets, where
provided)
H
Car status indication (e.g. doors open, possible ice
on road, etc.)
fig. 8
F0Y1103
9GETTING TO
KNOW YOUR CARSAFETY
STARTING AND
DRIVING
WARNING LIGHTS
AND MESSAGES
IN AN EMERGENCY
SERVICING AND
MAINTENANCE
TECHNICAL
SPECIFICATIONS
INDEX
Page 18 of 420
Headlight sensor
(Automatic headlight/dusk sensor sensitivity
adjustment)
(for versions/markets, where provided)
This function is used to turn the headlights on or off
according to external light conditions.
The dusk sensor sensitivity can be adjusted according
to 3 levels (level 1 = minimum sensitivity, level 2 =
medium sensitivity, level 3 = maximum sensitivity);
the greater the sensitivity set, the less the external
light variation needed to turn on the lights (e.g. with
a setting on level 3 at sunset the headlights switch
on earlier than in levels 1 and 2).
Proceed as follows to set:
❒press button
briefly. The level set previously
flashes on the display;
❒press theor
button to make the
adjustment;
❒press the
button briefly to return to the menu
screen or hold the button down to return to the
standard screen without storing.
Cornering lights
(Activation/deactivation of cornering lights)
(for versions/markets, where provided)
This function activates/deactivates ("On"/"Off") the
cornering lights (see the description in the “Exterior
lights” paragraph).Proceed as follows to activate/deactivate the lights:
❒press button
briefly. "On" or "Off" flash on
the display, according to what has been previously
set;
❒press
or
to make your choice;
❒press the
button briefly to return to the menu
screen or hold the button down to return to the
standard screen without storing.
Rain sensor
(Rain sensor sensitivity adjustment)
(for versions/markets, where provided)
This function allows you to adjust the rain sensor
sensitivity to 4 levels.
To set the required sensitivity level, proceed as
follows:
❒press button
briefly. The sensitivity “level” set
previously flashes on the display;
❒press theor
button to make the
adjustment;
❒press the
button briefly to return to the menu
screen or hold the button down to return to the
standard screen without storing.
14GETTING TO
KNOW YOUR CAR
SAFETY
STARTING AND
DRIVING
WARNING LIGHTS
AND MESSAGES
IN AN EMERGENCY
SERVICING AND
MAINTENANCE
TECHNICAL
SPECIFICATIONS
INDEX
Page 66 of 420
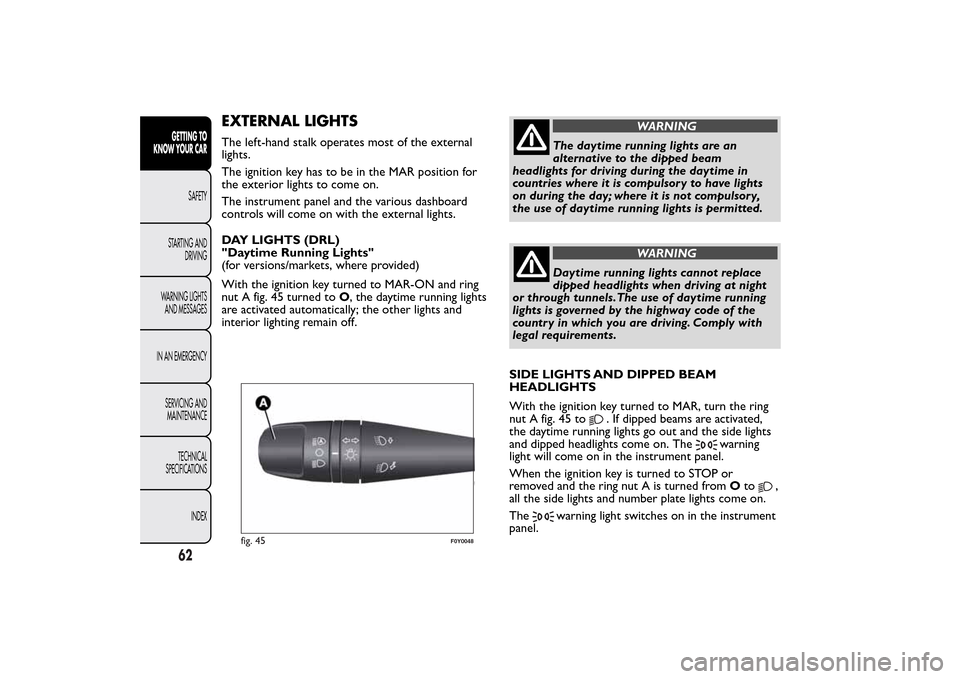
EXTERNAL LIGHTSThe left-hand stalk operates most of the external
lights.
The ignition key has to be in the MAR position for
the exterior lights to come on.
The instrument panel and the various dashboard
controls will come on with the external lights.
DAY LIGHTS (DRL)
"Daytime Running Lights"
(for versions/markets, where provided)
With the ignition key turned to MAR-ON and ring
nut A fig. 45 turned toO, the daytime running lights
are activated automatically; the other lights and
interior lighting remain off.
WARNING
The daytime running lights are an
alternative to the dipped beam
headlights for driving during the daytime in
countries where it is compulsory to have lights
on during the day; where it is not compulsory,
the use of daytime running lights is permitted.
WARNING
Daytime running lights cannot replace
dipped headlights when driving at night
or through tunnels.The use of daytime running
lights is governed by the highway code of the
country in which you are driving. Comply with
legal requirements.
SIDE LIGHTS AND DIPPED BEAM
HEADLIGHTS
With the ignition key turned to MAR, turn the ring
nut A fig. 45 to
. If dipped beams are activated,
the daytime running lights go out and the side lights
and dipped headlights come on. The
warning
light will come on in the instrument panel.
When the ignition key is turned to STOP or
removed and the ring nut A is turned fromOto
,
all the side lights and number plate lights come on.
The
warning light switches on in the instrument
panel.
fig. 45
F0Y0048
62GETTING TO
KNOW YOUR CAR
SAFETY
STARTING AND
DRIVING
WARNING LIGHTS
AND MESSAGES
IN AN EMERGENCY
SERVICING AND
MAINTENANCE
TECHNICAL
SPECIFICATIONS
INDEX
Page 67 of 420
AUTOMATIC LIGHT CONTROL
(AUTOLIGHT)
(Dusk sensor)
(for versions/markets, where provided)
This infrared LED sensor, combined with the rain
sensor and located on the windscreen, detects the
variations in outside brightness depending on the
light sensitivity set with the Setup Menu: the greater
the sensitivity, the less external light is required to
activate the exterior lights.
Activation
The dusk sensor activates when ring nut A fig. 45 is
turned to
. In this way the side lights and dipped
headlights are activated automatically according to
the external light level.
Following automatic light activation, the fog lights
(for versions/markets, where provided) and rear fog
light may still be switched on. When the lights are
automatically switched off, the front and rear fog
lights (if activated) are also switched off. The next
time the lights are switched on automatically, the fog
lights must be reactivated manually (if required).
With dusk sensor active, it is not possible to keep
the main beam headlights on constantly; only flashing
is permitted. To switch these lights on constantly,
turn ring nut A to
and pull the stalk towards the
steering wheel.On automatic sensor controlled deactivation, the
dipped headlights are deactivated first, followed
by the side lights a few seconds later.
If the sensor is activated but is malfunctioning, the
side lights and dipped beam headlights are switched
on irrespective of the outside light level: the sensor
failure is indicated on the display. It is also possible to
deactivate the sensor and switch on the desired
lights, if necessary.
IMPORTANT The sensor cannot detect the presence
of fog. These lights must therefore be switched on
manually in these circumstances.
MAIN BEAM HEADLIGHTS
To activate the main beam headlights, with ring nut A
at
, pull the stalk towards the steering wheel
beyond the end of travel position.
Thewarning light switches on in the instrument
panel.
When the stalk is pulled towards the steering wheel
again, beyond the end of travel position, the main
beam headlights deactivate, the dipped beam
headlights reactivate and the warning light
switches off.
It is not possible to switch on the main beam
headlights in fixed mode if the automatic lighting
control system is active.
63GETTING TO
KNOW YOUR CARSAFETY
STARTING AND
DRIVING
WARNING LIGHTS
AND MESSAGES
IN AN EMERGENCY
SERVICING AND
MAINTENANCE
TECHNICAL
SPECIFICATIONS
INDEX
Page 81 of 420
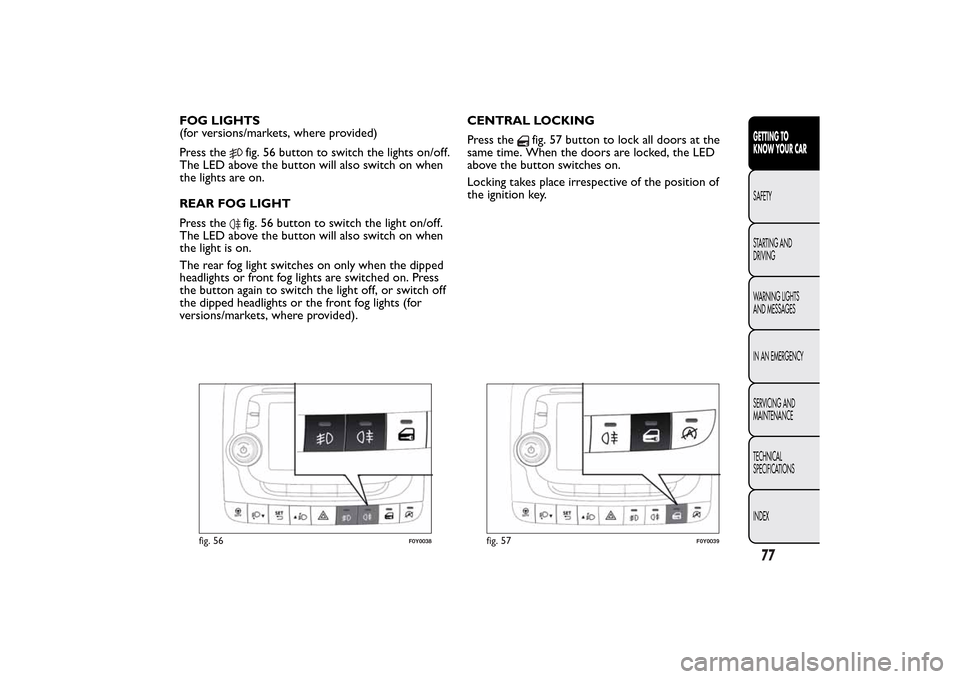
FOG LIGHTS
(for versions/markets, where provided)
Press the
fig. 56 button to switch the lights on/off.
The LED above the button will also switch on when
the lights are on.
REAR FOG LIGHT
Press thefig. 56 button to switch the light on/off.
The LED above the button will also switch on when
the light is on.
The rear fog light switches on only when the dipped
headlights or front fog lights are switched on. Press
the button again to switch the light off, or switch off
the dipped headlights or the front fog lights (for
versions/markets, where provided).CENTRAL LOCKING
Press the
fig. 57 button to lock all doors at the
same time. When the doors are locked, the LED
above the button switches on.
Locking takes place irrespective of the position of
the ignition key.
fig. 56
F0Y0038
fig. 57
F0Y0039
77GETTING TO
KNOW YOUR CARSAFETY
STARTING AND
DRIVING
WARNING LIGHTS
AND MESSAGES
IN AN EMERGENCY
SERVICING AND
MAINTENANCE
TECHNICAL
SPECIFICATIONS
INDEX
Page 113 of 420
HEADLIGHTSLIGHT BEAM DIRECTION
The correct alignment of the headlights is important
for the comfort and safety of not only the driver
but all other road users. This is also covered by
a specific rule of the highway code.
The headlights must be correctly aligned to
guarantee the best visibility conditions for all drivers
while travelling with headlights on.
Contact a Fiat Dealership to have the headlights
checked and adjusted, if necessary.
Check beam alignment every time the load or its
distribution changes.
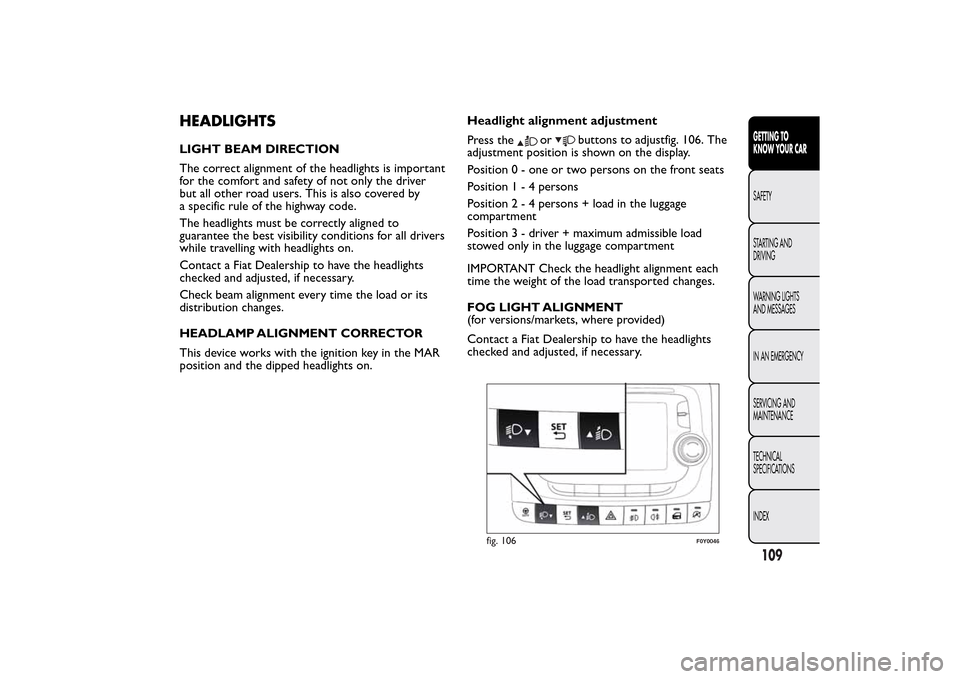
HEADLAMP ALIGNMENT CORRECTOR
This device works with the ignition key in the MAR
position and the dipped headlights on.Headlight alignment adjustment
Press the
or
buttons to adjustfig. 106. The
adjustment position is shown on the display.
Position 0 - one or two persons on the front seats
Position1-4persons
Position2-4persons + load in the luggage
compartment
Position 3 - driver + maximum admissible load
stowed only in the luggage compartment
IMPORTANT Check the headlight alignment each
time the weight of the load transported changes.
FOG LIGHT ALIGNMENT
(for versions/markets, where provided)
Contact a Fiat Dealership to have the headlights
checked and adjusted, if necessary.
fig. 106
F0Y0046
109GETTING TO
KNOW YOUR CARSAFETY
STARTING AND
DRIVING
WARNING LIGHTS
AND MESSAGES
IN AN EMERGENCY
SERVICING AND
MAINTENANCE
TECHNICAL
SPECIFICATIONS
INDEX