2014 FIAT 500L LIVING bonnet
[x] Cancel search: bonnetPage 28 of 420
SYMBOLSSpecial coloured labels have been attached near to or
on some of the components of your car. These
labels bear symbols that remind you of the
precautions to be taken with regard to that
particular component.
Under the bonnet there is also a label that
summarises all the symbols.
THE FIAT CODE SYSTEMTo further protect your car from theft, it has been
fitted with an engine immobilising system. It is
automatically activated when the ignition key is
removed.
There is an electronic device in each key which can
identify the signal emitted, when the engine is
started, from an aerial built into the ignition switch.
The signal is the "password", different every time the
vehicle is started, through which the control unit
recognises the key and enables starting.
OPERATION
Each time the vehicle is started turning the ignition
key to MAR-ON, the Fiat CODE system control unit
sends an acknowledgement code to the engine
control unit to deactivate the immobiliser. The code
is sent only if the Fiat CODE system control unit
has acknowledged the code received from the key.
Each time the ignition key is turned to STOP, the Fiat
CODE system deactivates the functions of the
engine management control unit.
If, during starting, the code is not correctly
recognised, the
warning light switches on in the
instrument panel.
In this case, turn the key to STOP and then to
MAR-ON; if it is still locked, try again with the other
keys that come with the vehicle. Contact a Fiat
Dealership if you still cannot start the engine.
24GETTING TO
KNOW YOUR CAR
SAFETY
STARTING AND
DRIVING
WARNING LIGHTS
AND MESSAGES
IN AN EMERGENCY
SERVICING AND
MAINTENANCE
TECHNICAL
SPECIFICATIONS
INDEX
Page 110 of 420
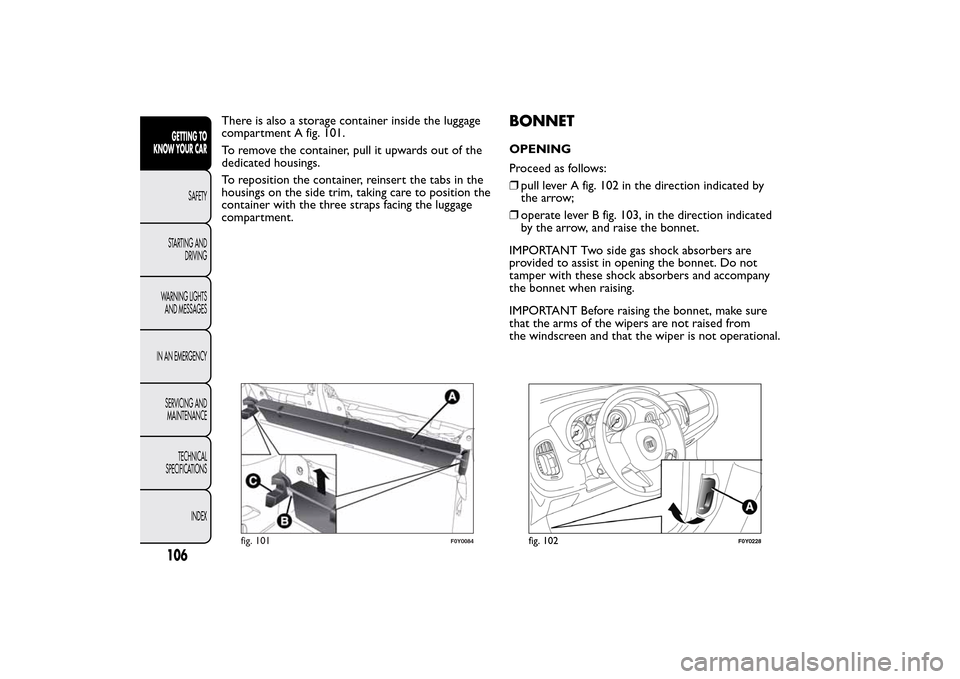
There is also a storage container inside the luggage
compartment A fig. 101.
To remove the container, pull it upwards out of the
dedicated housings.
To reposition the container, reinsert the tabs in the
housings on the side trim, taking care to position the
container with the three straps facing the luggage
compartment.
BONNETOPENING
Proceed as follows:
❒pull lever A fig. 102 in the direction indicated by
the arrow;
❒operate lever B fig. 103, in the direction indicated
by the arrow, and raise the bonnet.
IMPORTANT Two side gas shock absorbers are
provided to assist in opening the bonnet. Do not
tamper with these shock absorbers and accompany
the bonnet when raising.
IMPORTANT Before raising the bonnet, make sure
that the arms of the wipers are not raised from
the windscreen and that the wiper is not operational.
fig. 101
F0Y0084
fig. 102
F0Y0228
106GETTING TO
KNOW YOUR CAR
SAFETY
STARTING AND
DRIVING
WARNING LIGHTS
AND MESSAGES
IN AN EMERGENCY
SERVICING AND
MAINTENANCE
TECHNICAL
SPECIFICATIONS
INDEX
Page 111 of 420
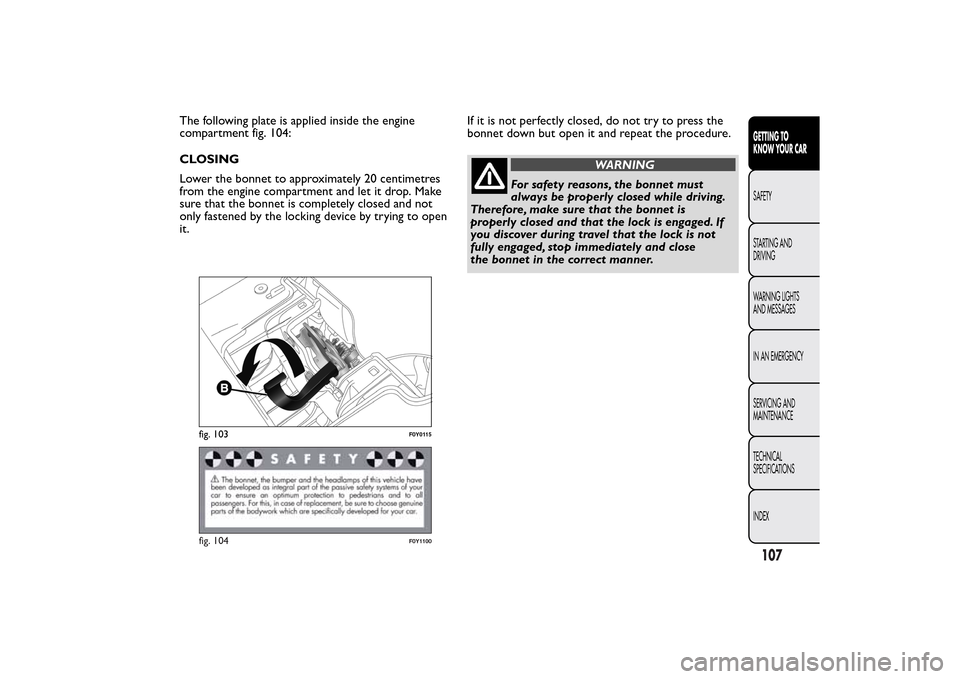
The following plate is applied inside the engine
compartment fig. 104:
CLOSING
Lower the bonnet to approximately 20 centimetres
from the engine compartment and let it drop. Make
sure that the bonnet is completely closed and not
only fastened by the locking device by trying to open
it.If it is not perfectly closed, do not try to press the
bonnet down but open it and repeat the procedure.
WARNING
For safety reasons, the bonnet must
always be properly closed while driving.
Therefore, make sure that the bonnet is
properly closed and that the lock is engaged. If
you discover during travel that the lock is not
fully engaged, stop immediately and close
the bonnet in the correct manner.
fig. 103
F0Y0115
fig. 104
F0Y1100
107GETTING TO
KNOW YOUR CARSAFETY
STARTING AND
DRIVING
WARNING LIGHTS
AND MESSAGES
IN AN EMERGENCY
SERVICING AND
MAINTENANCE
TECHNICAL
SPECIFICATIONS
INDEX
Page 124 of 420
IMPORTANT After turning the ignition key to STOP,
wait at least 1 minute before disconnecting the
electrical supply to the battery.
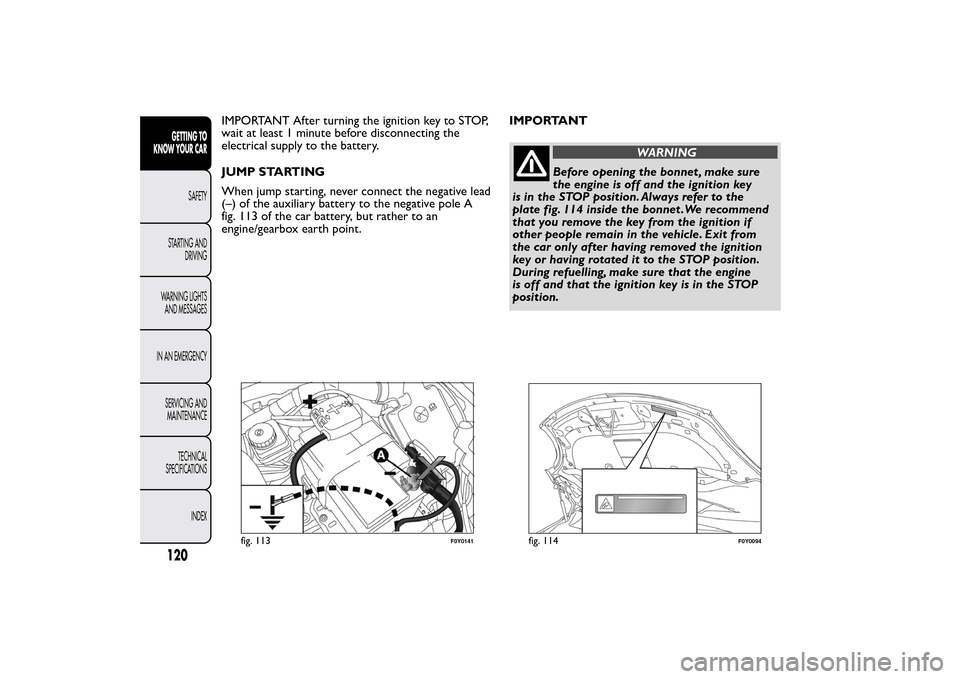
JUMP STARTING
When jump starting, never connect the negative lead
(–) of the auxiliary battery to the negative pole A
fig. 113 of the car battery, but rather to an
engine/gearbox earth point.IMPORTANT
WARNING
Before opening the bonnet , make sure
the engine is off and the ignition key
is in the STOP position. Always refer to the
plate fig. 114 inside the bonnet .We recommend
that you remove the key from the ignition if
other people remain in the vehicle. Exit from
the car only after having removed the ignition
key or having rotated it to the STOP position.
During refuelling, make sure that the engine
is off and that the ignition key is in the STOP
position.
fig. 113
F0Y0141
fig. 114
F0Y0094
120GETTING TO
KNOW YOUR CAR
SAFETY
STARTING AND
DRIVING
WARNING LIGHTS
AND MESSAGES
IN AN EMERGENCY
SERVICING AND
MAINTENANCE
TECHNICAL
SPECIFICATIONS
INDEX
Page 128 of 420
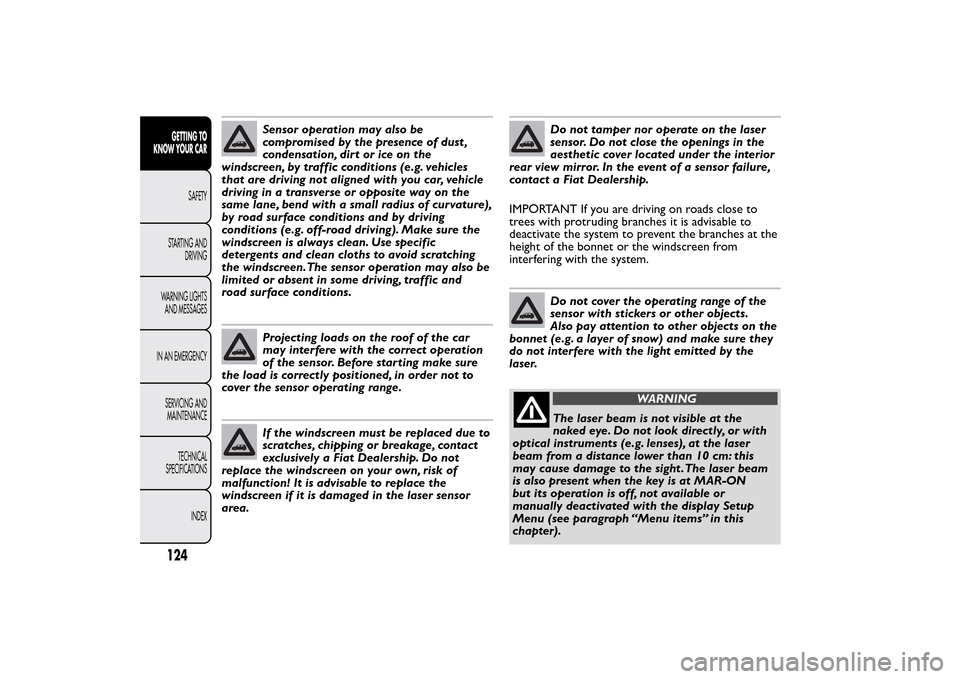
Sensor operation may also be
compromised by the presence of dust ,
condensation, dirt or ice on the
windscreen, by traffic conditions (e.g. vehicles
that are driving not aligned with you car, vehicle
driving in a transverse or opposite way on the
same lane, bend with a small radius of curvature),
by road surface conditions and by driving
conditions (e.g. off-road driving). Make sure the
windscreen is always clean. Use specific
detergents and clean cloths to avoid scratching
the windscreen.The sensor operation may also be
limited or absent in some driving, traffic and
road surface conditions.Projecting loads on the roof of the car
may interfere with the correct operation
of the sensor. Before starting make sure
the load is correctly positioned, in order not to
cover the sensor operating range.If the windscreen must be replaced due to
scratches, chipping or breakage, contact
exclusively a Fiat Dealership. Do not
replace the windscreen on your own, risk of
malfunction! It is advisable to replace the
windscreen if it is damaged in the laser sensor
area.
Do not tamper nor operate on the laser
sensor. Do not close the openings in the
aesthetic cover located under the interior
rear view mirror. In the event of a sensor failure,
contact a Fiat Dealership.
IMPORTANT If you are driving on roads close to
trees with protruding branches it is advisable to
deactivate the system to prevent the branches at the
height of the bonnet or the windscreen from
interfering with the system.Do not cover the operating range of the
sensor with stickers or other objects.
Also pay attention to other objects on the
bonnet (e.g. a layer of snow) and make sure they
do not interfere with the light emitted by the
laser.
WARNING
The laser beam is not visible at the
naked eye. Do not look directly, or with
optical instruments (e.g. lenses), at the laser
beam from a distance lower than 10 cm: this
may cause damage to the sight .The laser beam
is also present when the key is at MAR-ON
but its operation is off, not available or
manually deactivated with the display Setup
Menu (see paragraph “Menu items” in this
chapter).
124GETTING TO
KNOW YOUR CAR
SAFETY
STARTING AND
DRIVING
WARNING LIGHTS
AND MESSAGES
IN AN EMERGENCY
SERVICING AND
MAINTENANCE
TECHNICAL
SPECIFICATIONS
INDEX
Page 198 of 420
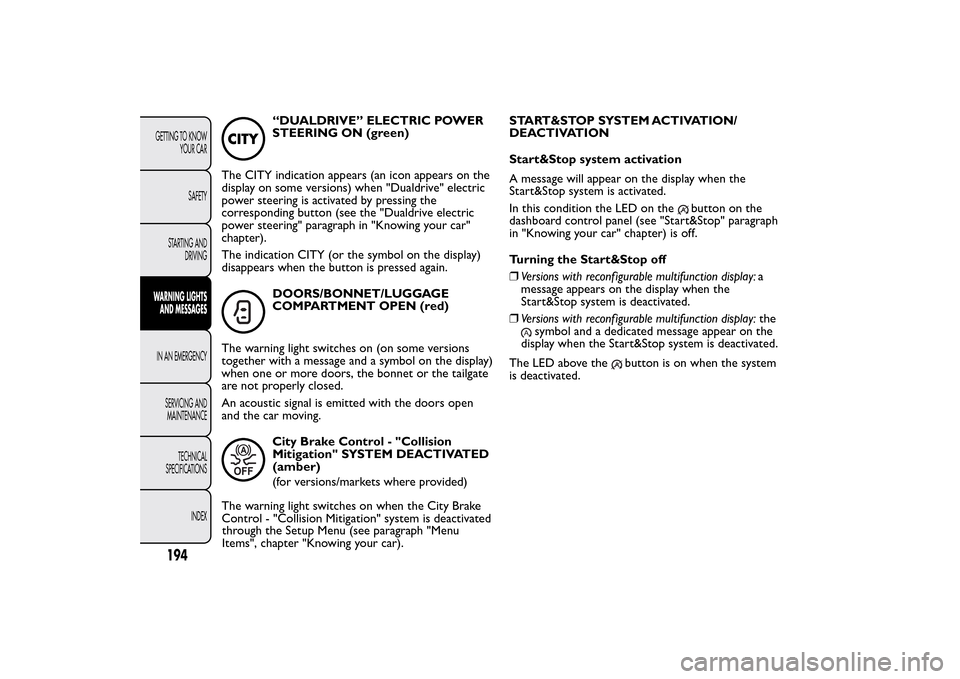
“DUALDRIVE” ELECTRIC POWER
STEERING ON (green)
The CITY indication appears (an icon appears on the
display on some versions) when "Dualdrive" electric
power steering is activated by pressing the
corresponding button (see the "Dualdrive electric
power steering" paragraph in "Knowing your car"
chapter).
The indication CITY (or the symbol on the display)
disappears when the button is pressed again.DOORS/BONNET/LUGGAGE
COMPARTMENT OPEN (red)
The warning light switches on (on some versions
together with a message and a symbol on the display)
when one or more doors, the bonnet or the tailgate
are not properly closed.
An acoustic signal is emitted with the doors open
and the car moving.City Brake Control - "Collision
Mitigation" SYSTEM DEACTIVATED
(amber)
(for versions/markets where provided)
The warning light switches on when the City Brake
Control - "Collision Mitigation" system is deactivated
through the Setup Menu (see paragraph "Menu
Items", chapter "Knowing your car).START&STOP SYSTEM ACTIVATION/
DEACTIVATION
Start&Stop system activation
A message will appear on the display when the
Start&Stop system is activated.
In this condition the LED on the
button on the
dashboard control panel (see "Start&Stop" paragraph
in "Knowing your car" chapter) is off.
Turning the Start&Stop off
❒Versions with reconf igurable multifunction display:a
message appears on the display when the
Start&Stop system is deactivated.
❒Versions with reconf igurable multifunction display:the
symbol and a dedicated message appear on the
display when the Start&Stop system is deactivated.
The LED above the
button is on when the system
is deactivated.
194GETTING TO KNOW
YOUR CAR
SAFETY
STARTING AND
DRIVINGWARNING LIGHTS
AND MESSAGESIN AN EMERGENCY
SERVICING AND
MAINTENANCE
TECHNICAL
SPECIFICATIONS
INDEX
Page 243 of 420
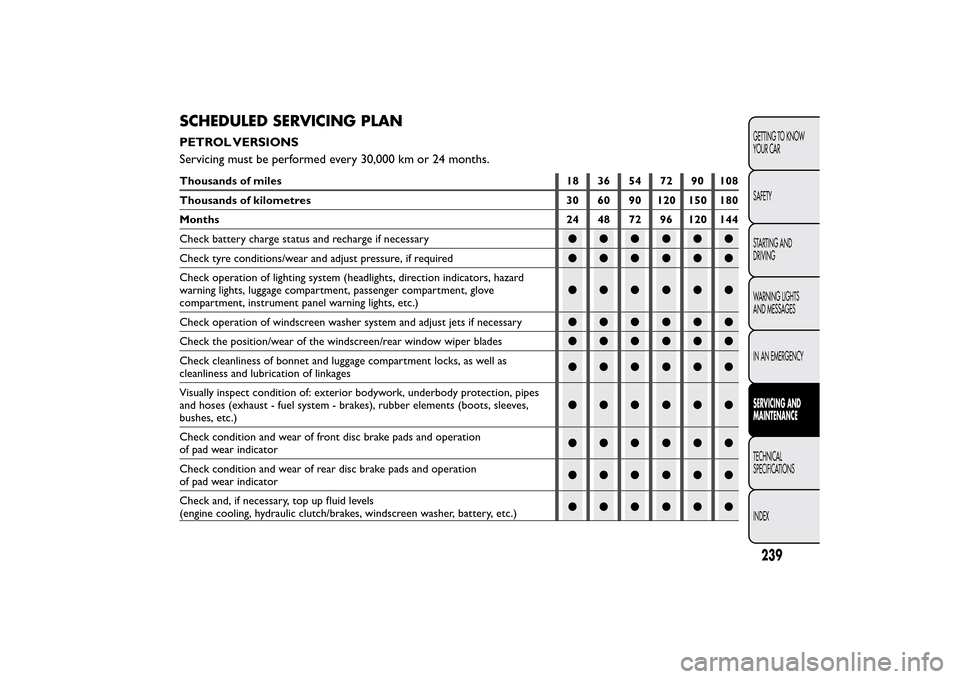
SCHEDULED SERVICING PLANPETROL VERSIONS
Servicing must be performed every 30,000 km or 24 months.Thousands of miles 18 36 54 72 90 108
Thousands of kilometres 30 60 90 120 150 180
Months 24 48 72 96 120 144
Check battery charge status and recharge if necessary●●●●●●
Check tyre conditions/wear and adjust pressure, if required●●●●●●
Check operation of lighting system (headlights, direction indicators, hazard
warning lights, luggage compartment, passenger compartment, glove
compartment, instrument panel warning lights, etc.)●●●●●●
Check operation of windscreen washer system and adjust jets if necessary●●●●●●
Check the position/wear of the windscreen/rear window wiper blades●●●●●●
Check cleanliness of bonnet and luggage compartment locks, as well as
cleanliness and lubrication of linkages●●●●●●
Visually inspect condition of: exterior bodywork, underbody protection, pipes
and hoses (exhaust - fuel system - brakes), rubber elements (boots, sleeves,
bushes, etc.)●●●●●●
Check condition and wear of front disc brake pads and operation
of pad wear indicator●●●●●●
Check condition and wear of rear disc brake pads and operation
of pad wear indicator●●●●●●
Check and, if necessary, top up fluid levels
(engine cooling, hydraulic clutch/brakes, windscreen washer, battery, etc.)●●●●●●
239GETTING TO KNOW
YOUR CAR
SAFETY
STARTING AND
DRIVING
WARNING LIGHTS
AND MESSAGES
IN AN EMERGENCYSERVICING AND
MAINTENANCETECHNICAL
SPECIFICATIONS
INDEX
Page 246 of 420
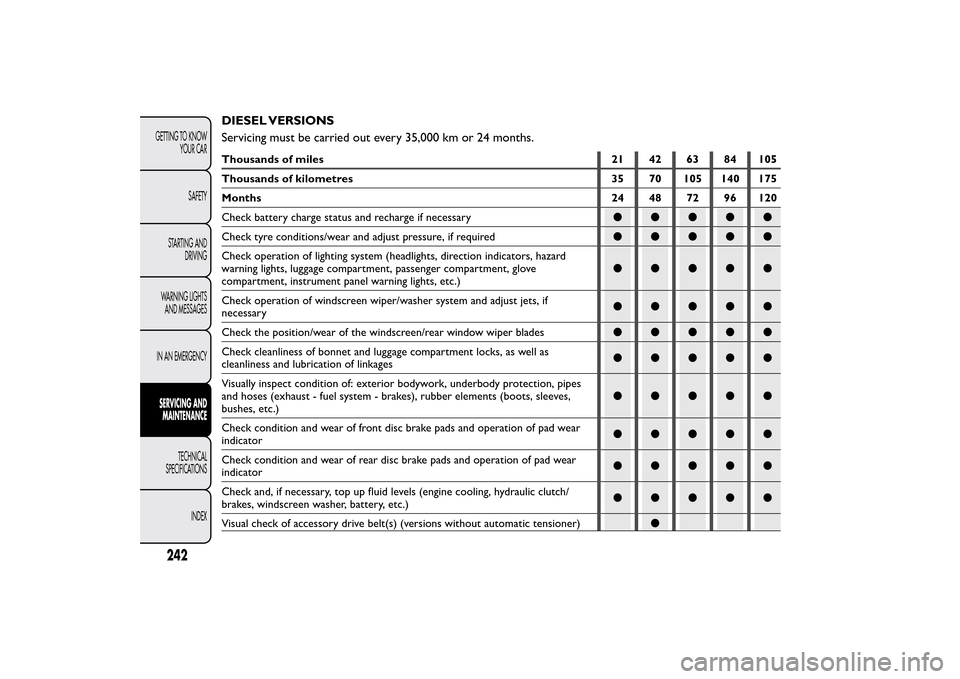
DIESEL VERSIONS
Servicing must be carried out every 35,000 km or 24 months.Thousands of miles 21 42 63 84 105
Thousands of kilometres 35 70 105 140 175
Months 24 48 72 96 120
Check battery charge status and recharge if necessary●●●●●
Check tyre conditions/wear and adjust pressure, if required●●●●●
Check operation of lighting system (headlights, direction indicators, hazard
warning lights, luggage compartment, passenger compartment, glove
compartment, instrument panel warning lights, etc.)●●●●●
Check operation of windscreen wiper/washer system and adjust jets, if
necessary●●●●●
Check the position/wear of the windscreen/rear window wiper blades●●●●●
Check cleanliness of bonnet and luggage compartment locks, as well as
cleanliness and lubrication of linkages●●●●●
Visually inspect condition of: exterior bodywork, underbody protection, pipes
and hoses (exhaust - fuel system - brakes), rubber elements (boots, sleeves,
bushes, etc.)●●●●●
Check condition and wear of front disc brake pads and operation of pad wear
indicator●●●●●
Check condition and wear of rear disc brake pads and operation of pad wear
indicator●●●●●
Check and, if necessary, top up fluid levels (engine cooling, hydraulic clutch/
brakes, windscreen washer, battery, etc.)●●●●●
Visual check of accessory drive belt(s) (versions without automatic tensioner)●
242GETTING TO KNOW
YOUR CAR
SAFETY
STARTING AND
DRIVING
WARNING LIGHTS
AND MESSAGES
IN AN EMERGENCYSERVICING AND
MAINTENANCE
TECHNICAL
SPECIFICATIONS
INDEX