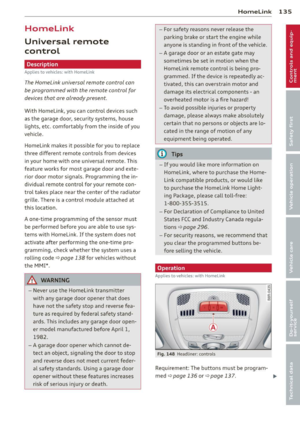
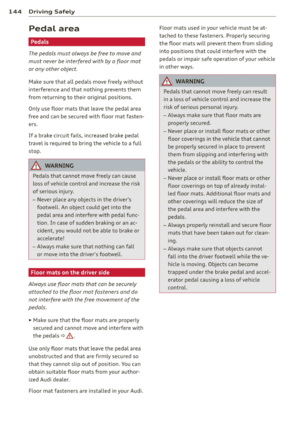
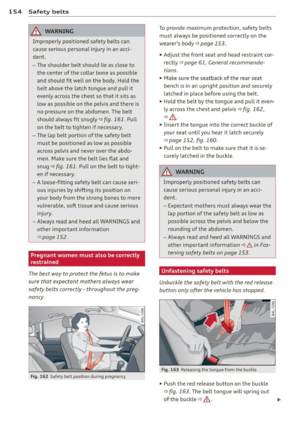
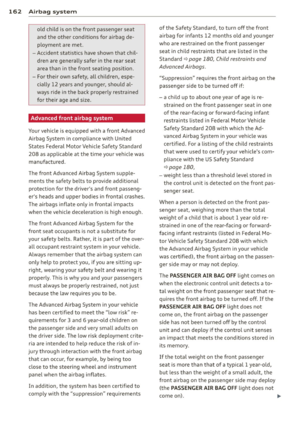
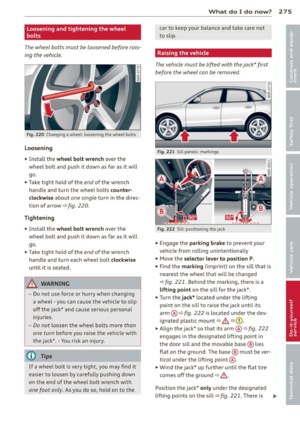
Page 49 of 316

@ Tips
After the ignition has been switched off,
the windows can still be opened or closed
for about 10 minutes. The power windows
are not switched
off until the dr iver 's door
or passenger's door has been opened .
Convenience opening/closing
The windows and the Panoramic sliding sun
roof* can be opened and closed wi th the me
chanical key or the emergency key.
C
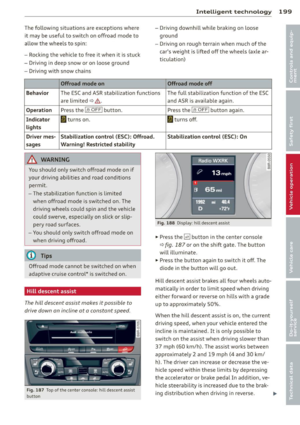
F ig. 41 Key turn s for ope ning and closin g
Convenience opening feature
§
ci: 0)
• Use the eme rgency key or pull the mechani
cal key out of the master key¢
page 3 7.
• Inse rt the key into the lock of the driver's
door.
• Turn the key to position ¢
fig. 41 @ until al l
the windows have reached the desired pos i
tion and the Panoramic sliding sunroof* is
tilted.
Convenience closing feature
• Use the emergency key or pull the mechani
cal key out of the master key¢
page 3 7.
• Turn the key in the lock of the driver's door
to the lock position @ until the windows
and the Panoramic sliding sunroof* are
closed ¢_& .
When you open or close the Panoramic sliding
sunroof*, the power sunshade will also open
or close.
Opening and closing 47
A WARNING
- Never close the windows and the Panor
amic sliding sunroof* inattentively and
without checking -there is risk of injury .
- You must always watch when the win
dows are be ing raised so that no one can
be trapped. If you re lease the key, the
clos ing action is immediately cance led.
- Always read and heed WARNING
¢.&. in
General description on page 39.
Correcting window regulator
malfunction
After disconnecting the vehicle battery, the
one-touch up and down feature must be acti
vated again.
• Pull and ho ld the power window sw itch until
the window is completely closed.
• Release the switch.
• Pull the switch again for one second. Th e au
tomatic closing/opening is now reactivated.
Panoramic sliding
sunroof
Operation
Applies to vehicles: with Panoramic sliding sunroof
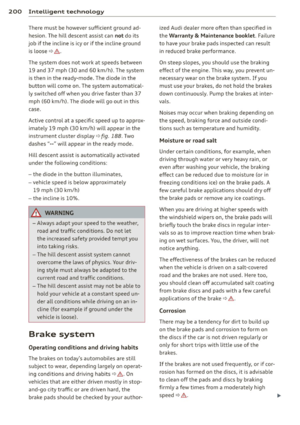
Fig . 42 Section from headliner: Knob fo r Pano ramic
s liding su nroof
Tilting
• The sunroof can be tilted or closed only in
sw itch position
@ ¢ fig. 42
• To tilt it, briefly p ress the switch ¢ fig. 42.
• To close it, briefly pull the switch ¢ _& . .,.
Page 50 of 316

48 Opening and clo sing
• To set an intermediate position, press/pull
the switch until the sunroof reaches the de
s ired posit ion .
Opening
• To move the sunroof to the position for re
duced wind noise, tu rn the switch to posi
tion @ until resistance can be felt.
• To open the sunroof complete ly, turn and
ho ld the switch against the resistance in po
s it ion @.
• To close the sunroof, turn the switch to posi
tion @ <=>,& .
• Turn the sw itch to the desired position to se
lect an intermediate pos it ion.
Opening and closing the sun shade
• To automatically open the sunshade com
pletely, briefly press the sw itch @ in the de
s ired arrow d irect ion.
• To stop the sunshade in an intermed iate po
s it io n, press the switc h again, or
• Press and ho ld the switch in the desi red a r
row direction.
• Re lease the switch when sunshade is at de -
s ired position .
Afte r the ignit ion is switched off, you can st ill
ope rate the Panoram ic sliding sunroof fo r
about 10 min utes . As soon as the driver's or
passenger's door is opened, the switch is in
operat ive.
The power sunshade can a lso be closed when
the Panoramic sliding sunroof is open .
A WARNING -
Pay careful attention when closing the
Panoramic sliding sunroof -otherwise seri
ous injury could result! For this reason, al
ways remove the ignition key when leaving
the vehicle .
Cy Note
Always close your Panoram ic sliding sun
roof when leaving your veh icle. Sudden
ra in can cause damage to the interio r
equ ipment of your vehicle, pa rticularly the
electronic equipment.
(D Tips
Information regarding convenience open
i ng/closing <=> page
47.
Emergency closing of the Panoramic
sliding sunroof
Applies to vehicles: with Panoramic sliding sunroof
If the Pano ramic sliding sunroof detects an
object in its path when it is closing, it w ill
open again automa tically. In th is case , you
can close the roof with t he power emergency
closing function.
• Within five seconds after the sunroof opens
automatically , pu ll the switc h until the roof
closes .
Page 51 of 316

Clear vision Lights
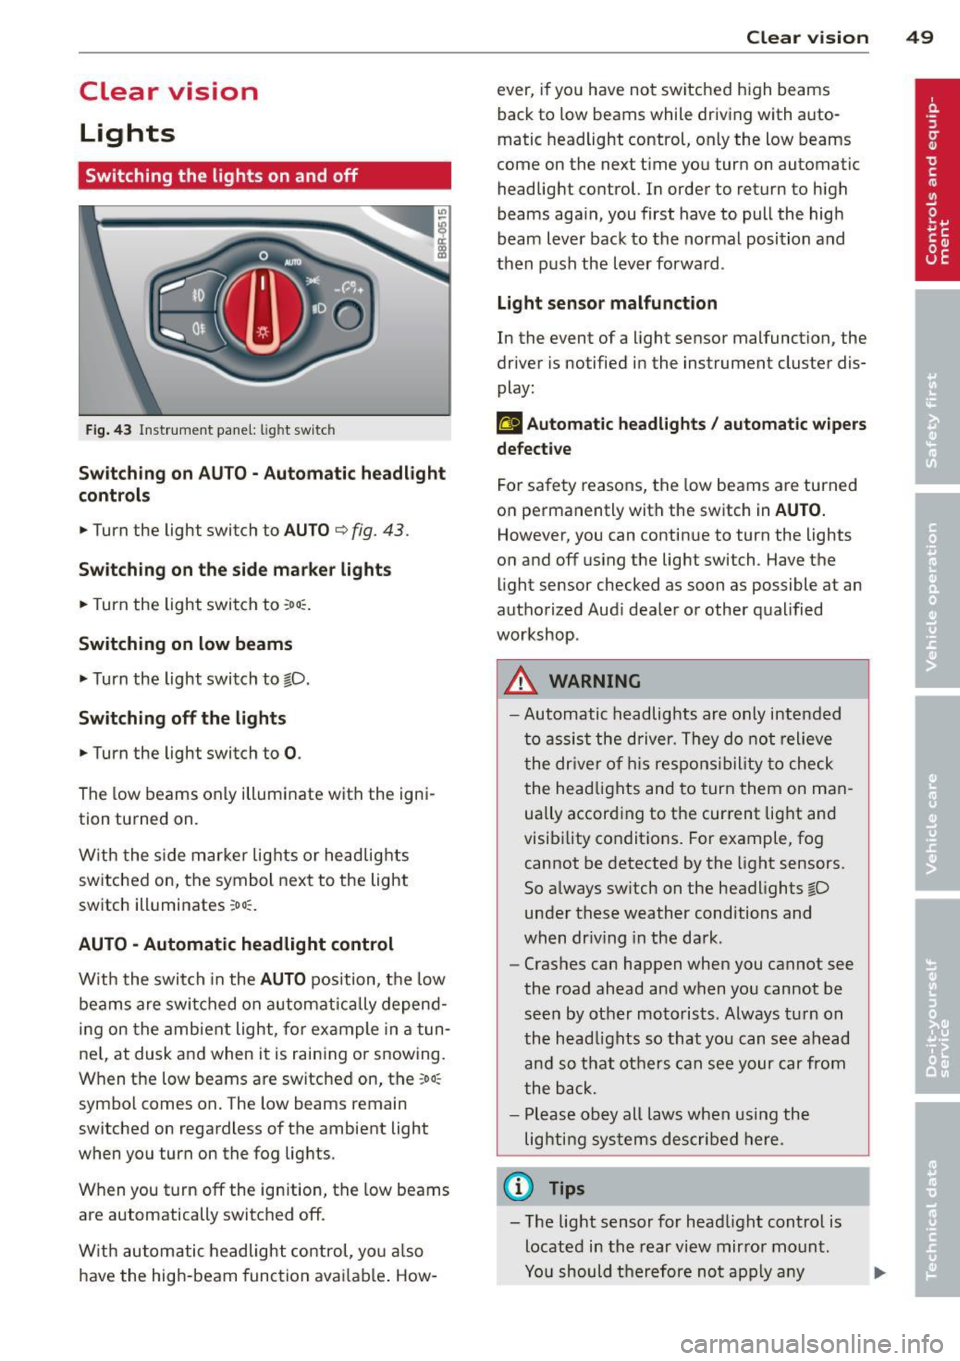
Switching the lights on and off
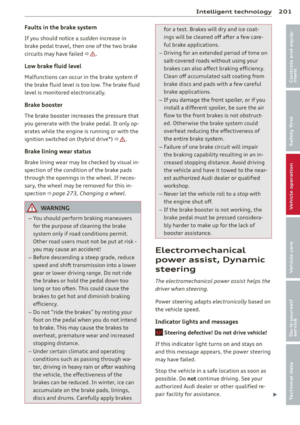
F ig . 43 Instrument pane l: light sw itch
Sw itching on AUTO - Automatic headlight
contr ols
• Turn the light switch to AUTO ¢ fig. 43.
Switchin g on the side m arker light s
• Turn the light switch to :oo:.
Switching on low beams
• Turn the light switch to @.D.
Swi tching off the lights
• Turn the light switch to 0 .
The low beams only illuminate with the igni
tion turned on.
With the s ide marker lights or headlights
switched on, the symbol next to the light
switch illuminates
:oo:.
AUTO -Automatic headlight control
With the switch in the AUTO position, the low
beams are swi tched on a utomatica lly depend
ing on the amb ient light, for example in a tun
ne l, at dusk and when it is raining or snowing.
When the low beams are switched on, the
:oo:
symbol comes on. The low beams remain
switched on regardless of the ambient light
when you turn on the fog lights.
When you turn
off the ign ition, the low beams
are automatically switched
off.
W ith automatic headlight control, yo u also
have the high-beam function avai lab le . How -
Clear vi sion 49
ever, if you have not switched high beams
back to low beams while driving with auto
matic headlight control, only the low beams
come on the next time you turn on automatic
headlight control. In order to return to high
beams aga in, you first have to pull the high
beam lever back to the normal position and
then push the lever forward .
Light sen so r malfunct ion
In the event of a light sensor malfunction, the
driver is notified in the instrument cluster dis
play :
fal Autom atic he adlights / autom ati c wi pers
defecti ve
For safety reasons, the low beams are turned
on permanently with the switch in
AUTO.
However, you can continue to turn the lights
on and
off us ing the light switch . Have the
light sensor checked as soon as possible at an
authorized Audi dealer or other qualified
workshop.
A WARNING
- Automatic headlights are only intended
to assist the driver. They do not relieve
the dr iver of h is respons ibility to check
the head lights and to turn them on man
ually accord ing to the current light and
visibility conditions. For example, fog cannot be detected by the light sensors.
So always sw itch on the headlights @.D
under these weather conditions and
when dr iv ing in the da rk .
- Crashes can happen when you cannot see
the road ahead and when you cannot be
seen by other motorists. Always tu rn on
the head lights so that you can see ahead
and so that others can see your car from
the back.
- Please obey all laws when using the
lighting systems described here.
(l'} Tips
- T he light sensor for head light control is
located in the rear view mirror mount.
Yo u should therefore not apply any
Page 52 of 316

50 Clear vis ion
stickers to the windshield in this area in
or der to prevent malfunctions or fai l
u res .
- Some exte rior lig hti ng f unctions can be
adjusted
c> page 50 .
-When yo u remove yo ur key from the igni
tion while the vehicle's lights are turned
on, a buzze r sounds as long as the driv
er's door is open .
- In coo l or damp weather , the ins ide of
the headlights, t urn signa ls and tail
li ghts can fog over due to the tempera
ture difference between the inside and
outside. They will clea r sho rtly after
switching them on . T his does not affect
the service life of the lighting .
- In the even t of a light sensor malfunc
t ion, the d river is no tified in th e inst ru
ment cluster disp lay
c> page 33.
Fog lights
Fig . 44 Fog light sw it c h
.,. To turn on the fog lights }D, press button @
c>fig . 44 .
.,. To turn on the rear fog ligh ts 0$, p ress but-
ton @.
Fog lights
The s ide marker lig hts or low beams must be
switched on . When the fog lights a re switched
on, the green check light at the edge of the
sw itch comes on.
If automatic driving light control AUTO is act i
vated, the low beams are switched on when
the fog lights are tur ned on .
Rear fog lights
Low be ams o r sid e mar ker lig hts wi th fog
li gh ts m ust be t urned on .
When the rear fog lights a re turned on, the
yellow check ligh t a t the edge of the switch
comes on.
(D Note
The rear fog lights s houl d only b e turned
o n in acc ord ance wi th t raff ic reg ulation, a s
the lights are brig ht for following tra ffic.
Adjusting exterior lighting
The functions are sele cted in the radio or in
the MM I*.
.,. Select: I CAR I function button > Ext erior
lighting .
Or
.,. Sele ct: !CARlfunc tion button>
Car sy stem s*
contro l butto n > Vehicle setting s > Exterior
light ing .
Coming home (Lights when leaving car ),
Leaving home (Lights when unlocking car )
The coming home f unct ion ill umin ates the
are a outside the vehicle when you tu rn t he ig
nit ion off and o pen the d river's doo r. Depend
ing on vehicle equ ipment, the f unction can be
switched on and off or the length of t i me the
lights remain on* can be adjusted .
T he leaving home illum inates the area o utside
the ve hicle when you un lock the vehicle . This
funct ion can be switched on and off .
T he Comi ng home and Leaving home f unc
tio ns only ope rate when it is dark and the
light switch is in the
AUTO position .
Auto headlights
When the lig ht sw itch i s in the AU TO
c> page 49 position, the switc h-on point of the
li gh ts can be changed i n the automa tic driving
light function.
Daytime running lights
USA models: You can swi tch the daytime run-
ning lights
On and Off . .,..
Page 53 of 316

Canada models : The function cannot be
turned off.
It is activated a utomatica lly each
time the ignition is switched on.
Travel mod e (Canada models)*
The headlight beam is asymmetrical. This pro
vides stronge r illum ination on the s ide of the
road on which you are driving . If you are driv
ing in a co untry that drives on the opposite
side of the road from your own country, this
will cause glare for oncoming drivers. To pre
vent glare:
- Trave l mode must be selected in vehicles
with Xenon headlights*.
- In vehicles with halogen headlights, certain
areas of the head light lenses must be cov
ered with waterproof adhesive covers that
prevent light from passing through. For
more information, please see your author
ized Audi dealer or author ized repair facility .
@ Tips
When travel mode* is activated, a d isp lay
in the drive r information system ind icates
this each time you switch the ignit io n on .
Instrument lighting
The basic brightness of the illumination for
the instruments, the center console and the
display can be adjusted .
Fig. 45 Inst rume nt lighting
.. Press the knob to release it.
.. Ro ta ting t he knob to the right" +" will in
crease the basic brightness when it is dark .
.. Rotating the knob to the left"-" will de
crease the basic br ightness when it is dark. Clear vi
sion 51
.. Pressing the knob will p revent unintentional
changes.
(D Tips
T he ill umination for the inst rument cluster
lights up w henever you switch on the igni
tion with the vehicle headlights off. As the
day light fades, the instrument cluster i llu
mination likewise dims automatically and
will go out completely when the outside light is very low. This feature is meant to
r emind you to switch on the head lights
whe n outs ide light conditions become
p oor .
Adaptive light
Applies to vehicles: wi th adaptive light
Wh en driving around bends, the relevant area
of the road is be tter illuminated.
Fi g. 4 6 Adapt ive light w hen driv ing
Switching on adapt ive light
.. Tu rn the light sw itch to AUTO ~ page 49,
fig. 43 .
The adaptive lig ht system is a combin ation o f
the dynam ic and the static corneri ng lights.
Wi th the lights switched on, the dynamic cor
ner ing light adapts to driving on curves. This
is dependent upon t he vehicle speed and
steering ang le. This provides better lighting
through the curve. The system operates in a
speed range from approximate ly 6 mph
(10 km/h) to 68 mph (110 km/h) .
The static cornering light switches on at
speeds of up to approximately 25 mph
Page 54 of 316

52 Clear vis ion
(40 km/h) when a certain steer ing whee l an
g le is reached or when a turn signa l is activat
ed . The area to the side of the vehicle is illu
minated better when turning .
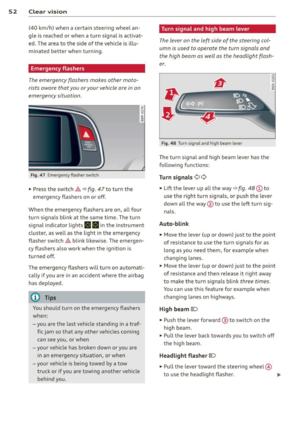
Emergency flashers
The emergency flashers makes other moto
rists aware that you or your vehicle are in an
emergency situation.
Fig . 4 7 Eme rg ency flashe r switc h
"" Pr ess the switch ~ ~ fig. 47 to turn the
eme rgency flas hers on or off.
~
9 a: (X) a:,
When the emergency flashers a re on, all four
turn signals blin k at the same time. The tu rn
signal in dicator lights
BB in the ins trument
cluster, as we ll as the lig ht in t he emerge ncy
fla sher swi tch ~ blink likewise . T he emerge n
cy flashers also w ork whe n the ignition is
turned off.
The emergen cy flashers w ill turn on autom ati
cally if you are in an a cci den t w here the a irba g
has de ployed .
@ Tips
You shou ld tur n on t he emerge ncy fl ashe rs
w hen :
- you are the last vehicle st anding in a traf
fi c ja m so t hat an y oth er veh icles com ing
c an see you, or when
- you r vehicle has broken dow n or yo u are
in an emerge ncy si tu ati on, or when
- you r vehi cle is bei ng towe d by a tow
truck o r if you are towi ng an othe r vehicle
b ehin d you. Turn signal and high beam lever
The lever on the left side of the steering col
umn is used to operate the turn signals and
the high beam as w
ell as the headlight flash
er.
Fi g. 48 Tu rn signal and high beam lever
The turn signa l and high beam lever has the
fo llowing functions:
Turn signals ¢¢
s
"" '? X co a,
"" Lift the leve r up a ll th e way ~ fig. 48 (D to
use the right turn s ign als, or push the leve r
down a ll th e way @ to use the left tur n sig
n a ls.
Auto-blink .,. Move the lever (up or down) just to the point
of resistance t o use the tur n sign als fo r as
long as you need them, for e xamp le when
chang ing lanes .
.,. Move the lever (up or down) just to the point
of resistance and then re lease it rig ht away
to make the turn s ignals b link
three times .
You can use this featu re for example when
chang ing lanes on highways .
High beam
[D
"" Push the lever forward @ to switch o n the
high beam .
.,. Pull the lever back towards you to switch off
the high beam.
Headlight fla sher
[D
.. Pull the lever toward the steering wheel@
to use the headlight flasher .
IJJ>
Page 55 of 316

Notes o n these featur es
-The turn signals only work with the ignition
turned on. The indicator lights
II or Ill in
the instrument cluster
¢page 14 also b link.
- After you have turned a corner, the turn sig-
nal switches off automatica lly.
- The
high beam works only when the head
lights are on. The indicator light
II in th e
instrument cluster illuminates when the
high beams are on.
- The
headlight flasher wo rks only as long as
you hold the lever -even if there are no
lights turned on. The indicator light
II in
the instrument cluster illuminates when you
use the headlight flasher.
A WARNING
Do not use the high beam or headlight
flasher if you know that thes e cou ld blind
oncoming traffic.
Interior lights
Front interior lights
-
The front interior lights also contain reading
lights for the driver and passenger .
r ,,,,, , 11111
~8 ,~
G) Gl
,o . . o
I
Fig. 49 Headliner: Fro nt inte rior/rea ding lights
The rocker switch @¢ fig. 49 for operating
the interior lighting has the following func
tions :
Door cont act swi tch
.,. Place the switch @ in the midd le position.
Interior light switched on
.,. Pla ce the switch @ in position I.
Clear vision 5 3
Interior light swit ch ed off
.,. Place the switch @ in position 0 .
Front read ing lights ~
.,. Press one of the switches@ to turn the
r ight or left reading light on or off .
With the door contact switch turned on, the
interior lights turn on as soon as you unlock
the vehicle or open the doors. The lighting is
also turned on when the ignition key is re
moved. The lights go out about 30 seconds af
ter the doors are closed. When the vehicle is locked or when the ignition is turned on, the
interior lights are turned off.
When a doo r is open, the interior lights are
tu rned off after about 10 minutes to prevent
draining of the battery .
The brightness of the lights is controlled au
tomat ica lly by a d immer when they are
swi tched on and off.
Rear interior lights
There are reading lights in the rear for the
passengers .
Fig . 50 Headliner: Rear read ing lig hts
The read ing l ights are switched on and off us
ing the buttons ~-
Depending on your model, the appearance
and the location of the reading lights may be
different .
Page 56 of 316

54 Clear vision
Vision
Sun visors
Using the sun visors makes driving safer.
Fig. 51 Sun visor
The sun visors for the driver and passenger
can be pulled out of their brackets in the cen
ter of the vehicle and turned towards the
doors
i::> fig. 51 (D. After the sun visor has
been turned to the door, it can be extended*
lengthwise.
Vanity mirror
The vanity mirrors on the sun visors are cov
ered. When the lid is opened @, the m irror
light in the headliner turns on automatically .
It turns off when the lid is closed and the visor
is folded up again.
Sun shade
App lies to vehicles: with s un shade
Fig. 52 Sun shade pulled up on
a rear window
.. Pull the shade out and hang it in the bracket
on the uppe r door frame
i::> fig. 52.
Wiper and washer
system
Switching the windshield wipers on
+ ®
Fig . 53 Windshield w iper lever
Fig.
54 Rear w iper actuat io n
Move the windshield w iper lever to the corre
sponding position:
@ -Windshield wiper off
(D-Interval mode. The windshield wiper au
tomatically activates when you drive 2 mph (4 km/h). The higher the sensitivity of the rain
sensor is set (sw itch @to the right), the ear li
er the windsh ield wipers react to moisture on
the windshield . In some models, you can
switch rain sensor mode
off and sw itch inter
mittent mode on in the MMI*. Select:
ICAR!
function button > Car systems* control but
ton
> Driver assist > Rain sensor. In interm it
tent mode, you can adjust the interval time
using the@switch.
@ -Slow wipin g
@-Fast wip ing
@ -Single wipe
®-Clean the win dshie ld. To eliminate water
droplets, the windsh ield wiper performs one
afterwipe operation after severa l seconds
ll>-