Page 105 of 193
. This, for example, helps to rock out a vehicle that is stuck,
e.g. in a bank of snow. The selector leve")
The selector lever is not locked when quickly moving across the position N
(e.g. from R to D). This, for example, helps to rock out a vehicle that is stuck,
e.g. in a bank of snow. The selector lever lock will engage if the lever is in posi-
tion N for more than approx. 2 seconds without the brake pedal being de-
pressed.
Releasing selector lever from mode P or N (selector lever lock)›
Press the brake pedal and the lock button at the same time in the direction
of the arrow » Fig. 102 on page 102 .
Just depress the brake pedal, if you would like to change from the mode N to
D .
Defective selector lever lock
If the selector lever lock is defective or its power supply is interrupted (e.g. dis-
charged vehicle battery, faulty fuse), the selector lever can no longer be moved
out of position P in the normal manner and the vehicle can no longer be driven.
The selector lever must be emergency released » page 162.
Note
If you want to move the selector lever from mode P to mode D or vice versa,
move the selector lever quickly. This prevents modes R or N from being acci-
dentally selected.
Manual shifting of gears (Tiptronic)
Fig. 103
Selector lever
Read and observe and on page 101 first.
Tiptronic mode makes it possible to manually shift gears on the selector lever. This mode can be selected both while stopping and while driving.
The currently selected gear is indicated in the » Fig. 101 on page 102 display.
The gear shift indicator must be observed when changing gear » page 38.
Switching to manual shifting›Push the gear selector from mode D towards the right, or left in a right-hand
drive vehicle.
Shifting up gears›
Push the selector lever
+
» Fig. 103 forwards.
Shifting down gears
›
Push the selector lever
-
» Fig. 103 backwards.
Note
■
It may be beneficial, for example, when travelling downhill, to use manual
shifting of gears. Shifting to a lower gear reduces the load on the brakes and
hence the wear on the brakes » page 99, Information on braking .■
When accelerating, the gearbox automatically shifts up into the higher gear
just before the maximum permissible engine speed is reached.
■
If a lower gear is selected, the gearbox does not shift down until there is no
risk of the engine over-revving.
Starting-off and driving
Read and observe
and on page 101 first.
Starting off
›
Start the engine.
›
Firmly depress and hold the brake pedal.
›
Press the lock button in the direction of the arrow » Fig. 102 on page 102 and
keep pressing.
›
Move the selector lever into the desired position » page 102and then release
the lock button.
›
Release the brake pedal and accelerate.
Stopping (while the car is moving)
›
Depress the brake pedal and bring the vehicle to a stop.
›
Keep holding the brake pedal until driving is resumed.
The selector lever position N does not have to be selected when stopping for a
short time, such as at a cross roads.
Kickdown
The kickdown function allows you to achieve the maximum acceleration of
your vehicle while driving.
When the accelerator pedal is fully depressed, the kickdown function is activa-
ted in any forward driving mode.
103Starting-off and Driving
Page 106 of 193

The gearbox shifts down one or more gears depending on the vehicle speed
and engine speed, and the vehicle accelerates.
The gearbox does not shift up into the highest gear until the engine has
reached its maximum revolutions for this gear range.WARNINGRapid acceleration, particularly on slippery roads, can lead to loss of vehicle
control – risk of accident!
Driving in an economical driving style
Introduction
This chapter contains information on the following subjects:
Driving in
104
Tips for economical driving
104
The fuel consumption, degree of pollution and vehicle wear depend on driving
style, road condition, weather conditions and the like.
Driving in
Driving in the engine
The engine has to be run in during the first 1,500 kilometres. During this peri- od, the driving style decides on the quality of the driving-in process.
During the first 1,000 km ,we recommend not driving faster than 3/4 of the
maximum permissible engine speed, not to drive at full throttle and not to use
a trailer.
In the range of 1,000 to 1,500 kilometres, the engine load can be increased up
to the maximum permitted engine speed.
New tyres
New tyres must firstly be “run in”, as they do not offer optimal grip at first.
Therefore, drive with special care for the first 500 km or so.
New brake pads
New brake pads have to first “grind in” because these do not initially have the best possible braking effect.
Therefore, drive with special care for the first 200 km or so.
Tips for economical driving
To achieve the lowest possible fuel consumption, the following instructions
must be observed.
Looking ahead when driving
Avoid unnecessary acceleration and braking.
Change gear in an energy saving and timely manner
Observe the recommended gear » page 38.
Avoid full throttle and high speeds
Fuel consumption will be halved if you drive at only 3/4 of the possible top
speed of your vehicle.
Reducing idling
When the engine is switched off, such as when waiting in a traffic jam, the fuel
economy is already greater after 30 - 40 s than the fuel quantity which is re-
quired for engine re-start.
Avoid short distances
When driving a short distance of less than about 4 km, the engine cannot
reach its operating temperature. As long as the engine has not reached oper-
ating temperature, the fuel consumption is significantly higher than with the
engine hot.
Pay attention to the correct tyre inflation pressure being maintained
Further information » page 143.
Avoid unnecessary ballast
Per 100 kg of weight, consumption increases by about 1 l/100 km. At a speed of
100-120 km/h, a vehicle fitted with a roof rack cross member without a load
will use about 10 % more fuel than normal due to the increased aerodynamic
drag.
Saving electricity
Electrical consumers (e.g. seat heating, air conditioning and the like) should
only be turned on for as long as necessary.104Driving
Page 107 of 193

Driving through water and driving off made-up roads
Introduction
This chapter contains information on the following subjects:
Driving through water
105
Driving off paved roads
105WARNINGImmediately after driving through water, mud, slush and the like, braking
effectiveness will be temporarily impaired » page 99, Information on brak-
ing . For this reason, sudden and violent braking manoeuvres are to be avoi-
ded - there is a risk of accident!
Driving through water
Fig. 104
Driving through water
Read and observe on page 105 first.
The following instructions must be observed if vehicle damage is to be avoided when driving through water (e.g. flooded roads).
›
Therefore, always determine the depth of the water before driving through
water.
The water level must not reach above the web of the lower beam » Fig. 104.
›
Do not drive any faster than at a walking speed.
At a higher speed, a water wave can form in front of the vehicle which can
cause water to penetrate into the engine's air induction system or other parts
of the vehicle.
›
Never stop in the water, do not reverse and do not switch the engine off.
CAUTION■ When driving through water, some parts of the vehicle such as the engine,
gearbox, chassis or electrics can be severely damaged.■
Oncoming vehicles can generate water waves which can exceed the permis-
sible water level for your vehicle.
■
Potholes, mud or rocks can be hidden under the water, making it difficult or
impossible to drive through water.
■
Do not drive through salt water, as the salt can cause corrosion. A vehicle
coming into contact with salt water is to be thoroughly rinsed with fresh wa-
ter.
Driving off paved roads
Read and observe
on page 105 first.
Only drive on such roads and in such terrain, which match the vehicle parame-ters » page 172 , Technical data as well as your driving skills.
The driver is always responsible for deciding whether the vehicle can handle
travelling in the given terrain.
WARNINGDrive particularly considerately and pro-actively when not on paved roads.■Always adjust your driving to the current terrain and weather conditions.
Excessive speed or incorrect driving manoeuvres can cause damage to the
vehicle and lead to serious injuries.■
Objects trapped under the base of the vehicle can damage the fuel lines,
the brake system, the seals and other parts of the chassis. Check the un-
derside of the vehicle and remove the trapped objects.
■
Combustible objects such as dry leaves or twigs caught under the base of
the vehicle could ignite on hot vehicle parts - risk of fire!
CAUTION
■ Pay attention to the ground clearance of the vehicle! When driving over ob-
jects which are larger than the ground clearance, the chassis and its compo-
nents can get damaged.■
Drive slowly in unknown terrain and watch out for unexpected obstacles,
such as potholes, rocks, stumps, etc.
■
Check up on confusing sections of unpaved roads before travelling on them
and consider whether such travelling is possible without risk.
105Starting-off and Driving
Page 108 of 193

106
Anti-lock Braking System (ABS)
106")
Assist systems
Braking and stabilisation systems
Introduction
This chapter contains information on the following subjects:
Electronic Stability Control (ESC)
106
Anti-lock Braking System (ABS)
106
Traction Control System (TCS)
106
Electronic Differential Lock (EDL)
107
Hydraulic Brake Assist (HBA)
107
Hill Hold Control (HHC)
107
This chapter deals with the functions of the braking and stabilisation systems,
with the error indicator referred to in chapter » page 30, Indicator lights .
The braking and stabilisation systems are automatically activated each time
the ignition is switched on.
WARNING■ A lack of fuel can cause irregular engine running or cause the engine to
shut down. The brake assist systems would then fail to function – risk of
accident!■
The increased safety provided by the brake assist systems must not
tempt you to take safety risks – risk of accident!
■
Adjust the speed and driving style to the current visibility, weather, road
and traffic conditions.
Electronic Stability Control (ESC)
Fig. 105
Buttons for the ESC system: Acti-
vating/deactivating TCS
Read and observe on page 106 first.
The ESC improves vehicle stability in dynamic driving situations, such as when the vehicle starts to skid.
The ESC monitors whether the desired direction of the current vehicle motion
is occurring. In case of any deviation (e.g. oversteer), the ESC automatically
brakes individual wheels to maintain the desired direction.
During an intervention in the system, the control light will blink in
the instru-
ment cluster.
The ESC system cannot be deactivated. The AST can only be
» Fig. 105 deacti-
vated with the symbol key » page 106.
The warning light lights up in the instrument cluster when the ASR is deactiva- ted .
The TCS should normally always be enabled. The system should be deactivated
only in the following situations, for example.
› When driving with snow chains.
› When driving in deep snow or on a very loose surface.
› When “rocking a car free” when it has become stuck.
Anti-lock Braking System (ABS)
Read and observe
on page 106 first.
ABS prevents the wheels from locking when braking. Thereby, it helps the
driver to maintain control of the vehicle.
The intervention of the ABS is noticeable from the pulsating movements of
the brake pedal which is accompanied by noises.
When the ABS system is active, do not brake periodically or reduce the pres-
sure on the brake pedal.
Traction Control System (TCS)
Read and observe
on page 106 first.
TCS prevents the spinning of the wheels of the driven axle. TCS reduces thedrive power transmitted to the wheels in the case of slipping wheels. Thereby,
for example, driving on road surfaces with low grip is made easier.
If your vehicle is fitted with the ESC system, the ASR is integrated into the ESC
system » page 106 .
106Driving
Page 109 of 193
, during a TCS intervention the
control indicator blinks in the instrument cluster.
Electronic Differential Lock (EDL)
Read and observe
on pag")
NoteFor vehicles without stabilization control (ESC), during a TCS intervention the
control indicator blinks in the instrument cluster.
Electronic Differential Lock (EDL)
Read and observe
on page 106 first.
EDL prevents the turning of the respective wheel of the driven axle. EDL
brakes the spinning wheel, if necessary, and transmits the driving force to the
other driving wheel. Driving becomes easier on road surfaces with different
traction under each wheel of the driven axle.
The EDL switches off automatically in order to avoid excessive heat generation
on the brake of the wheel being braked. The vehicle can continue to be driven
and has the same characteristics as a vehicle not fitted with EDL. Once the
brakes have cooled down, there is an automatic re-activation of EDL.
Hydraulic Brake Assist (HBA)
Read and observe
on page 106 first.
The HBA increases the braking effect and helps to reduce the braking dis-
tance.
The HBA is activated by the very quick operation of the brake pedal. In order to
achieve the shortest possible braking distance, the brake pedal must be ap-
plied firmly until the vehicle has come to a standstill.
The HBA function is automatically deactivated when the brake pedal is re-
leased.
Hill Hold Control (HHC)
Read and observe
on page 106 first.
When driving on slopes, HHC allows you to move your foot from the brake ped-al to the accelerator pedal without having to use the handbrake.
The system holds the brake pressure produced by the activation of the brake pedal for approx. 2 seconds after the brake pedal is released.
The brake pressure drops gradually the more you operate the accelerator ped-
al. If the vehicle does not start off within 2 seconds, it starts to roll back.
The HHC is active from a 5% slope if the driver's door is closed. HHC is always
only active on slopes when in forward or reverse start off.
Parking aid
Introduction
This chapter contains information on the following subjects:
Function
108
Activation/deactivation
108
The parking aid (hereinafter referred to only as a system) draws attention via
acoustic signals and an indication in the radio or navigation display when ma-
noeuvring around obstacles in the vicinity of the vehicle.
The system uses ultrasound waves to calculate the distance between the
bumper and an obstacle. The ultrasonic sensors are integrated in the rear
bumper.
WARNING■ The system only serves as an assistance and does not relieve the driver
of the responsibility for the vehicle operation.■
Moving persons or objects may not be recognised by the system sensors.
■
Under certain circumstances, surfaces of certain objects and types of
clothing cannot reflect the system signals. For this reason, such people or
objects may not be recognised by the system sensors.
■
External noise sources may affect the signals of the system sensors. Un-
der adverse conditions, this may cause objects or people to be not recog-
nised by the system.
■
Before reversing, you should make sure that there are no small obstacles,
such as rocks, thin posts, trailer draw-bars etc. behind your vehicle. Such
obstacles may not be recognised by the system sensors.
CAUTION
■ Keep the system sensors clean, snow-and ice-free and do not cover with any
objects of any kind, otherwise the system functioning may be impaired.■
The system function may be limited under adverse weather conditions
(heavy rain, water vapour, very low or high temperatures etc.).
■
Additionally installed accessories such as e.g. bicycle carriers can impair the
function of the parking aid.
107Assist systems
Page 110 of 193
A160B60
Acoustic signals and display
The i")
FunctionFig. 106
Range of sensors
Read and observe and on page 107 first.
Approximate range of sensors
Range » Fig. 106Distance behind the vehicle (in cm)A160B60
Acoustic signals and display
The interval between the acoustic signals becomes shorter as the clearance is
reduced. A continuous tone sounds from a distance of approx. 30 cm - danger
area. From this moment on, do not continue reversing!
Description of the indications in the radio or navigation system display, » the
radio instruction manual, navigation system user guide.
Activation/deactivation
Read and observe
and on page 107 first.
The system is activated automatically by engaging the reverse gear. This is
confirmed by a brief audible signal.
The system is deactivated by disengaging reverse gear.
Displaying an error
If a warning signal sounds for about 3 seconds after activating the system and
there is no obstacle close to your car, this indicates a system fault. Seek help
from a specialist garage.
NoteFor vehicles with a factory-fitted towing device, the system cannot be activa-
ted when towing a trailer.
Cruise Control System
Introduction
This chapter contains information on the following subjects:
Functioning
108
Operating Description
109
The Cruise Control System (CCS) maintains a set speed without you having to
actuate the accelerator pedal.
The status where the CCS maintains the speed is referred to hereinafter as the
control .
WARNING■
The CCS only serves as an assistance and does not relieve the driver of
the responsibility for the vehicle operation.■
Always adjust the speed and driving style to the current visibility, weath-
er, road and traffic conditions.
Functioning
Read and observe
on page 108 first.
Basic requirements for starting the control The CCS is activated.
On vehicles with a manual transmission , the second gear or higher must
be engaged.
On vehicles with an automatic transmission , the selector lever must be in
the D, S position or in the Tiptronic position.
The current speed must be higher than 20 km/hr.
This is only possible within the range which is permitted by the power output
and braking power of the engine.
108Driving
Page 111 of 193

WARNINGIf the engine power and engine braking effect is insufficient to maintain
the set speed, steering must be taken over!
Operating Description
Fig. 107
Operating lever: Cruise control
system controls
Read and observe on page 108 first.
Overview of the control elements of the CCS » Fig. 107ADeactivate CCS (delete stored speed) Interrupt control (sprung position) Activate CCS (control deactivated)BTake control again a)
/ Increase speedCStart control / reduce speeda)
If no speed is stored, then the current speed is adopted.
After starting the system, the current speed is stored and the indicator light
lights up in the
instrument cluster.
After the interruption in the control, the stored speed can be resumed by
pressing the
B
button.
Automatic control interruption
Automatic control interruption occurs if any of the following conditions are
met.
› By pressing the brake or clutch pedal.
› When one of the brake assist systems (e.g. ESC) intervenes.
› Through an airbag deployment.
WARNING■
Always deactivate the cruise control system after use to prevent the sys-
tem being switched on unintentionally.■
Control may only be resumed if the stored speed is not too high for the
current traffic conditions.
Note
During control, speed can be increased by pressing the accelerator pedal. Re-
leasing the accelerator pedal will cause the speed to drop again to the set
speed.
START-STOP
Introduction
This chapter contains information on the following subjects:
Operating conditions of the system
110
Operation in vehicles with manual gearbox
110
Operation in vehicles with automatic gearbox
110
System related automatic start-up
111
Manually deactivating/activating the system
111
Information messages
111
The START-STOP system (hereinafter referred to as the system) saves fuel and
reduces polluting emissions and CO 2 emissions by turning the engine off, e.g.
when stopping at traffic lights, and starting the engine again when moving off.
WARNING■ Never let the vehicle roll with the engine switched off.■The brake servo unit and power steering only operate if the engine is run-
ning.109Assist systems
Page 112 of 193

Operating conditions of the systemFig. 108
MAXI DOT display: Engine is au-
tomatically switched off / auto-
matic engine cut off is not possi-
ble
Read and observe on page 109 first.
For system-dependent automatic engine shutdown
to work, the following conditions must be met.
The driver's door is closed.
The driver has fastened the seat belt.
The bonnet is closed.
The driving speed was higher than 4 km/h after the last stop.
No trailer is coupled.
Some additional conditions for the system to function correctly cannot be in-
fluenced or recognised by the driver. Therefore, the system can react differ-
ently in situations which are identical from the driver's perspective.
If after stopping the car, the message START-STOP NOT POSSIBLE appears in
the segment display and/or in MAXI DOT-Display, » Fig. 108
then the condi-
tions for automatic engine shutdown have not been fulfilled.
Running the engine e.g. is essential for the following reasons.
› The engine temperature for the proper function of the system has not yet
been reached.
› The charge state of the vehicle battery is too low.
› The current consumption is too high.
› High air-conditioning or heating capacity (high fan speed, big difference be-
tween the desired and actual interior temperature).
Note■ If the vehicle remains outdoors for a long time in minus temperatures or in
direct sunlight, it can take several hours until the internal temperature of the
vehicle battery reaches a suitable temperature for proper operation of the
START STOP system.■
If the driver's seat belt is removed for more than approx. 30 seconds or the
driver's door is opened during stop mode, the engine will have to be started
manually.
■
After the manual engine start and with a manual gearbox the automatic en-
gine shutdown can take place only when a minimum distance required for the
system function has been covered.
Operation in vehicles with manual gearbox
Read and observe
on page 109 first.
In compliance with the operating conditions, automatic engine shutdown / au-
tomatic engine start takes place as described.
Automatic engine shutdown
›
Stop the vehicle.
›
Put the gear stick into Neutral.
›
Release the clutch pedal.
Automatic engine shutdown takes place, segment display shows START-STOP
ACTIVE or a check mark appears in the MAXI DOT display symbol
» Fig. 108
on
page 110 .
Automatic engine start
›
Depress the clutch pedal.
The automatic start procedure takes place again.
Operation in vehicles with automatic gearbox
Read and observe
on page 109 first.
In compliance with the operating conditions, automatic engine shutdown / au-
tomatic engine start takes place as described.
Automatic engine shutdown
›
Bring the vehicle to a stop and depress the brake pedal.
110Driving
 1
1 2
2 3
3 4
4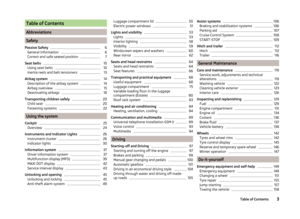 5
5 6
6 7
7 8
8 9
9 10
10 11
11 12
12 13
13 14
14 15
15 16
16 17
17 18
18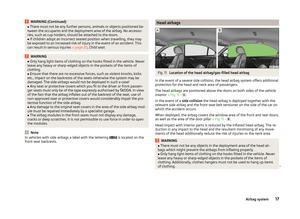 19
19 20
20 21
21 22
22 23
23 24
24 25
25 26
26 27
27 28
28 29
29 30
30 31
31 32
32 33
33 34
34 35
35 36
36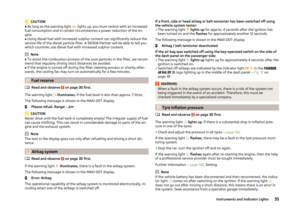 37
37 38
38 39
39 40
40 41
41 42
42 43
43 44
44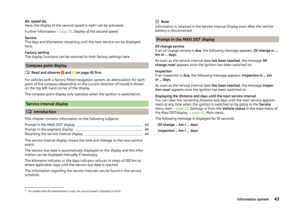 45
45 46
46 47
47 48
48 49
49 50
50 51
51 52
52 53
53 54
54 55
55 56
56 57
57 58
58 59
59 60
60 61
61 62
62 63
63 64
64 65
65 66
66 67
67 68
68 69
69 70
70 71
71 72
72 73
73 74
74 75
75 76
76 77
77 78
78 79
79 80
80 81
81 82
82 83
83 84
84 85
85 86
86 87
87 88
88 89
89 90
90 91
91 92
92 93
93 94
94 95
95 96
96 97
97 98
98 99
99 100
100 101
101 102
102 103
103 104
104 105
105 106
106 107
107 108
108 109
109 110
110 111
111 112
112 113
113 114
114 115
115 116
116 117
117 118
118 119
119 120
120 121
121 122
122 123
123 124
124 125
125 126
126 127
127 128
128 129
129 130
130 131
131 132
132 133
133 134
134 135
135 136
136 137
137 138
138 139
139 140
140 141
141 142
142 143
143 144
144 145
145 146
146 147
147 148
148 149
149 150
150 151
151 152
152 153
153 154
154 155
155 156
156 157
157 158
158 159
159 160
160 161
161 162
162 163
163 164
164 165
165 166
166 167
167 168
168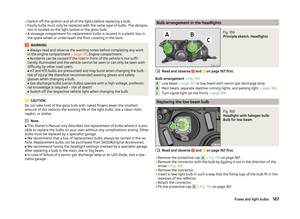 169
169 170
170 171
171 172
172 173
173 174
174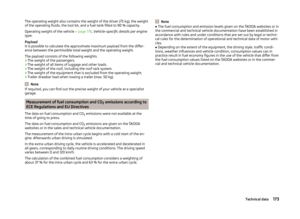 175
175 176
176 177
177 178
178 179
179 180
180 181
181 182
182 183
183 184
184 185
185 186
186 187
187 188
188 189
189 190
190 191
191 192
192