2013 MERCEDES-BENZ SL-CLASS ROADSTER air condition
[x] Cancel search: air conditionPage 268 of 572
Tires
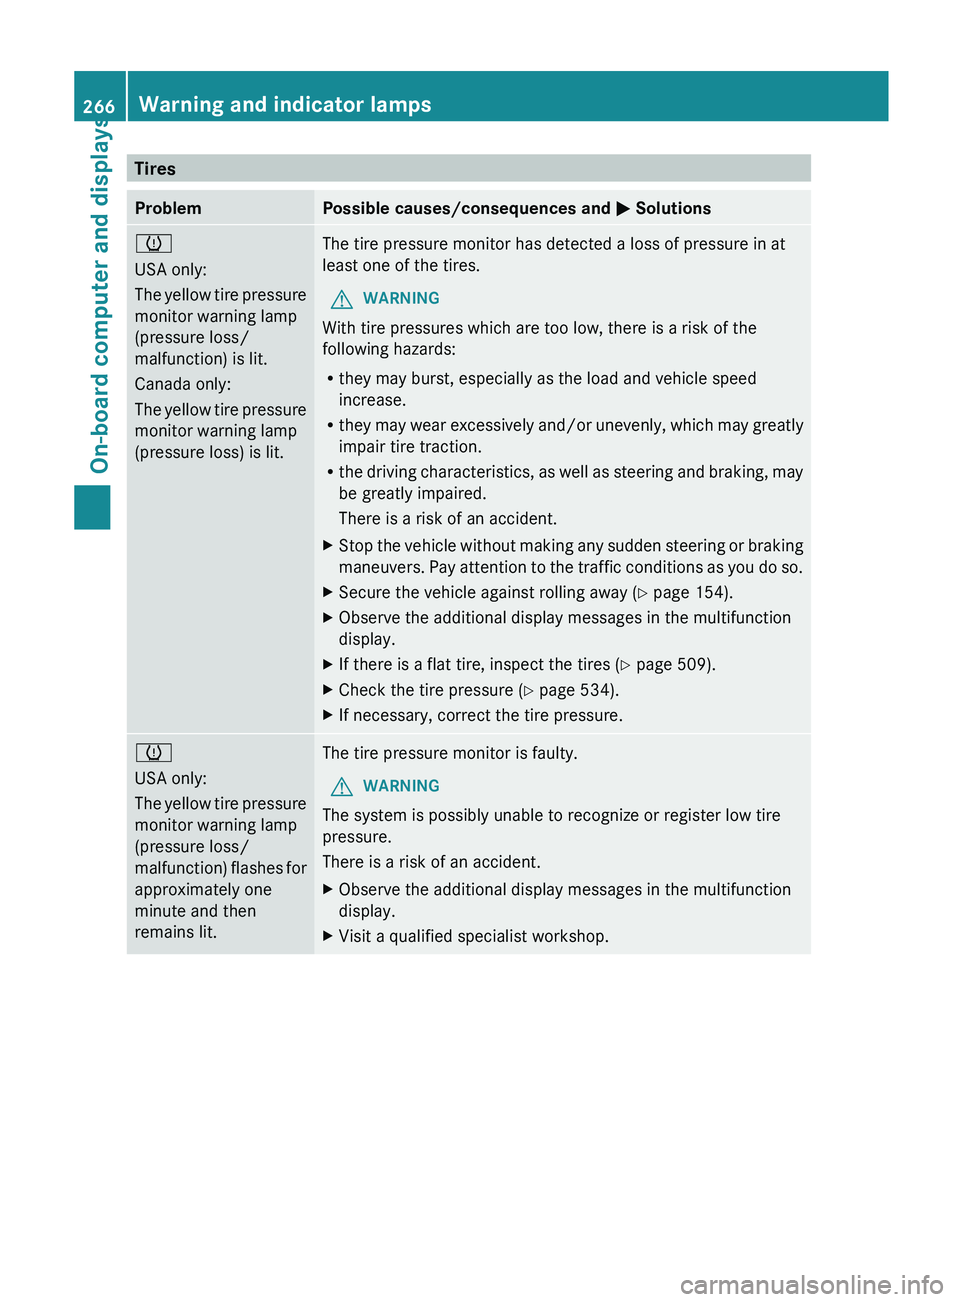
Problem Possible causes/consequences and
M Solutions
h
USA only:
The
yellow
tire pressure
monitor warning lamp
(pressure loss/
malfunction) is lit.
Canada only:
The yellow tire pressure
monitor warning lamp
(pressure loss) is lit. The tire pressure monitor has detected a loss of pressure in at
least one of the tires.
G WARNING
With tire pressures which are too low, there is a risk of the
following hazards:
R they may burst, especially as the load and vehicle speed
increase.
R they may
wear excessively and/or unevenly, which may greatly
impair tire traction.
R the driving characteristics, as well as steering and braking, may
be greatly impaired.
There is a risk of an accident.
X Stop the vehicle without making any sudden steering or braking
maneuvers. Pay
attention to the traffic conditions as you do so.
X Secure the vehicle against rolling away ( Y page 154).
X Observe the additional display messages in the multifunction
display.
X If there is a flat tire, inspect the tires ( Y page 509).
X Check the tire pressure (Y page 534).
X If necessary, correct the tire pressure. h
USA only:
The
yellow
tire pressure
monitor warning lamp
(pressure loss/
malfunction) flashes for
approximately one
minute and then
remains lit. The tire pressure monitor is faulty.
G WARNING
The system is possibly unable to recognize or register low tire
pressure.
There is a risk of an accident.
X Observe the additional display messages in the multifunction
display.
X Visit a qualified specialist workshop.266
Warning and indicator lamps
On-board computer and displays
Page 270 of 572
Useful information
i These operating instructions describe all
the standard and optional equipment of
your COMAND system, as available at the
time of going to print. Country-specific
differences are possible. Please note that
your COMAND system may not be
equipped with all the features described.
This also applies to safety-related systems
and functions.
i Read the information on qualified
specialist workshops: ( Y page 31).
Operating safety
Important safety notes
G
WARNING
Making alterations to electronic components
can cause malfunctions.
Radio, satellite
radio, amplifier, DVD changer,
navigation module, phone and voice control
are networked. If one component is not
functional or if it has been incorrectly
removed/replaced, this could impair the
operation of other components.
This could seriously jeopardize the
operational safety of your vehicle.
We recommend that you always have
maintenance work on electronic components
carried out at an authorized Mercedes-Benz
Center. G
WARNING
In
order to avoid distraction which could lead
to an accident, the driver should only enter
system settings
with the vehicle at a standstill
and operate the system only when road,
weather and traffic conditions permit.
Bear in mind that at a speed of only 30 mph
(approximately 50 km/h), the vehicle covers
a distance of 44 feet (approximately 14 m) per
second. COMAND delivers information to simplify
your choice of route and guide you
comfortably and safely to your destination.
For safety reasons, we recommend that you
bring your vehicle to a standstill, paying
attention to road and traffic conditions,
before making or accepting a telephone call
or viewing navigation maps, instructions or
downloaded information on the COMAND
screen.
G
WARNING
While the navigation system provides
directional assistance,
the driver must remain
focused on safe driving behavior, especially
attention to traffic and street signs, and
should utilize the system's audio cues while
driving.
The navigation system does not supply any
information on stop signs, yield signs, traffic
regulations or traffic safety rules. Their
observance always remains in the driver's
personal responsibility. DVD maps do not
cover all areas nor all routes within an area. G
WARNING
This equipment complies with FCC radiation
exposure limits set forth for uncontrolled
equipment and meets the FCC radio
frequency (RF) Exposure Guidelines in
Supplement C to OET65.
This equipment has very low levels of RF
energy that is deemed to comply without
maximum permissive exposure evaluation
(MPE). But it is desirable that it should be
installed and operated with at least 8
inches
(20 cm)
and more between the radiator and a
person's body (excluding extremities: hands,
wrists, feet and legs.) 268
Operating safety
COMAND
Page 278 of 572

Climate control status display
The climate status display in the COMAND display
(example)
If you change the settings of the climate
control system, the climate status display
appears for three seconds at the bottom of
the screen in the COMAND display. You will
see
the
current settings of the various climate
control functions.
Overview of climate control systems
(Y page 122).
The climate status display appears when:
X You turn one of the two temperature
controls and
set the temperature to the left
or right.
or
X You press one of the following buttons:
K Increases air flow
I Decreases air flow
¿ Switches climate control on/off
á Switches the ZONE function on/off
à Controls the air conditioning
automatically
ñ Sets the climate control style in
automatic mode (FOCUS/MEDIUM/
DIFFUSE)
_ Sets the air distribution
¬ Turns on the defrost function
Ù Turns on maximum cooling Example settings for the defrost function (top) and
for the climate mode in automatic mode
X
To hide the display: turn or press the
COMAND controller.
or
X Press one of the buttons on COMAND.
Displaying the image from the rear view
camera G
WARNING
The rear view camera is only an aid and may
show a distorted view of obstacles, show
them incorrectly or not at all.
Further information on the rear view camera
(Y page 190).
The image from the rear view camera is
shown in the COMAND display when reverse
gear is engaged if:
R your vehicle is equipped with a rear view
camera.
R COMAND is switched on
R the Activation by R gear function is
activated.
If the function is activated, the COMAND
display will automatically switch back to the
previously selected display as soon as you
shift out of reverse gear.
i Further information on the rear view
camera ( Y page 190).
X Press the W function button.
The system menu appears.
X Select Settings by turning cVd the
COMAND controller and press W to
confirm. 276
At a glance
COMAND
Page 297 of 572
If you select
Yes, a prompt will appear again
asking whether you really wish to reset.
X Select Yes or No and press W to confirm.
If you
select Yes, a message will be shown.
COMAND is reset and restarted.
If you select No, the process will be
canceled.
i Resetting personal COMAND data does
not reset the Internet and online settings
(Y page 401). Likewise, resetting the
Internet and
online settings does not reset
personal COMAND data. Navigation
Introduction
Safety notes G
WARNING
For safety reasons, only enter a new
destination when the vehicle is stationary.
When you are driving, another passenger
should enter the destination. Read the
Operator's Manual and select the route
before driving.
Bear in mind that at a speed of only 30 mph
(approximately 50 km/h
), the vehicle covers
a distance of 44 feet (approximately 14 m) per
second.
COMAND calculates the route to the
destination without taking account of the
following, for example:
R traffic lights
R stop and give way signs
R merging lanes
R parking or stopping in a no parking/no
stopping zone
R other road and traffic rules and regulations
R narrow bridges G
WARNING
COMAND may give incorrect navigation
commands if
the actual road/traffic situation
no longer corresponds to the data on the digital map. Digital maps do not cover all
areas nor all routes in an area. For example,
a route may have been diverted or the
direction of a one-way street may have
changed.
For
this
reason, you must always observe road
and traffic rules and regulations during your
journey. Road and traffic rules and regulations
always have priority over the system's driving
recommendations. G
WARNING
Navigation announcements are intended to
direct you
while driving without diverting your
attention from the road and driving.
Please always use this feature instead of
consulting the map display for directions.
Looking at the icons or map display can
distract you from traffic conditions and
driving, and increase the risk of an accident.
General notes Operational readiness of the navigation
system
The navigation system must determine the
position of the vehicle before first use or
whenever operational status is restored.
Therefore, you may have to drive for a while
before precise route guidance is possible.
GPS reception
Correct functioning of the navigation system
depends, amongst other things, on GPS
reception. In certain situations, GPS
reception may be impaired, there may be
interference or there may be no reception at
all, e.g. in tunnels or parking garages.
Entry restriction
On vehicles for certain countries, there is a
restriction on entering data.
The
restriction
is active from a vehicle speed
of above approximately 3 mph (5 km/h). As
soon as the speed falls below approximately Navigation
295
COMAND Z
Page 397 of 572
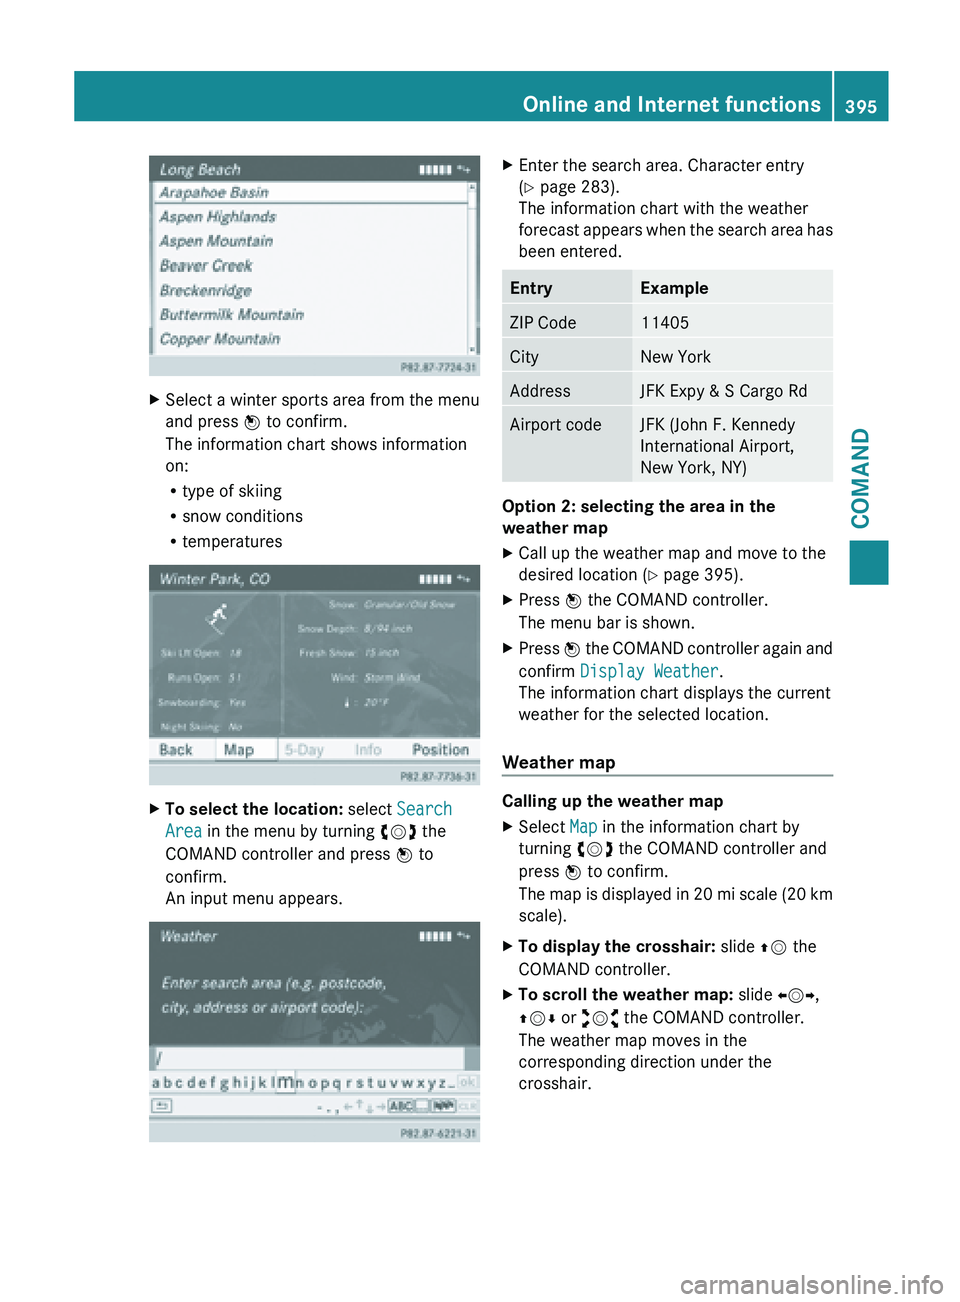
X
Select a winter sports area from the menu
and press W to confirm.
The information chart shows information
on:
R
type of skiing
R snow conditions
R temperatures X
To select the location: select Search
Area in the menu by turning cVd the
COMAND controller and press W to
confirm.
An input menu appears. X
Enter the search area. Character entry
(Y page 283).
The information chart with the weather
forecast appears
when the search area has
been entered. Entry Example
ZIP Code 11405
City New York
Address JFK Expy & S Cargo Rd
Airport code JFK (John F. Kennedy
International Airport,
New York, NY)
Option 2: selecting the area in the
weather map
X
Call up the weather map and move to the
desired location ( Y page 395).
X Press W the COMAND controller.
The menu bar is shown.
X Press W the COMAND controller again and
confirm Display Weather
.
The information chart displays the current
weather for the selected location.
Weather map Calling up the weather map
X
Select Map in the information chart by
turning cVd the COMAND controller and
press W to confirm.
The map
is displayed in 20 mi scale (20 km
scale).
X To display the crosshair: slide ZV the
COMAND controller.
X To scroll the weather map: slide XVY,
ZVÆ or aVb the COMAND controller.
The weather map moves in the
corresponding direction under the
crosshair. Online and Internet functions
395
COMAND Z
Page 466 of 572
X
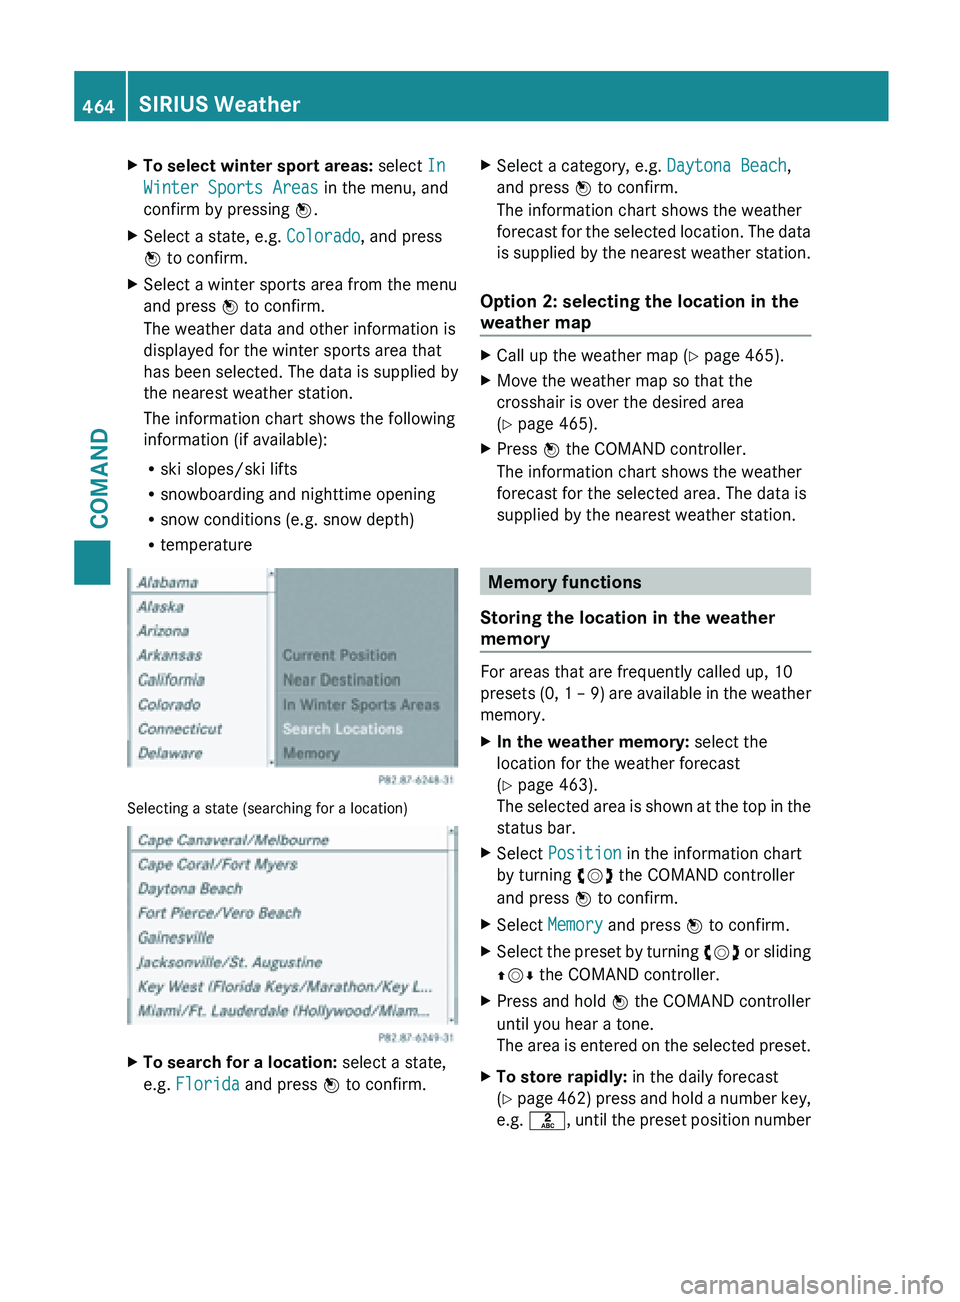
To select winter sport areas: select In
Winter Sports Areas in the menu, and
confirm by pressing W.
X Select a state, e.g. Colorado, and press
W to confirm.
X Select a winter sports area from the menu
and press W to confirm.
The weather data and other information is
displayed for the winter sports area that
has been selected. The data is supplied by
the nearest weather station.
The information chart shows the following
information (if available):
R
ski slopes/ski lifts
R snowboarding and nighttime opening
R snow conditions (e.g. snow depth)
R temperature Selecting a state (searching for a location)
X
To search for a location: select a state,
e.g. Florida and press W to confirm. X
Select a category, e.g. Daytona Beach,
and press W to confirm.
The information chart shows the weather
forecast for
the selected location. The data
is supplied by the nearest weather station.
Option 2: selecting the location in the
weather map X
Call up the weather map ( Y page 465).
X Move the weather map so that the
crosshair is over the desired area
(Y page 465).
X Press W the COMAND controller.
The information chart shows the weather
forecast for the selected area. The data is
supplied by the nearest weather station. Memory functions
Storing the location in the weather
memory For areas that are frequently called up, 10
presets (0,
1 – 9) are available in the weather
memory.
X In the weather memory: select the
location for the weather forecast
(Y page 463).
The selected
area is shown at the top in the
status bar.
X Select Position in the information chart
by turning cVd the COMAND controller
and press W to confirm.
X Select Memory and press W to confirm.
X Select the preset by turning cVd or
sliding
ZVÆ the COMAND controller.
X Press and hold W the COMAND controller
until you hear a tone.
The area
is entered on the selected preset.
X To store rapidly: in the daily forecast
(Y page
462) press and hold a number key,
e.g. l, until the preset position number464
SIRIUS Weather
COMAND
Page 470 of 572
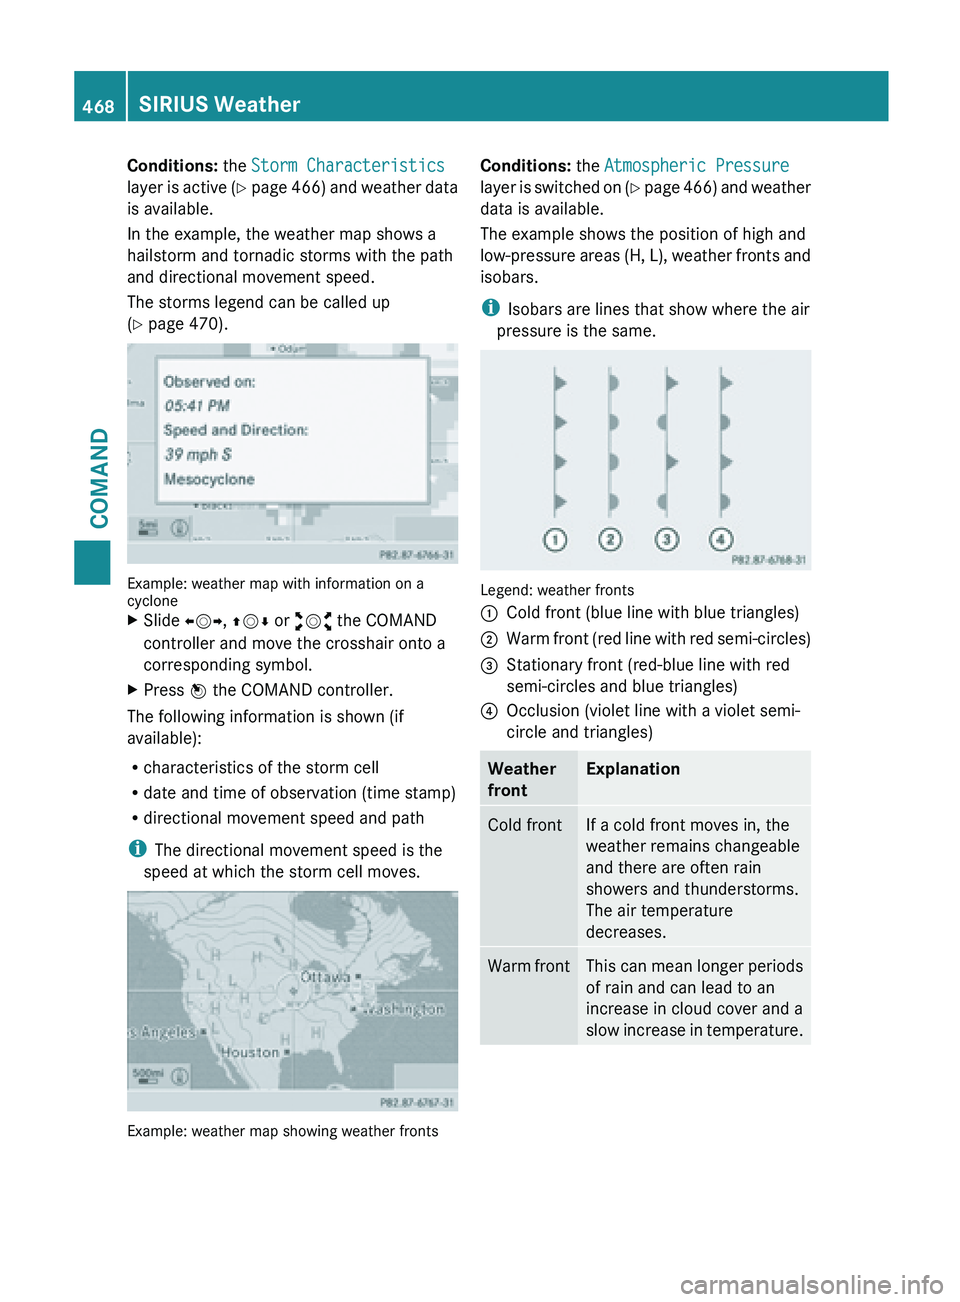
Conditions:
the Storm Characteristics
layer is
active (Y page 466) and weather data
is available.
In the example, the weather map shows a
hailstorm and tornadic storms with the path
and directional movement speed.
The storms legend can be called up
(Y page 470). Example: weather map with information on a
cyclone
X
Slide XVY, ZVÆ or aVb the COMAND
controller and move the crosshair onto a
corresponding symbol.
X Press W the COMAND controller.
The following information is shown (if
available):
R characteristics of the storm cell
R date and time of observation (time stamp)
R directional movement speed and path
i The directional movement speed is the
speed at which the storm cell moves. Example: weather map showing weather fronts Conditions:
the Atmospheric Pressure
layer is
switched on (Y page 466) and weather
data is available.
The example shows the position of high and
low-pressure areas (H, L), weather fronts and
isobars.
i Isobars are lines that show where the air
pressure is the same. Legend: weather fronts
:
Cold front (blue line with blue triangles)
; Warm front (red line with red semi-circles)
= Stationary front (red-blue line with red
semi-circles and blue triangles)
? Occlusion (violet line with a violet semi-
circle and triangles) Weather
front Explanation
Cold front If a cold front moves in, the
weather remains changeable
and there are often rain
showers and thunderstorms.
The air temperature
decreases.
Warm front This can mean longer periods
of rain and can lead to an
increase in cloud cover and a
slow
increase
in temperature.468
SIRIUS Weather
COMAND
Page 471 of 572
Weather
front Explanation
Stationary
front The weather front moves
minimally. The weather
remains changeable in this
area.
Occlusion This occurs when a faster cold
front reaches an advancing
warm front and combines
with it. The weather remains
changeable and rainy within
an occlusion.
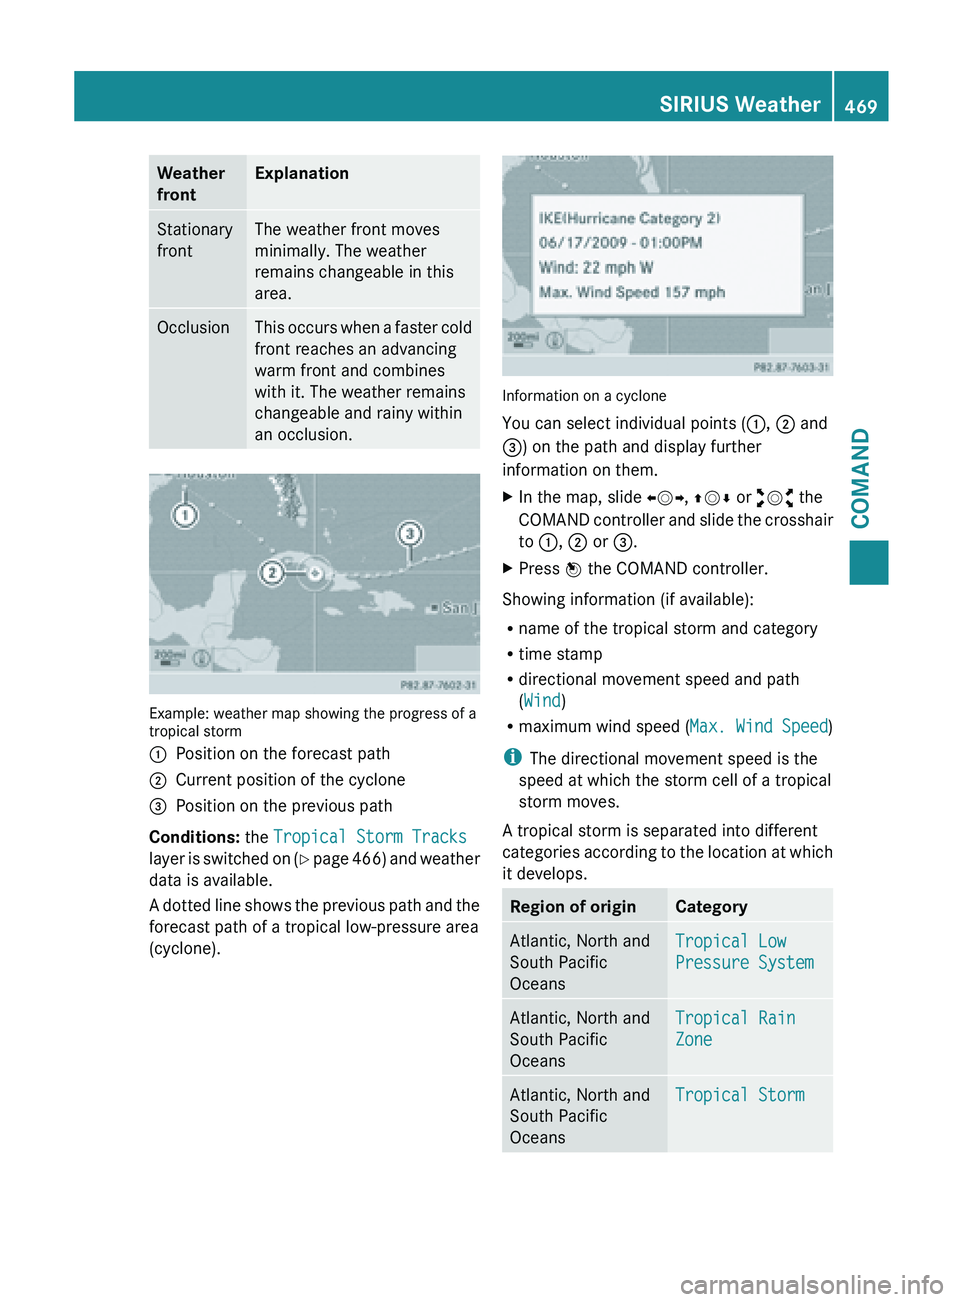
Example: weather map showing the progress of a
tropical storm
:
Position on the forecast path
; Current position of the cyclone
= Position on the previous path
Conditions: the Tropical Storm Tracks
layer is
switched on (Y page 466) and weather
data is available.
A dotted line shows the previous path and the
forecast path of a tropical low-pressure area
(cyclone). Information on a cyclone
You can select individual points (
:, ; and
=) on the path and display further
information on them.
X In the map, slide XVY, ZVÆ or aVb the
COMAND controller
and slide the crosshair
to :, ; or =.
X Press W the COMAND controller.
Showing information (if available):
R name of the tropical storm and category
R time stamp
R directional movement speed and path
(Wind)
R maximum wind speed ( Max. Wind Speed)
i The directional movement speed is the
speed at which the storm cell of a tropical
storm moves.
A tropical storm is separated into different
categories according
to the location at which
it develops. Region of origin Category
Atlantic, North and
South Pacific
Oceans
Tropical Low
Pressure System
Atlantic, North and
South Pacific
Oceans
Tropical Rain
Zone
Atlantic, North and
South Pacific
Oceans
Tropical StormSIRIUS Weather
469
COMAND Z