2013 MERCEDES-BENZ SL-CLASS ROADSTER wheel
[x] Cancel search: wheelPage 105 of 572

Mirrors
Rear-view mirror
X
Anti-glare mode: flick anti-glare lever :
forwards or back. Exterior mirrors
Adjusting the exterior mirrors G
WARNING
The exterior mirrors reduce the size of the
image. Objects are actually closer than they
appear. You
could misjudge the distance from
vehicles driving behind and cause an
accident, e.g. when changing lane. For this
reason, make sure of the actual distance from
the vehicle driving behind by glancing over
your shoulder. X
Make
sure that the SmartKey is in position
1 or 2 in the ignition lock.
X Press button : for the left-hand exterior
mirror or button ; for the right-hand
exterior mirror.
The indicator lamp in the corresponding
button lights up in red.
The indicator lamp goes out again after
some time. You can adjust the selected
mirror using adjustment button = as long
as the indicator lamp is lit.
X Press adjustment button = up, down, to
the right or to the left.
The exterior
mirror must be set to a position
that provides you with a good overview of
traffic conditions.
The convex exterior mirrors provide a larger
field of vision.
The exterior
mirrors are automatically heated
if the rear window defroster is switched on
and the outside temperature is low.
Exterior mirror out of position If an exterior mirror has been pushed out of
position, proceed as follows:
X
Move the exterior mirror into the correct
position manually.
The mirror housing is engaged again and
you can
adjust the exterior mirrors as usual
(Y page 103). Automatic anti-glare mirrors
G
WARNING
If incident light from headlamps is prevented
from striking the sensor in the rear-view
mirror, for
instance, by luggage piled too high
in the vehicle, the mirror's automatic anti-
glare function will not operate.
Incident light could then blind you. This may
distract you from the traffic conditions and,
as a result, you may cause an accident. Mirrors
103
Seats, steering wheel and mirrors Z
Page 106 of 572

The rear-view mirror and the exterior mirror
on
the
driver's side automatically go into anti-
glare mode if the following conditions are met
simultaneously:
R the ignition is switched on and
R incident light from headlamps strikes the
sensor in the rear-view mirror.
The mirrors do not go into anti-glare mode if
reverse gear is engaged or if the interior
lighting is switched on. Parking position for the exterior
mirror on the front-passenger side
Setting and
storing the parking positionUsing reverse gear
You can position the front-passenger side
exterior
mirror
in such a way that you can see
the rear wheel on that side as soon as you
engage reverse gear. You can store this
position.
X Make sure that the vehicle is stationary and
that the SmartKey is in position 2 in the
ignition lock.
X Press button ; for the exterior mirror on
the front-passenger side.
X Engage reverse gear.
The exterior mirror on the front-passenger
side moves to the preset parking position.
X Use adjustment button = to adjust the
exterior mirror
to a position that allows you
to see the rear wheel and the curb.
The parking position is stored. i
If you shift the transmission to another
position, the exterior mirror on the front-
passenger side returns to the driving
position.
Using the memory button
You can position the front-passenger side
exterior mirror
in such a way that you can see
the rear wheel on that side as soon as you
engage reverse gear. This setting can be
stored using memory button M ?.
X Make sure that the SmartKey is in
position 2 in the ignition lock.
X With the exterior mirror on the front-
passenger side activated, use adjustment
button = to adjust the exterior mirror. In
the exterior mirror, the rear wheel and the
curb should be visible.
X Press memory button M ? and
one of the
arrows on adjustment button = within
three seconds.
The parking position is stored if the exterior
mirror does not move.
X If the mirror moves out of position, repeat
the steps.
Calling up a stored parking position
setting X
Turn the SmartKey to position 2 in the
ignition lock.
X Adjust the exterior mirror on the front-
passenger side using button ;.
X Engage reverse gear.
The exterior mirror on the front-passenger
side moves to the stored parking position.
The exterior mirror on the front-passenger
side moves back to its original position:
R as soon as you exceed a speed of 9 mph
(15 km/h)
R if you press button :
for the exterior
mirror on the driver's side 104
Mirrors
Seats, steering wheel and mirrors
Page 107 of 572

Memory function
Storing settings
G
WARNING
Only use the memory function on the driver's
side when
the vehicle is stationary. You could
otherwise be distracted from the traffic
conditions by the seat moving of its own
accord, and as a result cause an accident. X
Adjust the seat electrically ( Y
page 98).
X On the driver's side, adjust the steering
wheel (Y page
101) and the exterior mirrors
(Y page 103).
X Press memory button M and one of the
storage position buttons 1, 2 or 3 within
three seconds.
The settings are stored in the selected
preset position. A tone sounds when the
settings have been completed. Calling up a stored setting
X Press and hold the relevant storage
position button 1
, 2 or 3 until the seat,
steering wheel and exterior mirrors are in
the stored position.
i The setting procedure is interrupted as
soon as you release the storage position
button. Memory function
105
Seats, steering wheel and mirrors Z
Page 115 of 572

Hazard warning lamps
X
To switch on the hazard warning lamps:
press button :.
All turn signals flash. If you now switch on
a turn
signal using the combination switch,
only the turn signal lamp on the
corresponding side of the vehicle will flash.
X To switch off the hazard warning
lamps: press button :.
The hazard warning lamps automatically
switch on if:
R an air bag is deployed.
R the vehicle decelerates rapidly from a
speed of
more than 45mph (70 km/h) and
comes to a standstill.
The hazard warning lamps switch off
automatically if the vehicle reaches a speed
of over 6mph (10km/h) again after a full
brake application.
i The hazard warning lamps still operate if
the ignition is switched off. Headlamp cleaning system
The headlamps are cleaned automatically if
the "Wipe with washer fluid" function is
operated five
times while the lights are on and
the engine is running (Y page 118). When you
switch off the ignition, the automatic
headlamp cleaning system is reset and
counting is resumed from 0. Cornering light function
The cornering light function improves the
illumination of the road over a wide angle in
the
direction
you are turning, enabling better
visibility in tight bends, for example. The
cornering light function can only be activated
when the low-beam headlamps are switched
on.
Active:
R if you are driving at speeds below
25mph (40 km/h) and switch on the turn
signal or turn the steering wheel
R if you are driving at speeds between
25mph (40 km/h) and45mph (70 km/h)
and turn the steering wheel
Not active: if your speed exceeds
25mph (40 km/h) or if you switch off the turn
signal or turn the steering wheel to the
straight-ahead position.
The cornering light function may remain lit for
a short time, but is automatically switched off
after no more than three minutes. Active light function
The active light function is a system that
moves the headlamps according to the
steering movements of the front wheels. In
this way, relevant areas remain illuminated
while driving. This allows you to recognize
pedestrians, cyclists and animals.
Active: when the lights are switched on. Exterior lighting
113
Lights and windshield wipers Z
Page 134 of 572

At high outside temperatures, open the air
vent and activate the "cooling with air
dehumidification" function. Otherwise,
temperature-sensitive items stored in the
glove box could be damaged.
:
Air vent thumbwheel
; Air vent
When automatic climate control is activated,
the glove box can be ventilated, for instance
to cool its contents. The level of airflow
depends on the airflow and air distribution
settings.
X To open/close: turn thumbwheel :
clockwise or counterclockwise. AIRSCARF, setting the vents
G
WARNING
When operating the climate control, the air
that enters the passenger compartment
through the air vents can be very hot or very
cold (depending
on the set temperature). This
could cause burns or frostbite to unprotected
skin in the immediate area of the air vents.
Always keep sufficient distance between
unprotected parts of the body and the air
vents. If necessary, use the air distribution
adjustment to direct the air to air vents in the
vehicle interior that are not in the immediate
area of unprotected skin. You can adjust the blower output of
AIRSCARF vents
: using the AIRSCARF
button ( Y page 101).132
Setting the air vents
Climate control
Page 137 of 572

G
WARNING
On slippery road surfaces, never downshift in
order to obtain braking action. This could
result in
drive wheel slip and reduced vehicle
control. Your vehicle's ABS will not prevent
this type of loss of control. G
WARNING
It is dangerous to shift the automatic
transmission out of parking position
P or
neutral position N if the engine speed is
higher than
idle speed. If your foot is not firmly
on the brake pedal, the vehicle could
accelerate quickly forward or in reverse. You
could lose control of the vehicle and hit
someone or something. Only shift into gear
when the engine is idling normally and when
your right foot is firmly on the brake pedal.
! Warm up the engine quickly. Do not use
the engine's full performance until it has
reached operating temperature.
Only shift the automatic transmission to
the desired drive position when the vehicle
is stationary.
Where possible, avoid spinning the drive
wheels when pulling away on slippery
roads. You could otherwise damage the
drive train.
! AMG vehicles: at low engine oil
temperatures below 68 ‡ (+20 †), the
maximum engine speed is restricted in
order to protect the engine. To protect the
engine and maintain smooth engine
operation, avoid driving at full throttle when
the engine is cold. SmartKey positions
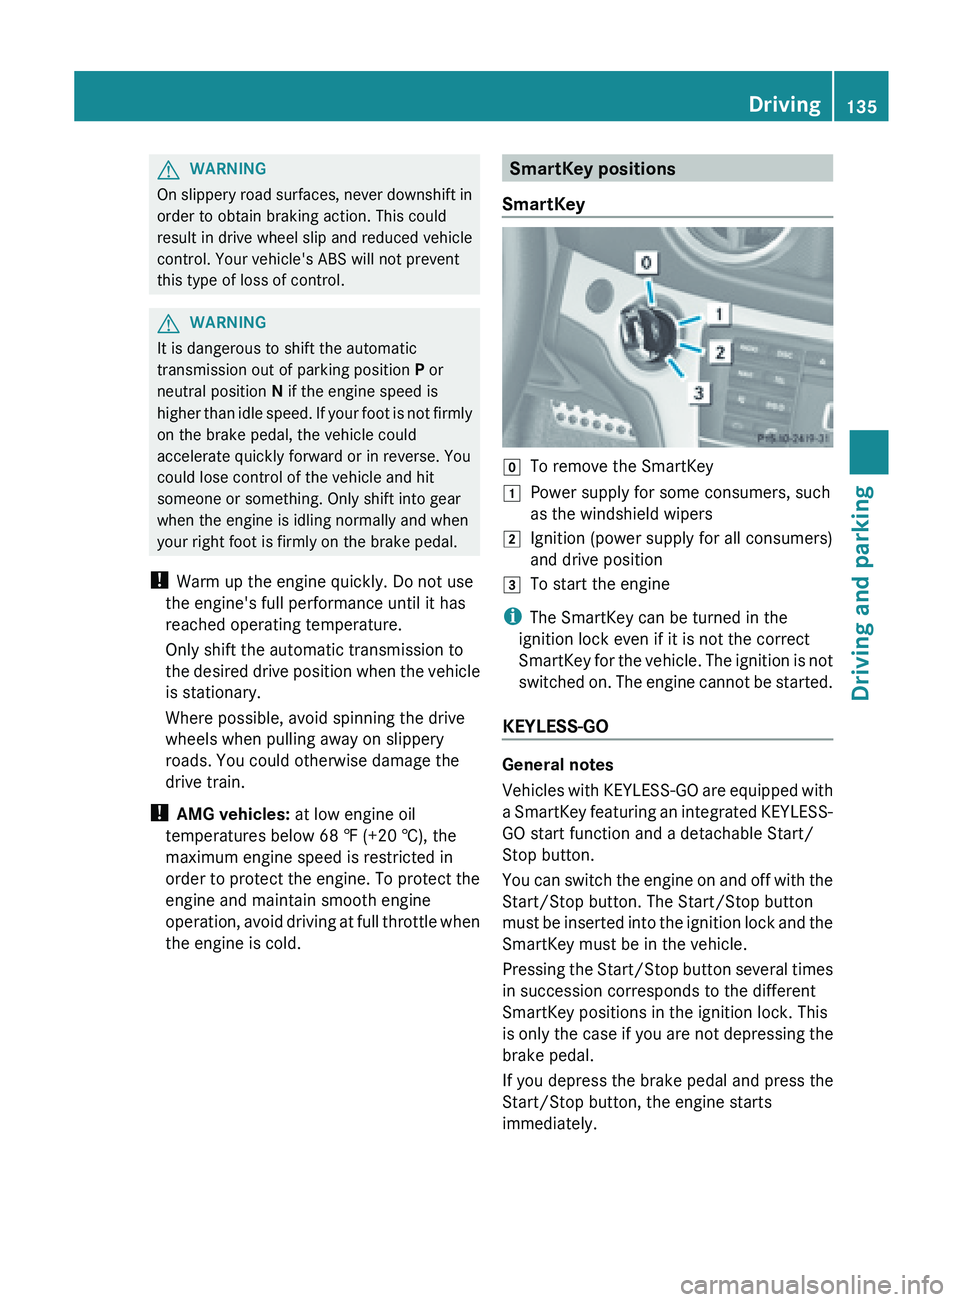
SmartKey g
To remove the SmartKey
1 Power supply for some consumers, such
as the windshield wipers
2 Ignition (power supply for all consumers)
and drive position
3 To start the engine
i The SmartKey can be turned in the
ignition lock even if it is not the correct
SmartKey for
the vehicle. The ignition is not
switched on. The engine cannot be started.
KEYLESS-GO General notes
Vehicles
with
KEYLESS-GO are equipped with
a SmartKey featuring an integrated KEYLESS-
GO start function and a detachable Start/
Stop button.
You can switch the engine on and off with the
Start/Stop button. The Start/Stop button
must be inserted into the ignition lock and the
SmartKey must be in the vehicle.
Pressing the Start/Stop button several times
in succession corresponds to the different
SmartKey positions in the ignition lock. This
is only the case if you are not depressing the
brake pedal.
If you depress the brake pedal and press the
Start/Stop button, the engine starts
immediately. Driving
135
Driving and parking Z
Page 148 of 572

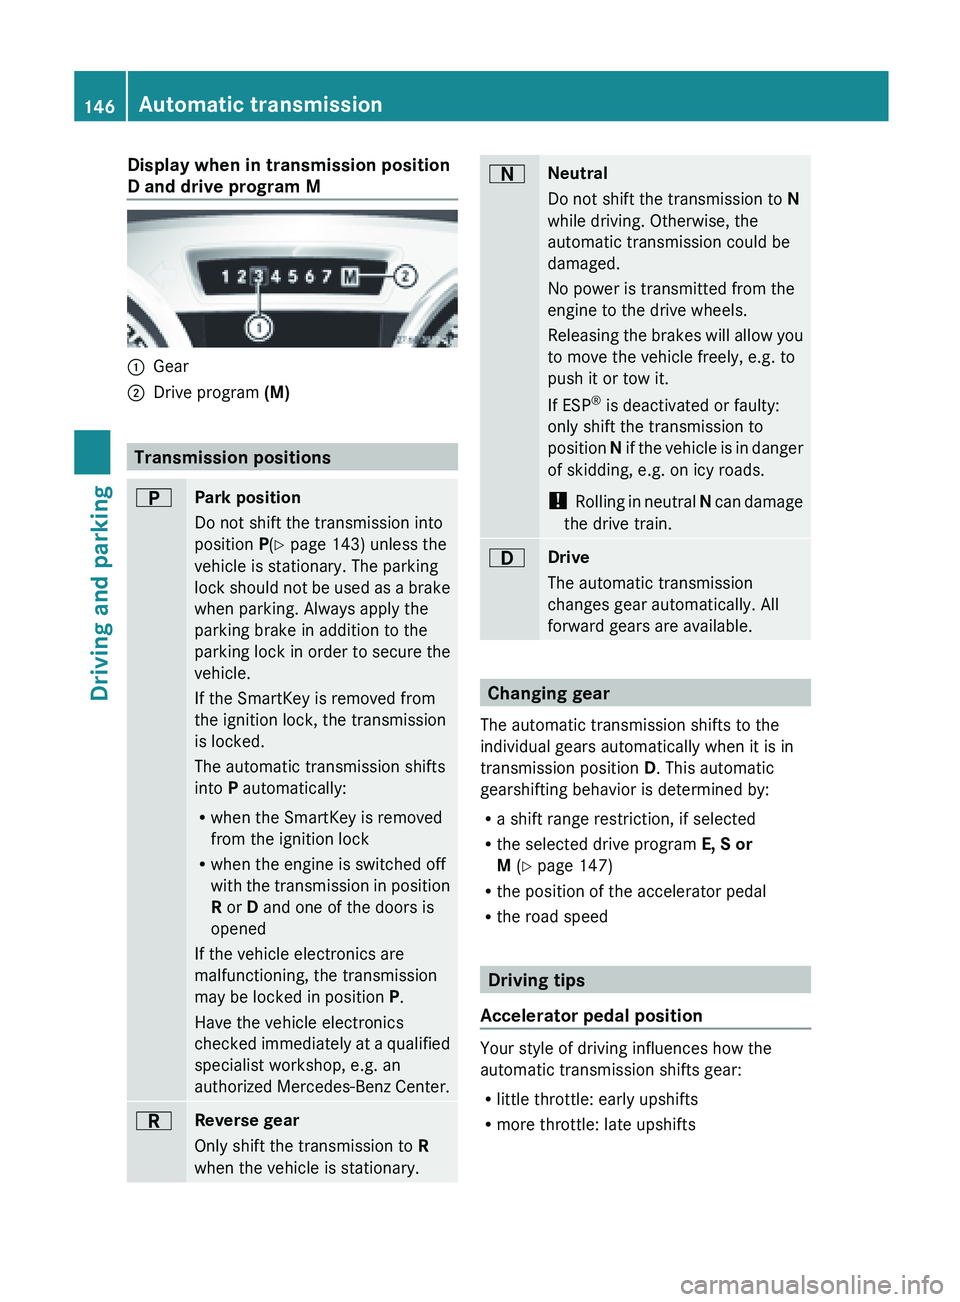
Display when in transmission position
D and drive program M
:
Gear
; Drive program (M) Transmission positions
B
Park position
Do not shift the transmission into
position P(Y page 143) unless the
vehicle is stationary. The parking
lock
should
not be used as a brake
when parking. Always apply the
parking brake in addition to the
parking lock in order to secure the
vehicle.
If the SmartKey is removed from
the ignition lock, the transmission
is locked.
The automatic transmission shifts
into P automatically:
R when the SmartKey is removed
from the ignition lock
R when the engine is switched off
with the transmission in position
R or D and one of the doors is
opened
If the vehicle electronics are
malfunctioning, the transmission
may be locked in position P.
Have the vehicle electronics
checked immediately at a qualified
specialist workshop, e.g. an
authorized Mercedes-Benz Center. C
Reverse gear
Only shift the transmission to
R
when the vehicle is stationary. A
Neutral
Do not shift the transmission to
N
while driving. Otherwise, the
automatic transmission could be
damaged.
No power is transmitted from the
engine to the drive wheels.
Releasing the
brakes will allow you
to move the vehicle freely, e.g. to
push it or tow it.
If ESP ®
is deactivated or faulty:
only shift the transmission to
position N if the vehicle is in danger
of skidding, e.g. on icy roads.
! Rolling in neutral N can damage
the drive train. 7
Drive
The automatic transmission
changes gear automatically. All
forward gears are available.
Changing gear
The automatic transmission shifts to the
individual gears automatically when it is in
transmission position D. This automatic
gearshifting behavior is determined by:
R a shift range restriction, if selected
R the selected drive program E, S or
M (Y page 147)
R the position of the accelerator pedal
R the road speed Driving tips
Accelerator pedal position Your style of driving influences how the
automatic transmission shifts gear:
R
little throttle: early upshifts
R more throttle: late upshifts146
Automatic transmission
Driving and parking
Page 150 of 572

With the drive program selector switch, you
can choose from a range of different
transmission configurations or select the
RACE START drive mode.
X
Turn drive program selector : until the
desired drive program appears in the
multifunction display.
R
C Controlled Efficiency: comfortable
engine and transmission design that
provides for optimum fuel consumption
R S Sport: sporty engine and transmission
settings
R S+ SportPlus: extremely sporty engine
and transmission settings
R M Manual: manual gearshifting
R RS driving
mode RACE START: optimum
acceleration dynamics from a standstill
(SL 63 AMG only)
X Turn drive program selector switch : until
the desired drive program is shown in the
multifunction display.
The drive program indicator on the drive
program selector lights up red.
i The automatic transmission shifts to
automatic drive program C
each time the
engine is started.
i RS cannot be selected during normal
driving. For further information on RACE
START, see ( Y page 177).
AMG button (SETUP) You can save and call up the following
presettings with the AMG button:
R
Drive program (Y page 147)
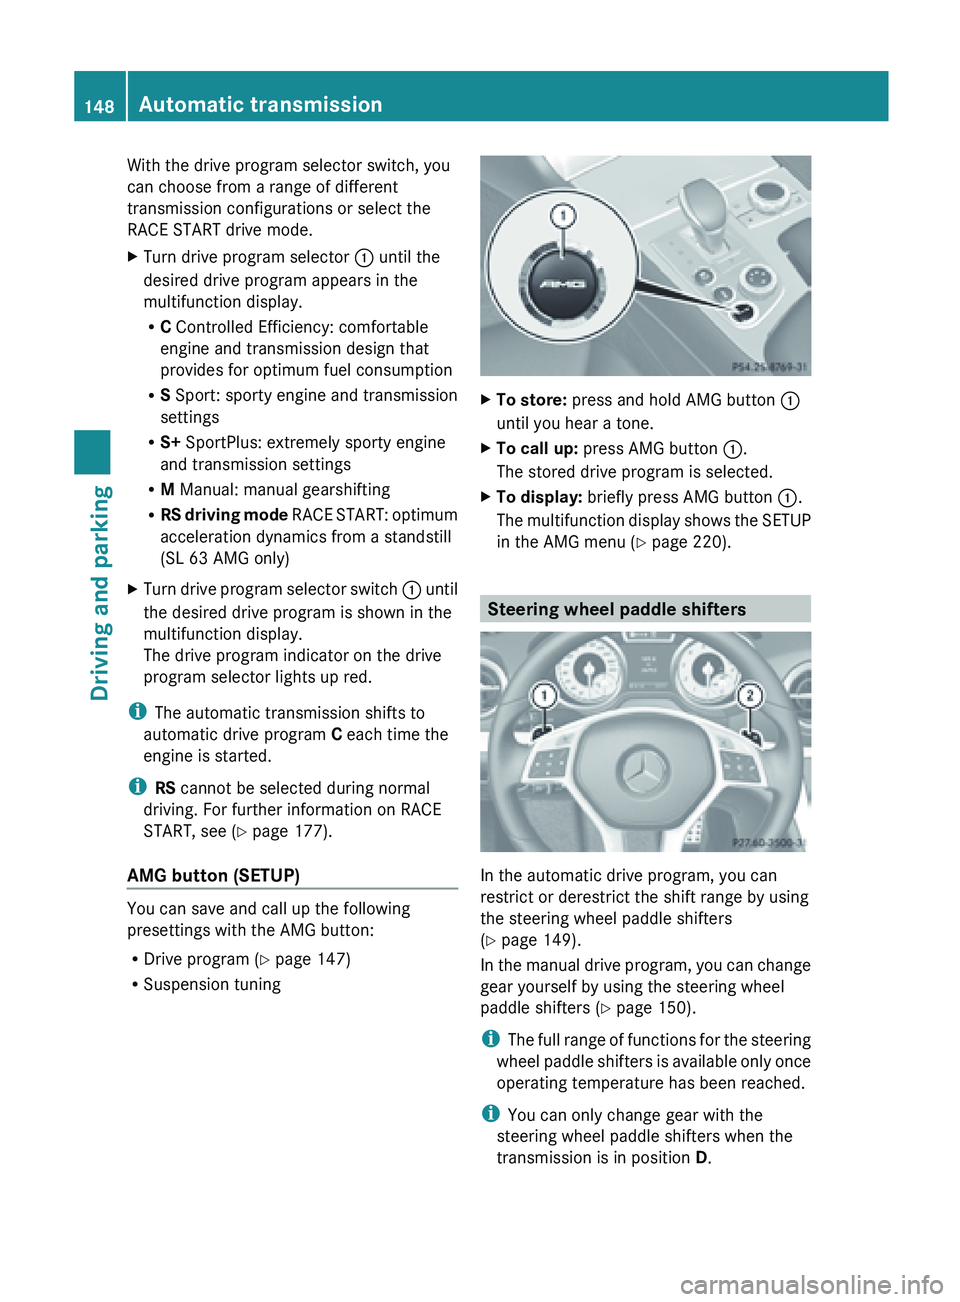
R Suspension tuning X
To store: press and hold AMG button :
until you hear a tone.
X To call up: press AMG button :.
The stored drive program is selected.
X To display: briefly press AMG button :.
The multifunction
display shows the SETUP
in the AMG menu (Y page 220). Steering wheel paddle shifters
In the automatic drive program, you can
restrict or derestrict the shift range by using
the steering wheel paddle shifters
(Y page 149).
In
the
manual drive program, you can change
gear yourself by using the steering wheel
paddle shifters ( Y page 150).
i The full range of functions for the steering
wheel paddle shifters is available only once
operating temperature has been reached.
i You can only change gear with the
steering wheel paddle shifters when the
transmission is in position D. 148
Automatic transmission
Driving and parking