2013 MERCEDES-BENZ SL-CLASS ROADSTER fuel consumption
[x] Cancel search: fuel consumptionPage 292 of 572

standard time are lost. Switching between
summer and standard time (
Y page 290).
i The following
navigation system functions
require the time, time zone and summer/
standard time to be set correctly in order
to work properly:
R route guidance on routes with time-
dependent traffic guidance
R calculation of expected time of arrival
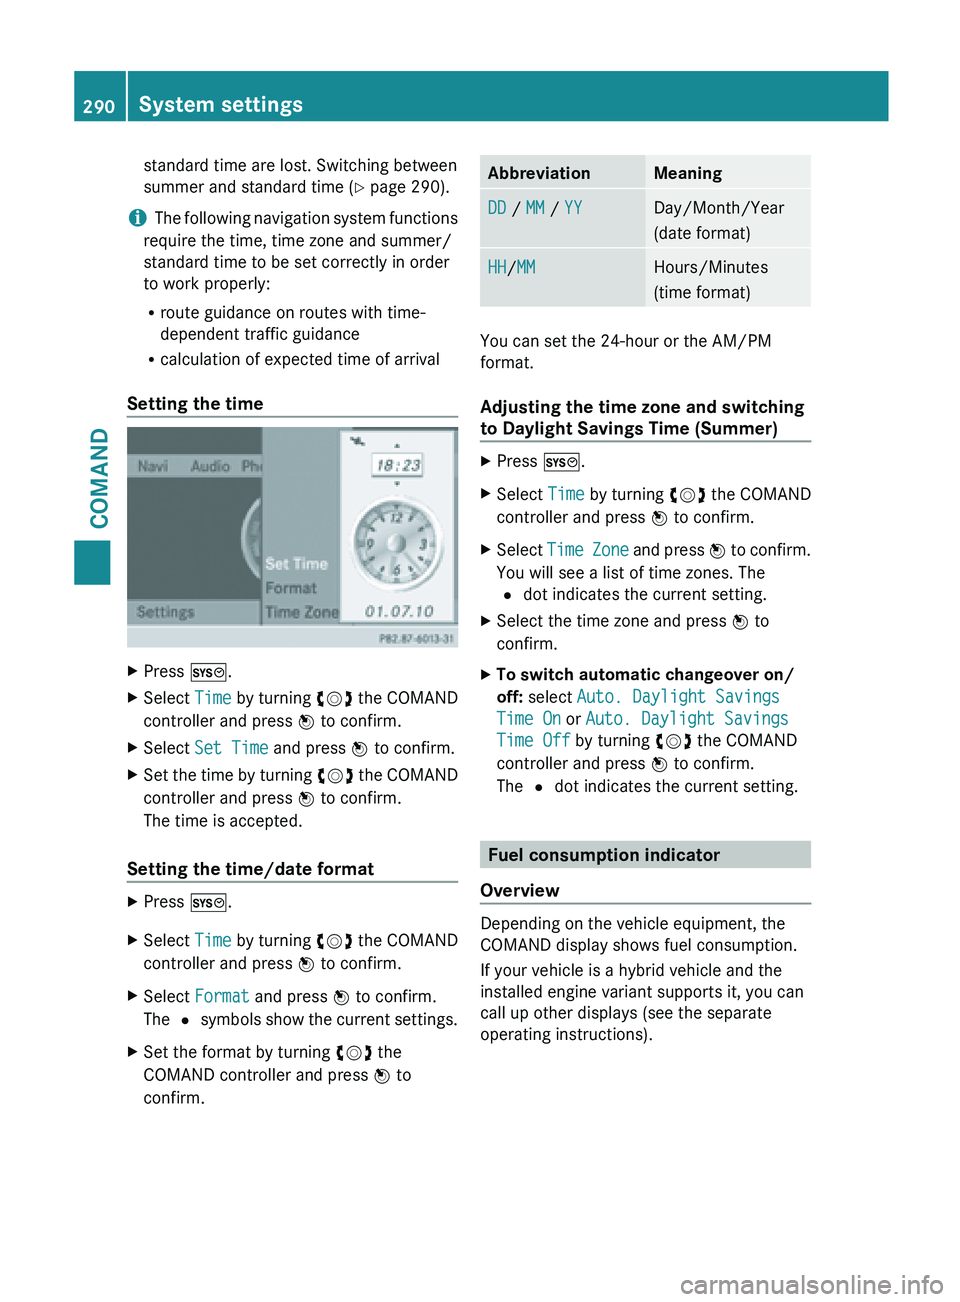
Setting the time X
Press W.
X Select Time by turning cVd the COMAND
controller and press W to confirm.
X Select Set Time and press W to confirm.
X Set the time by turning cVd the
COMAND
controller and press W to confirm.
The time is accepted.
Setting the time/date format X
Press W.
X Select Time by turning cVd the COMAND
controller and press W to confirm.
X Select Format and press W to confirm.
The # symbols
show the current settings.
X Set the format by turning cVd the
COMAND controller and press W to
confirm. Abbreviation Meaning
DD / MM / YY Day/Month/Year
(date format)
HH/MM Hours/Minutes
(time format)
You can set the 24-hour or the AM/PM
format.
Adjusting the time zone and switching
to Daylight Savings Time (Summer)
X
Press W.
X Select Time by turning cVd the COMAND
controller and press W to confirm.
X Select Time Zone
and press W to confirm.
You will see a list of time zones. The
# dot indicates the current setting.
X Select the time zone and press W to
confirm.
X To switch automatic changeover on/
off: select Auto. Daylight Savings
Time On or Auto. Daylight Savings
Time Off by turning cVd the COMAND
controller and press W to confirm.
The # dot indicates the current setting. Fuel consumption indicator
Overview Depending on the vehicle equipment, the
COMAND display shows fuel consumption.
If your vehicle is a hybrid vehicle and the
installed engine variant supports it, you can
call up other displays (see the separate
operating instructions).290
System settings
COMAND
Page 293 of 572

Calling up/exiting the display
X
To call up the full screen display: press
the W button.
X In the system menu, slide ZV the
COMAND controller up until the Full
Screen option is selected.
X Press W the COMAND controller.
The system display is shown as full screen
(without system menu).
X Slide XVY the COMAND controller
repeatedly until the fuel consumption
indicator appears.
The COMAND display shows the fuel
consumption for
the last 15 minutes of the
journey.
X To exit the full screen display: press W
the COMAND controller.
The system menu appears.
Every bar of the graph displays the average
value for one minute.
The fuel consumption indicator may differ
from the indicator in the FROM START trip
computer in the Trip menu (Y page 209).Driving conditions menu (Active Body
Control)
General notes On vehicles with Active Body Control (ABC),
you can display some driving systems and
additional information in the COMAND
display. Calling up drive status regulator (ABC) X
Press W.
X In the system menu, slide ZV the
COMAND controller up until the display/
selection window is selected.
X Slide XVY the COMAND controller
repeatedly until the drive status regulator
(ABC) appears.
The corresponding displays appear in the
COMAND display.
Details on the displays:
R for standard vehicles ( Y page 180)
R for AMG vehicles ( Y page 183)
Exiting the display X
Slide XVY the COMAND controller until
the desired display (clock or fuel
consumption) is shown. Text reader settings
X Press the W button.
X Select Settings by turning cVd the
COMAND controller and press W to
confirm.
X Select Text Reader Speed and press W
to confirm.
A list appears. The # dot indicates the
current setting.
X Select a setting by turning cVd the
COMAND controller and press W to
confirm. Voice Control System settings
Opening/closing the help window The help window provides information in
addition to the audible instructions during
individualization and during the subsequent
voice control. System settings
291
COMAND Z
Page 300 of 572

Carpool lanes may only be used under certain
conditions.
Normally
you can use these lanes
when two or more occupants are traveling in
the vehicle. However, there are lanes that can
only be used when three or four occupants
(e.g. in New York) travel in the vehicle. In
California, lone drivers can use a carpool lane
if their vehicle's emission level or fuel
consumption is below a fixed threshold.
Carpool lanes may be reserved for specific
times (e.g. during the peak period).
Carpool lanes are identified by HOV symbols
on special road signs and by markings on the
road. The road signs may also include the
designation CARPOOL. The lanes are arranged
as a separate lane next to the others or are
built as a physically separate lane.
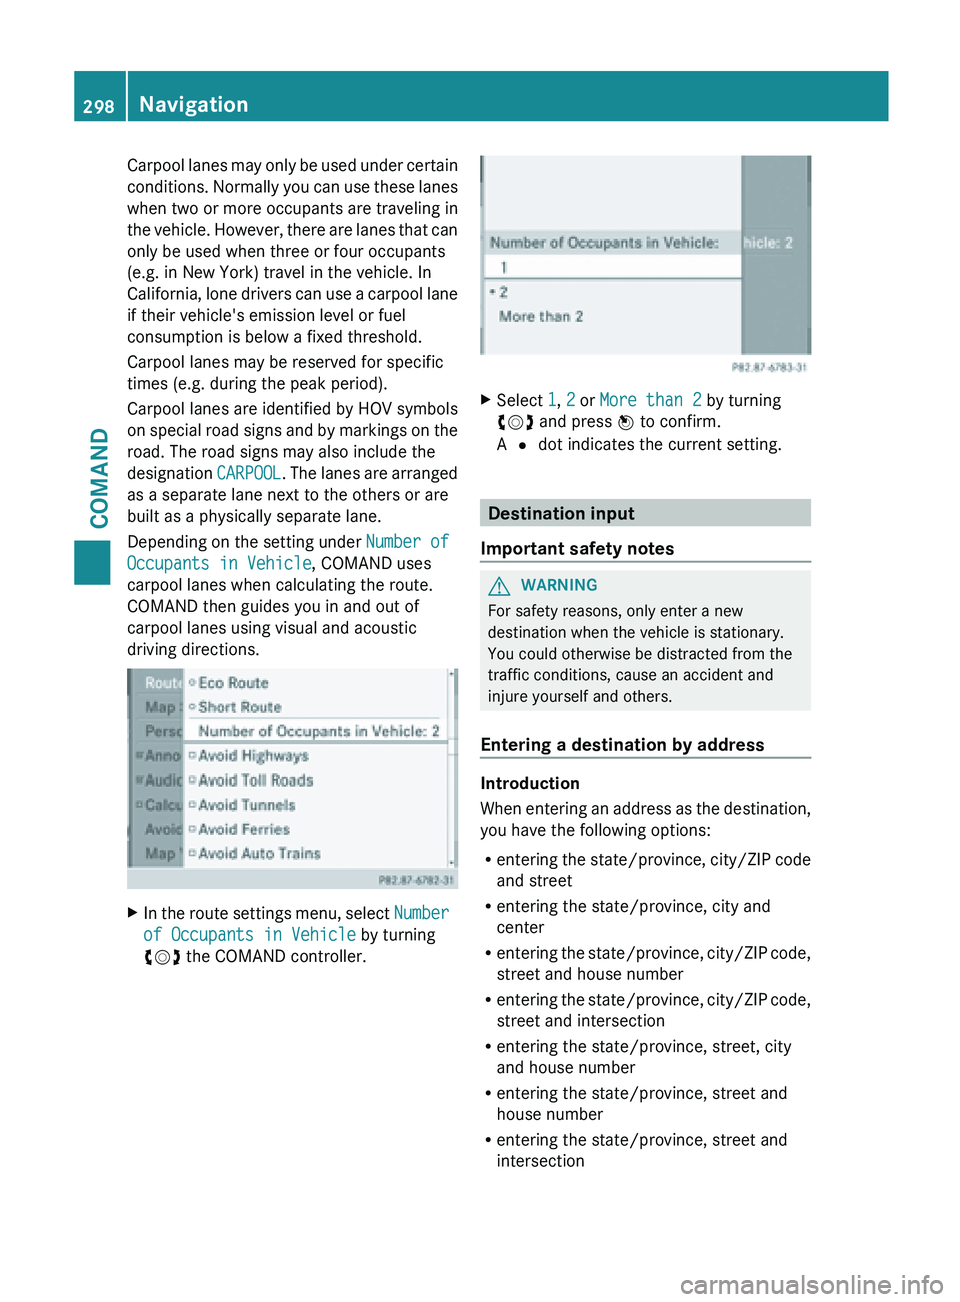
Depending on the setting under Number of
Occupants in Vehicle, COMAND uses
carpool lanes when calculating the route.
COMAND then guides you in and out of
carpool lanes using visual and acoustic
driving directions. X
In the route settings menu, select Number
of Occupants in Vehicle by turning
cVd the COMAND controller. X
Select 1, 2 or More than 2 by turning
cVd and press W to confirm.
A # dot indicates the current setting. Destination input
Important safety notes G
WARNING
For safety reasons, only enter a new
destination when the vehicle is stationary.
You could otherwise be distracted from the
traffic conditions, cause an accident and
injure yourself and others.
Entering a destination by address Introduction
When
entering
an address as the destination,
you have the following options:
R entering the state/province, city/ZIP code
and street
R entering the state/province, city and
center
R entering the state/province, city/ZIP code,
street and house number
R entering the state/province, city/ZIP code,
street and intersection
R entering the state/province, street, city
and house number
R entering the state/province, street and
house number
R entering the state/province, street and
intersection298
Navigation
COMAND
Page 534 of 572

Underinflated or overinflated tires
Underinflation G
WARNING
Tires with pressure that is too low can
overheat and burst as a consequence. In
addition, they
also suffer from excessive and/
or irregular wear, which can severely impair
the braking properties and the driving
characteristics. There is a risk of an accident.
Avoid tire pressures that are too low in all the
tires, including the spare wheel.
Underinflated tires may:
R overheat, leading to tire defects
R have an adverse effect on handling
characteristics
R wear quickly and unevenly
R have an adverse effect on fuel consumption
Overinflation G
WARNING
Tires
with excessively high pressure can burst
because they are damaged more easily by
road debris, potholes etc. In addition, they
also suffer from irregular wear, which can
severely impair
the braking properties and the
driving characteristics. There is a risk of an
accident.
Avoid tire pressures that are too high in all the
tires, including the spare wheel.
Overinflated tires may:
R increase the braking distance
R have an adverse effect on handling
characteristics
R wear quickly and unevenly
R have an adverse effect on ride comfort
R be more susceptible to damage Maximum tire pressures
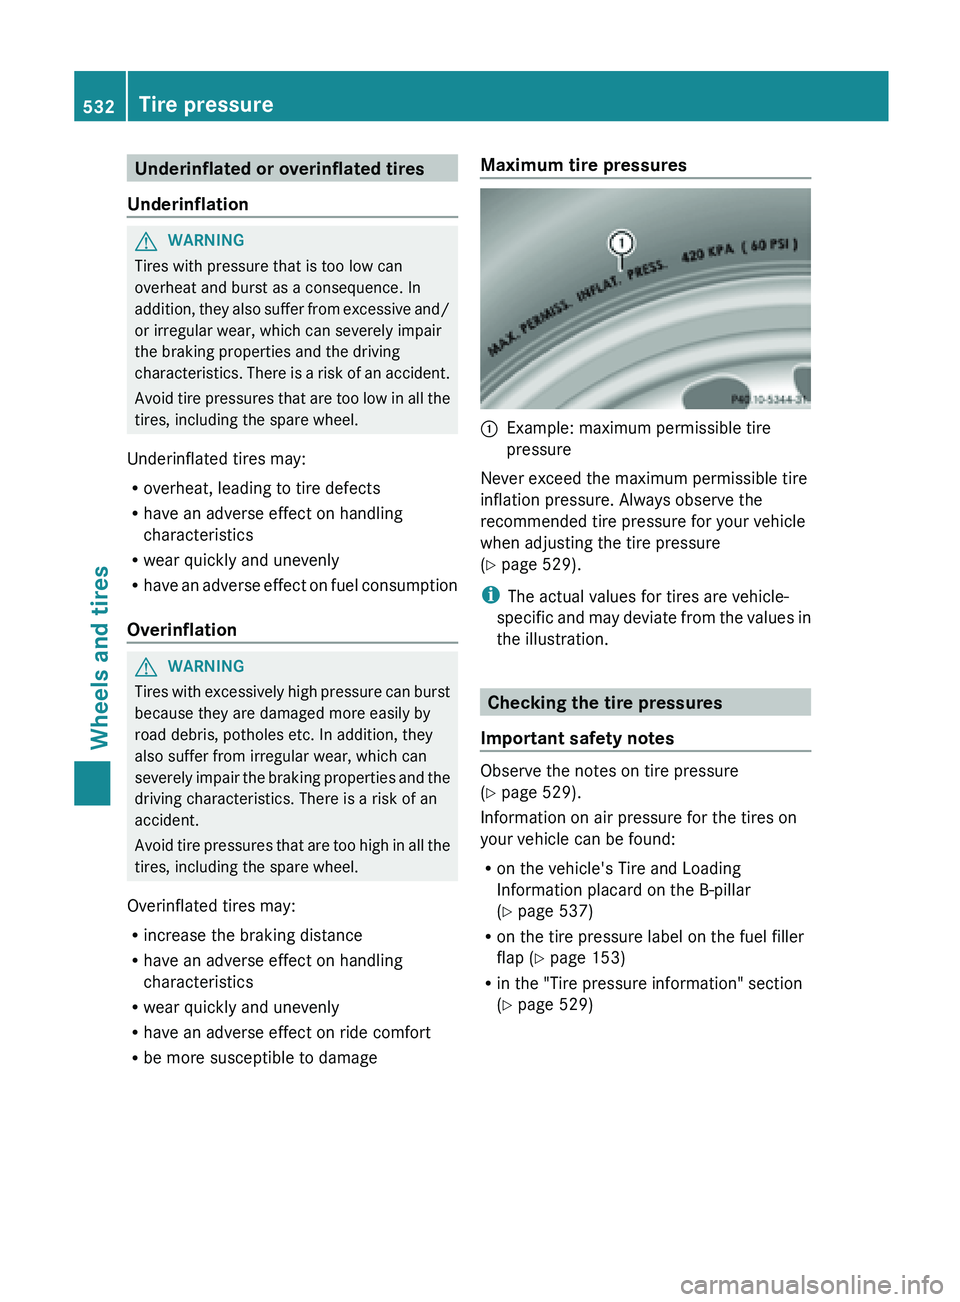
:
Example: maximum permissible tire
pressure
Never exceed the maximum permissible tire
inflation pressure. Always observe the
recommended tire pressure for your vehicle
when adjusting the tire pressure
(
Y page 529).
i The actual values for tires are vehicle-
specific and
may deviate from the values in
the illustration. Checking the tire pressures
Important safety notes Observe the notes on tire pressure
(
Y page 529).
Information on air pressure for the tires on
your vehicle can be found:
R on the vehicle's Tire and Loading
Information placard on the B-pillar
(Y page 537)
R on the tire pressure label on the fuel filler
flap ( Y page 153)
R in the "Tire pressure information" section
(Y page 529)532
Tire pressure
Wheels and tires
Page 555 of 572

These tires have been specially adapted for
use with the control systems, such as ABS
or ESP
®
, and are marked as follows:
R MO = Mercedes-Benz Original
R MOE =
Mercedes-Benz Original Extended
(tires featuring run-flat characteristics)
R MO1 = Mercedes-Benz Original (only
certain AMG tires)
Mercedes-Benz Original Extended tires
may only be used on wheels that have been
specifically approved by Mercedes-Benz.
Only use tires, wheels or accessories
tested and approved by Mercedes-Benz.
Certain characteristics, e.g. handling,
vehicle noise emissions or fuel
consumption, may otherwise be adversely
affected. In addition, when driving with a
load, tire dimension variations could cause
the tires to come into contact with the
bodywork and axle components. This could
result in damage to the tires or the vehicle.
Mercedes-Benz accepts no liability for
damage resulting from the use of tires,
wheels or accessories other than those
tested and approved.
Information on tires, wheels and approved
combinations can be obtained from any
qualified specialist workshop.
Overview of abbreviations used in the
following tire tables:
R BA: both axles
R FA: front axle
R RA: rear axle
The recommended pressures for various
operating conditions can be found:
R on the Tire and Loading Information placard
with the recommended tire pressures on
the B-pillar on the driver's side
R in the tire pressure table on the inside of
the fuel filler flap
Observe the notes on recommended tire
pressures under various operating conditions
(Y page 529). Check tire pressures regularly, and only when
the tires are cold. Comply with the
maintenance recommendations of the tire
manufacturer in
the vehicle document wallet.
Notes on the vehicle equipment – always
equip the vehicle with:
R tires of the same size on a given axle (left/
right)
R the same type of tires at a given time
(summer tires, winter tires, MOExtended
tires)
Vehicles equipped with MOExtended tires are
not equipped with a TIREFIT kit at the factory.
It is therefore recommended that you
additionally equip your vehicle with a TIREFIT
kit if you mount tires that do not feature run-
flat properties, e.g. winter tires. A TIREFIT kit
may be obtained from a qualified specialist
workshop.
i Not all wheel and tire combinations are
available ex factory for all countries.
i On the following pages, you can find
information on approved wheel rims and
tire sizes for equipping your vehicle with
winter tires. Winter tires are not available
ex factory as standard equipment or
optional extras.
If you would like to equip your vehicle with
approved winter tires, you may also, in
certain circumstances, require rims of the
appropriate size. The sizes of the approved
winter tires may deviate from that of the
standard tires. This is dependent on the
model and the equipment installed at the
factory.
The tires and wheel rims, as well as further
information, can be obtained at a qualified
specialist workshop. Wheel and tire combinations
553
Wheels and tires Z