2013 CHEVROLET CAPTIVA SPORT key
[x] Cancel search: keyPage 58 of 374
Black plate (16,1)Chevrolet Captiva Sport Owner Manual - 2013 - crc - 11/12/12
3-16 Seats and Restraints
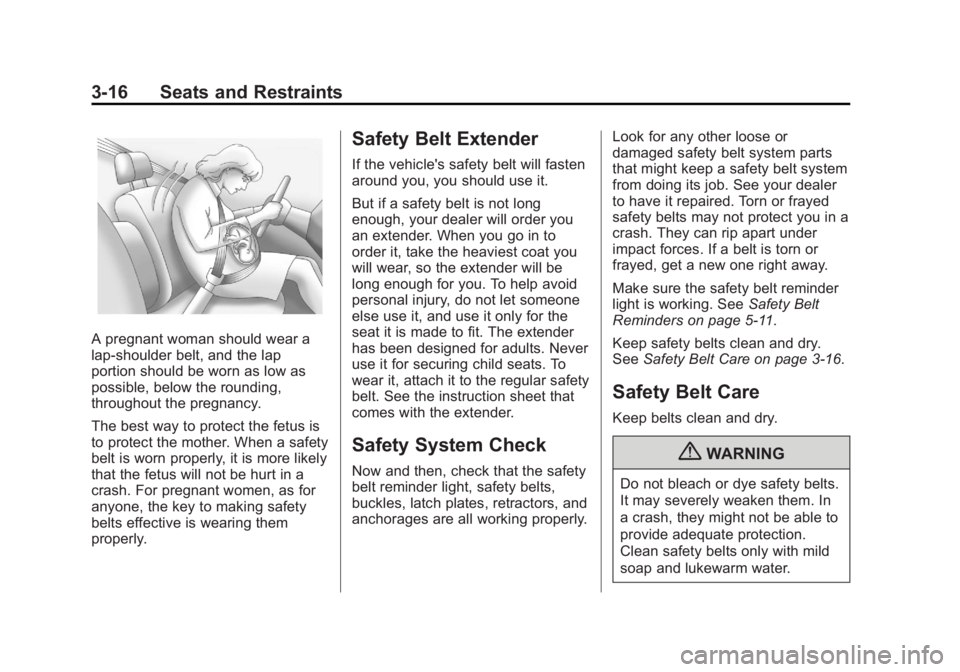
A pregnant woman should wear a
lap-shoulder belt, and the lap
portion should be worn as low as
possible, below the rounding,
throughout the pregnancy.
The best way to protect the fetus is
to protect the mother. When a safety
belt is worn properly, it is more likely
that the fetus will not be hurt in a
crash. For pregnant women, as for
anyone, the key to making safety
belts effective is wearing them
properly. Safety Belt Extender If the vehicle's safety belt will fasten
around you, you should use it.
But if a safety belt is not long
enough, your dealer will order you
an extender. When you go in to
order it, take the heaviest coat you
will wear, so the extender will be
long enough for you. To help avoid
personal injury, do not let someone
else use it, and use it only for the
seat it is made to fit. The extender
has been designed for adults. Never
use it for securing child seats. To
wear it, attach it to the regular safety
belt. See the instruction sheet that
comes with the extender.
Safety System Check Now and then, check that the safety
belt reminder light, safety belts,
buckles, latch plates, retractors, and
anchorages are all working properly. Look for any other loose or
damaged safety belt system parts
that might keep a safety belt system
from doing its job. See your dealer
to have it repaired. Torn or frayed
safety belts may not protect you in a
crash. They can rip apart under
impact forces. If a belt is torn or
frayed, get a new one right away.
Make sure the safety belt reminder
light is working. See Safety Belt
Reminders on page 5 ‑ 11 .
Keep safety belts clean and dry.
See Safety Belt Care on page 3 ‑ 16 .
Safety Belt Care Keep belts clean and dry.
{ WARNING
Do not bleach or dye safety belts.
It may severely weaken them. In
a crash, they might not be able to
provide adequate protection.
Clean safety belts only with mild
soap and lukewarm water.
Page 66 of 374
Black plate (24,1)Chevrolet Captiva Sport Owner Manual - 2013 - crc - 11/12/12
3-24 Seats and Restraints The parts of the airbag that come
into contact with you may be warm,
but not too hot to touch. There may
be some smoke and dust coming
from the vents in the deflated
airbags. Airbag inflation does not
prevent the driver from seeing out of
the windshield or being able to steer
the vehicle, nor does it prevent
people from leaving the vehicle.
{ WARNINGWhen an airbag inflates, there
may be dust in the air. This dust
could cause breathing problems
for people with a history of
asthma or other breathing trouble.
To avoid this, everyone in the
vehicle should get out as soon as
it is safe to do so. If you have
breathing problems but cannot
get out of the vehicle after an
airbag inflates, then get fresh air
by opening a window or a door.
(Continued) WARNING (Continued) If you experience breathing
problems following an airbag
deployment, you should seek
medical attention.
The vehicle has a feature that may
automatically unlock the doors, turn
on the interior lamps and hazard
warning flashers, and shut off the
fuel system after the airbags inflate.
You can lock the doors, turn off the
interior lamps and hazard warning
flashers by using the controls for
those features. You must first,
however, turn the ignition key to the
following ignition switch positions:
1. Turn the ignition key to
LOCK/OFF.
2. Turn the ignition key to ON/RUN. { WARNINGA crash severe enough to inflate
the airbags may have also
damaged important functions in
the vehicle, such as the fuel
system, brake and steering
systems, etc. Even if the vehicle
appears to be drivable after a
moderate crash, there may be
concealed damage that could
make it difficult to safely operate
the vehicle.
Use caution if you should attempt
to restart the engine after a crash
has occurred.
In many crashes severe enough to
inflate the airbag, windshields are
broken by vehicle deformation.
Additional windshield breakage may
also occur from the right front
passenger airbag. .
Airbags are designed to inflate
only once. After an airbag
inflates, you will need some new
Page 93 of 374
Black plate (1,1)Chevrolet Captiva Sport Owner Manual - 2013 - crc - 11/12/12
Storage 4-1
Storage Storage Compartments Instrument Panel Storage . . . . . 4-1
Glove Box . . . . . . . . . . . . . . . . . . . . 4-1
Cupholders . . . . . . . . . . . . . . . . . . . 4-1
Front Storage . . . . . . . . . . . . . . . . . 4-1
Sunglasses Storage . . . . . . . . . . 4-1
Center Console Storage . . . . . . 4-2
Additional Storage Features Cargo Cover . . . . . . . . . . . . . . . . . . 4-2
Cargo Tie-Downs . . . . . . . . . . . . . 4-2
Cargo Management
System . . . . . . . . . . . . . . . . . . . . . . 4-2
Convenience Net . . . . . . . . . . . . . 4-3
Roof Rack System Roof Rack System . . . . . . . . . . . . 4-3 Storage
Compartments Instrument Panel Storage The vehicle has a storage area to
the left of the steering wheel. Pull
down on the handle to access.
Glove Box To open the glove box, lift up on the
lever. If the glove box has a lock,
use the key to lock and unlock it.
Cupholders There are cupholders in the center
console and in the second row seat
armrest.
Pull down the armrest to access the
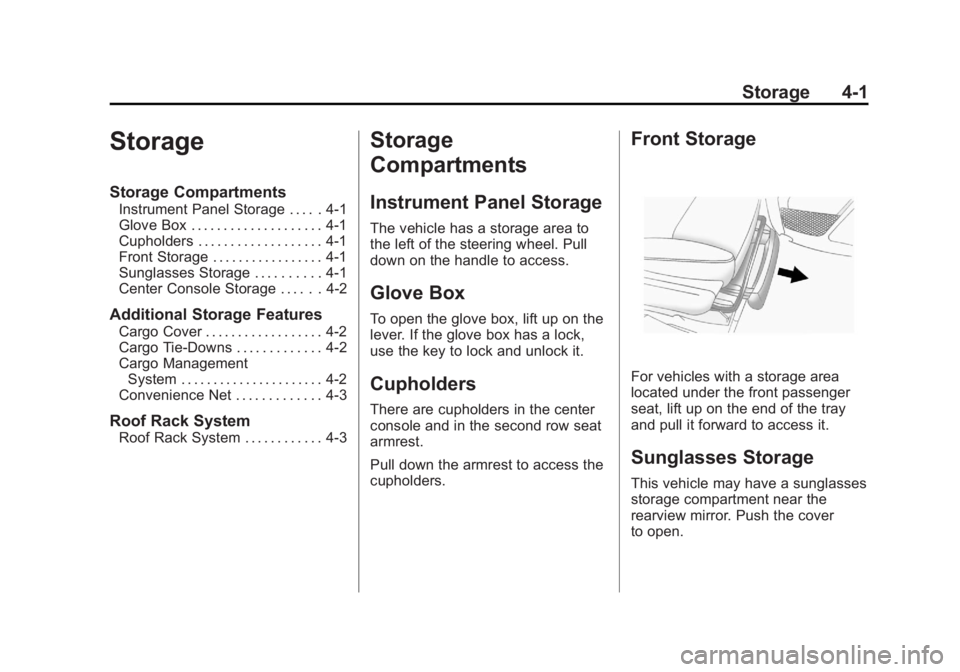
cupholders. Front Storage
For vehicles with a storage area
located under the front passenger
seat, lift up on the end of the tray
and pull it forward to access it.
Sunglasses Storage This vehicle may have a sunglasses
storage compartment near the
rearview mirror. Push the cover
to open.
Page 97 of 374
Black plate (1,1)Chevrolet Captiva Sport Owner Manual - 2013 - crc - 11/12/12
Instruments and Controls 5-1
Instruments and
Controls Controls Steering Wheel Adjustment . . . 5-2
Steering Wheel Controls . . . . . . 5-2
Horn . . . . . . . . . . . . . . . . . . . . . . . . . . 5-3
Windshield Wiper/Washer . . . . . 5-3
Rear Window Wiper/
Washer . . . . . . . . . . . . . . . . . . . . . . 5-4
Compass . . . . . . . . . . . . . . . . . . . . . 5-4
Clock . . . . . . . . . . . . . . . . . . . . . . . . . 5-6
Power Outlets . . . . . . . . . . . . . . . . . 5-7
Warning Lights, Gauges, and
Indicators Warning Lights, Gauges, and
Indicators . . . . . . . . . . . . . . . . . . . . 5-8
Instrument Cluster . . . . . . . . . . . . 5-9
Speedometer . . . . . . . . . . . . . . . . 5-10
Odometer . . . . . . . . . . . . . . . . . . . . 5-10
Trip Odometer . . . . . . . . . . . . . . . 5-10
Tachometer . . . . . . . . . . . . . . . . . . 5-10
Fuel Gauge . . . . . . . . . . . . . . . . . . 5-10
Safety Belt Reminders . . . . . . . 5-11 Airbag Readiness Light . . . . . . 5-12
Passenger Airbag Status
Indicator (United States) . . . . 5-12
Charging System Light . . . . . . 5-13
Malfunction
Indicator Lamp . . . . . . . . . . . . . 5-14
Service Vehicle Soon
Light . . . . . . . . . . . . . . . . . . . . . . . 5-16
Brake System Warning
Light . . . . . . . . . . . . . . . . . . . . . . . 5-16
Electric Parking Brake
Light . . . . . . . . . . . . . . . . . . . . . . . 5-17
Antilock Brake System (ABS)
Warning Light . . . . . . . . . . . . . . 5-18
All-Wheel-Drive Light . . . . . . . . 5-18
Power Steering Warning
Light . . . . . . . . . . . . . . . . . . . . . . . 5-19
StabiliTrak ®
Indicator Light . . . 5-19
Traction Control System
(TCS) Warning Light . . . . . . . 5-19
Engine Coolant Temperature
Warning Light . . . . . . . . . . . . . . 5-20
Tire Pressure Light . . . . . . . . . . 5-20
Fuel Economy Light . . . . . . . . . 5-20
Low Fuel Warning Light . . . . . . 5-21
Security Light . . . . . . . . . . . . . . . . 5-21 Reduced Engine Power
Light . . . . . . . . . . . . . . . . . . . . . . . 5-21
High-Beam On Light . . . . . . . . . 5-22
Front Fog Lamp Light . . . . . . . . 5-22
Low Washer Fluid Warning
Light . . . . . . . . . . . . . . . . . . . . . . . 5-22
Cruise Control Light . . . . . . . . . 5-22
Door Ajar Light . . . . . . . . . . . . . . 5-22
Gate Ajar Light . . . . . . . . . . . . . . 5-23
Information Displays Driver Information
Center (DIC) . . . . . . . . . . . . . . . 5-23
Vehicle Messages Vehicle Messages . . . . . . . . . . . 5-28
Brake System Messages . . . . 5-28
Compass Messages . . . . . . . . . 5-29
Cruise Control Messages . . . . 5-29
Door Ajar Messages . . . . . . . . . 5-29
Engine Cooling System
Messages . . . . . . . . . . . . . . . . . . 5-30
Engine Oil Messages . . . . . . . . 5-30
Engine Power Messages . . . . 5-31
Fuel System Messages . . . . . . 5-31
Key and Lock Messages . . . . . 5-32
Lamp Messages . . . . . . . . . . . . . 5-32
Page 102 of 374
Black plate (6,1)Chevrolet Captiva Sport Owner Manual - 2013 - crc - 11/12/12
5-6 Instruments and Controls It is suggested to calibrate away
from tall buildings, utility wires,
manhole covers, or other industrial
structures, if possible.
If CAL should ever appear in the
DIC display, the compass should be
calibrated.
If the DIC display does not show a
heading, for example, N for North,
or the heading does not change
after making turns, there may be a
strong magnetic field interfering with
the compass. Such interference
may be caused by a magnetic CB or
cell phone antenna mount, a
magnetic emergency light, magnetic
note pad holder, or any other
magnetic item. Turn off the vehicle,
move the magnetic item, then turn
on the vehicle and calibrate the
compass. To calibrate the compass, use the
following procedure:
Compass Calibration Procedure
1. Before calibrating the compass,
make sure the compass is set to
the variance zone in which the
vehicle is located. See
“ Compass Variance (Zone)
Procedure ” earlier in this
section.
Do not operate any switches
such as window, sunroof,
climate controls, seats, etc.
during the calibration procedure.
2. Press the vehicle information
button until PRESS
V TO
CALIBRATE COMPASS
displays.
3. Press the set/reset button to
start the compass calibration.
4. The DIC will display
CALIBRATING COMPASS:
TURN IN CIRCLES. Drive the
vehicle in tight circles at less
than 8 km/h (5 mph) to complete
the calibration. The DIC will display COMPASS
CALIBRATION COMPLETE for a
few seconds when the
calibration is complete. The DIC
display will then return to the
previous menu.
Clock To set the time and date:
1. Turn the ignition key to ACC/
ACCESSORY or ON/RUN.
Press
O to turn the radio on.
2. Press
H and HR, MIN, MM, DD,
and YYYY (hour, minute, month,
day, and year) display.
3. Press the softkey below any one
of the tabs to be changed.
4. To increase the time or date do
one of the following: .
Press the softkey below the
selected tab. .
Press
¨ SEEK, or
\ FWD. .
Turn
f clockwise.
Page 103 of 374

Black plate (7,1)Chevrolet Captiva Sport Owner Manual - 2013 - crc - 11/12/12
Instruments and Controls 5-75. To decrease the time or date do
one of the following: .
Press
© SEEK or
s REV..
Turn
f counterclockwise.
The date does not automatically
display. To see the date press
Hwhile the radio is on. The date with
display times out after a few
seconds and goes back to the
normal radio and time display.
To change the time default setting
from 12 hour to 24 hour or to
change the date default setting from
month/day/year to day/month/year:
1. Press
H and then the softkey
below the forward arrow label to
select the time 12H and 24H,
and the date MM/DD/YYYY
(month, day, and year) and DD/
MM/YYYY (day, month, and
year) display.
2. Press the softkey below the
desired option. 3. Press
H again to apply the
selected default, or let the
screen time out.
Power Outlets The accessory power outlets can be
used to plug in electrical equipment,
such as a cell phone or MP3 player.
The power outlets are inside the
center floor console, on the rear of
the center floor console, and in the
rear cargo compartment.
The power outlet located in the rear
cargo area is powered at all times.
Remove the cover to access and
replace when not in use.
Notice: Leaving electrical
equipment plugged in for an
extended period of time while the
vehicle is off will drain the
battery. Always unplug electrical
equipment when not in use and
do not plug in equipment that
exceeds the maximum 20 ampere
rating. Certain electrical accessories may
not be compatible with the
accessory power outlet and could
overload vehicle or adapter fuses.
If a problem is experienced, see
your dealer.
When adding electrical equipment,
be sure to follow the installation
instructions included with the
equipment. See Add-On Electrical
Equipment on page 9 ‑ 45 .
Notice: Hanging heavy
equipment from the power outlet
can cause damage not covered
by the vehicle warranty. The
power outlets are designed for
accessory power plugs only, such
as cell phone charge cords.
Page 128 of 374
Black plate (32,1)Chevrolet Captiva Sport Owner Manual - 2013 - crc - 11/12/12
5-32 Instruments and Controls cap allows fuel to evaporate into the
atmosphere. A few driving trips with
the cap properly installed should
turn this light and message off.
Key and Lock Messages REPLACE REMOTE KEY FOB
BATTERY This message displays if a Remote
Keyless Entry (RKE) transmitter
battery is low. The battery needs to
be replaced in the transmitter. See
“ Battery Replacement ” under
Remote Keyless Entry (RKE)
System Operation on page 2 ‑ 2 .
Lamp Messages AUTOMATIC LIGHT
CONTROL ON
This message displays when the
automatic headlamp system is
activated by turning the exterior
lamps control to AUTO. AUTOMATIC LIGHT
CONTROL OFF This message displays when the
automatic headlamp system has
been turned off.
Object Detection System
Messages PARK ASST (Assist)
BLOCKED SEE OWNERS
MANUAL This message displays if there is
something interfering with the park
assist system. See Ultrasonic
Parking Assist on page 9 ‑ 31 for
more information.
PARK ASSIST OFF
After the vehicle has been started,
this message displays to remind the
driver that the URPA system has
been turned off. Press the set/reset
button or the trip odometer reset
stem to acknowledge this message and clear it from the DIC display.
For more information see Ultrasonic
Parking Assist on page 9 ‑ 31 .
SERVICE PARK ASSIST This message displays if there is a
problem with the Ultrasonic Rear
Parking Assist (URPA) system. Do
not use this system to help you
park. See Ultrasonic Parking Assist
on page 9 ‑ 31 for more information.
See your dealer for service.
Ride Control System
Messages SERVICE STABILITRAK This message displays if there is a
problem with the StabiliTrak ®
system. A warning light also
appears on the instrument cluster.
See StabiliTrak ®
Indicator Light on
page 5 ‑ 19 . See StabiliTrak ®
System
on page 9 ‑ 28 for more information.
If this message turns on while you
are driving, pull off the road as soon
as possible and stop carefully. Try
Page 133 of 374
Black plate (37,1)Chevrolet Captiva Sport Owner Manual - 2013 - crc - 11/12/12
Instruments and Controls 5-37AUTO DOOR LOCK
This feature allows you to select
when the vehicle's doors will
automatically lock. See Automatic
Door Locks on page 2 ‑ 6 .
Press
U until PRESS
V TO SET
AUTO DOOR LOCK appears on the
DIC display. Press
V once to
access the settings for this feature.
Then press
U to scroll through the
following settings:
SHIFT OUT OF PARK (default):
The doors will automatically lock
when the vehicle is shifted out of
P (Park).
AT VEHICLE SPEED: The doors
will automatically lock when the
vehicle speed is above 13 km/h
(8 mph) for three seconds.
NO CHANGE: No change will be
made to this feature. The current
setting will remain.
To select a setting, press
V while
the desired setting is displayed on
the DIC. AUTO DOOR UNLOCK
This feature allows you to select
whether or not to turn off the
automatic door unlocking feature.
It also allows you to select which
doors and when the doors will
automatically unlock. See Automatic
Door Locks on page 2 ‑ 6 .
Press
U until PRESS
V TO SET
AUTO DOOR UNLOCK appears on
the DIC display. Press
V once to
access the settings for this feature.
Then press
U to scroll through the
following settings:
OFF: None of the doors will
automatically unlock.
DRIVER DOOR AT KEY OUT:
Only the driver door will unlock
when the key is taken out of the
ignition.
DRIVER DOOR IN PARK: Only the
driver door will unlock when the
vehicle is shifted into P (Park). ALL DOORS AT KEY OUT: All of
the doors will unlock when the key
is taken out of the ignition.
ALL DOORS IN PARK (default):
All of the doors will unlock when the
vehicle is shifted into P (Park).
NO CHANGE: No change will be
made to this feature. The current
setting will remain.
To select a setting, press
V while
the desired setting is displayed on
the DIC.
REMOTE DOOR LOCK
This feature allows you to select the
type of feedback you will receive
when locking the vehicle with the
Remote Keyless Entry (RKE)
transmitter. You will not receive
feedback when locking the vehicle
with the RKE transmitter if the doors
are open. See Remote Keyless
Entry (RKE) System Operation on
page 2 ‑ 2 .