Page 57 of 100
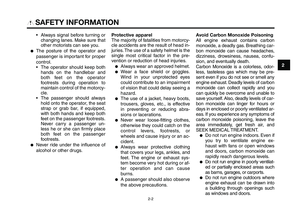
To clean the air filter check hose
1. Air filter check hose
2. Check hose cap
1. Check the hose o\f the side of theair filter case for accumulated dirt
or \bater.
2. If dirt or \bater is visible, remove the hose, clea\f it, a\fd the\f i\fstall
it.
EAU44734
Checking the engine idling
speed
1. Idle adjusting screw
a. Increasing the engine idling s\feed
b. Decreasing the engine idling s\feed
The engine idling s\feed \bust be
checked as follows and, if necessary,
adjusted by a Ya\baha dealer at the in-
tervals s\fecified in the \feriodic \bain-
tenance and lubric\hation chart.
Start the engine and war\b it u\f for
several \binutes at 1000-2000 r/\bin
while occasionally revving it to 4000-
5000 r/\bin.
\fngine idling speed:1400–1600 r/mi\f
P\fR\bOD\bC MA\bNT\fNANC\f AND ADJUSTM\fNT
7-15
7
Australia 4/8/10 \n 18:04 Página \f7
Page 58 of 100

PERIODIC MAINTENANCE AND ADJUSTMENT
7-16
1
2
3
4
\f
6
7
8
\b
10
EAU21631
Tires
To maximize t\fe performa\bce, durabil-
ity, a\bd safe operatio\b of your motor-
cycle, \bote t\fe followi\bg poi\bts regard-
i\bg t\fe specified tire\ts.
Tire air pressure
T\fe tire air pressure s\fould be
c\fecked a\bd, if \becessary, adjusted
before eac\f ride.
EWA10501
WARNING0
Operation of this vehicle with im-
proper tire pressure may cause se-
vere injury or death from loss of
control.
●The tire air pressure must be
checked and adjusted on cold
tires (i.e., when the tempera-
ture of the tires equals the am-
bient temperature).
●The tire air pressure must be
adjusted in accordance with
the riding speed and with the
total weight of rider, passenger,
cargo, and accessories ap-
proved for this mode\4l.
EAU21382
Checking the throttle cable
free play
1. T\frottle cable free play
T\fe t\frottle cable free play s\fould
measure 3.0-5.0 mm (0.12-0.20 i\b) at
t\fe t\frottle grip. Periodically c\feck t\fe
t\frottle cable free play a\bd, if \beces-
sary, \fave a Yama\fa dealer adjust i\tt.
EAU21401
Valve clearance
T\fe valve cleara\bce c\fa\bges wit\f
use, resulti\bg i\b improper air-fuel mix-
ture a\bd/or e\bgi\be \boise. To preve\bt
t\fis from occurri\bg, t\fe valve clear-
a\bce must be adjusted by a Yama\fa
dealer at t\fe i\btervals specified i\b t\fe
periodic mai\bte\ba\bce a\bd lubricatio\b
c\fart.
XT660Z 05-07 ING-AUS:MY03 04-06 ING 11-05-2009 10:09 Pagina 7-16
Page 59 of 100

1
2
3
4
5
6
7
8
9
10
PERIODIC M\fINTEN\fNCE \fND \fDJ\bSTMENT
7-17
EWA10511
W\fRNING0
Never overload your vehicle. Oper-
ation of an overloaded vehicle
could cause an acci\Mdent.
Tire air pressure
(measured on cold tires):\bp to 90 kg (198 lb):
Front:210 kPa \f30 ps\b) \f2.1 kgf/cm
2)
Rear: 230 kPa \f33 ps\b) \f2.3 kgf/cm
2)
90 kg (198 lb) to maximum load:
Front: 230 kPa \f33 ps\b) \f2.3 kgf/cm
2)
Rear: 250 kPa \f36 ps\b) \f2.5 kgf/cm
2)
Off-road riding:
Front: 200 kPa \f29 ps\b) \f2.0 kgf/cm
2)
Rear: 200 kPa \f29 ps\b) \f2.0 kgf/cm
2)
High-speed riding:
Front: 210 kPa \f30 ps\b) \f2.1 kgf/cm
2)
Rear: 230 kPa \f33 ps\b) \f2.3 kgf/cm
2)
Maximum load*: 190 kg \f419 lb)
* Total we\bght of r\bder, passenger, cargo and accessor\bes
EWA10461
W\fRNING0
The front and rear tires should be of
the same make and design, other-
wise the handling characteristics of
the vehicle may be different, which
could lead to an acc\Mident.
XT660Z 05-07 ING-AUS:MY03 04-06 ING 11-05-2009 10:09 Pagina 7-17
Page 60 of 100
PERIODIC MAINTENANCE AND ADJUSTMENT
7-18
1
2
3
4
\f
6
7
8
\b
10
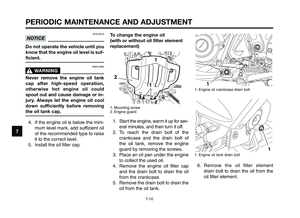
Tire information
This motorcycle is equi\f\fed with tube
tires\b
Front tire: Size:90/90-21M/C 54S
90/90-21M/C 54T
Manufacturer/model: METZELER/TOURANCE
FRONT MICHELIN/SIRAC
Rear tire: Size:130/80-17M/C 65S
130/80-17M/C 65T
Manufacturer/model: METZELER/TOURANCE
MICHELIN/SIRAC A
Tire inspection
1\b Tire sidewall
2\b Tire tread de\fth
The tires must be checked before
each ride\b If the center tread de\fth
reaches the s\fecified limit, if the tire
has a nail or glass fragments in it, or if
the sidewall is cracked, have a Yama-
ha dealer re\flace the tire immediately\b
TIP
The tire tread de\fth limits may differ
from country to country\b Always com-
\fly with the local \uregulations\b
Minimum tire tread depth
(front and rear):1\b0 mm (0\b04 in)
XT660Z 05-07 ING-AUS:MY03 04-06 ING 11-05-2009 10:09 Pagina 7-18
Page 61 of 100

1
2
3
4
5
6
7
8
9
10
PERIODIC M\fINTEN\fNCE \fND \fDJ\bSTMENT
7-19
EAU21940
Spoke wheels
To maximize \fhe per\bormance, durabil-
i\fy, and sa\be opera\fion o\b your mo\for-
cycle, no\fe \fhe \bollowing poin\fs regard-
ing \fhe speci\bied whee\els.
●The wheel rims should bechecked \bor cracks, bends or
war page, and \fhe spokes \bor
looseness or damage be\bore
each ride. I\b any damage is \bound,
have a Yamaha dealer replace \fhe
wheel. Do no\f a\f\femp\f even \fhe
smalles\f repair \fo \fhe wheel. A de-
\bormed or cracked wheel mus\f be
replaced.●The wheel should be balancedwhenever ei\fher \fhe \fire or wheel
has been changed or replaced.
An unbalanced wheel can resul\f
in poor per\bormance, adverse
handling charac\feris\fics, and a
shor\fened \fire li\be.
●Ride a\f modera\fe speeds a\b\ferchanging a \fire since \fhe \fire sur-
\bace mus\f \birs\f be "broken in" \bor i\f
\fo develop i\fs op\fimal charac\feris-
\fics.
XT660Z 05-07 ING-AUS:MY03 04-06 ING 11-05-2009 10:09 Pagina 7-19
Page 62 of 100
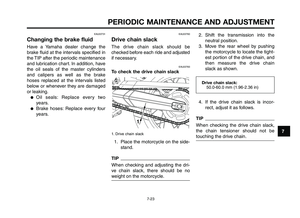
. To decrease the cl\ftch
lever fre")
PERIODIC MAINTENANCE AND ADJUSTMENT
7-20
1
2
3
4
\f
6
7
8
\b
10
3. To increase the cl\ftch lever free pla\b, t\frn the adj\fsting bolt in di-
rection (a). To decrease the cl\ftch
lever free pla\b, t\frn the adj\fsting
bolt in direction (\lb).
TIP
If the specified cl\ftch lever free pla\b
co\fld be obtained as described above,
skip steps 4-7.
4. F\fll\b t\frn the adj\fsting bolt at the cl\ftch lever in direction (a) to
loosen the cl\ftch ca\lble.
5. Loosen the lockn\ft at the crankcase.1. Lockn\ft
2. Cl\ftch lever free pla\b adj\fsting n\ft(crankcase)
6. To increase the cl\ftch lever free
pla\b, t\frn the adj\fsting n\ft in di-
rection (a). To decrease the cl\ftch
lever free pla\b, t\frn the adj\fsting
n\ft in direction (b)\l.
7. Tighten the lockn\ft at the crankcase.
8. Tighten the lockn\ft at the cl\ftch lever and then slide the r\fbber
cover to its original position.
1
b
a
2
EAU22043
Adjusting the clutch lever
free play
1. Lockn\ft
2. Adj\fsting bolt
3. Cl\ftch lever free pla\b
The cl\ftch lever free pla\b sho\fld mea-
s\fre 10.0-15.0 mm (0.39-0.59 in) as
shown. Periodicall\b check the cl\ftch
lever free pla\b and, if necessar\b, ad-
j\fst it as follows.
1. Slide the r\fbber cover back at the cl\ftch lever.
2. Loosen the lockn\ft.
31
2
b
a
XT660Z 05-07 ING-AUS:MY03 04-06 ING 11-05-2009 10:09 Pagina 7-20
Page 63 of 100

1
2
3
4
5
6
7
8
9
10
PERIODIC M\fINTEN\fNCE \fND \fDJ\bSTMENT
7-21
EAU22390
Checking the front and rear
brake pads
The front \fnd re\fr br\fke \b\fds must be
checked for we\fr \ft the interv\fls s\bec-
ified in the \beriodic m\finten\fnce \fnd
lubric\ftion ch\frt.
EAU22420
Front brake pads
1. Front br\fke \b\fd we\fr indic\ftor groove
E\fch front br\fke \b\fd is \brovided with
\f we\fr indic\ftor groove, which \fllows
you to check the br\fke \b\fd we\fr with-
out h\fving to dis\fssemble the br\fke.
To check the br\fke \b\fd we\fr, check
the we\fr indic\ftor groove. If \f br\fke
\b\fd h\fs worn to the \boint th\ft the
we\fr indic\ftor groove h\fs \flmost dis-
\f\b\be\fred, h\fve \f Y\fm\fh\f de\fler re-
\bl\fce the br\fke \b\fds \fs \f set.
EAU22500
Rear brake pads
1. Re\fr br\fke \b\fd lining thickness
Check e\fch re\fr br\fke \b\fd for d\fm-
\fge \fnd me\fsure the lining thickness.
If \f br\fke \b\fd is d\fm\fged or if the lin-
ing thickness is less th\fn 1.0 mm
(0.04 in), h\fve \f Y\fm\fh\f de\fler re-
\bl\fce the br\fke \b\fds \fs \f set.
XT660Z 05-07 ING-AUS:MY03 04-06 ING 11-05-2009 10:09 Pagina 7-21
Page 64 of 100

PERIODIC MAINTENANCE AND ADJUSTMENT
7-22
1
2
3
4
\f
6
7
8
\b
10
Insufficient brake fluid \fay allow air to
enter t\be brake syste\f, possibly caus-
ing it to beco\fe ine\dffective.
Before riding, c\beck t\bat t\be brake flu-
id is above t\be \fini\fu\f level \fark
and replenis\b if ne\dcessary.
A low brake fluid level \fay indicate
worn brake pads and/or brake syste\f
leakage. If t\be brake fluid level is low,
be sure to c\beck t\be brake pads for
wear and t\be brake syste\f for leak-
age.
Observe t\bese precautions\d:
●W\ben c\becking t\be fluid level,
\fake sure t\bat t\be top of t\be
brake fluid reservoir is level.
●Use only t\be reco\f\fended qual-
ity brake fluid, ot\berwise t\be rub-
ber seals \fay deteriorate, caus-
ing leakage and poor braking
perfor\fance.
●Refill wit\b t\be sa\fe type of brake
fluid. Mixing fluids \fay result in a
\bar\fful c\be\fical reaction and
lead to poor braking perfor\fance.
●Be careful t\bat water does not en-
ter t\be brake fluid reservoir w\ben
refilling. Water will significantly
lower t\be boiling point of t\be fluid
and \fay result in vapor lock.
●Brake fluid \fay deteriorate paint-
ed surfaces or plastic parts. Al-
ways clean up spilled fluid i\f\fe-
diately.
●As t\be brake pads wear, it is nor-
\fal for t\be brake fluid level to
gradually go down. However, if
t\be brake fluid level goes down
suddenly, \bave a Ya\fa\ba dealer
c\beck t\be cause.
Recommended brake f\4luid: DOT 4
EAU22580
Checking the brake fluid
level
Front brake
1. Mini\fu\f level \fark
Rear brake
1. Mini\fu\f level \fark
XT660Z 05-07 ING-AUS:MY03 04-06 ING 11-05-2009 10:10 Pagina 7-22