2012 TOYOTA DYNA 100/150 Owners Manual (in English)
-
 1
1 -
 2
2 -
 3
3 -
 4
4 -
 5
5 -
 6
6 -
 7
7 -
 8
8 -
 9
9 -
 10
10 -
 11
11 -
 12
12 -
 13
13 -
 14
14 -
 15
15 -
 16
16 -
 17
17 -
 18
18 -
 19
19 -
 20
20 -
 21
21 -
 22
22 -
 23
23 -
 24
24 -
 25
25 -
 26
26 -
 27
27 -
 28
28 -
 29
29 -
 30
30 -
 31
31 -
 32
32 -
 33
33 -
 34
34 -
 35
35 -
 36
36 -
 37
37 -
 38
38 -
 39
39 -
 40
40 -
 41
41 -
 42
42 -
 43
43 -
 44
44 -
 45
45 -
 46
46 -
 47
47 -
 48
48 -
 49
49 -
 50
50 -
 51
51 -
 52
52 -
 53
53 -
 54
54 -
 55
55 -
 56
56 -
 57
57 -
 58
58 -
 59
59 -
 60
60 -
 61
61 -
 62
62 -
 63
63 -
 64
64 -
 65
65 -
 66
66 -
 67
67 -
 68
68 -
 69
69 -
 70
70 -
 71
71 -
 72
72 -
 73
73 -
 74
74 -
 75
75 -
 76
76 -
 77
77 -
 78
78 -
 79
79 -
 80
80 -
 81
81 -
 82
82 -
 83
83 -
 84
84 -
 85
85 -
 86
86 -
 87
87 -
 88
88 -
 89
89 -
 90
90 -
 91
91 -
 92
92 -
 93
93 -
 94
94 -
 95
95 -
 96
96 -
 97
97 -
 98
98 -
 99
99 -
 100
100 -
 101
101 -
 102
102 -
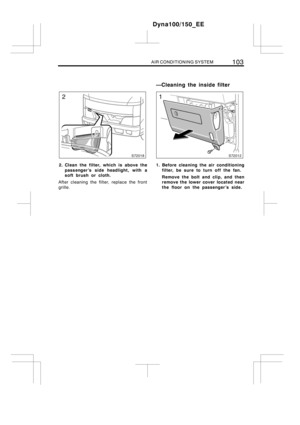
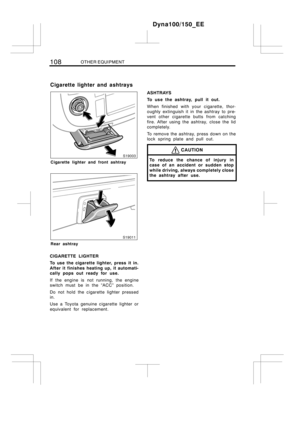
 103
103 -
 104
104 -
 105
105 -
 106
106 -
 107
107 -
 108
108 -
 109
109 -
 110
110 -
 111
111 -
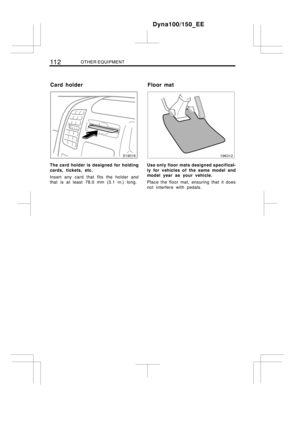
 112
112 -
 113
113 -
 114
114 -
 115
115 -
 116
116 -
 117
117 -
 118
118 -
 119
119 -
 120
120 -
 121
121 -
 122
122 -
 123
123 -
 124
124 -
 125
125 -
 126
126 -
 127
127 -
 128
128 -
 129
129 -
 130
130 -
 131
131 -
 132
132 -
 133
133 -
 134
134 -
 135
135 -
 136
136 -
 137
137 -
 138
138 -
 139
139 -
 140
140 -
 141
141 -
 142
142 -
 143
143 -
 144
144 -
 145
145 -
 146
146 -
 147
147 -
 148
148 -
 149
149 -
 150
150 -
 151
151 -
 152
152 -
 153
153 -
 154
154 -
 155
155 -
 156
156 -
 157
157 -
 158
158 -
 159
159 -
 160
160 -
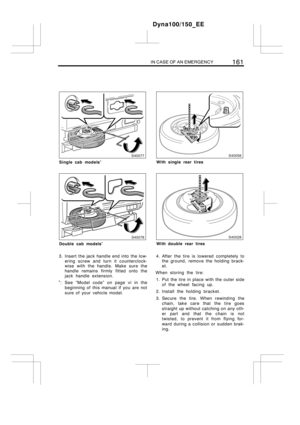
 161
161 -
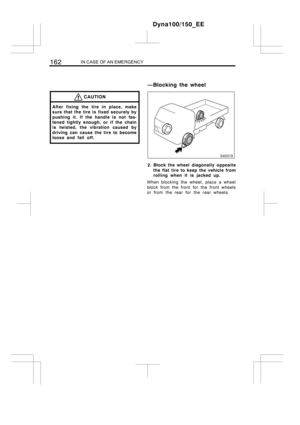
 162
162 -
 163
163 -
 164
164 -
 165
165 -
 166
166 -
 167
167 -
 168
168 -
 169
169 -
 170
170 -
 171
171 -
 172
172 -
 173
173 -
 174
174 -
 175
175 -
 176
176 -
 177
177 -
 178
178 -
 179
179 -
 180
180 -
 181
181 -
 182
182 -
 183
183 -
 184
184 -
 185
185 -
 186
186 -
 187
187 -
 188
188 -
 189
189 -
 190
190 -
 191
191 -
 192
192 -
 193
193 -
 194
194 -
 195
195 -
 196
196 -
 197
197 -
 198
198 -
 199
199 -
 200
200 -
 201
201 -
 202
202 -
 203
203 -
 204
204 -
 205
205 -
 206
206 -
 207
207 -
 208
208 -
 209
209 -
 210
210 -
 211
211 -
 212
212 -
 213
213 -
 214
214 -
 215
215 -
 216
216 -
 217
217 -
 218
218 -
 219
219 -
 220
220 -
 221
221 -
 222
222 -
 223
223 -
 224
224 -
 225
225 -
 226
226 -
 227
227 -
 228
228 -
 229
229 -
 230
230 -
 231
231 -
 232
232 -
 233
233 -
 234
234 -
 235
235 -
 236
236 -
 237
237 -
 238
238 -
 239
239
 IN CASE OF AN EMERGENCY163
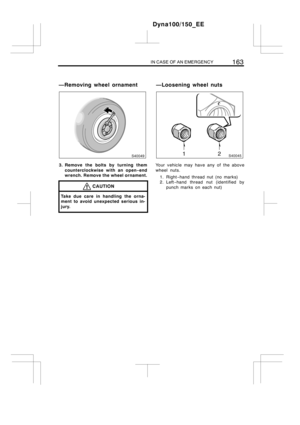
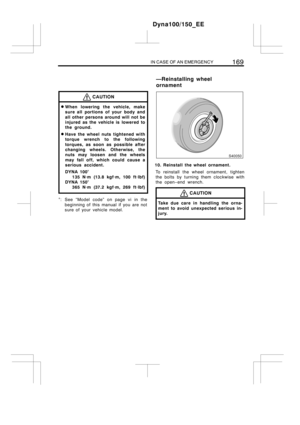
3. Remove the bolts by turning them
counterclockwise with an open−end
wrench. Remove the wheel ornament.
CAUTION
Take due care in handling the orna-
ment to avoid unexpect")
 164IN CASE OF AN EMERGENCY
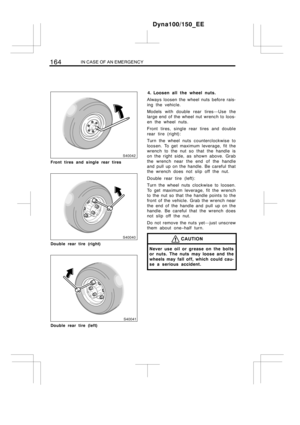
Front tires and single rear tires
Double rear tire (right)
Double rear tire (left)
4. Loosen all the wheel nuts.
Always loosen the wheel nuts before rais-
ing the vehicle.
M")
 IN CASE OF AN EMERGENCY165
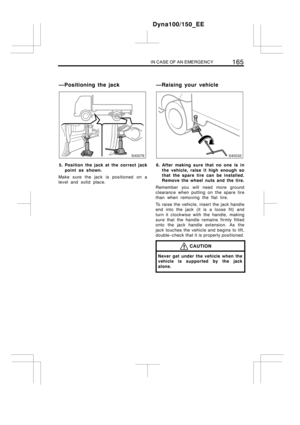
5. Position the jack at the correct jack
point as shown.
Make sure the jack is positioned on a
level and solid place.6. After making sure that no one is in
the vehicle, rais")
 166IN CASE OF AN EMERGENCY
Left−side wheel
Right−hand thread Left−hand threadRight−side wheel
7. Remove the stop bolts, change tires,
reinstall the stop bolts and tighten
them.
Skip this step")
 IN CASE OF AN EMERGENCY167
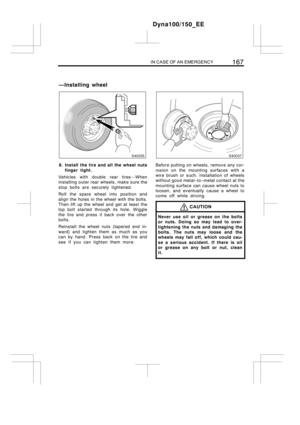
8. Install the tire and all the wheel nuts
finger tight.
Vehicles with double rear tires—When
installingouter rear wheels, make sure the
stop bolts are securely tightened.")
 168IN CASE OF AN EMERGENCY
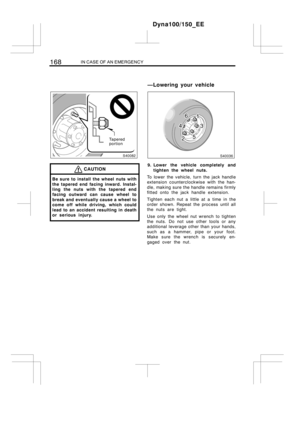
Tapered
portion
CAUTION
Be sure to install the wheel nuts with
the tapered end facing inward. Instal-
ling the nuts with the tapered end
facing outward can cause wheel to
br")
 IN CASE OF AN EMERGENCY169
CAUTION
DWhen lowering the vehicle, make
sure all portions of your body and
all other persons around will not be
injured as the vehicle is lowered to
the ground.
DHave the w")
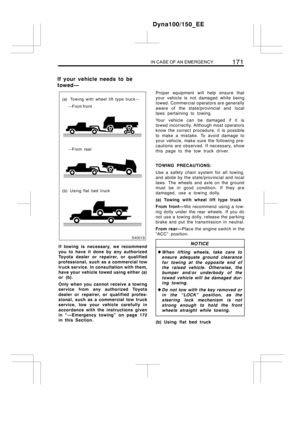
 170IN CASE OF AN EMERGENCY
11. Check the air pressure of the re-
placed tire.
Adjust the air pressure to the specification
designated on page 226 in Section 8. If
the pressure is lower, drive slowly t")