2012 MERCEDES-BENZ SL ROADSTER check engine
[x] Cancel search: check enginePage 386 of 637
the engine running in enclosed spaces with-
out sufficient ventilation.
Introduction
The digital maps generated by the map soft-
ware become outdated in the same way as
conventional road maps. Optimal route guid-
ance can only be provided by the navigation
system in conjunction with the most up-to-
date map software.
Information about new versions of the digital map can be obtained from a Mercedes-Benz
Service Centre. You can have the digital mapupdated there with a DVD, or you can update
it yourself.
In some countries, it is possible to update the map data for COMAND Online free of charge
for a period of 3 years. Information on the
availability of this service for your vehicle can be obtained from your Mercedes-Benz Ser-
vice Centre. If the free update is not available
in your country, please read the "Updating
process" section.
Entitlement to the free update
For the first three years after your vehicle is
registered, you are entitled to all available
updates to the map software for
COMAND Online. They are usually installed
during a regular vehicle service. After this
period, you can purchase further updates
from your Mercedes-Benz Service Centre.
The free updates relate to the vehicle and not
to an individual. If there is a change of own-
ership within 3 years of first registration, the
new owner is entitled to the map software
updates.
Availability of free updates
Enter your e-mail address at http://
www.mercedes-benz-accessories.com/
comand-infomail. You will receive a one-off e- mail containing information on how to updatethe map software. Please also visit http://
www.mercedes-benz-accessories.com/
navigation-updates to find out if map soft- ware updates for your vehicle are available at
your Mercedes-Benz partner.
Updating at the Mercedes-Benz Service
Centre
If an update for your map software is availa-
ble, you will receive it free of charge at your
Mercedes-Benz Service Centre during your
vehicle's annual service. You can arrange a
separate appointment for this at your
Mercedes-Benz Service Centre on request.
The update is performed only by a Mercedes- Benz Service Centre for European map data.
The map software is not provided on a data
medium.
Carrying out the update yourself
i The update process may take some time
(over an hour), depending on the size of the
digital map. During this time, you will only
be able to switch on radio mode and to
accept incoming calls. The update will be
completed more quickly if the vehicle is
stationary.
If you start the update with the engine
switched off and the starter battery has
insufficient power, COMAND Online may
automatically switch off. This preserves the battery. If this occurs, restart the update
with the engine running.
X Insert the DVD:
R in the single DVD drive (Y page 469)
R in the DVD changer (Y page 469)
COMAND Online checks whether the digi-
tal map on the DVD is compatible with the
navigation system and system software.
A prompt then appears asking if you want
to install the database. Versions of the
database currently installed and the data-
base that is to be installed are displayed.
X Select Yes
Yes orNo No and press Wto confirm.
After selecting Yes
Yes, an activation code
must be entered when installing a database
for the first time. You will receive the acti-
vation code when you buy the navigation
DVD. Navigation
383COMAND Online Z
Page 566 of 637
There is a risk of injury when accessing the
engine compartment.
As far as possible, allow the engine to cool
down and only touch the following compo-
nents. X
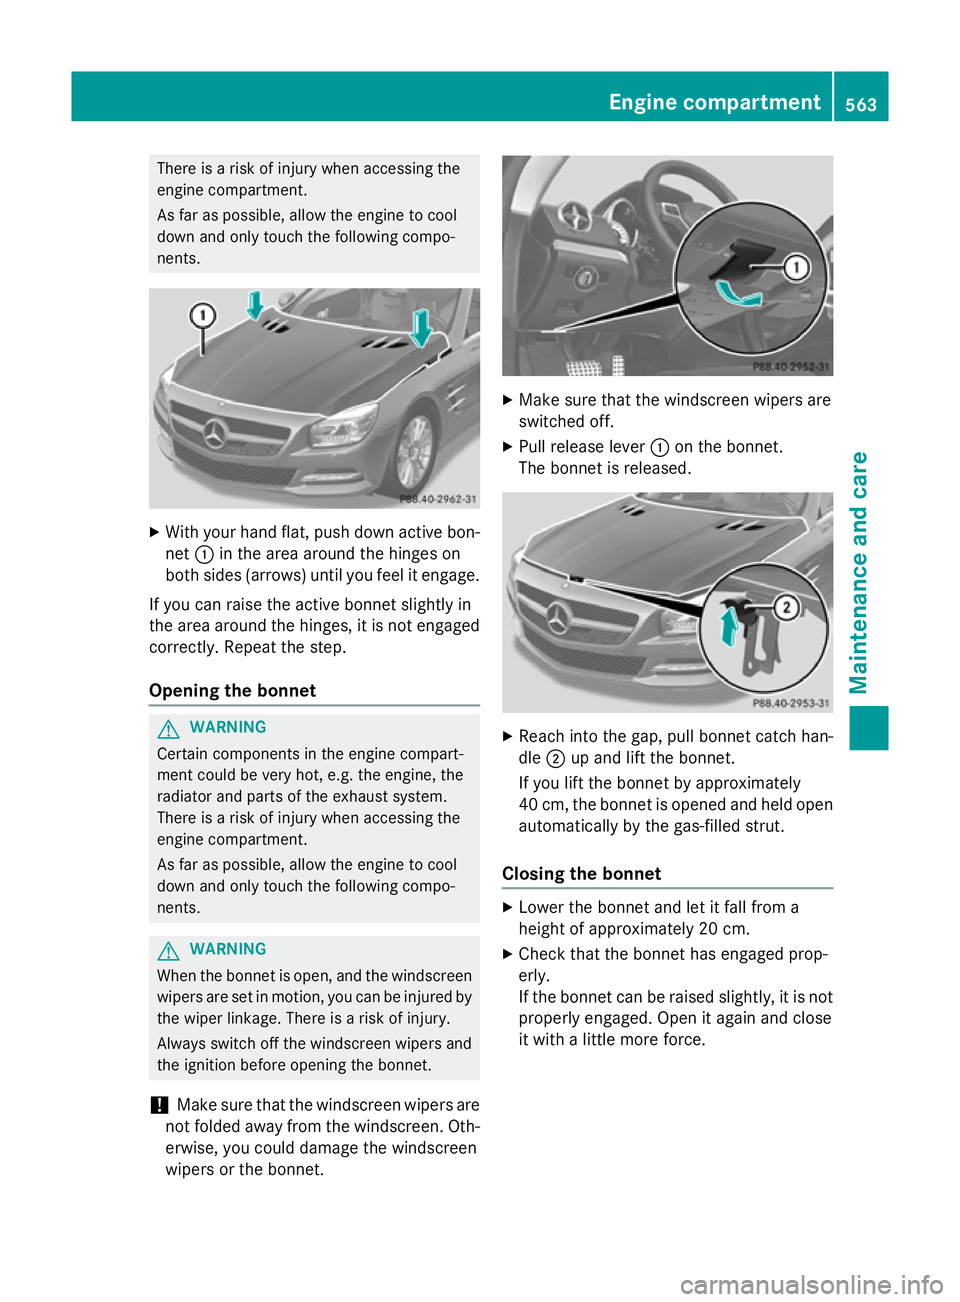
With your hand flat, push down active bon-
net :in the area around the hinges on
both sides (arrows) until you feel it engage.
If you can raise the active bonnet slightly in
the area around the hinges, it is not engaged correctly. Repeat the step.
Opening the bonnet G
WARNING
Certain components in the engine compart-
ment could be very hot, e.g. the engine, the
radiator and parts of the exhaust system.
There is a risk of injury when accessing the
engine compartment.
As far as possible, allow the engine to cool
down and only touch the following compo-
nents. G
WARNING
When the bonnet is open, and the windscreen wipers are set in motion, you can be injured by
the wiper linkage. There is a risk of injury.
Always switch off the windscreen wipers and
the ignition before opening the bonnet.
! Make sure that the windscreen wipers are
not folded away from the windscreen. Oth-
erwise, you could damage the windscreen
wipers or the bonnet. X
Make sure that the windscreen wipers are
switched off.
X Pull release lever :on the bonnet.
The bonnet is released. X
Reach into the gap, pull bonnet catch han-
dle ;up and lift the bonnet.
If you lift the bonnet by approximately
40 cm, the bonnet is opened and held open automatically by the gas-filled strut.
Closing the bonnet X
Lower the bonnet and let it fall from a
height of approximately 20 cm.
X Check that the bonnet has engaged prop-
erly.
If the bonnet can be raised slightly, it is not
properly engaged. Open it again and close
it with a little more force. Engine compartment
563Maintenance and care Z
Page 567 of 637
Engine oil
Notes on oil level Depending on your driving style, the vehicle
consumes up to 0.8 litres of oil per 1,000 km.
The oil consumption may be higher than this
when the vehicle is new or if you frequently
drive at high engine speeds.
Depending on the engine, the oil dipstick may be installed at a different location.
When checking the oil level:
R park the vehicle on a level surface.
R the engine should be switched off for
approximately five minutes if the engine is
at normal operating temperature.
R if the engine is not at normal operating
temperature, e.g. if the engine was only
started briefly, wait approximately
30 minutes before carrying out the meas-
urement.
Checking the oil level using the oil dip-
stick G
WARNING
Certain components in the engine compart-
ment could be very hot, e.g. the engine, the
radiator and parts of the exhaust system.
There is a risk of injury when accessing the
engine compartment.
As far as possible, allow the engine to cool
down and only touch the following compo-
nents. Example
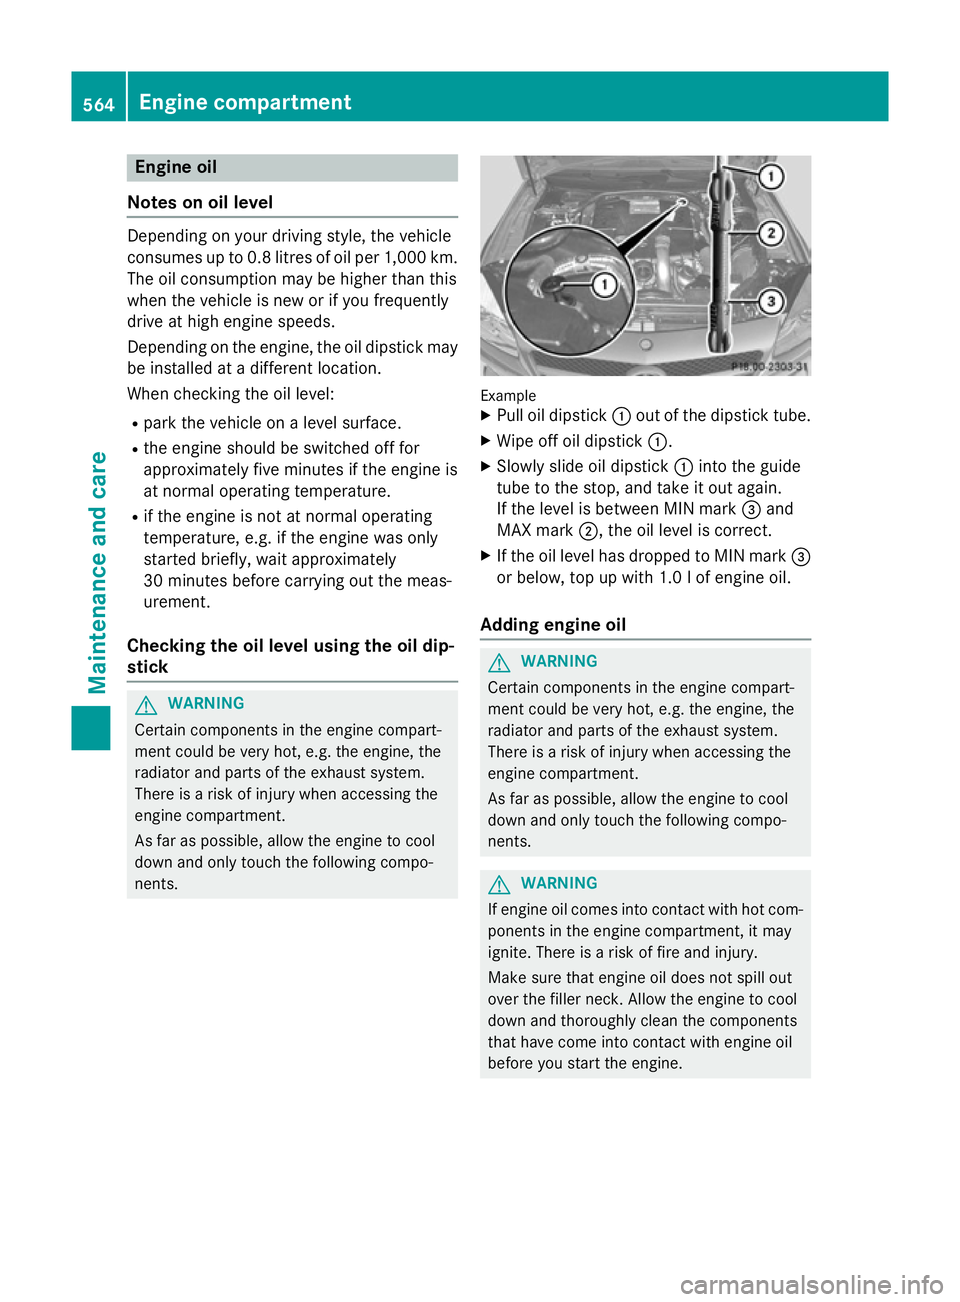
X Pull oil dipstick :out of the dipstick tube.
X Wipe off oil dipstick :.
X Slowly slide oil dipstick :into the guide
tube to the stop, and take it out again.
If the level is between MIN mark =and
MAX mark ;, the oil level is correct.
X If the oil level has dropped to MIN mark =
or below, top up with 1.0 l of engine oil.
Adding engine oil G
WARNING
Certain components in the engine compart-
ment could be very hot, e.g. the engine, the
radiator and parts of the exhaust system.
There is a risk of injury when accessing the
engine compartment.
As far as possible, allow the engine to cool
down and only touch the following compo-
nents. G
WARNING
If engine oil comes into contact with hot com- ponents in the engine compartment, it may
ignite. There is a risk of fire and injury.
Make sure that engine oil does not spill out
over the filler neck. Allow the engine to cool
down and thoroughly clean the components
that have come into contact with engine oil
before you start the engine. 564
Engine compartmentMaintenance and care
Page 568 of 637
H
Environmental note
When topping up the oil, take care not to spill any. If oil enters the soil or waterways, it is
harmful to the environment.
! Only use engine oils and oil filters that
have been approved for vehicles with a ser-
vice system. You can obtain a list of the
engine oils and oil filters tested and
approved in accordance with the
Mercedes-Benz Specifications for Service
Products at any Mercedes-Benz Service
Centre.
Damage to the engine or exhaust system is caused by the following:
R using engine oils and oil filters that have
not been specifically approved for the
service system
R changing the engine oil and oil filter after
missing the change interval required by
the service system
R using engine oil additives
! Do not add too much oil. If the oil level is
above the "max" mark on the dipstick, too
much oil has been added. This can lead to
damage to the engine or the catalytic con-
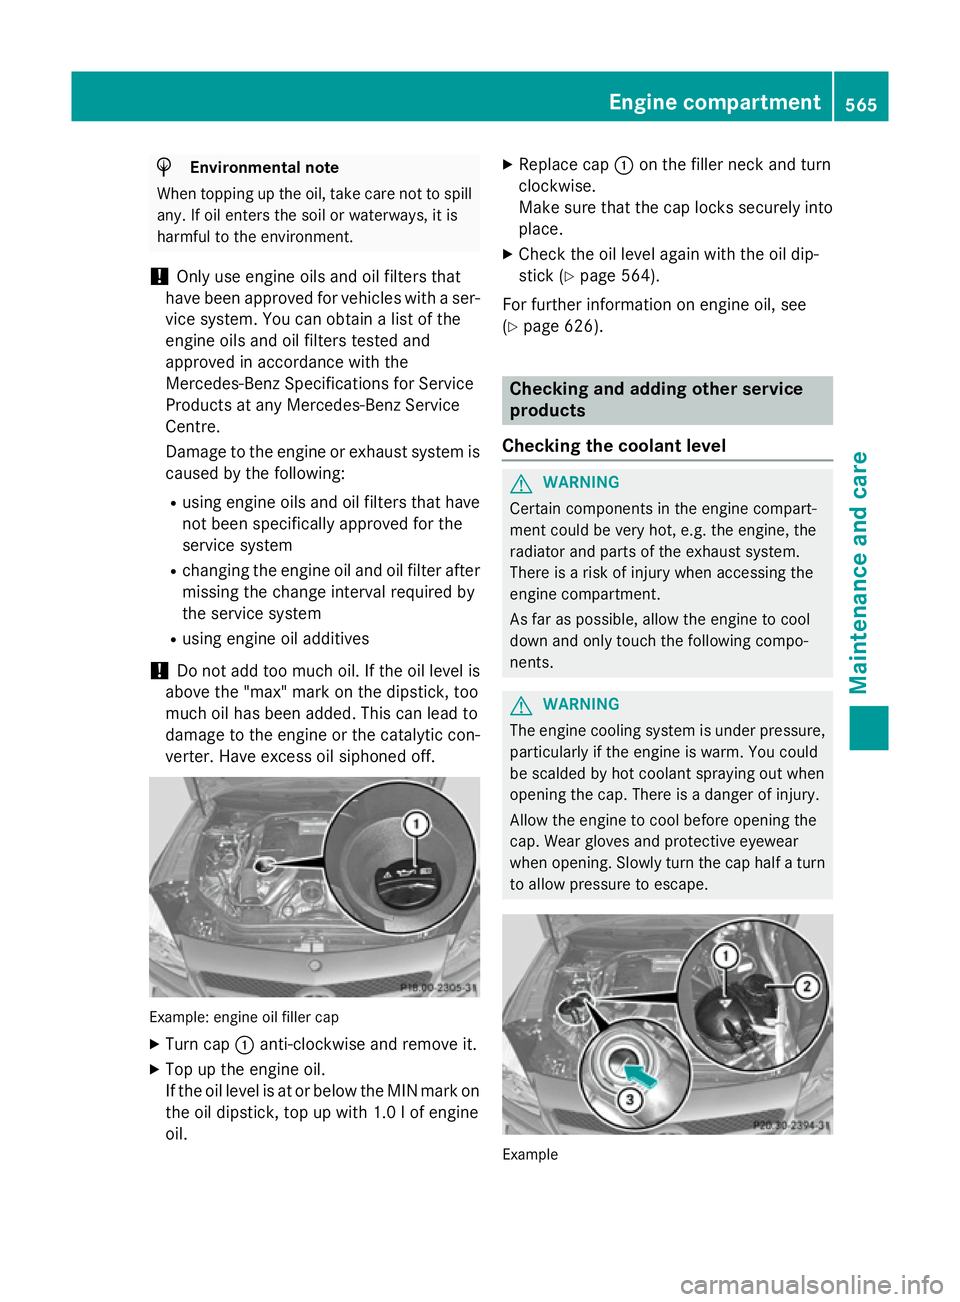
verter. Have excess oil siphoned off. Example: engine oil filler cap
X Turn cap :anti-clockwise and remove it.
X Top up the engine oil.
If the oil level is at or below the MIN mark on
the oil dipstick, top up with 1.0 l of engine
oil. X
Replace cap :on the filler neck and turn
clockwise.
Make sure that the cap locks securely into place.
X Check the oil level again with the oil dip-
stick (Y page 564).
For further information on engine oil, see
(Y page 626). Checking and adding other service
products
Checking the coolant level G
WARNING
Certain components in the engine compart-
ment could be very hot, e.g. the engine, the
radiator and parts of the exhaust system.
There is a risk of injury when accessing the
engine compartment.
As far as possible, allow the engine to cool
down and only touch the following compo-
nents. G
WARNING
The engine cooling system is under pressure, particularly if the engine is warm. You could
be scalded by hot coolant spraying out when
opening the cap. There is a danger of injury.
Allow the engine to cool before opening the
cap. Wear gloves and protective eyewear
when opening. Slowly turn the cap half a turn
to allow pressure to escape. Example Engine compartment
565Maintenance and care Z
Page 569 of 637
X
Park the vehicle on a level surface.
Only check the coolant level if the vehicle is
on a level surface and the engine has
cooled down.
X Turn the key to position 2in the ignition
lock (Y page 155).
On vehicles with KEYLESS-GO, press the
Start/Stop button twice (Y page 155).
X Check the coolant temperature gauge in
the multifunction display.
The coolant temperature must be below
70 †.
X Turn the key to position 0(Y page 155) in
the ignition lock.
X Slowly turn cap ;half a turn anti-clock-
wise to allow excess pressure to escape.
X Turn cap ;further anti-clockwise and
remove it.
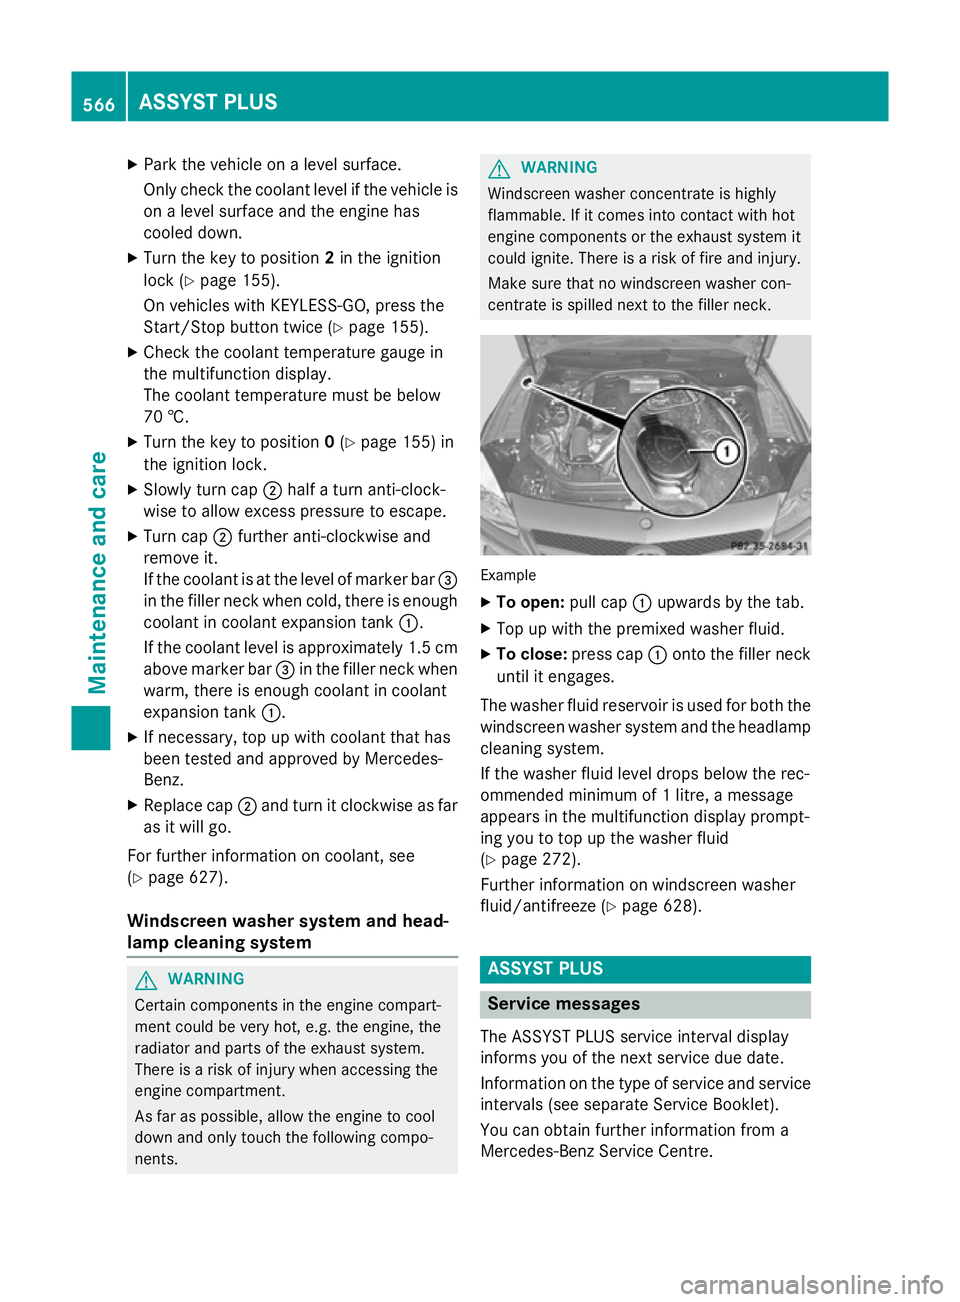
If the coolant is at the level of marker bar =
in the filler neck when cold, there is enough
coolant in coolant expansion tank :.
If the coolant level is approximately 1.5 cm above marker bar =in the filler neck when
warm, there is enough coolant in coolant
expansion tank :.
X If necessary, top up with coolant that has
been tested and approved by Mercedes-
Benz.
X Replace cap ;and turn it clockwise as far
as it will go.
For further information on coolant, see
(Y page 627).
Windscreen washer system and head-
lamp cleaning system G
WARNING
Certain components in the engine compart-
ment could be very hot, e.g. the engine, the
radiator and parts of the exhaust system.
There is a risk of injury when accessing the
engine compartment.
As far as possible, allow the engine to cool
down and only touch the following compo-
nents. G
WARNING
Windscreen washer concentrate is highly
flammable. If it comes into contact with hot
engine components or the exhaust system it
could ignite. There is a risk of fire and injury.
Make sure that no windscreen washer con-
centrate is spilled next to the filler neck. Example
X To open: pull cap:upwards by the tab.
X Top up with the premixed washer fluid.
X To close: press cap :onto the filler neck
until it engages.
The washer fluid reservoir is used for both the
windscreen washer system and the headlamp cleaning system.
If the washer fluid level drops below the rec-
ommended minimum of 1 litre, a message
appears in the multifunction display prompt-
ing you to top up the washer fluid
(Y page 272).
Further information on windscreen washer
fluid/antifreeze (Y page 628). ASSYST PLUS
Service messages
The ASSYST PLUS service interval display
informs you of the next service due date.
Information on the type of service and service
intervals (see separate Service Booklet).
You can obtain further information from a
Mercedes-Benz Service Centre. 566
ASSYST PLUSMaintenance and care
Page 571 of 637
In these or similar operating conditions, have
the air filter, engine oil and oil filter, for exam- ple, changed more frequently. The tyres mustbe checked more frequently if the vehicle is
operated under increased loads. Further
information can be obtained at a qualified
specialist workshop, e.g. a Mercedes-Benz
Service Centre.
Driving abroad An extensive Mercedes-Benz Service network
is also available in other countries. You can
obtain further information from any
Mercedes-Benz Service Centre. Care
Notes on care
H
Environmental note
Dispose of empty packaging and cleaning
cloths in an environmentally responsible man- ner.
! For cleaning your vehicle, do not use any
of the following:
R dry, rough or hard cloths
R abrasive cleaning agents
R solvents
R cleaning agents containing solvents
Do not scrub.
Do not touch the surfaces or protective
films with hard objects, e.g. a ring or ice
scraper. You could otherwise scratch or
damage the surfaces and protective film.
! Do not park up the vehicle for an extended
period straight after cleaning it, particularly after having cleaned the wheels with wheel
cleaner. Wheel cleaners could cause
increased corrosion of the brake discs and
brake pads/linings. For this reason, you
should drive for a few minutes after clean-
ing. Braking heats the brake discs and the
brake pads/linings, thus drying them. The
vehicle can then be parked up. Regular care of your vehicle is a condition for
retaining the quality in the long term.
Use care products and cleaning agents rec-
ommended and approved by Mercedes-Benz. Washing the vehicle and cleaning the
paintwork
Automatic car wash G
WARNING
Braking efficiency is reduced after the vehicle has been washed. There is a risk of an acci-
dent.
After washing the vehicle, brake carefully
while paying attention to the traffic conditions in order to restore full braking efficiency.
! If DISTRONIC PLUS or the HOLD function
is activated, the vehicle brakes automati-
cally in certain situations. To prevent dam-
age to the vehicle, deactivate DISTRONIC
PLUS and the HOLD function in the follow-
ing or other similar situations:
R when towing the vehicle
R in the car wash
! It is preferable to use car washes with
adjustable high-pressure pre-cleaning that
corresponds to the specification for the
Cabriolet programme. In car washes that
use high water pressures, there is a risk
that a small amount of water may leak into
the vehicle.
! Vehicles with HANDS-FREE ACCESS: if a
key with KEYLESS-GO is within the detec-
tion range of the KEYLESS-GO antenna, the
following situations could lead to the unin-
tentional opening of the boot lid:
R using a car wash
R using a high-pressure cleaner
Make sure that the key is at least 2 maway
from the vehicle.
! Make sure that the automatic transmis-
sion is in position Nwhen washing your 568
CareMaintenance and care
Page 587 of 637
!
Have the battery checked regularly at a
qualified specialist workshop.
Observe the service intervals in the Service
Booklet or contact a qualified specialist
workshop for more information.
! You should have all work involving the
battery carried out at a qualified specialist
workshop. In the exceptional case that it is
necessary for you to disconnect the battery yourself, make sure that:
R you switch off the engine and remove the
key. On vehicles with KEYLESS-GO,
ensure that the ignition is switched off.
Check that all the indicator lamps in the
instrument cluster are off. Otherwise,
electronic components, such as the
alternator, may be damaged.
R you first remove the negative terminal
clamp and then the positive terminal
clamp. Never swap the terminal clamps.
Otherwise, the vehicle's electronic sys-
tem may be damaged.
R the transmission is locked in position P
after disconnecting the battery. The vehi-
cle is secured against rolling away. You
can then no longer move the vehicle.
The battery and the cover of the positive
terminal clamp must be fitted securely dur- ing operation.
In order for the battery to achieve the maxi-
mum possible service life, it must always be
sufficiently charged.
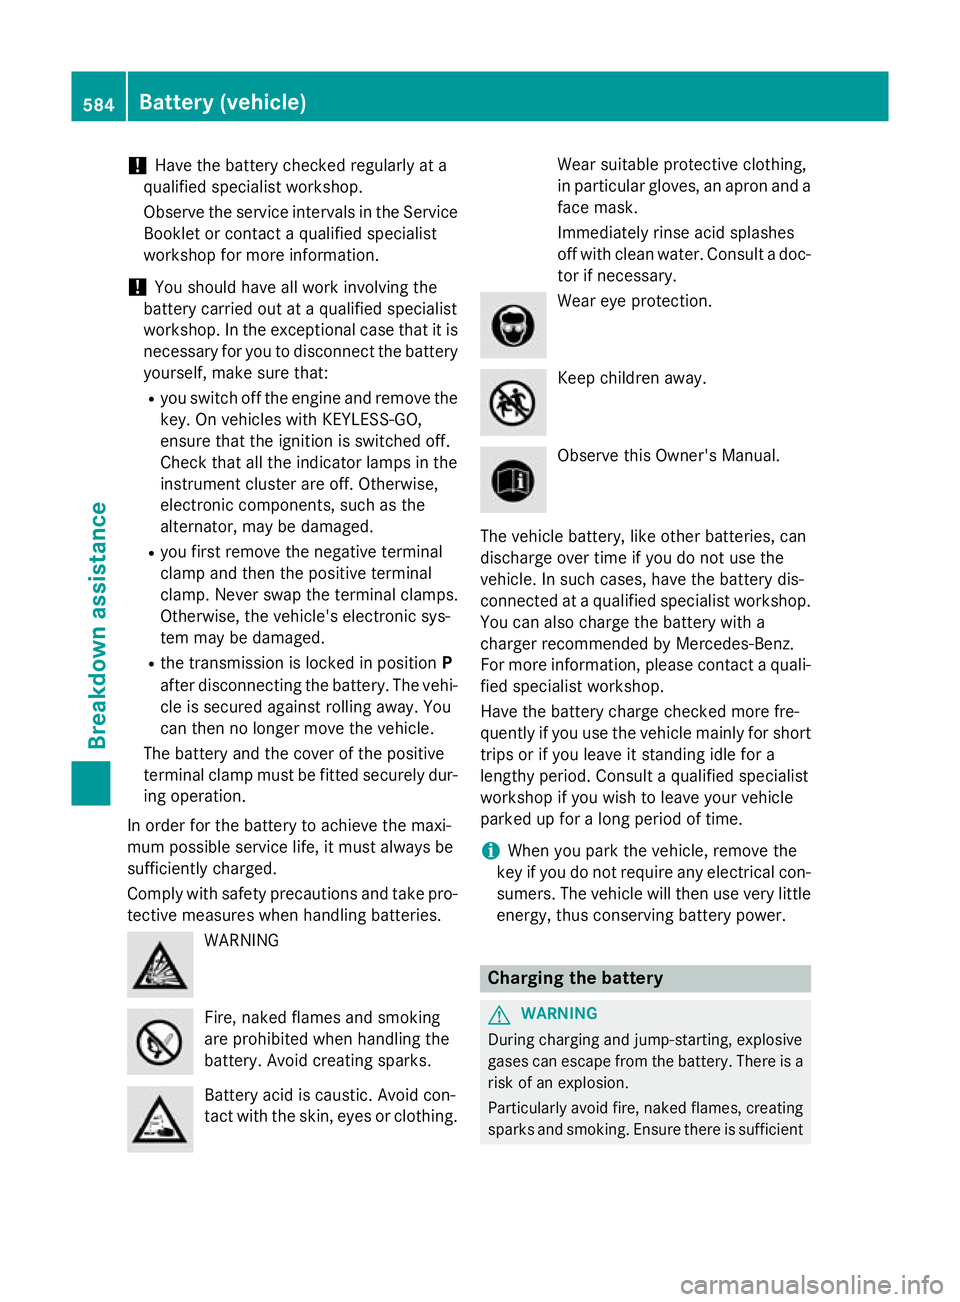
Comply with safety precautions and take pro-
tective measures when handling batteries. WARNING
Fire, naked flames and smoking
are prohibited when handling the
battery. Avoid creating sparks.
Battery acid is caustic. Avoid con-
tact with the skin, eyes or clothing. Wear suitable protective clothing,
in particular gloves, an apron and a
face mask.
Immediately rinse acid splashes
off with clean water. Consult a doc- tor if necessary. Wear eye protection.
Keep children away.
Observe this Owner's Manual.
The vehicle battery, like other batteries, can
discharge over time if you do not use the
vehicle. In such cases, have the battery dis-
connected at a qualified specialist workshop.
You can also charge the battery with a
charger recommended by Mercedes-Benz.
For more information, please contact a quali- fied specialist workshop.
Have the battery charge checked more fre-
quently if you use the vehicle mainly for short
trips or if you leave it standing idle for a
lengthy period. Consult a qualified specialist
workshop if you wish to leave your vehicle
parked up for a long period of time.
i When you park the vehicle, remove the
key if you do not require any electrical con- sumers. The vehicle will then use very littleenergy, thus conserving battery power. Charging the battery
G
WARNING
During charging and jump-starting, explosive
gases can escape from the battery. There is a risk of an explosion.
Particularly avoid fire, naked flames, creating
sparks and smoking. Ensure there is sufficient 584
Battery (vehicle)Breakdown assistance
Page 588 of 637
ventilation while charging and jump-starting.
Do not lean over a battery. G
WARNING
Battery acid is caustic. There is a risk of injury. Avoid contact with the skin, eyes or clothing.
Do not inhale any battery gases. Do not lean
over the battery. Keep children away from
batteries. Wash battery acid immediately with water and seek medical attention. G
WARNING
A discharged battery can freeze at tempera-
tures below freezing point. When jump-start-
ing the vehicle or charging the battery, gases can escape from the battery. There is a risk of
an explosion.
Allow the frozen battery to thaw out before
charging it or jump-starting.
! Only charge the installed battery with a
battery charger which has been tested and
approved by Mercedes-Benz. These battery chargers allow the battery to be charged
while still installed in the vehicle.
! Only use battery chargers with a maxi-
mum charging voltage of 14.8 V.
! Only
charge the battery using the jump-
start connection point.
The jump-starting connection point is in the
engine compartment.
If the indicator/warning lamps do not light up at low temperatures, it is very likely that the
discharged battery has frozen. In this case
you may neither jump-start the vehicle nor
charge the battery. The service life of a bat-
tery that has been thawed may be reduced.
The starting characteristics may be impaired,
especially at low temperatures. Have the
thawed battery checked at a qualified spe-
cialist workshop.
Read the battery charger's operating instruc- tions before charging the battery. X
Open the bonnet.
X Connect the battery charger to the positive
terminal and earth point in the same order
as when connecting the donor battery in
the jump-starting procedure
(Y page 586). Battery (vehicle)
585Breakdown assistance Z