2012 MERCEDES-BENZ CLS COUPE lock
[x] Cancel search: lockPage 207 of 373
R
ESP ®
is deactivated.
R al os soft yrep ressure or adefective tyr eis
detected.
Activatin gActiveB lind Spo tAssist
X Make sure that the radar sensor system
(Y page 225) and Active Blind Spot Assist
(Y page 220) are activated in the on-board
computer.
X Turn the key to position 2in the ignition
lock.
Warning lamps :in the exterior mirrors
light up red for approximately
1.5 seconds and then turn yellow.
Active Lane Keeping Assist Important safety notes
G
WARNING
Active Lane Keeping Assist does not keep
your vehicle in its lane. It is only an aid and
may detect the lane markings on the road
incorrectly or not at all.
The system may be impaired or may not func-
tion if:
R there is poor visibility, e.g. due to inade-
quate illumination of the road surface,
snow, rain, fog or spray.
R there is glare, e.g. from oncoming traffic,
the sun, or reflection from other vehicles.
R the windscreen is dirty, fogged up or cov-
ered, for instance by asticker, in the vicinity
of the camera.
R several or no lane markings for asingle lane
are present.
R the lane markings are worn away, dark or
covered up, e.g. by dirt or snow.
R the distanc etothe vehicle in fron tistoo
small and as aresult the lane markings can-
not be recognised.
R the lane markings on the road are unclear,
e.g. near roadworks. R
the lane markings change quickly, e.g.
branch off, cross, or merge.
R the road is narrow and winding.
Active Lane Keeping Assist cannot detect
road and traffic conditions. It is not asubsti-
tute for attentive driving. You are responsible
for the vehicle's speed, braking in good time,
and steerin gcorrectly. Always adapt your
driving style to suit the prevailing road and
weather conditions. Always pay attention to
traffic conditions and your surroundings. Oth-
erwise, you may fail to recognise dangers in
time, cause an accident and injure yourself
and others.
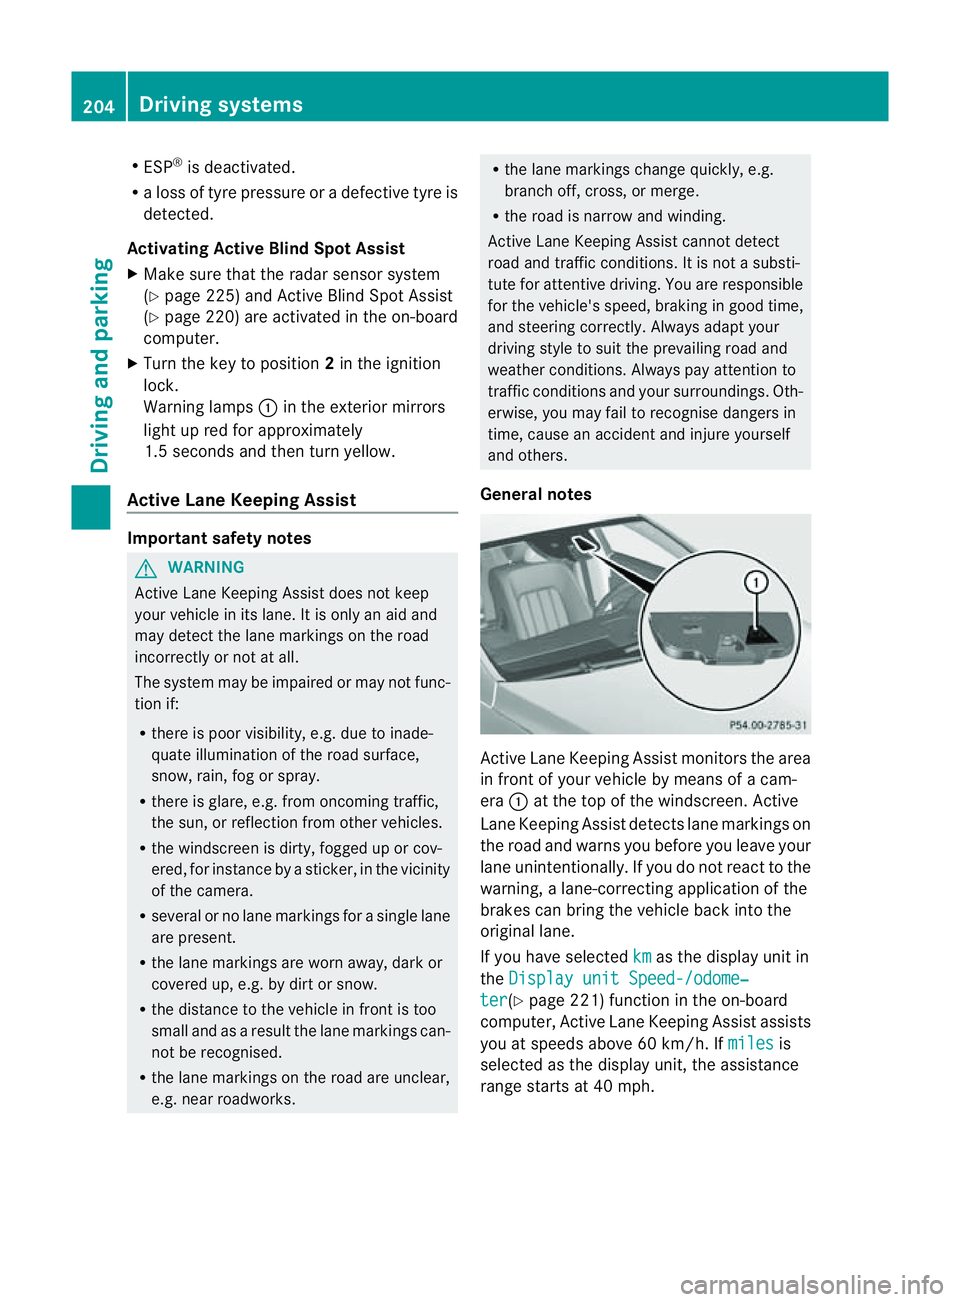
General notes Active Lane Keeping Assist monitors the area
in fron
tofyour vehicle by means of acam-
era :at the top of the windscreen .Active
Lane Keeping Assist detect slane markings on
th er oad and warn syou before you leave your
lane unintentionally. If you do no treact to the
warning, alane-correctinga pplication of the
brakes can bring the vehicle back intot he
original lane.
If you have selected km as the display unit in
the Display unit Speed-/odome‐ ter (Y
page 221)f unction in the on-board
computer, Active Lane Keeping Assist assists
you at speeds above 60 km/h. If miles is
selected as the display unit, the assistance
range start sat40mph. 204
Driving systemsDriving and parking
Page 214 of 373
X
To activate the on-board computer: turn
the key to position 1in the ignition lock.
Yo uc an contro lthe multifunctio ndisplay and
the settings in the on-board computer using
the buttons on the multifunction steering
wheel.
Left control panel =
; R
Calls up the men uand men ubar 9
:
Pres
sbriefly:
R Scrolls through lists
R Selects asubmen uorfunction
R In the Audio menu: selects a
stored station ,anaudio track or
av ideo scene
R In the Tel (telephone) menu:
switches to the phon ebook and
selects aname or telephone
number 9
:
Pres
sand hold:
R In the Audio menu: selects the
previous/next station or selects
an audio track or avideo scene
using rapid scrolling
R In the Tel (Telephone) menu:
start srapid scrolling if the phone
book is open a R
Confirms selection/display mes-
sage
R In the Tel (telephone) menu:
switches to the telephon ebook
and start sdialling the selected
number
R In the Audio menu: stops the
station searc hfunction at the
desire dstation Righ
tcontrol panel ~ R
Reject sorendsac all
R Exits telephone book/redial
memory 6 R
Makes or accept sacall
R Switche stotheredial memory W
X R
Adjust sthe volume 8 R
Mute Back button
%
Press briefly:
R
Back
R Switche soff LINGUATRONIC;
see th eseparate operating
instructions
R Hide sdisplay messages/calls
up th elast Trip men
ufunction
used
R Exits th etelephone book/redial
memory %
Press and hold:
R
Calls up th estandar ddisplay in
the Trip menu
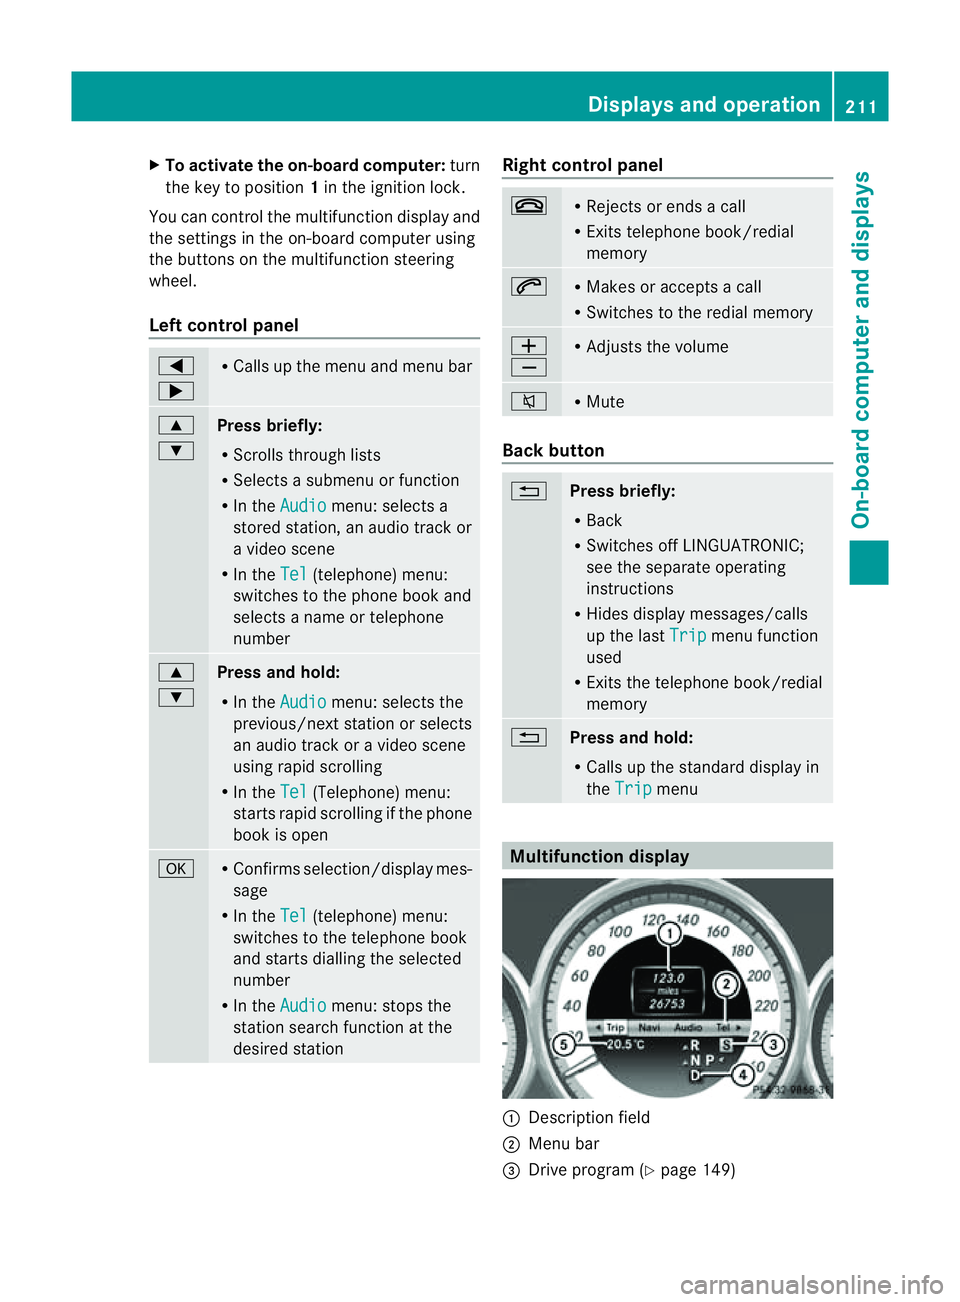
Multifunction display
:
Description field
; Men ubar
= Drive program (Y page 149) Displays and operation
211On-boardcomputer and displays Z
Page 227 of 373
X
Press the :or9 button to select the
Surround lighting function.
When the Surround lighting function is
activated, the light cone and the area
around the vehicle are displaye dinred in
the multifunction display.
X Press the abutton to save the setting.
Deactivating delayed switch-off of the exte-
rior lighting temporarily:
X Before leaving the vehicle, turn the key to
position 0in the ignition lock.
X Turn the key to position 2in the ignition
lock.
The exterior lighting delayed switch-off is
deactivated.
Delayed switch-off of the exterior lighting is
reactivated the next time you start the
engine.
If you have activated the Surround light‐ing function and the light switch is set to
Ã,t he following functions are activated
when it is dark:
R surround lighting: the exterior lighting
remains lit for 40 seconds after unlocking
with the key. If you start the engine, the
surround lighting is switched off and auto-
matic headlamp mode is activated
(Y page 111).
R Exterior lighting delayed switch-off: the
exterior lighting remains lit for 60seconds
after the engine is switched off. If you close
all the doors and the boot lid, the exterior
lighting goes off after 5seconds.
i Depending on your vehicle's equipment,
when the surround lighting and delayed
switch-off exterior lighting are on, the fol-
lowing light up:
R side lamps
R dipped-beam headlamps
R daytime driving lights
R surround lighting in the exterior mirrors Activating/deactivating the interior light-
ing delayed switch-off
If you activat
ethe Lightin gdelayed sw.- off function
,the interior lighting remains on
for 20seconds after you remove the key from
the ignition lock.
X Press the =or; button on the steer-
ing wheel to select the Settings menu.
X Press the :or9 button to select the
Light submenu.
X Press ato confirm.
X Press the :or9 button to select the
Light. delay function.
When the Lightingdelayed sw.-off function is activated, the vehicle interior is
displayed in red in the multifunction dis-
play.
X Press the abutton to save the setting.
Vehicle Setting permanent SPEEDTRONIC
X
Press the =or; button on the steer-
ing wheel to select the Settings menu.
X Press the :or9 button to select the
Vehicle submenu.
X Press ato confirm.
X Press the :or9 button to select the
Limit speed (winter tyres): function.
You will see the curren tsetting.
X Press ato confirm.
X Press the :or9 button to adjust
permanen tSPEEDTRONIC in increment sof
ten ( 230 km/h to
160 km/h ). The
Off set-
ting switches permanent SPEEDTRONIC
off.
X Press the abutton to store the entry.
For furthe rinformation on permanent SPEED-
TRONI C(Ypage 170). 224
Menus and submenusOn-board computer and displays
Page 228 of 373
Switching the automatic locking feature
on/off
X
Press the =or; button on the steer-
ing wheel to select the Settings menu.
X Press the :or9 button to select the
Vehicle submenu.
X Press ato confirm.
X Press the :or9 button to select the
Auto. door locks function.
When the Automatic door locks func-
tion is activated, the vehicle doors are dis-
played in red in the multifunction display.
X Press the abutton to save the setting.
If you activate the Automatic door locks function, the vehicle is centrally locked above
as
peed of around 15 km/h.
For further information on the automatic lock-
ing feature, see (Y page 84).
Activating/deactivating the acoustic
locking confirmation
If you switch on the Acoustic Lock function,
an acoustic signal sounds when you lock the
vehicle.
X Press the =or; button on the steer-
ing wheel to select the Settings menu.
X Press the :or9 button to select the
Vehicle submenu.
X Press ato confirm.
X Press the :or9 button to select the
Acoustic Lock function.
If the Acoustic Lock function is activated,
the & symbol in the multifunction dis-
play lights up red.
X Press the abutton to save the setting.
Activating/deactivating the radar sensor
system
X Press the =or; button on the steer-
ing wheel to select the Settings menu.
X Press the :or9button to select the
Vehicle submenu.
X Press ato confirm. X
Press the 9or: button to select
Radar sensor (See Owner's Man.): .
You will see the selected setting: on or
off .
X Press the abutton to save the setting.
i You must deactivate the radar sensor sys-
tem in certain countries and near radio
telescope facilities. For further informa-
tion, see (Y page 368).
When you are close to radio telescope facili-
ties, the radar sensor system will be deacti-
vated automatically.
The following systems are switched off when
the radar sensor system is deactivated:
R DISTRONIC PLUS (Y page 170)
R BAS PLUS (Y page 64)
R PRE-SAFE ®
Brake (Y page 68)
R Blind Spot Assist (Y page 197)
R Active Blind Spot Assist (Y page 201)
Heating Auxiliary heating departuret
ime G
WARNING
Exhaust fumes are produced when the auxili-
ary heating is in operation. Inhaling these
exhaust fumes can be poisonous. You should
therefore switch off the auxiliary heating in
confined spaces without an extraction sys-
tem, e.g. agarage. G
WARNING
When operating the auxiliary heating parts of
the vehicle can get very hot. Make sure that
the exhaust system does not under any cir-
cumstances come into contact with easily
ignitable material such as dry grass or fuels.
The material could otherwise ignite and set
the vehicle alight. Choose your parking spot
accordingly.
Operating the auxiliary heating is thus pro-
hibited at filling stations or when your vehicle
is being refuelled. You must therefore switch
off the auxiliary heating at filling stations. Menus and submenus
225On-board computer and displays Z
Page 230 of 373
X
Press the :or9 button to select the
Easy Entry/Exit: function.
If the Easy Entry/Exit function is activa-
ted, the vehicle steerin gwheel is displayed
in red in the multifunction display.
X Press the abutton to save the setting.
Further information on the EASY-ENTRY/EXIT
feature (Y page 104).
Switching the belt adjustment on/off
X Press the =or; button on the steer-
ing wheel to select the Settings menu.
X Press the :or9 button to select the
Convenience submenu.
X Press ato confirm.
X Press the :or9 button to select the
Belt adjustment function.
When the Belt adjustment function is
activated, the vehicle seat belt is displayed
in red in the multifunction display.
X Press the abutton to save the setting.
For further information on belt adjustment,
see (Y page 50).
Switching the fold-in mirrors when lock-
ing function on/off
This function is only availabl eonvehicles with
Memory Function (Y page 107).
When you activat ethe Auto. fold in func-
tion, the exterior mirrors are folded in when
the vehicle is locked. When you unlock the
vehicle and then open adoor, the exterior
mirrors fold out again.
X Press the =or; button on the steer-
ing wheel to select the Settings menu.
X Press the :or9 button to select the
Convenience submenu.
X Press ato confirm.
X Press the :or9 button to select the
Auto. fold in function.
If the Auto. fold in function is activated,
the vehicle's exterior mirror is displaye din
red in the multifunction display.
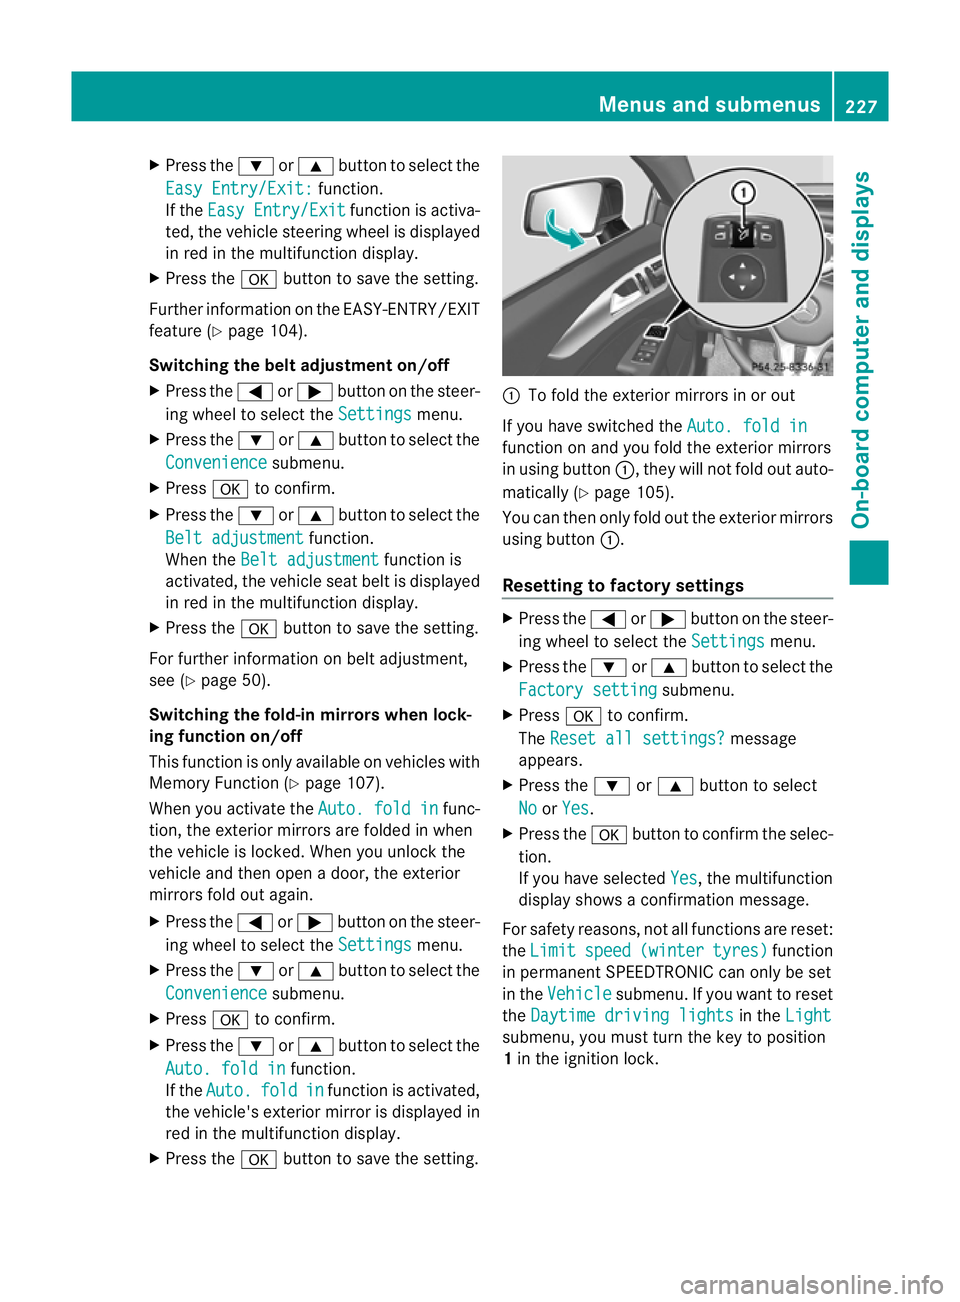
X Press the abutton to save the setting. :
To fold the exterior mirrors in or out
If you have switched the Auto. fold in function on and you fold the exterior mirrors
in using button
:,they will not fold out auto-
matically (Y page 105).
You can then only fold out the exterior mirrors
using button :.
Resetting to factor ysettings X
Pres sthe = or; button on th esteer-
ing wheel to selec tthe Settings menu.
X Press the :or9 button to select the
Factory setting submenu.
X Press ato confirm.
The Reset all settings? message
appears.
X Press the :or9 button to select
No or
Yes .
X Press the abutton to confirm the selec-
tion.
If you have selected Yes ,t
he multifunction
displays howsaconfirmation message.
For safety reasons, not all functions are reset:
the Limit speed (winter tyres) function
in permanent SPEEDTRONIC can only be set
in the Vehicle submenu. If you want to reset
the Daytime driving lights in the
Light submenu, you must turn the key to position
1
in the ignition lock. Menus and submenus
227On-board computer and displays Z
Page 231 of 373

AMG men
uinAMG vehicles
AMG displays :
Digital speedometer
; Gear indicator
= Upshift indicator
? Engine oil temperature
A Coolant temperature
B ECO start/stop function status indicator
(Y page 144)
X Press the =or; button on the steer-
ing wheel to select the AMG menu.
Upshift indicator UP =
indicates that the
engin ehas reached the overrevving range
when in the manual gearshift program.
Upshift indicator UP =
fades out other mes-
sages until you have shifted up.
If the engin eoil temperature is below 80 †,
the oil temperature is shown in blue. Avoid
using the full output of the engin eduring this
time.
SETUP :
Driv eprogram (C /SS+ /M )
; ESP ®
mode (ON /OFF )orS
PORT handling
mode (SPORT )
= Suspension tunin g(COMFORT /SPORT /
SPORT+ ) SETUP shows the drive program, the ESP
®
(Electronic Stability Program) mode and the
suspension tuning.
X Press the =or; button on the steer-
ing wheel to select the AMG menu.
X Press the 9button repeatedly until
SETUP is displayed.
or
X Briefly press the AMG button on the centre
console (Y page 183).
RACETIMER Displaying and starting the RACETIMER
:
Lap
; RACETIMER
You can start the RACETIME Rwhen the
engin eisrunning or if the key is in position
2 in the ignition lock.
X Press the =or; button on the steer-
ing wheel to select the AMG menu.
X Press the 9button repeatedly until the
RACETIME Risshown.
X To start: press the abutton to start the
RACETIMER.
Displaying the intermediat etime 228
Menus and submenusOn-boar
dcomputer and displays
Page 232 of 373
X
Press the =or; button to select
Interm. Time .
X Press ato confirm.
The intermediate time is displaye dfor five
seconds.
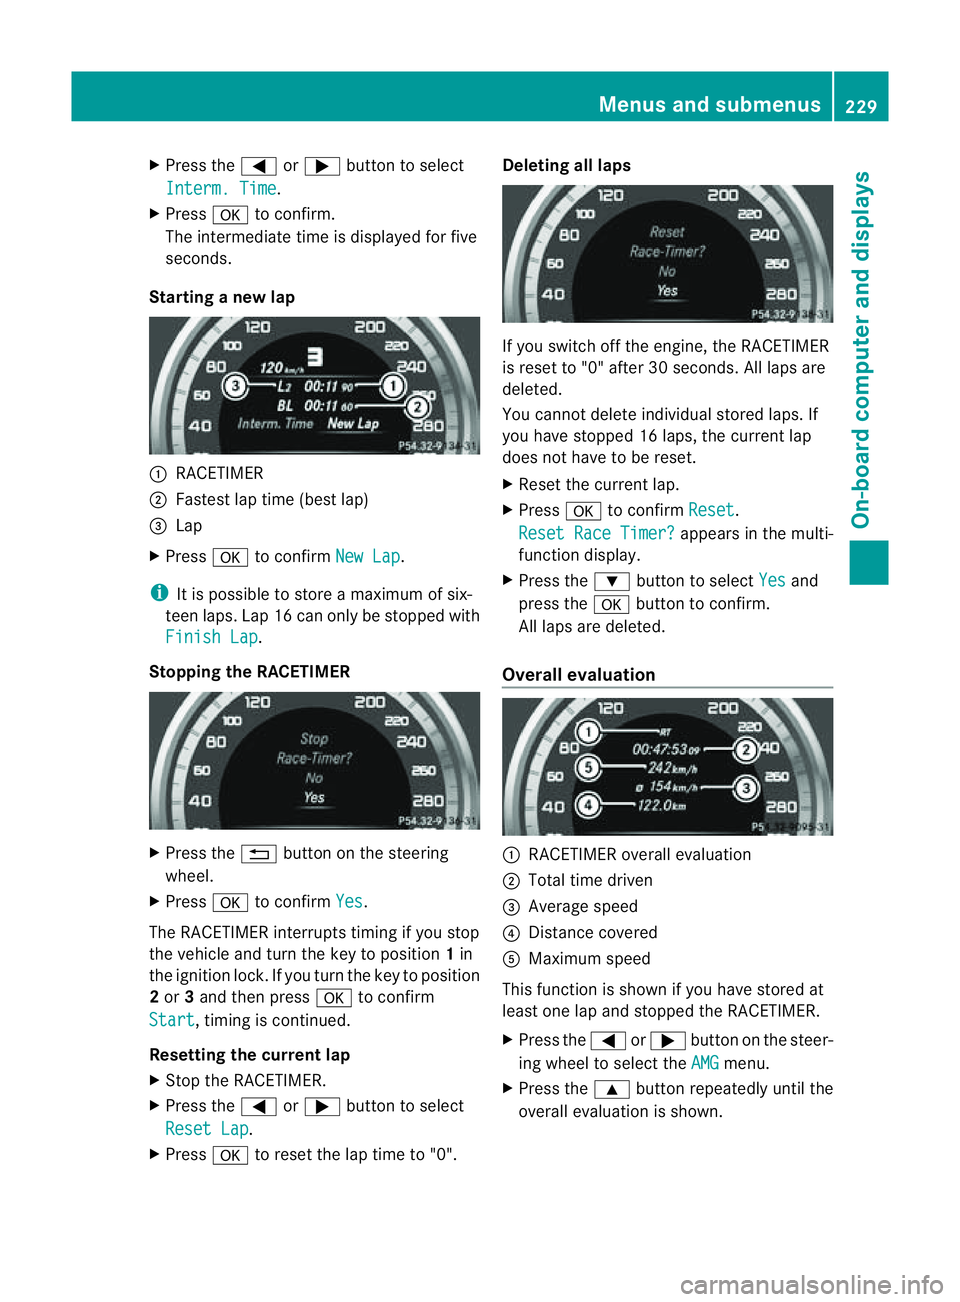
Starting anew lap :
RACETIMER
; Fastest lap time (best lap)
= Lap
X Press ato confirm New Lap .
i It is possible to store amaximum of six-
teen laps. Lap 16 can only be stopped with
Finish Lap .
Stopping the RACETIMER X
Press the %button on the steering
wheel.
X Press ato confirm Yes .
The RACETIME Rinterrupts timing if you stop
the vehicle and turn the key to position 1in
the ignition lock. If you turn the key to position
2 or 3and then press ato confirm
Start ,t
iming is continued.
Resetting the current lap
X Stop the RACETIMER.
X Press the =or; button to select
Reset Lap .
X Press ato reset the lap time to "0". Deleting all laps
If you switch off the engine, the RACETIMER
is reset to "0" after 30 seconds. All laps are
deleted.
You cannot delete individual stored laps. If
you have stopped 16 laps, the curren tlap
does no thave to be reset.
X Reset th ecurren tlap.
X Press ato confirm Reset .
Reset Rac eTimer? appear
sinthemulti-
function display.
X Press the :buttontos electYes and
pres sthe a buttontoc onfirm.
All laps are deleted.
Overall evaluation :
RACETIMER overall evaluation
; Total tim edriven
= Averag espeed
? Distance covered
A Maximum speed
This function is shown if you have store dat
least on elap and stopped th eRACETIMER.
X Press the =or; button on the steer-
ing whee ltoselect the AMG menu.
X Press the 9button repeatedly unti lthe
overall evaluation is shown. Menus and submenus
229On-board computer and displays Z
Page 235 of 373
Safety systems
Display messages Possible causes/consequences and
M Solutions
!÷
currently unavail‐
able See Owner's
Manual ABS (Anti-lock Braking System), ESP
®
(Electronic Stability Pro-
gram), BAS (Brake Assist), PRE-SAFE ®
,t he HOLD function and hill
start assist are temporarily unavailable.
The adaptive brake lights, BAS PLUS and PRE-SAFE ®
Brake may
also have failed.
In addition, the ÷,åand! warning lamps light up in
the instrumen tcluster.
ATTENTION ASSIST is deactivated.
Possible causes:
R self-diagnosis is not yet complete.
R the on-board voltage may be insufficient.
G WARNING
The brake system continues to function normally, but without the
functions listed above. The wheels could therefore lock if you
brake hard, for example.
The steerability and braking characteristics may be severely affec-
ted. The braking distance in an emergency braking situation can
increase.
If ESP ®
is not operational, ESP ®
is unable to stabilise the vehicle.
The danger of skidding and having an accident increases.
X Carefullyd rive onasuitable stretch of road, making slight steer-
ing movementsatas peed above 20 km/h.
If the display message disappears, the functions mentioned
above are available again.
If the display message continues to be displayed:
X Drive on carefully.
X Visit aqualified specialist workshop. !÷
inoperative See
Owner's Manual ABS,E
SP®
,B AS ,PRE-SAFE ®
,t he HOLD function and hill start
assist are unavailable due to amalfunction.
The adaptive brake lights, BAS PLUS and PRE-SAFE ®
Brake may
also have failed.
In addition, the J,÷,åand! warning lamps light
up in the instrumen tcluster.
ATTENTION ASSIST is deactivated.
G WARNING 232
Display messagesOn-board computer and displays