2012 MERCEDES-BENZ CLS COUPE lock
[x] Cancel search: lockPage 163 of 373
Switching off the engine
Vehicles with automatic transmission X
Firmly depress the parking brake.
X All vehicles (except AMG vehicles): shift
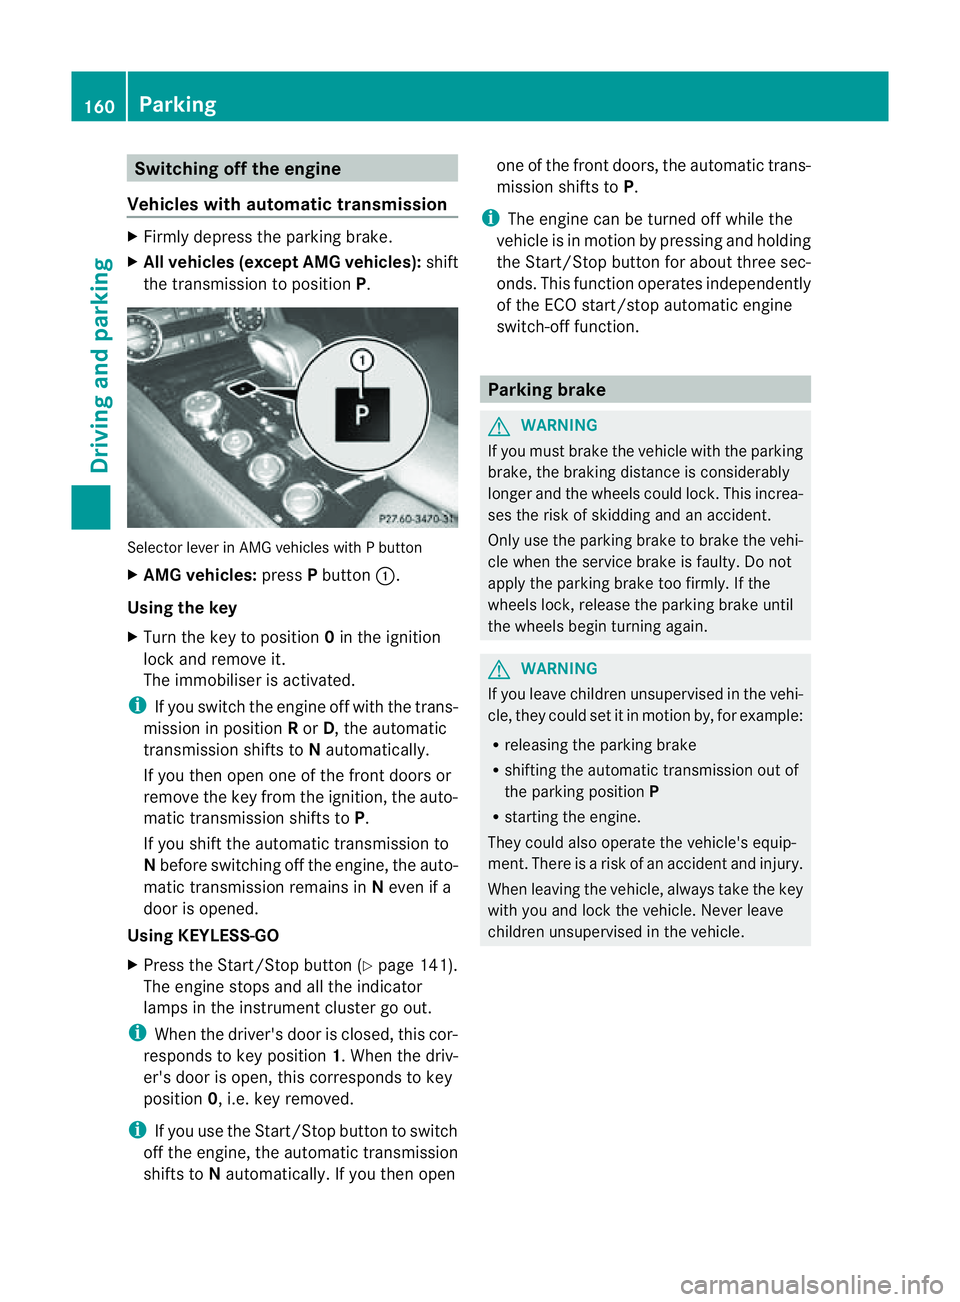
the transmission to position P.Selector lever in AMG vehicles with
Pbutton
X AMG vehicles: pressPbutton :.
Using the key
X Turn the key to position 0in the ignition
lock and remove it.
The immobiliser is activated.
i If you switch the engine off with the trans-
mission in position Ror D,t he automatic
transmission shifts to Nautomatically.
If you then open one of the front doors or
remove the key from the ignition, the auto-
matic transmission shifts to P.
If you shift the automatic transmission to
N before switching off the engine, the auto-
matic transmission remains in Neven if a
door is opened.
Using KEYLESS-GO
X Press the Start/Stop button (Y page 141).
The engine stops and all the indicator
lamps in the instrumen tcluster go out.
i When the driver's door is closed, this cor-
responds to key position 1.When the driv-
er's door is open ,this corresponds to key
position 0,i.e. key removed.
i If you use the Start/Stop button to switch
off the engine, the automatic transmission
shift stoNautomatically. If you the nopen one of the fron
tdoors, the automatic trans-
mission shifts to P.
i The engine can be turned off while the
vehicle is in motion by pressing and holding
the Start/Stop button for about three sec-
onds. This function operates independently
of the ECO start/stop automatic engine
switch-off function. Parking brake
G
WARNING
If you must brake the vehicle with the parking
brake, the braking distance is considerably
longer and the wheels could lock. This increa-
ses the risk of skidding and an accident.
Only use the parking brake to brake the vehi-
cle when the service brake is faulty. Do not
apply the parking brake too firmly. If the
wheels lock, release the parking brake until
the wheels begin turnin gagain. G
WARNING
If you leave children unsupervised in the vehi-
cle, they could set it in motion by, for example:
R releasing the parking brake
R shifting the automatic transmission out of
the parking position P
R starting the engine.
They could also operate the vehicle's equip-
ment.T here isarisk of an accident and injury.
When leaving the vehicle, always take the key
with you and lock the vehicle. Never leave
children unsupervised in the vehicle. 160
ParkingDriving and parking
Page 167 of 373
The wear of individual componentsoft
he
brake system, such as the brake pads/linings
or brake discs, depends on the individual driv-
ing style and operating conditions.
For this reason, it is impossible to state a
mileage lifetime that will be valid under all
circumstances. An aggressive driving style
will lead to high wear. You can obtain further
information about this from your Mercedes-
Benz Servic eCentre.
New and replaced brake pads and discs only
reach their optimum braking effect after sev-
eral hundred kilometres of driving. Compen-
sate for this by applying greater force to the
brake pedal. Do not forget this, and adapt
your driving and braking accordingly during
this run-in period.
Excessively heavy braking results in corre-
spondingly high brake wear. Observe the
brake system warning lamp in the instrument
cluster and notea ny brake status messages
in the multifunction display .For high-per-
formanc edriving in particular, it is important
to maintain and have the brake system
checked regularly. Driving on wet roads
Aquaplaning If water has accumulated to
acertain depth
on the road surface, there is adanger of aqua-
planing occurring, even if:
R you are driving at low speeds.
R the tyres have adequate tread depth.
For this reason, do not drive in tyre ruts and
brake carefully.
Driving on flooded roads !
Bear in mind that vehicles travelling in
front or in the opposite direction create
waves. This may cause the maximum per-
missible water depth to be exceeded.
These notes must be observed under all
circumstances. You could otherwise dam- age the engine, the electronics or the trans-
mission.
If you have to drive on stretches of road on
which water has collected, please bear in
mind that:
R the maximum permissible still water depth
is 25 cm.
R you should drive no faster than at walking
pace. Winter driving
Important safety notes G
WARNING
If you shift down on aslippery road surface in
an attempt to increase the engine's braking
effect ,the drive wheels could lose their grip.
This increases the risk of skidding and having
an accident.
Do not shift down for additional engine brak-
ing on aslippery road surface. G
DANGER
If the exhaust pipe is blocked or adequate
ventilation is not possible, poisonous gases
such as carbon monoxide (CO) may enter the
vehicle. This is the case, e.g. if the vehicle
becomes trapped in snow. There is arisk of
fatal injury.
If you leave the engine or the auxiliary heating
running, make sure the exhaust pipe and area
around the vehicle are clear of snow. To
ensure an adequate supply of fresh air, open
aw indow on the side of the vehicle that is not
facing into the wind.
Have your vehicle winterproofed at aqualified
specialist workshop at the onset of winter.
Observe the notes in the "Winter operation"
section (Y page 330).
Driving with summer tyres Observe the notes in the "Winter operation"
section (Y
page 330). 164
Driving tipsDriving and parking
Page 184 of 373
Activating RACE START
X
Depress th ebrak epedal wit hyour left foot
and keep it depressed.
X Turn the drive program selector clockwise
(Y page 151) until the RSlamp lights up.
The RACE START Confirm: Paddle UP Cancel: Paddle DOWN message appears
in the multifunction display.
i If the activation conditions are no longer
fulfilled, RACE START is cancelled. The
RACE START cancelled message
appears in the multifunction display.
X To cancel: pull the left steerin gwheel shift
paddle (Y page 152).
or
X To confirm: pull the right steerin gwheel
shift paddle (Y page 152).
The RACE START available Depress accelerator message appears in the mul-
tifunction display.
i If you do not depress the accelerator
pedal fully within two seconds, RACE
START is cancelled. The RACE START not
possible See Owner's Manual message
appears in the multifunction display.
X Fully depress the accelerator pedal.
The engine speed rises to approximately
3500 rpm.
The RACE START Release brake to start message appears in the multifunc-
tion display.
i If you do not release the brake pedal
within five seconds, RACE START is cancel-
led. The RACE START cancelled mes-
sage appears in the multifunction display.
X Take your foot off the brake, but keep the
accelerator pedal depressed.
The vehicle pulls away at maximum accel-
eration.
The RACE START active message appears
in the multifunction display.
RACE START is deactivated when the vehicle
reaches aspeed of approximately 50 km/h. Drive program
S+is activated. SPORT han-
dling mode remains activated.
RACE START is deactivated immediately if
you release the accelerator pedal during
RACE START or if any of the activation condi-
tions are no longer fulfilled. The RACE START
not possible See Owner's Manual mes-
sage appears in the multifunction display.
i After using it several times in short suc-
cession, RACE START will be unavailable
until acertain distance has been driven. AIRMATIC
Vehicle level Important safety notes
G
WARNING
If you have selected "Comfort tuning", the
vehicle will be lowered if you lock it within
60 seconds of the engine being switched off.
Make sure, therefore, that nobody is in the
vicinit yofthe wheel housing or under the
vehicle when you lock the vehicle. Otherwise,
limbs could become trapped.
! The vehicle is lowered by about 15 mm if:
R you have selected "Comfort tuning"
R you switch off the engine and
R you lock the vehicle within approximately
60 seconds
When parking, position your vehicle so that
it does not make contact with the kerb as
the vehicle is lowered. Your vehicle could
otherwise be damaged.
Your vehicle regulates its height automati-
cally. All-round level control ensures the best
possible suspension and constant ground
clearance, even with aladen vehicle. When
you drive fast, the vehicle is lowered auto-
matically to improve driving safety and to
reduce fuel consumption. Driving systems
181Driving and parking Z
Page 185 of 373
The following vehicle levels are possible:
R
normal
R raised: the vehicle is raised by about
25 mm when compared with the normal
level.
R lowered: the vehicle is lowered by about
10 mm when compared with the normal
level.
The "Normal" and "Raised" vehicle levels can
be set manually.
The "Lowered" vehicle level is set automati-
cally:
R at speeds above 140 km/h
R if you have selected "Comfort tuning"
(Y page 182) and then lock the vehicle
within 60 seconds of the engine being
switched off
R if you have selected "Sports tuning"
(Y page 182)
Setting the vehicle level G
WARNING
Make sure that nobody is in the vicinit yofthe
wheel housing or under the vehicle while low-
ering the vehicle when it is stationary. Other-
wise, limbs could become trapped.
Select the "Normal" setting for normal road
surfaces and "Raised" for driving with snow
chains or on particularly poor road surfaces.
Your selection remains stored even if you
remove the key from the ignition lock.
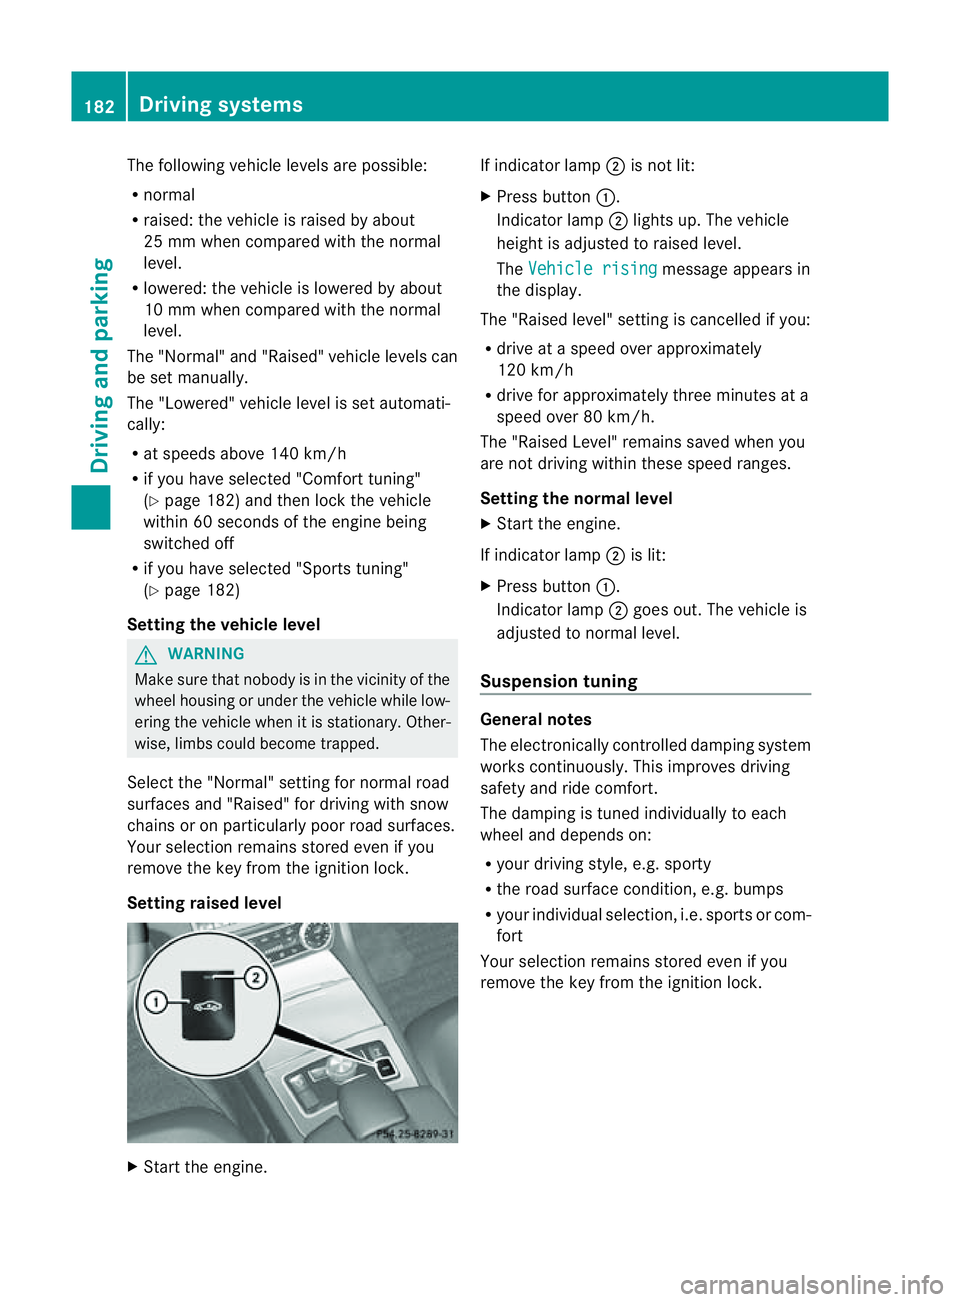
Setting raised level X
Start the engine. If indicator lamp
;is not lit:
X Press button :.
Indicator lamp ;lights up. The vehicle
height is adjusted to raised level.
The Vehicle rising message appears in
the display.
The "Raised level" setting is cancelled if you:
R drive at aspeed over approximately
120 km/h
R drive for approximately three minutes at a
speed over 80 km/h.
The "Raised Level" remains saved when you
are not driving within these speed ranges.
Setting the norma llevel
X Start the engine.
If indicator lamp ;is lit:
X Press button :.
Indicator lamp ;goes out. The vehicle is
adjusted to normal level.
Suspension tuning General notes
The electronically controlled damping system
works continuously. This improves driving
safety and ride comfort.
The damping is tuned individually to each
wheel and depends on:
R
your driving style, e.g. sporty
R the road surface condition, e.g. bumps
R your individual selection ,i.e. sports or com-
fort
Your selection remains stored even if you
remove the key from the ignition lock. 182
Driving systemsDriving and parking
Page 189 of 373
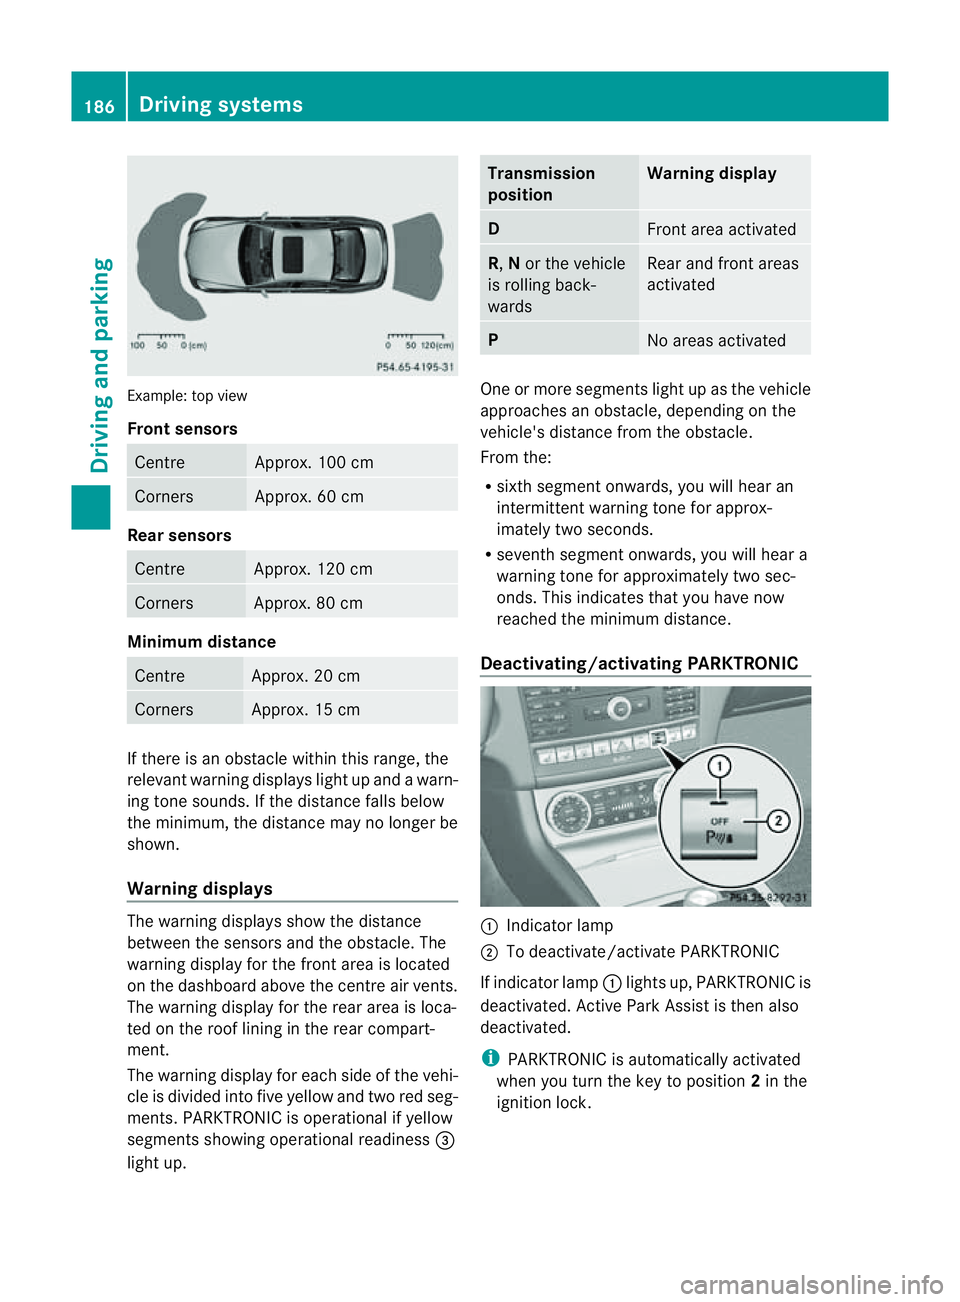
Example: top view
Front sensors
Centre Approx. 100 cm
Corners Approx. 60 cm
Rea
rsensors Centre Approx
.120 cm Corners Approx
.80cm Minimum distance
Centre Approx
.20cm Corners Approx
.15cm If there is an obstacle within this range, the
relevant warning displays light up and awarn-
ing tone sounds. If th edistanc efalls below
the minimum, the distanc emay no longer be
shown.
Warning displays The warning displays sho
wthe distance
between th esensor sand th eobstacle. The
warning display for the fron tarea is located
on the dashboard above the centre air vents.
The warning display for the rear area is loca-
ted on the roof lining in the rear compart-
ment.
The warning display for each side of the vehi-
cle is divided into five yellow and two red seg-
ments. PARKTRONIC is operational if yellow
segments showing operational readiness =
light up. Transmission
position Warning display
D
Front area activated
R,
Nor the vehicle
is rolling back-
wards Reara
nd front areas
activated P
No area
sactivated One or more segments light up as the vehicle
approache
sanobstacle, depending on the
vehicle's distance from the obstacle.
From the:
R sixth segment onwards, you willh earan
intermitten twarnin gtonef or approx-
imately two seconds.
R sevent hsegment onwards, you will hear a
warning tonef or approximately two sec-
onds. This indicates that you have now
reached the minimum distance.
Deactivating/activating PARKTRONIC :
Indicator lamp
; To deactivate/activate PARKTRONIC
If indicator lamp :lights up, PARKTRONIC is
deactivated. Active Park Assist is then also
deactivated.
i PARKTRONIC is automatically activated
when you turn the key to position 2in the
ignition lock. 186
Driving systemsDriving and parking
Page 194 of 373
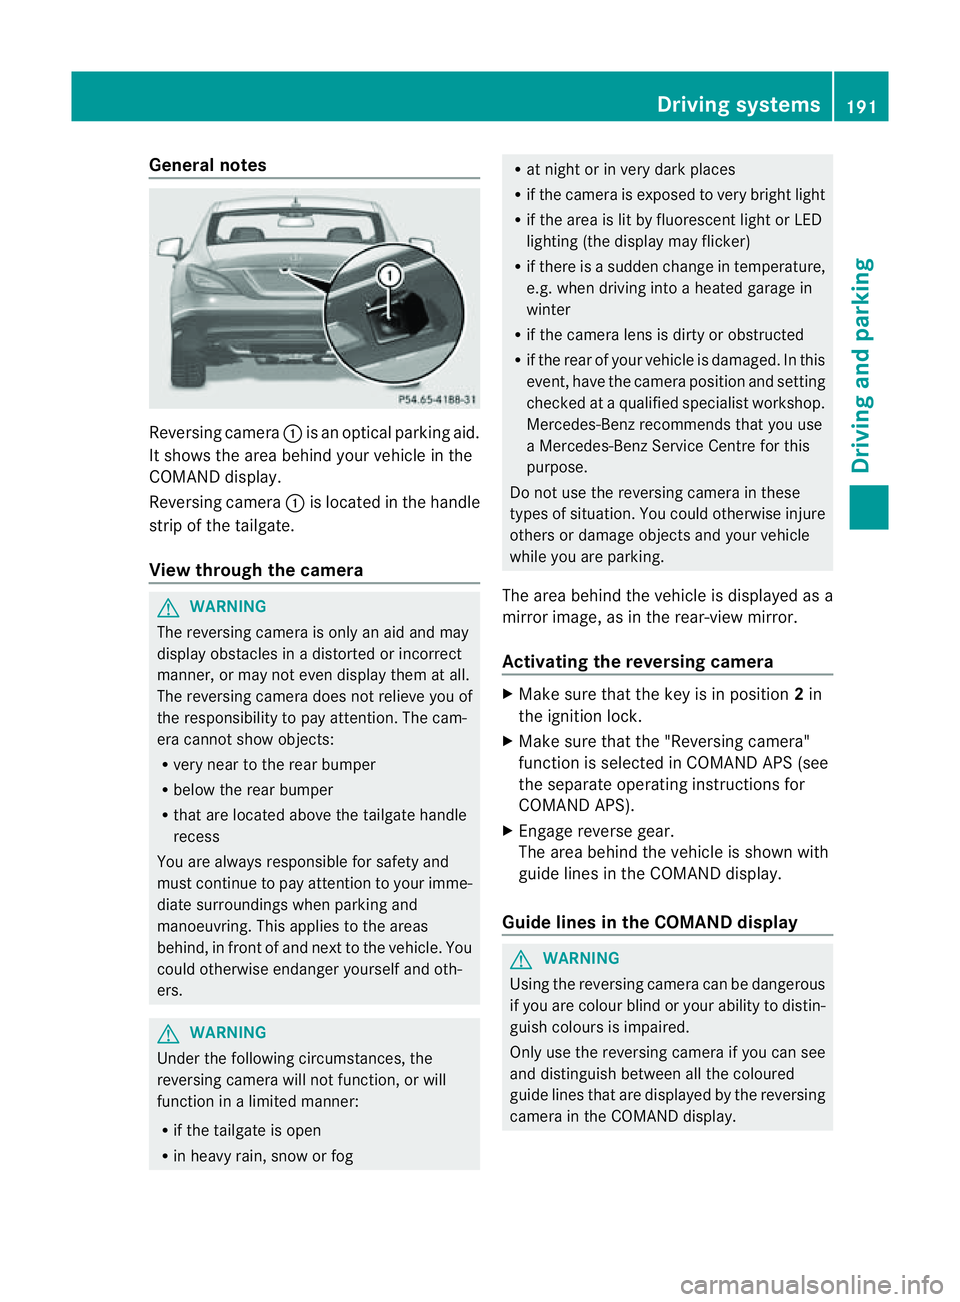
General notes
Reversing camera
:is an optical parking aid.
It shows the area behind yourv ehicle in the
COMAND display.
Reversing camera :is located in the handle
strip of the tailgate.
View through the camera G
WARNING
The reversing camera is only an aid and may
display obstacles in adistorted or incorrect
manner, or may not even display them at all.
The reversing camera does not relieve you of
the responsibility to pay attention .The cam-
era cannot show objects:
R very near to the rear bumper
R below the rear bumper
R that are located above the tailgate handle
recess
You are always responsible for safety and
must continue to pay attention to your imme-
diate surroundings when parking and
manoeuvring. This applies to the areas
behind, in front of and next to the vehicle. You
could otherwise endanger yourself and oth-
ers. G
WARNING
Under the following circumstances, the
reversing camera will not function, or will
function in alimited manner:
R if the tailgate is open
R in heavy rain, snow or fog R
at night or in very dark places
R if the camera is exposed to very bright light
R if the area is lit by fluorescent light or LED
lighting (the display may flicker)
R if there is asudden change in temperature,
e.g. when driving into aheated garage in
winter
R if the camera lens is dirty or obstructed
R if the rear of your vehicle is damaged. In this
event, have the camera position and setting
checked at aqualified specialist workshop.
Mercedes-Ben zrecommends that you use
aM ercedes-Benz Service Centr efor this
purpose.
Do not use the reversin gcamera in these
types of situation .You could otherwise injure
others or damage object sand your vehicle
while you are parking.
The area behind the vehicle is displayed as a
mirror image, as in the rear-view mirror.
Activating the reversing camera X
Make sure that the key is in position 2in
the ignition lock.
X Make sure that the "Reversing camera"
function is selected in COMAND APS (see
the separate operating instructions for
COMAND APS).
X Engage reverse gear.
The area behind the vehicle is shown with
guide lines in the COMAND display.
Guide lines in the COMAND display G
WARNING
Using the reversing camera can be dangerous
if you are colour blind or your ability to distin-
guish colours is impaired.
Only use the reversing camera if you can see
and distinguish between all the coloured
guide lines that are displayed by the reversing
camera in the COMAND display. Driving systems
191Driving and parking Z
Page 198 of 373
The system may be impaired or may not func-
tion if:
R there is poor visibility, e.g. due to snow,
rain, fog or spray.
R the windscreen is dirty, misted up or cov-
ered, for instance by asticker, in the vicinity
of the camera.
R on bends, on uphill gradients or downhill
gradients. G
WARNING
Night View Assist Plus does not detect
object sinthe immediate vicinit yofthe vehi-
cle. Look through the windscreen when
manoeuvring. Make sure that there are no
people or animals in the area in which you are
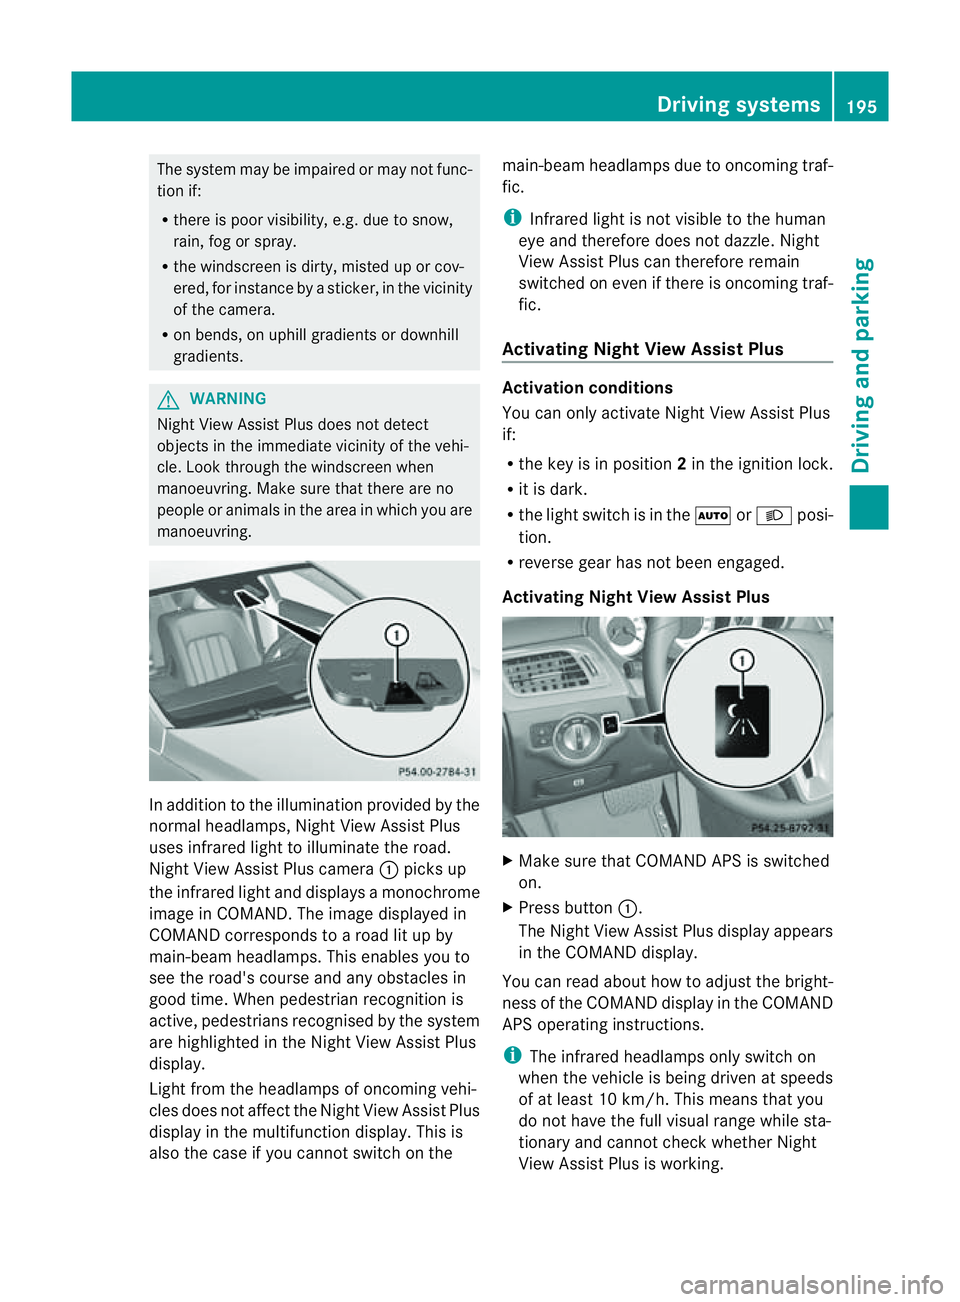
manoeuvring. In addition to the illumination provided by the
normal headlamps, Night View Assist Plus
uses infrared light to illuminate the road.
Night View Assist Plus camera :picks up
the infrared light and display samonochrome
image in COMAND .The image displayed in
COMAND corresponds to aroad lit up by
main-beam headlamps. This enables you to
see the road's course and any obstacles in
good time. When pedestrian recognition is
active, pedestrians recognised by the system
are highlighted in the Night View Assist Plus
display.
Light from the headlamps of oncomingv ehi-
cles does not affect the Night View Assist Plus
displayint he multifunction display. This is
also the case if you cannot switch on the main-beam headlamps due to oncomingt
raf-
fic.
i Infrared light is not visible to the human
eye and therefore does not dazzle. Night
View Assist Plus can therefore remain
switched on even if there is oncomingt raf-
fic.
Activating Night View Assist Plus Activation conditions
You can only activate Night View Assist Plus
if:
R
the key is in position 2in the ignition lock.
R it is dark.
R the light switch is in the ÃorL posi-
tion.
R reverse gear has not been engaged.
Activating Night View Assist Plus X
Make sure that COMAND APS is switched
on.
X Press button :.
The Night View Assist Plus displaya ppears
in the COMAND display.
You can read about how to adjust the bright-
ness of the COMAND displayint he COMAND
APS operating instructions.
i The infrared headlamps only switch on
when the vehicle is being driven at speeds
of at least 10 km/h. This means that you
do not have the full visual range while sta-
tionary and cannot check whether Night
View Assist Plus is working. Driving systems
195Driving and parking Z
Page 202 of 373
If
av ehicle is detected within the monitoring
range of Blind Spot Assist at speedsa bove
30 km/h, warning lamp :on the corre-
sponding side lights up red. This warning
alwayso ccurs when avehicle enters the blind
spot monitoring range from behind or from
the side. When you overtake avehicle ,the
warning only occurs if the difference in speed
is less than 12 km/h.
The yellow indicator lamp goes out if reverse
gear is engaged. Blind Spot Assist is then
deactivated.
The brightness of the indicator/warning
lampsisa djusted automaticall yaccording to
the ambient light.
Collision warning
If av ehicle is detected in the monitoring range
of Blind Spot Assist and you switch on the
corresponding turn signal ,adouble warning
tone sounds. Red warning lamp :flashes. If
the turn signal remains on, detected vehicles
are indicated by the flashing of red warning
lamp :.There are no further warning tones.
Switching on Blind Spot Assist
X Make sure that the radar sensor system
(Y page 225) and Blind Spot Assist
(Y page 220) are activated in the on-board
computer.
X Turn the key to position 2in the ignition
lock.
Warning lamps :in the exterior mirrors
light up red for approximately
1.5 seconds and then turn yellow.
Lane Keeping Assist Important safety notes
G
WARNING
Lane Keeping Assist does not keep your vehi-
cle in its lane. It is only an aid and may detect
the lane markings on the road incorrectly or
not at all. The system may be impaired or may not func-
tion if:
R
there is poor visibility, e.g. due to insuffi-
cient illumination of the road, or due to
snow, rain, fog or spray.
R there is glare, e.g. from oncomingt raffic,
the sun, or reflection from other vehicles.
R the windscreen is dirty, misted up or cov-
ered, for instancebyas ticker, in the vicinity
of the camera
R several or no lane markings for asingle lane
are present.
R the lane markings are worn away,d ark or
covered up, e.g. by dirt or snow.
R the distance to the vehicle in front is too
small and the lane markings thus cannot be
detected.
R the lane markings on the road are unclear,
e.g. near roadworks.
R the lane markings change quickly, e.g.
lanes branch off, cross one another or
merge.
R the road is narrow and winding.
Lane Keeping Assist cannot detect road and
traffic conditions. It is not asubstitute for
attentive driving. You are responsible for the
vehicle's speed, braking in good time, and
steering correctly. Always adapt your driving
style to suit the prevailing road and weather
conditions. Always pay attention to traffic
conditionsa nd your surroundings. Otherwise,
you may fail to recognise dangers in time,
cause an accident and injure yourself and oth-
ers. Driving systems
199Driving and parking Z