2012 MERCEDES-BENZ CLS COUPE low oil pressure
[x] Cancel search: low oil pressurePage 7 of 373

1, 2,
3...
12 Vsocket
see Socket
4ETS
see ETS/4ETS (Electronic Trac-
tionS ystem)
4MATIC (permanent four-wheel
drive) .................................................. 184
4MATIC off-road system ...................184 A
ABS (Anti-lock Braking System) Display message ............................ 232
Function/notes ................................ 63
Important safety notes ....................63
Warning lamp ................................. 261
Activating/deactivating air-recir-
culation mode .................................... 131
Activating/deactivating cooling
with air dehumidification .................127
Active Blin dSpot Assist
Activating/deactivating (on-
board computer) ............................ 220
Display message ............................ 246
Function/notes ............................. 201
Active Driving Assistanc epackage .201
Active Lane Keepin gAssist
Activating/deactivating (on-
board computer) ............................ 220
Display message ............................ 246
Function/notes ............................. 204
Active light function .........................115
Active multicontour seat ..................100
Active Park Assist Display message ............................ 247
Active Parking Assist
Important safety notes ..................187
Active Service System
see ASSYST PLUS
ADAPTIVE BRAKE ................................. 68
Adaptive brake lamps .........................65
Adaptive Highbeam Assist Display message ............................ 240
Function/notes ............................. 116Adaptive Main-beam Assist
Switching on/off (on-board com-
puter) ............................................. 223
Additives (engine oil) ........................364
Airbags Front airba g(driver, front
passenger )....................................... 44
Important safety guidelines .............42
Kneeba g.......................................... .44
Pelvis airbag .................................... 45
Sidebag ............................................ 45
Triggering ......................................... 41
Windowba g...................................... 46
Air-conditionin gsystem
see Climate control
Airf ilter (white display message) ....243
AIRF LOW ........................................... 128
AIRMATIC Display message ............................ 243
Function/notes ............................. 181
Airp ressure
see Tyr epressure
Airv ents
Glove compartmen t....................... 137
Important safety notes ..................136
Rea r............................................... 137
Setting ........................................... 136
Setting the centre airv ents........... 137
Setting the sid eairvents ............... 137
Alarm system
see ATA (Anti-Theft Alarm system)
Ambient lighting
Setting the brightness (on-board
computer) ...................................... 223
Setting the colou r(on-board com-
puter) ............................................ .223
AMG RID ECONTROL sports sus-
pension ............................................... 183
Anti-glare film .................................... 293
Anti-loc kBraking System
se eA BS (Anti-lock Braking System)
Anti-Thef tAlarm system
se eA TA (Anti-Theft Alarm system)
Aquaplaning ....................................... 164
Ashtray ............................................... 282
Assistanc emenu (on-board com-
puter) ................................................. .218 4
Index
Page 302 of 373

X
Replac ecap : on th efiller neck and turn
clockwise.
Mak esuret hatthe cap locks securel yinto
place.
X Chec kthe oil level again with the oil dip-
stick (Y page 298).
For further information on engine oil, see
(Y page 363). Other service products
Checking the coolant level G
WARNING
The cooling system is pressurised. Therefore,
only unscrew the cap once the engine has
cooled down. The coolant temperature gauge
must display less than 70 †.Otherwise, you
could be scalded if hot coolant escapes. X
Park the vehicl eonalevel surface.
Onl ycheck the coolant level if the vehicle
is on alevel surface and the engine has
coole ddown.
X Turn the key to position 2in the ignition
lock (Y page 141).
On vehicles with KEYLESS-GO, press the
Start/Stop button twice (Y page 141).
X Check the coolant temperatur edisplay in
the instrument cluster.
Th ec oolant temperatur emustbeb elow
70 †.
X Turn the key to position 0(Y page 141) in
the ignition lock. X
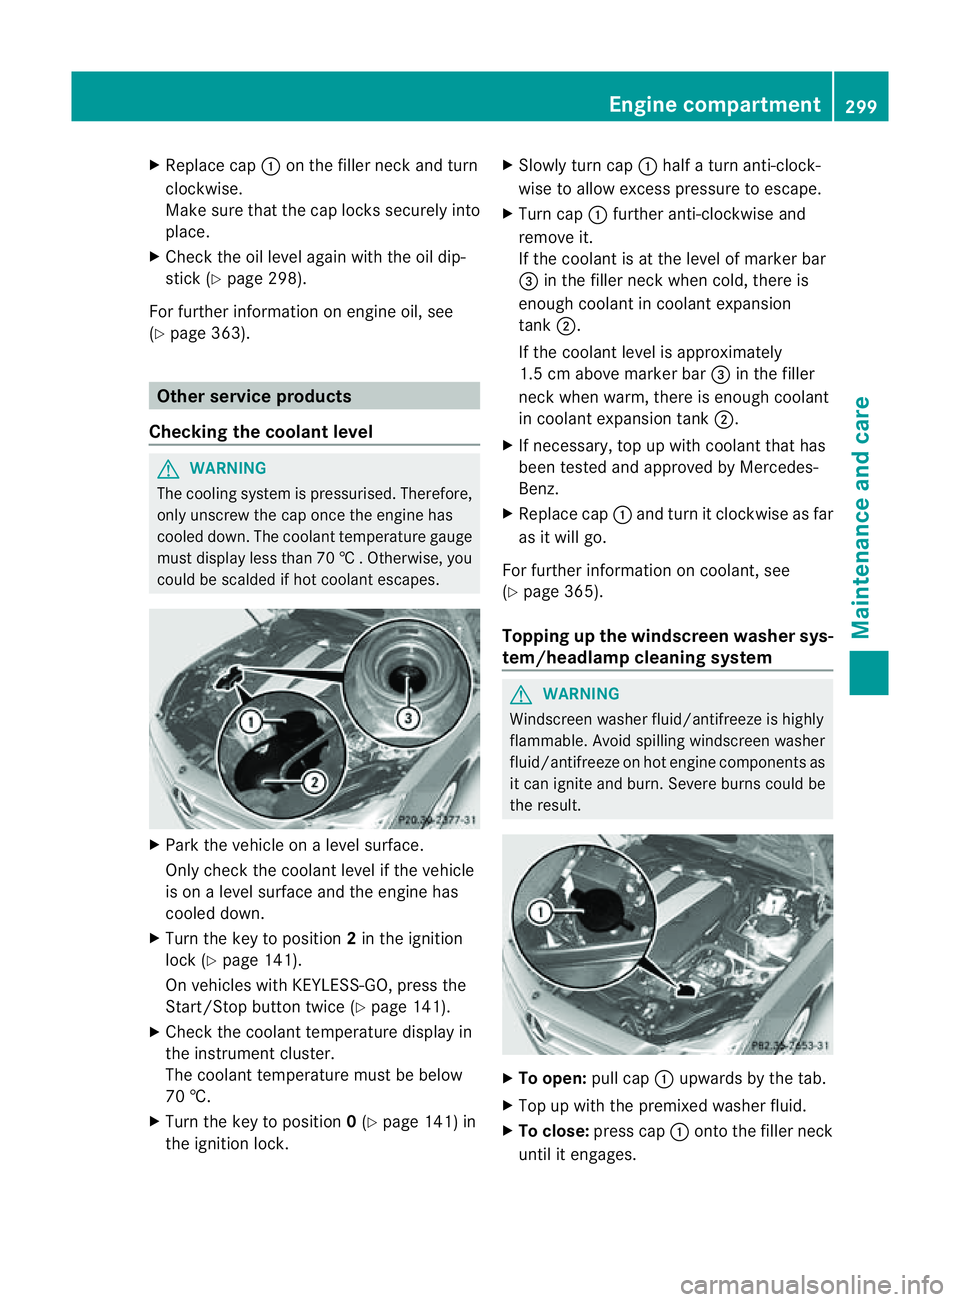
Slowl yturnc ap : half aturna nti-clock-
wise to allow exces spressure to escape.
X Turn cap :further anti-clockwis eand
remove it.
If th ecoolan tisatt heleve lofm arkerbar
= in th efille rneck when cold, ther eis
enough coolant in coolant expansion
tank ;.
If the coolant level is approximately
1.5 cm above marker bar =in the filler
neckw hen warm, there is enough coolant
in coolant expansion tank ;.
X If necessary, top up with coolant that has
been tested and approved by Mercedes-
Benz.
X Replace cap :and turn it clockwise as far
as it will go.
For further information on coolant, see
(Y page 365).
Topping up the windscreen washer sys-
tem/headlam pcleaning system G
WARNING
Windscreen washer fluid/antifreez eishighly
flammable. Avoid spilling windscreen washer
fluid/antifreez eonhot engin ecomponent sas
it can ignit eand burn. Severe burns could be
the result. X
To open: pull cap:upwards by the tab.
X Top up with the premixed washer fluid.
X To close: press cap :ontothe filler neck
until it engages. Engine compartment
299Maintenance and care Z
Page 340 of 373

Storing wheels
Storew heels that are not being used in acool,
dry and preferably dark place. Protect the
tyres against oil, grease, petrol and diesel. Cleaning the wheels
G
WARNING
The water jet of circular-jet nozzles (dirt grind-
ers) can cause damage not visible from the
outside to tyres or chassis components. Com-
ponentsd amaged in this way can unexpect-
edly fail. There is arisk of an accident.
Do not use high-pressure cleaners with circu-
lar-jet nozzles to clean the vehicle. Have dam-
aged tyres or chassis components replaced
immediately. Fitting
awheel
Preparing the vehicle X
Stop the vehicle on solid, non-slippery and
leve lground.
X Apply the parking brake.
X Bring the front wheels into the straight-
ahead position.
X Shift the transmission to position P.
X Vehicles with AIRMATIC :make sure that
"normal" leve lisselecte d(Ypage 181).
X Switch off th eengine.
X Vehicles without KEYLESS-GO: remove
th ek eyfrom th eignition lock.
X Vehicles with KEYLESS-GO: open the
driver' sdoor.
The on-board electronics have status 0,
whic hist hesame as th ekeyhaving been
removed.
X Vehicles with KEYLESS-GO: remove the
Start/Sto pbutto nfromt heignition lock
(Y page 141). X
If included in th evehicle equipment,
remove th etyre-chang etoolkit from the
vehicle.
X Secure th evehicle to preven titfrom rolling
away.
i Apart from certain country-specific varia-
tions, the vehicles are not equipped with a
tyre-change tool kit. Some tools for chang-
ing awhee lare specific to the vehicle. For
more information on which tools are
required to perform awhee lchange on your
vehicle, consult aqualified specialist work-
shop.
Necessary wheel-changing tools can
include, for example:
R jack
R whee lchock
R whee lwrench
Securing the vehicle agains trolling
away If your vehicle is equipped with
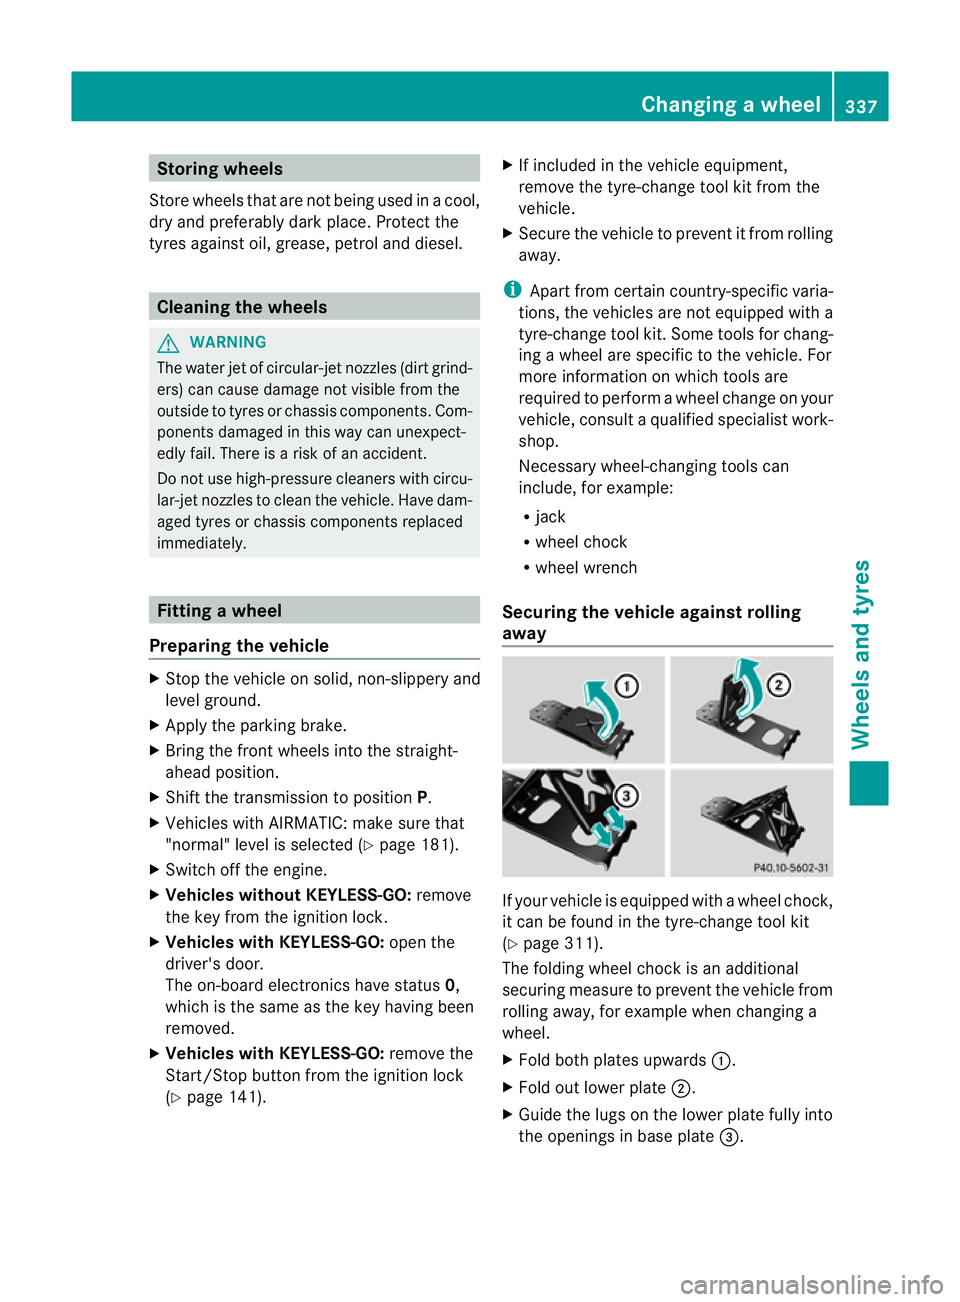
awheel chock,
it can be foun dinthetyre-change tool kit
(Y page 311).
The folding wheel chock is an additional
securin gmeasur etoprevent th evehicle from
rollin gaway, for example when changin ga
wheel.
X Fold bot hplates upwards :.
X Fold out lower plate ;.
X Guide th elugs on th elower plat efully into
th eo pening sinbase plate =. Changing
awheel
337Wheels and tyres Z