2011 MITSUBISHI L200 ignition
[x] Cancel search: ignitionPage 94 of 330

Warning lampsE00502400017Brake warning lamp E00502501637
This lamp illuminates when the ignition
switch is turned to the “ON” position,
and goes off after a few seconds.
Always make sure that the lamp goes off
before driving.
With the ignition switch in the “ON” po-
sition, the brake warning lamp illumi-
nates under the following conditions:
l When the parking brake lever has
been engaged.
l When the brake fluid level in the
reservoir falls to a low level.
l When the brake force distribution
function is not operating correctly.
(vehicles with anti-lock brake sys-
tem)CAUTIONl In the situations listed below,
brake performance may be com-
promised or the vehicle may be-
come unstable if brakes are ap-
plied suddenly; consequently,
avoid driving at high speeds or
applying the brakes suddenly.
Furthermore, immediately the
vehicle should be brought to a
stop in a safe location and to
have it checked.CAUTION• The brake warning lamp
does not illuminate when
the parking brake is applied
or does not turn off when
the parking brake is re-
leased.
• The ABS warning lamp and
brake warning lamp illumi-
nate at the same time.
For details, refer to “ABS
warning lamp” on page
4-44. (vehicles with anti-lock
brake system)
• The brake warning lamp re-
mains illuminated during
driving.
l The vehicle should be brought
to a halt in the following man-
ner when brake performance
has deteriorated. •Depress the brake pedal
harder than usual.
Even if the brake pedal
moves down to the very end
of its possible stroke, keep it
pressed down hard.
• Should the brakes fail, use
engine braking to reduce
your speed and carefully
pull the parking brake lever
to park your vehicle.
Depress the brake pedal to
operate the stop lamp to
alert the vehicles behind you.Check engine warning lamp E00502600657
This lamp is a part of an onboard diag-
nostic system which monitors the emis-
sions, engine and automatic transmission
control systems.
If a problem is detected in one of these
systems, this lamp illuminates.
Although your vehicle will usually be
drivable and not need towing, we recom-
mend you to have the system checked as
soon as possible.
This lamp will also illuminate for a few
seconds when the ignition switch is
turned to the “ON” position. If it does
not go off after a few seconds, we recom-
mend you to have the vehicle checked.CAUTIONl Prolonged driving with this
lamp on may cause further dam-
age to the emission control sys-
tem. It could also affect fuel
economy and drivability.
l If the lamp does not illuminate
when the ignition switch is
turned to the “ON” position,
we recommend you to have the
system checked.
Instruments and controls
3-08
3
Page 95 of 330

CAUTIONlIf the lamp illuminates while
the engine is running, avoid
driving at high speeds and we
recommend you to have the sys-
tem checked.
During vehicle operation with
the lamp illuminated, the vehi-
cle may not accelerate when
you depress the accelerator ped-
al.
When the vehicle is stationary
with the lamp illuminated, you
must depress the brake pedal
more firmly than usual since
the engine idling speed is high-
er than usual and the vehicle
with an A/T has a stronger ten-
dency to creep forward.
NOTE
l The engine electronic control mod-
ule accommodating the onboard di-
agnostic system has various fault
data (especially about the exhaust
emission) stored.
This data will be erased if a bat-
tery cable is disconnected which
will make a rapid diagnosis diffi-
cult. Do not disconnect a battery
cable when the check engine warn-
ing lamp is ON.
Charge warning lamp E00502700821
This lamp illuminates when the ignition
switch is turned to the “ON” position,
and goes off after the engine has started.CAUTIONl If the lamp comes on while the
engine is running, the probable
cause is as shown below.
Park the vehicle immediately at
a safe place and we recommend
you to have it checked. •Broken drive belt or abnor-
mality in the charging sys-
tem. A broken drive belt cau-
ses poor braking efficiency.
Depress the brake pedal
harder than usual to park
the vehicle in a safe place.Oil pressure warning lamp E00502800620
This lamp illuminates when the ignition
switch is turned to the “ON” position,
and goes off after the engine has started.
If it illuminates while the engine is run-
ning, the oil pressure is too low.
If the warning lamp illuminates while
the engine is running, turn the engine off
and have it inspected.CAUTIONl If this lamp illuminates when
the engine oil level is not low,
have it inspected.
l This warning lamp does not in-
dicate the amount of oil in the
crankcase. This must be deter-
mined by checking the oil level
on the dipstick, while the en-
gine is switched off.
l If you continue driving with
low engine oil level or with this
warning lamp illuminated, en-
gine seizure may occur.
NOTE
l The oil pressure warning lamp
should not be treated as an indica-
tion of the engine’s oil level. The
oil level must be checked using
the dipstick.
Door ajar warning lamp E00503300475
This lamp illuminates when a door is ei-
ther open or not completely closed.
If the vehicle speed reaches approximate-
ly 8 km/h (5 mph) with a door open or
incompletely closed, the warning lamp
flashes 16 times and a buzzer simultane-
ously sounds 16 times as a warning.
Instruments and controls
3-09
3
Page 96 of 330
CAUTIONlBefore moving your vehicle,
check that the warning lamp is
OFF.
NOTE
l It is possible to change the buzzer
setting for either of the following
types of operation. For further in-
formation, we recommend you to
consult a MITSUBISHI
MOTORS Authorized Service
Point. •No buzzer operation (buzzer
disabled)
• Continuous buzzer operation
Centre information display* E00517800181WARNINGlWhen operating the system for a pro-
longed period, make sure the vehicle is
parked in a well ventilated area to avoid
the accumulation of toxic fumes inside
and outside of the passenger compartment.CAUTIONl The driver should not operate the display
while the vehicle is in motion.
l When operating the system, stop the vehi-
cle in a safe area.When the ignition switch is turned to “ACC” posi-
tion, the screen switches on automatically.
NOTE l Placing a cellular phone in the monitor’s
small storage compartment may weaken the
phone’s reception. This does not indicate a
fault with the system.
l Use of wireless devices such as transceivers
or a cellular phone near the monitor may
make the following condition on the display.
This does not indicate a fault with the system. • The screen goes dark temporarily.
• The compass may not show the correct di-
rection.
l Depending on the angle of view, you may
see reddish horizontal lines on the monitor.
The lines are a characteristic of the vacuum
fluorescent display (VFD) used in the moni-
tor. They do not indicate a fault.
Instruments and controls
3-10
3
Page 100 of 330
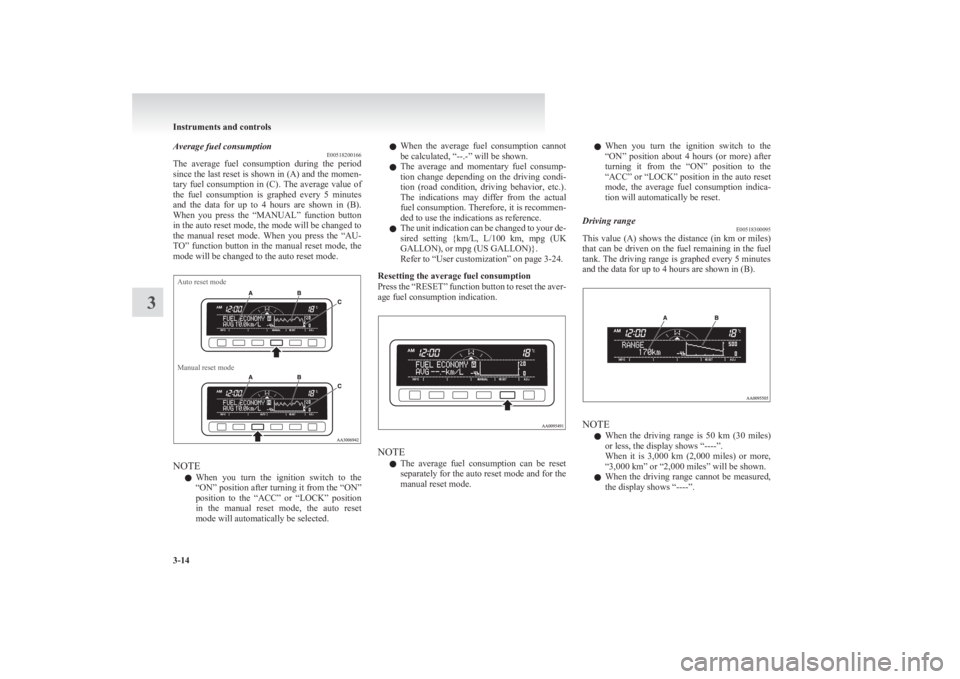
Average fuel consumptionE00518200166
The average fuel consumption during the period
since the last reset is shown in (A) and the momen-
tary fuel consumption in (C). The average value of
the fuel consumption is graphed every 5 minutes
and the data for up to 4 hours are shown in (B).
When you press the “MANUAL” function button
in the auto reset mode, the mode will be changed to
the manual reset mode. When you press the “AU-
TO” function button in the manual reset mode, the
mode will be changed to the auto reset mode.Auto reset modeManual reset mode
NOTE
l When you turn the ignition switch to the
“ON” position after turning it from the “ON”
position to the “ACC” or “LOCK” position
in the manual reset mode, the auto reset
mode will automatically be selected.
l When the average fuel consumption cannot
be calculated, “--.-” will be shown.
l The average and momentary fuel consump-
tion change depending on the driving condi-
tion (road condition, driving behavior, etc.).
The indications may differ from the actual
fuel consumption. Therefore, it is recommen-
ded to use the indications as reference.
l The unit indication can be changed to your de-
sired setting {km/L, L/100 km, mpg (UK
GALLON), or mpg (US GALLON)}.
Refer to “User customization” on page 3-24.
Resetting the average fuel consumption
Press the “RESET” function button to reset the aver-
age fuel consumption indication.
NOTE
l The average fuel consumption can be reset
separately for the auto reset mode and for the
manual reset mode.
l When you turn the ignition switch to the
“ON” position about 4 hours (or more) after
turning it from the “ON” position to the
“ACC” or “LOCK” position in the auto reset
mode, the average fuel consumption indica-
tion will automatically be reset.Driving range E00518300095
This value (A) shows the distance (in km or miles)
that can be driven on the fuel remaining in the fuel
tank. The driving range is graphed every 5 minutes
and the data for up to 4 hours are shown in (B).
NOTE
l When the driving range is 50 km
(30 miles)
or less, the display shows “----”.
When it is 3,000 km (2,000 miles) or more,
“3,000 km” or “2,000 miles” will be shown.
l When the driving range cannot be measured,
the display shows “----”.
Instruments and controls
3-14
3
Page 101 of 330
lThe driving range is shown based on the ac-
cumulated fuel consumption data, however,
may be changed depending on the driving con-
dition (road condition, driving behavior,
etc.). If the battery terminals are disconnec-
ted, the accumulated fuel consumption data
will be erased. It is recommended to use the
indication as reference.
l When the vehicle is fueled, the driving range
will be updated. However, if the amount of
fueling is small, the indication may not be cor-
rect. Therefore, fill up the tank as much as
possible in case of fueling.
l When the vehicle is stopped on a steep slope,
the value of the driving range may increase.
This is caused by the fuel movement inside
the tank on the slope and is not deemed as a
failure.
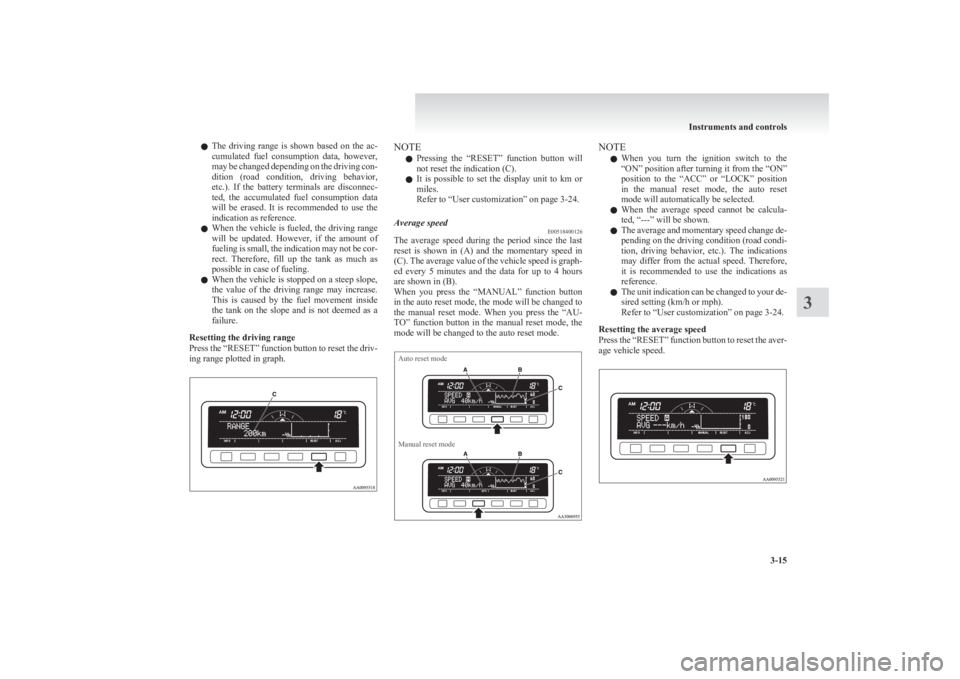
Resetting the driving range
Press the “RESET” function button to reset the driv-
ing range plotted in graph.NOTE
l Pressing the “RESET” function button will
not reset the indication (C).
l It is possible to set the display unit to km or
miles.
Refer to “User customization” on page 3-24.Average speed E00518400126
The average speed during the period since the last
reset is shown in (A) and the momentary speed in
(C). The average value of the vehicle speed is graph-
ed every 5 minutes and the data for up to 4 hours
are shown in (B).
When you press the “MANUAL” function button
in the auto reset mode, the mode will be changed to
the manual reset mode. When you press the “AU-
TO” function button in the manual reset mode, the
mode will be changed to the auto reset mode.
Auto reset modeManual reset modeNOTE
l When you turn the ignition switch to the
“ON” position after turning it from the “ON”
position to the “ACC” or “LOCK” position
in the manual reset mode, the auto reset
mode will automatically be selected.
l When the average speed cannot be calcula-
ted, “---” will be shown.
l The average and momentary speed change de-
pending on the driving condition (road condi-
tion, driving behavior, etc.). The indications
may differ from the actual speed. Therefore,
it is recommended to use the indications as
reference.
l The unit indication can be changed to your de-
sired setting (km/h or mph).
Refer to “User customization” on page 3-24.
Resetting the average speed
Press the “RESET” function button to reset the aver-
age vehicle speed.
Instruments and controls
3-15
3
Page 102 of 330
NOTEl The average speed can be reset separately for
the auto reset mode and for the manual reset
mode.
l When you turn the ignition switch to the
“ON” position about 4 hours (or more) after
turning it from the “ON” position to the
“ACC” or “LOCK” position in the auto reset
mode, the average speed indication will auto-
matically be reset.Outside temperature E00518500097
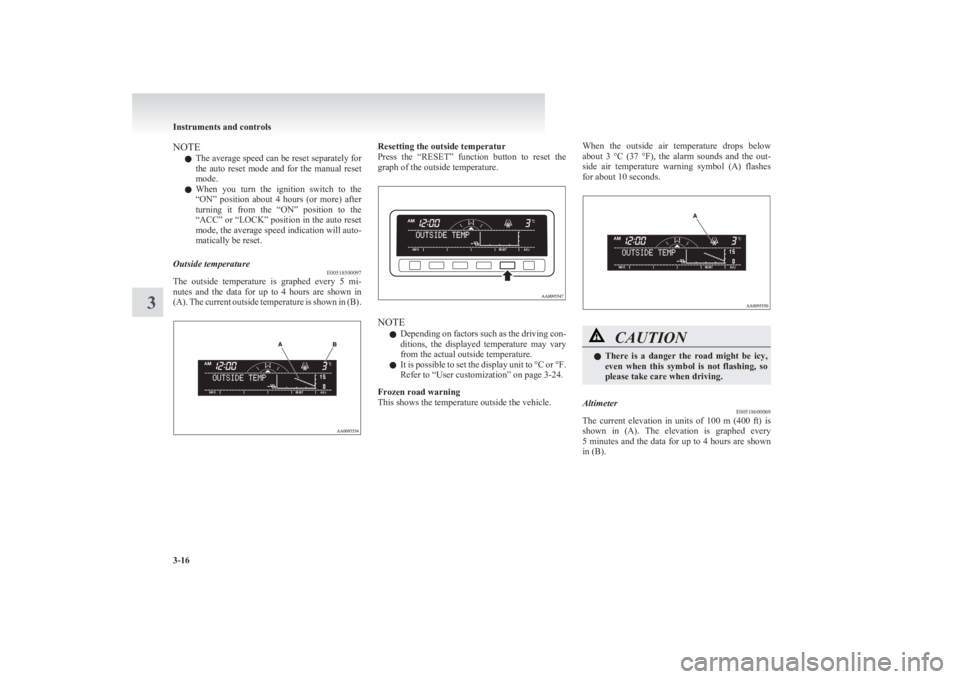
The outside temperature is graphed every 5 mi-
nutes and the data for up to 4 hours are shown in
(A). The current outside temperature is shown in (B).
Resetting the outside temperatur
Press the “RESET” function button to reset the
graph of the outside temperature.
NOTE
l Depending on factors such as the driving con-
ditions, the displayed temperature may vary
from the actual outside temperature.
l It is possible to set the display unit to °C or °F.
Refer to “User customization” on page 3-24.
Frozen road warning
This shows the temperature outside the vehicle.
When the outside air temperature drops below
about 3 °C (37 °F), the alarm sounds and the out-
side air temperature warning symbol (A) flashes
for about 10 seconds.CAUTIONl There is a danger the road might be icy,
even when this symbol is not flashing, so
please take care when driving.Altimeter E00518600069
The current elevation in units of 100 m (400 ft) is
shown in (A). The elevation is graphed every
5 minutes and the data for up to 4 hours are shown
in (B).
Instruments and controls
3-16
3
Page 116 of 330

Combination headlamps anddipper switch E00506001728
Headlamps
NOTE l Do not leave the headlamps and other lamps
on for a long time while the engine is station-
ary (not running). A run-down battery could
result.
l When it rains or when the vehicle has been
washed, the inside of the lens sometimes be-
comes foggy. This is the same phenomenon
as when window glass mists up on a humid
day, and does not indicate a functional prob-
lem. When the lamp is switched on, the heat
will remove the fog. However, if water gath-
ers inside the lamp, we recommend you to
have it checked.Type 1
Rotate the switch to turn on the lamps.OFFAll lamps offPosition, tail, licence plate and instrument
panel lamps onHeadlamps and other lamps go on
Type 2
Rotate the switch to turn on the lamps.
OFFAll lamps off
AUTO
With the ignition switch in the “ON” po-
sition, headlamps, position, tail, licence
plate, and instrument panel lamps turn
on and off automatically in accordance
with outside light level. All lamps turn
off automatically when the ignition
switch is turned to the “OFF” position.Position, tail, licence plate and instru-
ment panel lamps onHeadlamps and other lamps go on
NOTE
l The sensitivity of the automatic on/off con-
trol can be adjusted.
For further information, we recommend you
to consult a MITSUBISHI MOTORS Author-
ized Service Point.
l When the headlamps are turned off by the au-
tomatic on/off control with the ignition
switch in the “ON” position, the front fog
lamps (if so equipped) and rear fog lamp also
go off. When the headlamps are subsequent-
ly turned back on by the automatic on/off con-
trol, the front fog lamps also come on but the
rear fog lamp stays off. If you wish to turn
the rear fog lamp back on, operate the switch
again.
l Do not cover the sensor (A) for the automat-
ic on/off control by affixing a sticker or label
to the windscreen.
Instruments and controls
3-30
3
Page 117 of 330

lIf the lamps do not turn on or off with the
switch in the “AUTO” position, manually op-
erate the switch and we recommend you to
have your vehicle checked.
[Vehicles with Daytime Running Lamp]
When the ignition switch is in the “ON” position
and the lamp switch is set to the “OFF” position,
the low beam of the headlamps, tail lamps, etc.,
will illuminate.
Lamps (headlamps, fog lamp, etc.) au-
to-cutout function
l If the key is turned to the “LOCK” or
“ACC” position or removed from the igni-
tion switch and the lamps will stay on for
about 3 minutes without opening the driver’s
door while the lamp switch in the “
” posi-
tion, the lamps automatically turn off.
l If the key is turned to the “LOCK” or
“ACC” position or removed from the igni-
tion switch and the driver’s door is opened
within 3 minutes while the lamp switch in
the “
” position, a buzzer will sound to
warn the driver that the lamps have not been
turned off, and these lamps will automatical-
ly turn off.
NOTE l The lamp auto-cutout will not function when
the lamp switch is in the “
” position.
l When the ignition key has been turned to ei-
ther the “LOCK” or “ACC” position or re-
moved from the ignition switch with the
lamp switch in the “
” position, and the
lamp switch is returned to the “OFF” posi-
tion within approximately 3 minutes, the auto-
cutout function will not be activated.
When you want to keep the lamps on l Turn the switch in the “OFF” position to
switch off all lamps while the ignition key is
in the “LOCK” or “ACC” position or re-
move it from the ignition switch.
l Turn on the lamps with the switch in the
“
” or “” position again, then the
lamps will remain on.
NOTE l It is possible to alter the auto-cutout function
such that: • Auto-cutout function is never activated.
For details, we recommend you to consult a
MITSUBISHI MOTORS Authorized Service
Point.
Lamp monitor buzzer E00506100184
If the driver’s door is opened when the ignition key
is in the “LOCK” or “ACC” position or removed
from the ignition switch while the lamps are on, a
buzzer will sound to remind the driver to turn off
the lamps. When the lamp auto-cutout function
acts, the buzzer will stop automatically. When this
function does not act, turn off the lamp switch to
stop the buzzer.Dipper (High/Low beam change) E00506200286
When the lamp switch is in the “” position, the
beam changes from high to low (or low to high)
each time the lever is pulled to (1). While the high-
beam is on, the high-beam indication lamp in the in-
strument cluster will also illuminate.
Headlamp flasher E00506300157
The high-beams flash when the lever is pulled slight-
ly (2), and will go off when it is released.
When the high-beam is on, the high-beam indica-
tion lamp in the instrument cluster will also illumi-
nate.
Instruments and controls
3-31
3