2011 MITSUBISHI L200 ignition
[x] Cancel search: ignitionPage 58 of 330

Seat belt pretensioner system andforce limiter system* E00405700283
The driver’s and front passenger’s seat equipped
with an airbag has a pretensioner seat belt.Pretensioner system E00405801089
The pretensioner system will retract their respec-
tive seat belts instantaneously, thus maximizing the
seat belt’s effectiveness, if there is a frontal impact
severe enough to injure the driver and/or front pas-
senger and the ignition switch is in the “ON” or
“START” position.
The seat belt pretensioner includes the following
components:
1- Front impact sensors
2- Seat belt pretensioners
3- Airbag control unit
WARNINGl To obtain the best results from your pre-
tensioner seat belt, make sure you have ad-
justed your seat correctly and wear your
seat belt properly.CAUTIONl Installation of audio equipment or re-
pairs in the vicinity of the pretensioner
seat belts or floor console must be per-
formed in line with MITSUBISHI
MOTORS guidelines. It is important to
do so because the work could affect the
pretensioner systems.
l If you need to scrap the vehicle, please con-
sult a MITSUBISHI MOTORS Author-
ized Service Point. It is important to do
so because unexpected activation of the
pretensioner seat belts could cause inju-
ries.
NOTE
l The pretensioner seat belts will be activated
if the vehicle suffers a severe frontal impact,
even if the seat belts are not worn.
l The pretensioner seat belts are designed to
work only once. After the pretensioner seat
belts have been activated, we recommend
you have them replaced by a MITSUBISHI
MOTORS Authorized Service Point.
SRS warning lamp E00405900126
This warning lamp is shared by the SRS airbags
and the pretensioner seat belts.
Refer to “SRS warning lamp” on page 2-38.Force limiter system E00406000078
In the event of a collision, each force limiter sys-
tem will effectively absorb the load applied to the
seat belt so as to minimize the impact to the passen-
ger.Seat and seat belts
2-12
2
Page 76 of 330

The airbags will operate only when the ignition
switch is in the “ON” or “START” position.
When the airbag control unit detect an impact of suf-
ficient frontal or side force, it sends an ignition sig-
nal to the airbag modules to ignite materials in the
inflator and generate gas and inflate the airbags.
The airbags deployment produces a sudden, loud
noise, and releases some smoke and powder, but
these conditions are not injurious, and do not indi-
cate a fire in the vehicle. People with respiratory
problems may feel some temporary irritation from
chemicals used to produce the deployment; open
the windows after airbag deployment, if safe to do
so.
The airbags deflate very rapidly after deployment,
so there is little danger of obscured vision.
The time required from the sensors detecting an im-
pact to deflation of the airbags after deployment is
shorter than a blink of an eye.CAUTIONl Airbags inflate at an extremely rapid
speed. In certain situations, contact with
inflating airbags can result in abrasions,
light cuts, bruises, and the like.Front passenger’s airbag ON-OFF
switch E00410100184
The front passenger’s airbag ON-OFF switch can
be used to disable the front passenger’s airbag. If
you have a rearward facing child restraint system
that cannot be fitted to any seat other than the front
passenger seat, be sure to turn OFF the front passen-
ger’s airbag ON-OFF switch before using it. (Refer
to “To turn an airbag off” on page 2-30.)
The front passenger’s airbag ON-OFF switch is lo-
cated in the glove box.WARNINGl To reduce risk of serious or fatal injury:
•Always remove the key from the igni-
tion switch before operating a front
passenger’s airbag ON-OFF switch.
Failure to do so could adversely affect
the airbag performance.
• Wait at least 60 seconds to operate the
front passenger’s airbag ON-OFF
switch after turning the ignition
switch from “ON” position to
“LOCK” position.
The SRS airbag system is designed to
retain enough voltage to deploy the air-
bag.WARNING• Always remove the key from the front
passenger’s airbag ON-OFF switch af-
ter operating that switch. Failure to
do so could lead to improper position
of the front passenger’s airbag ON-
OFF switch.To turn an airbag off E00410600219
To turn an airbag off, follow these steps:
1.Insert the key into the key opening of the ap-
propriate front passenger’s airbag ON-OFF
switch, and turn that airbag ON-OFF switch
to the “OFF” position.
2. Remove the key from the key opening of the
front passenger’s airbag ON-OFF switch.
3. Insert the key into the ignition switch, and
turn the ignition to the “ON” position.
The front passenger’s airbag OFF indication lamp
will stay on to show that the front passenger’s air-
bag is not operational. ( “Front passenger’s airbag
OFF indication lamp” on page 2-31)
Seat and seat belts
2-30
2
Page 77 of 330

That airbag will remain OFF, and will NOT de-
ploy, until it is turned ON again.WARNINGl To reduce risk of serious or fatal injury:
•If the indication lamp does not come
on when the front passenger’s airbag
ON-OFF switch is turned OFF, do not
fit a rearward facing child restraint
system to the front passenger seat.
• Do not turn OFF the front passen-
ger’s airbag ON-OFF switch except
when a rearward facing child re-
straint system is fitted to the front pas-
senger seat.To turn an airbag on E00410700106
To turn an airbag on, follow these steps:
1.Insert the key into the key opening of the ap-
propriate front passenger’s airbag ON-OFF
switch, and turn that airbag ON-OFF switch
to “ON” position.
2. Remove the key from the key opening of that front passenger’s airbag ON-OFF switch.
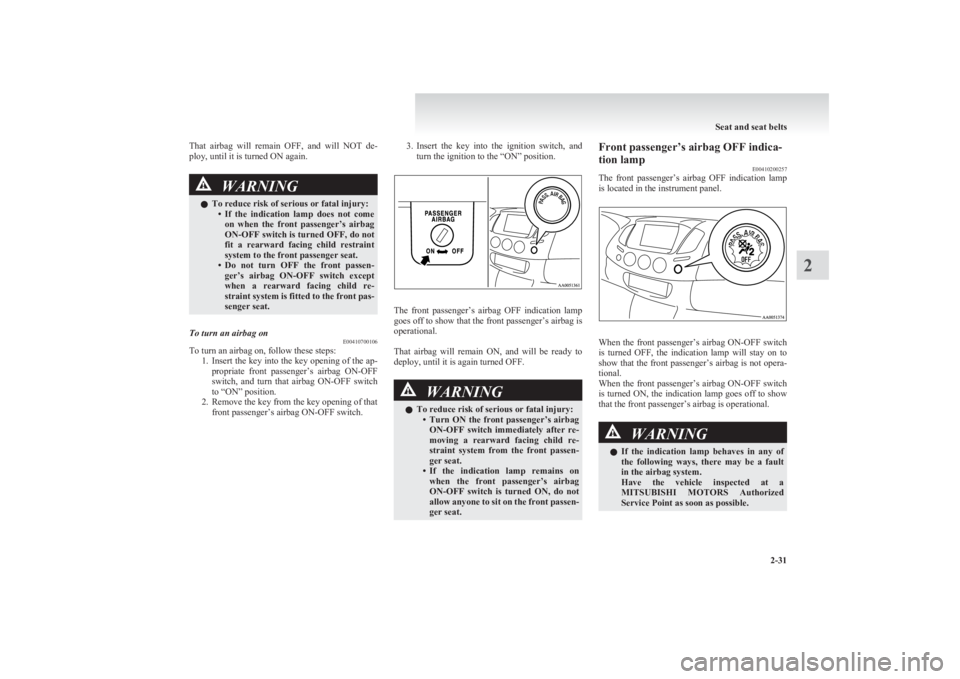
3.Insert the key into the ignition switch, and
turn the ignition to the “ON” position.
The front passenger’s airbag OFF indication lamp
goes off to show that the front passenger’s airbag is
operational.
That airbag will remain ON, and will be ready to
deploy, until it is again turned OFF.
WARNINGl To reduce risk of serious or fatal injury:
•Turn ON the front passenger’s airbag
ON-OFF switch immediately after re-
moving a rearward facing child re-
straint system from the front passen-
ger seat.
• If the indication lamp remains on
when the front passenger’s airbag
ON-OFF switch is turned ON, do not
allow anyone to sit on the front passen-
ger seat.Front passenger’s airbag OFF indica-
tion lamp E00410200257
The front passenger’s airbag OFF indication lamp
is located in the instrument panel.
When the front passenger’s airbag ON-OFF switch
is turned OFF, the indication lamp will stay on to
show that the front passenger’s airbag is not opera-
tional.
When the front passenger’s airbag ON-OFF switch
is turned ON, the indication lamp goes off to show
that the front passenger’s airbag is operational.
WARNINGl If the indication lamp behaves in any of
the following ways, there may be a fault
in the airbag system.
Have the vehicle inspected at a
MITSUBISHI MOTORS Authorized
Service Point as soon as possible.
Seat and seat belts
2-31
2
Page 84 of 330

WARNINGlDo not attach a microphone (A) or any
other device or object around the part
where the curtain airbags (B) activate
such as on the windscreen, side door
glass, front and rear pillars and roof side
or assist grips. When the curtain airbags
inflate, the microphone or other device or
object will be hurled with great force or
the curtain airbags may not activate cor-
rectly, resulting in death or serious injury.WARNINGl Do not put a hanger or any heavy or poin-
ted object on the coat hook.
If the curtain airbag was activated, any
such item could be propelled away with
great force and could prevent the curtain
airbag from inflating correctly. Hang
clothes directly on the coat hook (without
using a hanger).
Make sure there are no heavy or sharp ob-
jects in the pockets of clothes that you
hang on the coat hook.
l Do not allow a child to lean against or
close to the front door even if the child is
seated in a child restraint system.
The child’s head should also not be
leaned against or be close to the area of
the seat where the side airbag and cur-
tain airbag are located. It is dangerous if
the side airbag and curtain airbag inflate.
Failure to follow all of these instructions
could lead to serious or fatal injury to the
child.
l We recommend work around and on the
side airbags and curtain airbags system
to be done by MITSUBISHI MOTORS
Authorized Service Point. Improper
work could result in inadvertent deploy-
ment of a side airbags and curtain air-
bags, or could render a side airbags and
curtain airbags inoperative; either situa-
tion could result in serious injury.SRS warning lamp E00407801201
There is a Supplemental Restraint System (“SRS”)
warning lamp on the instrument panel. The system
checks itself and the lamp tells you if there is a prob-
lem. When the ignition switch is turned to the
“ON” or “START” position, the warning lamp
should illuminate for several seconds and then
should go out. This means the system is ready. If
an SRS airbag or pretensioner seat belt is not oper-
ating properly, the warning lamp comes on and
stays on.
The SRS warning lamp is shared by the SRS airbag
and the seat belt pretensioner system.WARNINGl If any of the following conditions occur,
the SRS and/or seat belt pretensioners
are not working properly, and we recom-
mend you to have it inspected by a
MITSUBISHI MOTORS Authorized
Service Point immediately.
Seat and seat belts
2-38
2
Page 89 of 330

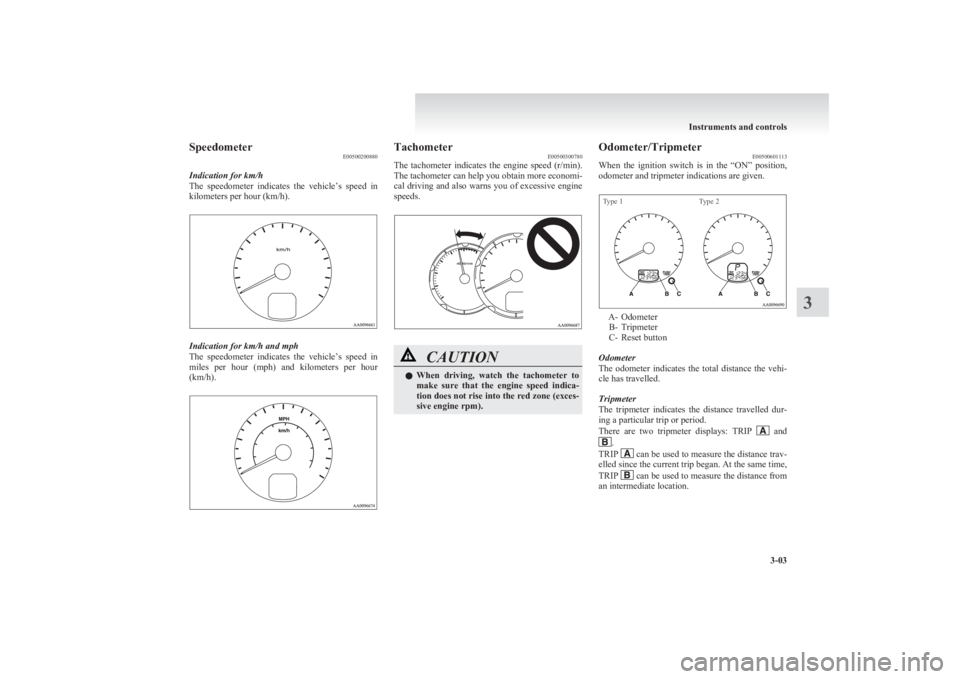
SpeedometerE00500200880
Indication for km/h
The speedometer indicates the vehicle’s speed in
kilometers per hour (km/h).
Indication for km/h and mph
The speedometer indicates the vehicle’s speed in
miles per hour (mph) and kilometers per hour
(km/h).
Tachometer E00500300780
The tachometer indicates the engine speed (r/min).
The tachometer can help you obtain more economi-
cal driving and also warns you of excessive engine
speeds.CAUTIONl When driving, watch the tachometer to
make sure that the engine speed indica-
tion does not rise into the red zone (exces-
sive engine rpm).Odometer/Tripmeter E00500601113
When the ignition switch is in the “ON” position,
odometer and tripmeter indications are given.Type 1Type 2
A- Odometer B- Tripmeter
C- Reset button
Odometer
The odometer indicates the total distance the vehi-
cle has travelled.
Tripmeter
The tripmeter indicates the distance travelled dur-
ing a particular trip or period.
There are two tripmeter displays: TRIP
and.
TRIP can be used to measure the distance trav-
elled since the current trip began. At the same time,
TRIP
can be used to measure the distance from
an intermediate location.
Instruments and controls
3-03
3
Page 90 of 330

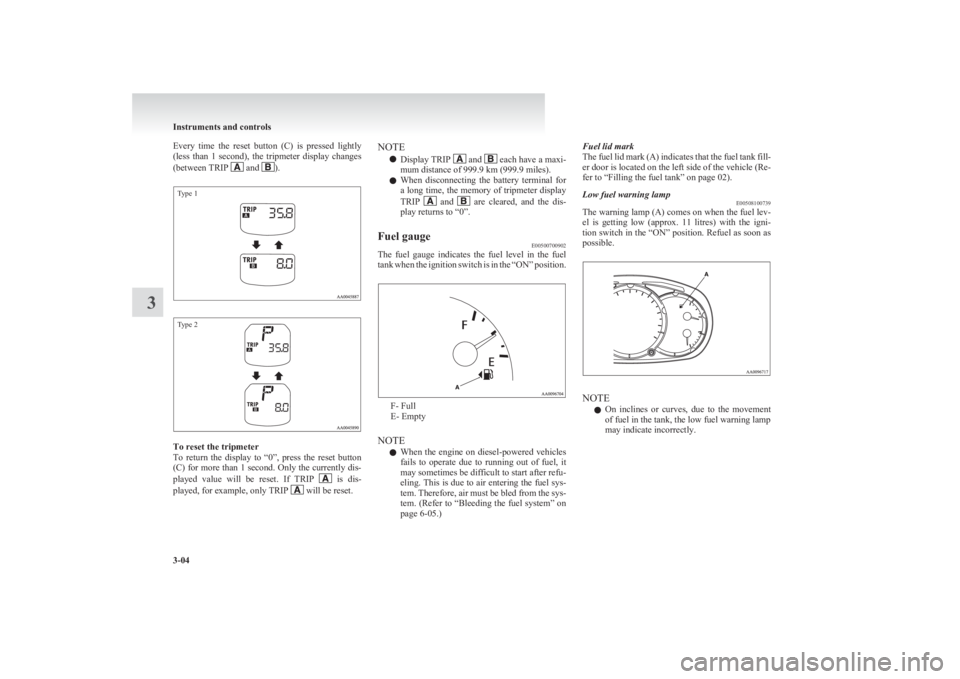
Every time the reset button (C) is pressed lightly
(less than 1 second), the tripmeter display changes
(between TRIP
and ).
Type 1Type 2
To reset the tripmeter
To return the display to “0”, press the reset button
(C) for more than 1 second. Only the currently dis-
played value will be reset. If TRIP
is dis-
played, for example, only TRIP will be reset.
NOTE
l Display TRIP
and each have a maxi-
mum distance of 999.9 km (999.9 miles).
l When disconnecting the battery terminal for
a long time, the memory of tripmeter display
TRIP
and are cleared, and the dis-
play returns to “0”.
Fuel gauge E00500700902
The fuel gauge indicates the fuel level in the fuel
tank when the ignition switch is in the “ON” position.
F- Full
E- Empty
NOTE l When the engine on diesel-powered vehicles
fails to operate due to running out of fuel, it
may sometimes be difficult to start after refu-
eling. This is due to air entering the fuel sys-
tem. Therefore, air must be bled from the sys-
tem. (Refer to “Bleeding the fuel system” on
page 6-05.)
Fuel lid mark
The fuel lid mark (A) indicates that the fuel tank fill-
er door is located on the left side of the vehicle (Re-
fer to “Filling the fuel tank” on page 02).Low fuel warning lamp E00508100739
The warning lamp (A) comes on when the fuel lev-
el is getting low (approx. 11 litres) with the igni-
tion switch in the “ON” position. Refuel as soon as
possible.
NOTE
l On inclines or curves, due to the movement
of fuel in the tank, the low fuel warning lamp
may indicate incorrectly.
Instruments and controls
3-04
3
Page 91 of 330

Water temperature gaugeE00500800479
The water temperature gauge indicates the engine
coolant temperature when the ignition switch is in
the “ON” position.CAUTIONl If the indication needle enters the H zone
while the engine is running, it indicates
that the engine is possibly overheating. Im-
mediately park your vehicle in a safe
place and make the necessary correc-
tions. (Refer to “Engine overheating” on
page 6-04.)
While driving, care should always be tak-
en to maintain the normal operating tem-
perature.Daytime dipper button (meter illumi-
nation control)* E00508800273
The rheostat can be adjusted while the headlamps
or tail lamps turn on.
Turn the dial to adjust the illumination (meter, mul-
ti centre display, audio system’s control panel, heat-
er control panel, etc.) to the desired brightness.
1- To reduce brightness
2- To increase brightness
Instruments and controls
3-05
3
Page 93 of 330

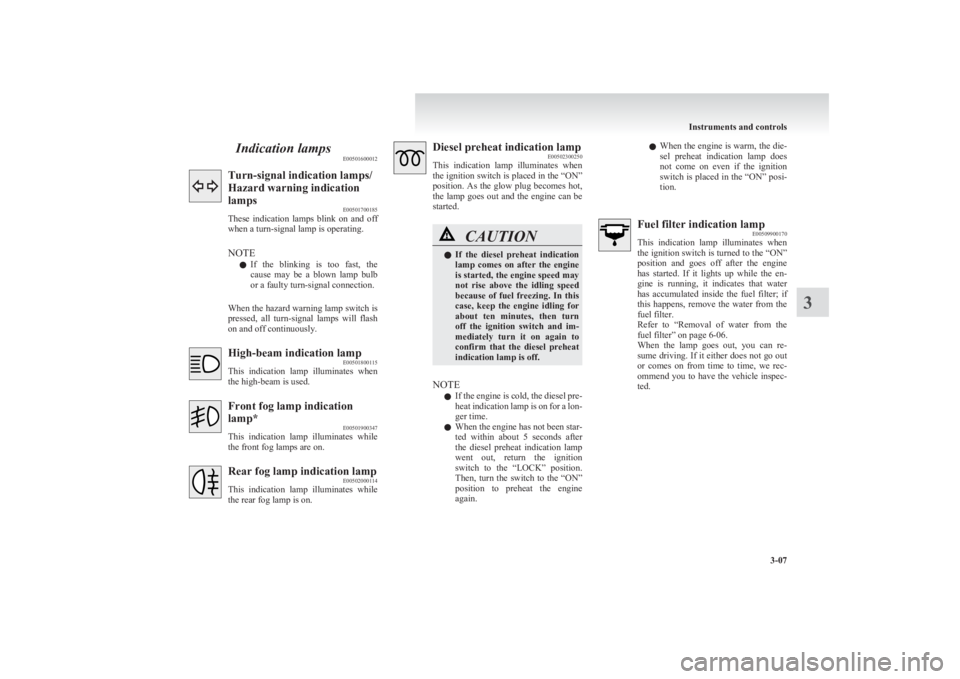
Indication lampsE00501600012Turn-signal indication lamps/
Hazard warning indication
lamps E00501700185
These indication lamps blink on and off
when a turn-signal lamp is operating.
NOTE l If the blinking is too fast, the
cause may be a blown lamp bulb
or a faulty turn-signal connection.
When the hazard warning lamp switch is
pressed, all turn-signal lamps will flash
on and off continuously.High-beam indication lamp E00501800115
This indication lamp illuminates when
the high-beam is used.Front fog lamp indication
lamp* E00501900347
This indication lamp illuminates while
the front fog lamps are on.Rear fog lamp indication lamp E00502000114
This indication lamp illuminates while
the rear fog lamp is on.Diesel preheat indication lamp E00502300250
This indication lamp illuminates when
the ignition switch is placed in the “ON”
position. As the glow plug becomes hot,
the lamp goes out and the engine can be
started.CAUTIONl If the diesel preheat indication
lamp comes on after the engine
is started, the engine speed may
not rise above the idling speed
because of fuel freezing. In this
case, keep the engine idling for
about ten minutes, then turn
off the ignition switch and im-
mediately turn it on again to
confirm that the diesel preheat
indication lamp is off.
NOTE
l If the engine is cold, the diesel pre-
heat indication lamp is on for a lon-
ger time.
l When the engine has not been star-
ted within about 5 seconds after
the diesel preheat indication lamp
went out, return the ignition
switch to the “LOCK” position.
Then, turn the switch to the “ON”
position to preheat the engine
again.
l When the engine is warm, the die-
sel preheat indication lamp does
not come on even if the ignition
switch is placed in the “ON” posi-
tion.Fuel filter indication lamp E00509900170
This indication lamp illuminates when
the ignition switch is turned to the “ON”
position and goes off after the engine
has started. If it lights up while the en-
gine is running, it indicates that water
has accumulated inside the fuel filter; if
this happens, remove the water from the
fuel filter.
Refer to “Removal of water from the
fuel filter” on page 6-06.
When the lamp goes out, you can re-
sume driving. If it either does not go out
or comes on from time to time, we rec-
ommend you to have the vehicle inspec-
ted.
Instruments and controls
3-07
3