2011 MITSUBISHI L200 set clock
[x] Cancel search: set clockPage 97 of 330

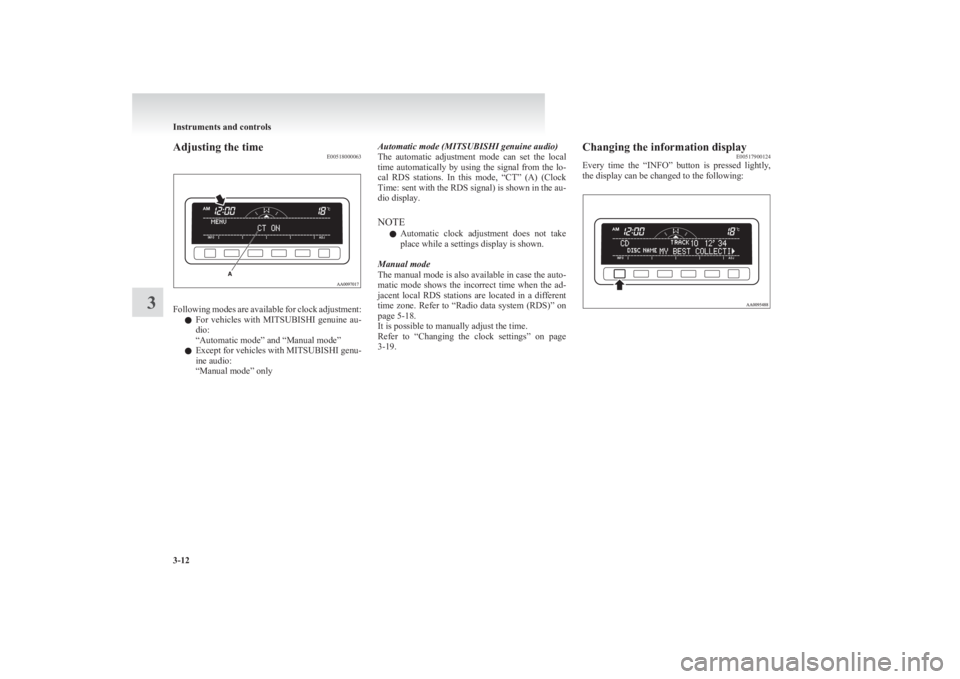
1-Clock ® p. 3-19
Indicates the time.
2- Electronic compass This display shows the direction of the vehicle.
3- Frozen road warning ® p. 3-16
Gives an indication when the outside temperature is 3 °C or lower.
4- Outside temperature ® p. 3-16
5- Centre information display indications Indicates details of each display.
6- “INFO” button Used to select various kinds of information for display.
7- Function buttons
Press this button to select options shown in the display.
8- “ADJ” button Used for adjusting the clock and for selecting settings displays.
9- Display for function buttons This display shows the options available for each function button.
Instruments and controls
3-11
3
Page 98 of 330

Adjusting the timeE00518000063
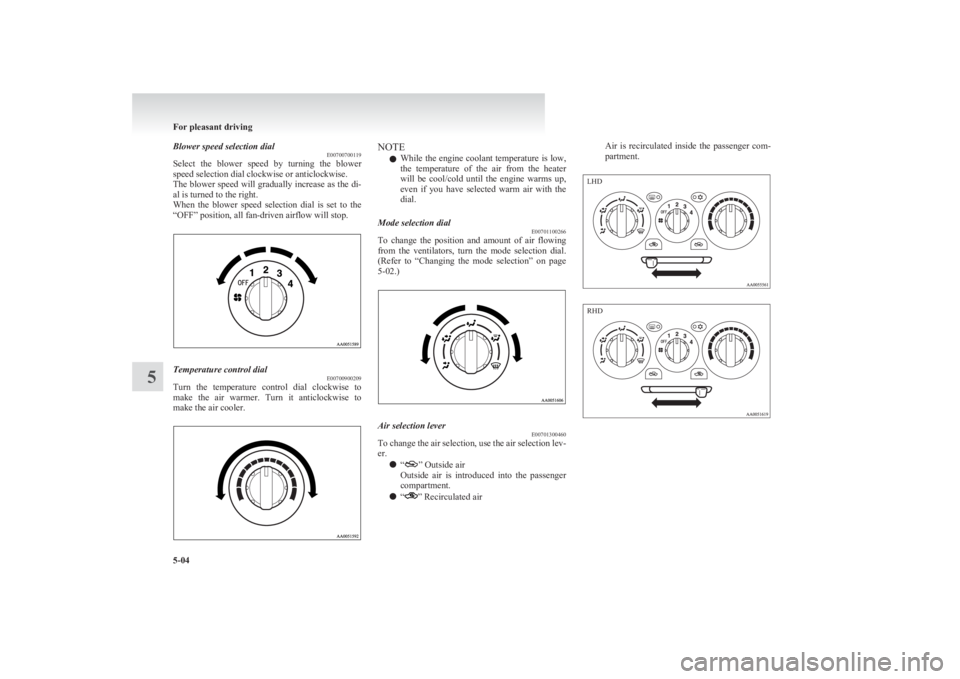
Following modes are available for clock adjustment:
l For vehicles with
MITSUBISHI genuine au-
dio:
“Automatic mode” and “Manual mode”
l Except for vehicles with
MITSUBISHI genu-
ine audio:
“Manual mode” only
Automatic mode (MITSUBISHI genuine audio)
The automatic adjustment mode can set the local
time automatically by using the signal from the lo-
cal RDS stations. In this mode, “CT” (A) (Clock
Time: sent with the RDS signal) is shown in the au-
dio display.
NOTE l Automatic clock adjustment does not take
place while a settings display is shown.
Manual mode
The manual mode is also available in case the auto-
matic mode shows the incorrect time when the ad-
jacent local RDS stations are located in a different
time zone. Refer to “Radio data system (RDS)” on
page 5-18.
It is possible to manually adjust the time.
Refer to “Changing the clock settings” on page
3-19.Changing the information display E00517900124
Every time the “INFO” button is pressed lightly,
the display can be changed to the following:
Instruments and controls
3-12
3
Page 104 of 330

NOTEl Pressing the “RESET” function button will
not reset the indication (C).
l It is possible to set the display unit to hPa,
mb, kPa, or inHg.
Refer to “User customization” on page 3-24.Calendar E00518800032
The date is shown. The calendar pattern can be
changed to your desired setting.
Refer to “Changing the calendar setting” on page
3-23.
Clock-only E00518900033
Only the clock is shown. The time notation can be
changed to your desired setting. (12 hour/24 hour)
Refer to “User customization” on page 3-24.Blank E00519000015
The whole display can be turned into blank. In this
case, buttons remain illuminated.
NOTE
l If you operate the audio system, the audio dis-
play pops up.
Selecting settings displays E00519100090
Every time the “ADJ” button is pressed lightly, the
display can be changed to the following:CAUTIONl The driver should not operate the display
while the vehicle is in motion.
l When operating the system, stop the vehi-
cle in a safe area.
1- Changing the clock settings ® p. 3-19
2- Adjusting the display brightness ® p. 3-20
3- Correcting the compass ® p. 3-21
4- Changing the calendar setting ® p. 3-23
5- User customization ® p. 3-24
6- Adjusting the barometer ® p. 3-28
Instruments and controls
3-18
3
Page 105 of 330

Changing the clock settingsE00519200121
1. Press the “ADJ” button to select the clock set-
ting display.
2. It is possible to adjust the clock using the func-
tion buttons.
“H”-Adjust “hour”.
The indication increases by one hour, ev-
ery time you lightly press the “H” func-
tion button. If you continue pressing the
button for about 2 seconds or more, the
indication is fast-forwarded, and then the
setting is changed to the hour selected.“M”-Adjust “minute”.
The indication increases by one minute,
every time you lightly press the “M” func-
tion button. If you continue pressing the
button for about 2 seconds or more, the
indication is fast-forwarded, and then the
setting is changed to the minute selected.“SET”-To reset the minutes to zero.
The time is adjusted as described below
by pressing the function button “SET”.
l 10:30-11:29 · · · · change to 11:00
l 11:30-12:29 · · · · change to 12:00
In this occasion, the display flashes twice
and then the setting is changed.
3. After making the adjustment, press the “IN-
FO” button to select the information display.
Instruments and controls
3-19
3
Page 134 of 330

1-Firmly depress and hold the brake pedal,
then pull the lever out slightly and turn it
clockwise (LHD) or anticlockwise (RHD).
2- Push in the lever completely.
Parking E00600601202
Parking on a hill
To prevent the vehicle from rolling, follow these
procedures:
Parking on a downhill slope
Turn the front wheels towards the kerb and move
the vehicle forward until the kerb side wheel gently
touches the kerb.
Set the parking brake and place the gearshift lever
into the “R” (Reverse) position (with M/T) or the
selector lever into the “P” (PARK) position (with
A/T).
If necessary, apply chocks to wheels.
Parking on an uphill slope
Turn the front wheels away from the kerb and
move the vehicle back until the kerb side wheel gen-
tly touches the kerb.
Set the parking brake and place the gearshift lever
into the 1 st
position (with M/T) or the selector lever
into the “P” (PARK) position (with A/T).
If necessary, apply chocks to wheels.
NOTE l If your vehicle is equipped with
A/T, be sure
to apply the parking brake before moving the
selector lever to the “P” (PARK) position. If
you move the selector lever to the “P”
(PARK) position before applying the parking
brake, it may be difficult to disengage the se-
lector lever from the “P” (PARK) position
when next you drive the vehicle, requiring ap-
plication of a strong force to the selector lev-
er to move from the “P” (PARK) position.Parking with the engine running
Never leave the engine running while you take a
short sleep/rest. Also, never leave the engine run-
ning in a closed or poorly ventilated place.WARNINGl Leaving the engine running risks injury
or death from accidentally moving the
gearshift lever (on M/T vehicles) or the se-
lector lever (on A/T vehicles) or the accu-
mulation of toxic exhaust fumes in the pas-
senger compartment.
Where you park
Your front bumper can be damaged if you scrape it
over kerbs or parking stop blocks. Be careful when
travelling up or down steep slopes where your bump-
er can scrape the road.
WARNINGl Do not park your vehicle in areas where
combustible materials such as dry grass
or leaves can come in contact with a hot
exhaust, since a fire could occur.
When leaving the vehicle
Always remove the key from the ignition switch
and lock all doors when leaving the vehicle unatten-
ded.
Always try to park your vehicle in a well lit area.
Starting and driving
4-08
4LHD RHD
Page 186 of 330

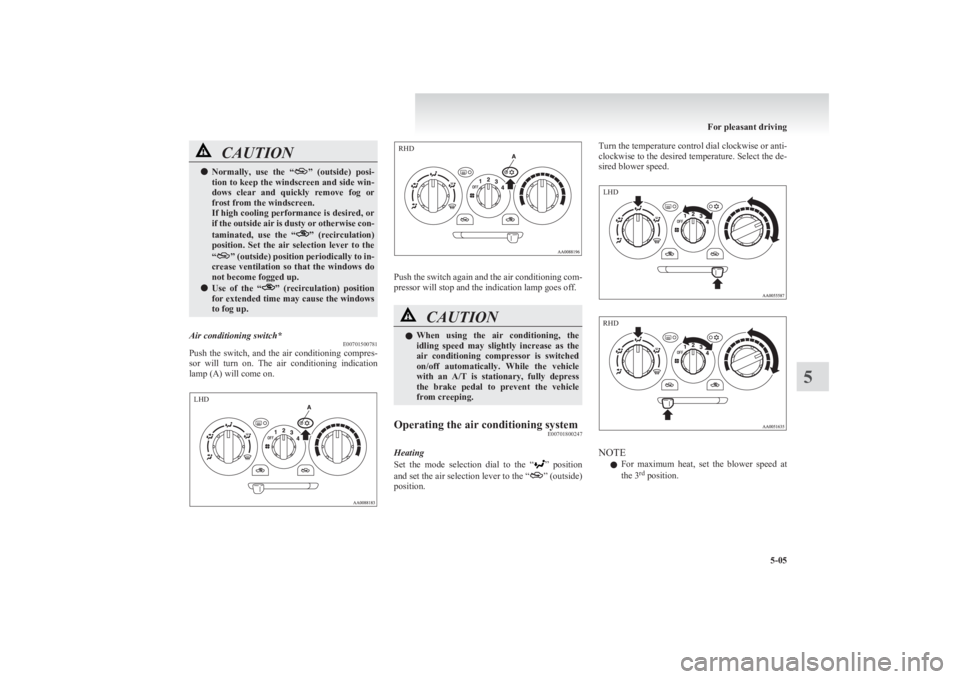
Blower speed selection dialE00700700119
Select the blower speed by turning the blower
speed selection dial clockwise or anticlockwise.
The blower speed will gradually increase as the di-
al is turned to the right.
When the blower speed selection dial is set to the
“OFF” position, all fan-driven airflow will stop.Temperature control dial E00700900209
Turn the temperature control dial clockwise to
make the air warmer. Turn it anticlockwise to
make the air cooler.
NOTE
l While the engine coolant temperature is low,
the temperature of the air from the heater
will be cool/cold until the engine warms up,
even if you have selected warm air with the
dial.Mode selection dial E00701100266
To change the position and amount of air flowing
from the ventilators, turn the mode selection dial.
(Refer to “Changing the mode selection” on page
5-02.)
Air selection lever E00701300460
To change the air selection, use the air selection lev-
er.
l “
” Outside air
Outside air is introduced into the passenger
compartment.
l “
” Recirculated air
Air is recirculated inside the passenger com-
partment.
For pleasant driving
5-04
5 LHD RHD
Page 187 of 330

CAUTIONlNormally, use the “”
(outside) posi-
tion to keep the windscreen and side win-
dows clear and quickly remove fog or
frost from the windscreen.
If high cooling performance is desired, or
if the outside air is dusty or otherwise con-
taminated, use the “
” (recirculation)
position. Set the air selection lever to the
“
” (outside) position periodically to in-
crease ventilation so that the windows do
not become fogged up.
l Use of the “
”
(recirculation) position
for extended time may cause the windows
to fog up.
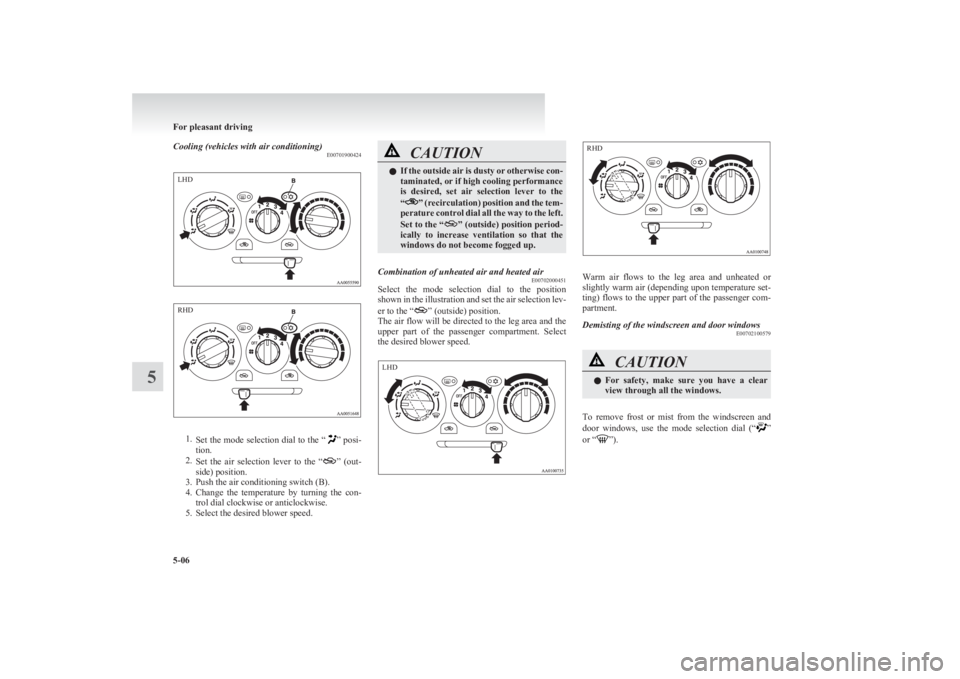
Air conditioning switch* E00701500781
Push the switch, and the air conditioning compres-
sor will turn on. The air conditioning indication
lamp (A) will come on.
Push the switch again and the air conditioning com-
pressor will stop and the indication lamp goes off.
CAUTIONl When using the air conditioning, the
idling speed may slightly increase as the
air conditioning compressor is switched
on/off automatically. While the vehicle
with an A/T is stationary, fully depress
the brake pedal to prevent the vehicle
from creeping.Operating the air conditioning system E00701800247
Heating
Set the mode selection dial to the “
” position
and set the air selection lever to the “” (outside)
position.
Turn the temperature control dial clockwise or anti-
clockwise to the desired temperature. Select the de-
sired blower speed.
NOTE
l For maximum heat, set the blower speed at
the 3 rd
position.
For pleasant driving
5-05
5 LHD RHD LHD RHD
Page 188 of 330

Cooling (vehicles with air conditioning)E00701900424
1.Set the mode selection dial to the “” posi-
tion.
2. Set the air selection lever to the “
” (out-
side) position.
3. Push the air conditioning switch (B).
4. Change the temperature by turning the con-
trol dial clockwise or anticlockwise.
5. Select the desired blower speed.
CAUTIONl If the outside air is dusty or otherwise con-
taminated, or if high cooling performance
is desired, set air selection lever to the
“
” (recirculation) position and the tem-
perature control dial all the way to the left.
Set to the “
” (outside) position period-
ically to increase ventilation so that the
windows do not become fogged up.
Combination of unheated air and heated air E00702000451
Select the mode selection dial to the position
shown in the illustration and set the air selection lev-
er to the “
” (outside) position.
The air flow will be directed to the leg area and the
upper part of the passenger compartment. Select
the desired blower speed.
Warm air flows to the leg area and unheated or
slightly warm air (depending upon temperature set-
ting) flows to the upper part of the passenger com-
partment.
Demisting of the windscreen and door windows E00702100579CAUTIONlFor safety, make sure you have a clear
view through all the windows.
To remove frost or mist from the windscreen and
door windows, use the mode selection dial (“”
or “”).
For pleasant driving
5-06
5LHD RHD LHD RHD