Page 105 of 196

Radio MINI Boost CDEntertainment
103
4.Select the desired volume and press the but-
ton on the right.
Setting tone controls
You can select between the following settings:
>Bass: bass setting.
> Treble: treble setting.
> Balance: volume distribution right/left.
> Fader: volume distri bution front/back.
The tone settings are set for all audio sources at
once.
Setting the bass, treble and balance
1. Press the button.
2. Select the desired tone setting and press the
button on the right.
3. Select the desired volume and press the but-
ton on the right.
Resetting tone settings
The tone settings are reset to the middle values.
1.Press the button.
2. Press the button.
Time
Setting the time, date and time format
You can set the time, date and time format, refer
to page57.
Radio
Your radio is designed to receive FM and AM sig-
nals.
Listening to the radio
1. Switch on the radio, refer to page 102.
2. If necessary, press the MODE button.
3. Press the button.
4. Press the corresponding button as
often as necessary until the desired wave-
length band is selected.
> AM: AM and AMA
> FM: FM1/FM2 and FMA
Selecting a station
The setting is stored for the remote control in
use.
Next station
Press the … button.
The next station that can be received is selected.
Selecting stations manually by
frequency
1. Press the button.
2. Press the button each time to enter a
desired frequency.
Or, by using the button on the right:
1. Press the button.
2. Turn the knob on the right until the desired
frequency is reached.
Automatically update strongest stations
Press the corresponding button as long
as necessary until "Autostore" is displayed.
Several seconds may go by until the stations are
stored and one of the stations can be heard.
Page 106 of 196

EntertainmentRadio MINI Boost CD
104
If you do not wish to use the Autostore
feature, you can store six stations of your
choice in the FMA or AMA memory levels.<
Playing and selecting stations, scan
You can play all the statio ns that can be received
for approx. 10 seconds.
Press the button.
Interrupting the scan an d selecting a station:
Press the button.
Storing and recalling stations
Memory presets
Your radio can store 30 stations:
> FM1, FM2: six stations of your choice for
each
> AM: six stations of your choice
> FMA/AMA: automatically , the six strongest
stations
Storing a station
1.
Press the corresponding button as
often as necessary until the desired fre-
quency range is selected
2. Selecting stations.
3.
… Press and hold the
desired button until th e station can again be
heard after a short interruption.
The memory level and the selected button
are shown on the display, e.g.:
Recalling stored stations
1. Press the corresponding button as often as necessary until the desired wave-
length band is selected.
2.
… Press the desired but-
ton.
For the knob on the right:
Turn the knob on the right as long as necessary
until the desired stat ion has been reached.
RDS – Radio Data System
The Radio Data System transmits additional
information in the FM frequency range. RDS sta-
tions have the following features:
>For stations that broadcast over several fre-
quencies, the frequency with the best recep-
tion quality is automatically selected.
> Under good reception conditions, the sta-
tion names are displayed.
> Additional information can be shown on the
display, e.g., text me ssages from the station.
> Over RDS, some stations transmit the type of
the received program, PTY. At the option of
the station, this can be shown briefly on the
display, e.g., message s, NEWS. Using PTY,
warnings regarding ca tastrophies can also
be displayed, e.g., "ALARM".
Switching RDS on/off
1. Press the button.
2. Press the button.
The name of the current station is displayed if it
transmits RDS information.
Displaying the program type
1. Press the button.
2. Press the button.
Page 107 of 196

Radio MINI Boost CDEntertainment
105
HD Radio™ reception*
Many radio stations transmit analog and digital
signals. If a digital radio network is available,
these stations can be received digitally and thus
with improved sound quality.
License conditions
HD Radio™ technology is manufactured under
U.S. and Foreign Patents licensed from iBiquity
Digital Corp. HD Radio™ and the HD and HD
Radio logos are proprietary trademarks of iBiq-
uity Digital Corp.
Activating/deactivating digital radio
reception
1.Press the MODEbutton.
2. Press the button.
3. Press the button.
4. Press the button.
"HD": a station has been received digitally.
"(HD)": a station is transmitting digital signals;
however, digital radio re ception is switched off.
For some stations, the digital signals are not
broadcast simultaneously with the analog sig-
nals. If you are in an area where the selected sta-
tion can not be continuously received digitally,
then the playback switches between analog and
digital reception. As a result, the reception can
be interrupted and then resume from time to
time. In this type of situation, it is suggested that
digital radio reception be turned off.
Selecting programs from a digital
station*
Some stations broadcast several programs. To
select one of these programs:
1. Press the … button as often as neces-
sary until the desired digital station is dis- played.
If a station broadcasts several programs,
then, e.g., "HD1" is displayed.
2. Press the button.
3. Select the desired program.
Up to eight programs per station can be
selected, "HD1" to "HD8".
Displaying additional information
For digital stations, addi tional information about
the current track is displayed, e.g., the name of
the artist.
Press the button.
The information is displayed.
Operation indicators
Acquiring
A search for digital stat ions is being conducted.
No Signal
No digital station has been found.
Satellite radio*
You can receive more than 100 different chan-
nel with higher audio quality.
The channels are offere d in defined packages.
To receive the channels of your choice, you have
to approve the package.
You may experience signal drops and
muting events related to this new technol-
ogy. <
Enabling or blocking channels
1.Press the MODEbutton.
Page 108 of 196

EntertainmentRadio MINI Boost CD
106
2. Press the button.
3. Press the button.
4. Select the desired category.
The channels are displayed. This symbol indicates the current channel.
Activating
1. Turn the knob on the right to select a chan-
nel that is not yet activated.
2. Press the knob on the right to confirm a
channel.
A phone number and th e electronic serial
number, ESN, are displayed. When activat-
ing, the electronic serial number is required.
3. To activate the channels:
Dial the phone number.
Blocking
1.Press the MODEbutton.
2. Press the button.
3. Press the button for a longer
period.
A phone number and th e electronic serial
number, ESN, are displayed. For blocking,
the electronic serial number is required. 4.
To block channels:
Dial the phone number.
To select and store a channel
1.Press the MODEbutton.
2. Press the button.
3. Press the button.
4. Select the desired category.
5. Select desired channel.
To display all the channels: Press the button.
To store a channel:
1. Press the button.
2. Press the button as often as nec-
essary until the desired memory level, SAT 1
or SAT 2, is reached.
3.
... Keep the desired but-
ton pressed until the channel can again be
heard after a short interruption.
Changing to the current channel
Press the button.
Page 109 of 196

Radio MINI Boost CDEntertainment
107
Additional information
The name of the channel and additional infor-
mation about the current track is displayed, e.g.,
the name of the artist.
1.Selecting a desired channel.
2. Press the button.
Changing channels using buttons
Press the … button for the corresponding
direction.
The next activated channel is recalled.
Search function
1.Press and hold the button for the cor-
responding direction.
The activated channels are shown, one after
another, on the display.
2. Release the button to select the displayed
channel.
Notes
When there is a signal blockage or the transmis-
sion is suspended mome ntarily for more than
4 seconds, a message appears on the Control
Display.
Service may be interrupted or unavailable
for specific reasons such as environmental
or topographic conditions and others that Satel-
lite Radio cannot directly control.
Signals may not be available under tunnels, in
parking garages, next to tall buildings, nearby
trees with dense foliage, nearby mountains or
other possible stro ng sources of radio interfer-
ence.
Service should resume no rmally after the source
of signal unavailabil ity has been cleared.<
CD player
Starting the CD player
Some time may pass until the CD player starts.
1.Turning on the radio, refer to page 102.
2. Insert the CD with the printed side up into
the CD slot.
If there is already a CD in the CD slot:
1. Switch on the radio, if necessary.
2. Press the MODE button.
3. Press the button.
Changing the music track
Jumping tracks
Press the … button as often as necessary
until the desired track is reached.
Using the knob on the right:
Turn the knob on the right until the desired track
has been reached.
Fast forward/reverse
1.Press and hold the … button.
The track can be heard but is distorted.
2. To cancel the fast fo rward/reverse, release
the button.
Random order
Press the button.
To terminate the random generator:
Press the button.
Playing a track and selecting, scan
Press the button.
To cancel the scan and select a track:
Press the button.
Page 110 of 196

EntertainmentRadio MINI Boost CD
108
Selecting MP3 music tracks
The CD player can also play CDs with com-
pressed audio data, such as MP3 and WMA.
Selecting a track
1. Press the button.
2. Select the desired folder and press the but-
ton on the right.
> : press the button on the right to open
a folder
> : press the button on the right to close
a folder
3. If necessary, select a dditional subfolders
and press the button on the right.
4. Select the desired track and press the button
on the right.
During playback, you can browse through the
folder.
To change to the current track:
Press the button.
Track display
You can call up any input information on the cur-
rent music track:
1. Press the button.
2. Press the button.
Ejecting the CD out of the CD player
Press the button.
The CD is partially ejected from the CD slot.
Operation indicators
>"Insert CD"
The CD slot is empty.
> "Error CD"
The CD can not be read or is defective.
> "Temp. CD"
The operating temperature is too high.
Notes
CD players are laser products of Class 1. Do
not operate if the co ver is damaged; oth-
erwise, serious injury to eyes may result.
Do not use CDs with after-market labels; other-
wise, the labels can loosen as a result of the heat
generated during playback and possibly cause
irreparable damage to the system.
Only use round CDs with a standard diameter of
4.7 in/12 cm and do not pl ay CDs with adapters,
e.g., single CDs; otherwise, the CDs or the adapt-
ers may jam and it may not be possible to eject
them.
Do not use combined CD/DVDs, e.g., DVD
Plus;
otherwise, the CD/DVD may jam and it may not
be possible to eject it. <
General malfunctions
The CD players are optimized for operation in
vehicles. They may be more sensitive to defec-
tive CDs than players for stationary use.
If a CD can not be played, first check if the CD is
properly inserted.
Humidity
If there is high humidity, the CD or the focusing
lens for the laser beam may get fogged up and
playing the CD may temporarily not be possible.
Malfunctions with individual CDs
If there are malfunctions with individual CDs,
then they may be due to the following causes.
CDs that you burned yourself
Potential problems with home-burned CDs are,
for example, inconsistent data generation and
burning processes, as well as low quality or
excessive aging of the blanks that are used.
Only write on the upper surface of CDs with a
writing instrument that is suitable for the pur-
pose.
Page 111 of 196

Radio MINI Boost CDEntertainment
109
Damaged CDs
Avoid finger prints as well as dust, scratches and
moisture.
Store CDs in sleeves.
Do not expose CDs to a temperature greater
than 1227/50 6, elevated humidity or direct
sunlight.
CDs with copy protection
CDs are often provided with copy protection
from the manufacturer. This can result in CDs not
playing or playing back in only a limited fashion.
Care
If necessary, clean the reflecting side of the CD
with a commercially avail able cleaning cloth by
wiping in a straight line from the center out-
wards.
USB audio interface*
> iPods/iPhones or USB devices such as MP3
players and USB memory sticks: connect via
the USB audio interface
> iPhone/mobile phone music players: con-
nection using a snap-in adapter
*, refer to
page 124.
> Only one iPod/iPhone can be connected to
the vehicle. Output fr om an iPod/iPhone to
the USB audio interface is only possible if
there is no iPhone in the snap-in adapter.
> Popular audio files, such as MP3, AAC and
M3U playlists, can be played. Depending on
the audio file, proper playback can not be
ensured in every case,
such as for bit rates greater than 256 kbit/s.
> Music tracks with inte grated Digital Rights
Management (DRM) cannot be played.
Because of the large number of audio devices on
the market, it can not be ensured that every
device will properly operate in the vehicle. Addi-
tional inform ation may be found at
www.mini.com/connectivity or at a dealer.
Connecting
MINI, MINI Convertible, MINI Clubman:
1 Connection for audio playback:
TRS connector 1/8"/3.5 mm
2 USB interface
*
MINI Countryman:
1USB interface
*
2Connection for audio playback:
TRS connector 1/8"/3.5 mm
Apple iPod/iPhone
Use the special cable adapter for Apple iPods/
iPhones to produce the connection. The cable
adapter is required for a proper connection.
For additional information, contact your MINI
dealer or visit the Internet at www.mini.com/
connectivity
To play audio tracks ov er the car's speaker sys-
tem, connect the iPod to ports 1 and 2.
The iPod/iPhone's menu structure is supported
by the USB audio interface.
Page 112 of 196

EntertainmentRadio MINI Boost CD
110
USB device
To play audio tracks over the car's speaker sys-
tem, connect the USB device to port2.
After first connecting, the track information is
transferred to the vehicle. The time required is
dependent on the USB device and on the num-
ber of tracks.
Information from up to four USB devices or
approx. 20,000/ tracks can be stored in the
vehicle.
Starting audio playback
iPod
1. Press the MODE button.
2. Press the button.
USB device
1.Press the MODE button.
2. Press the button.
Changing music tracks
Jumping tracks
Press the … button as often as necessary
until the desired track is reached.
Using the knob on the right:
Turn the knob on the right until the desired track
has been reached.
Fast forward/reverse
1.Press and hold the … button.
The track can be heard but is distorted.
2. To cancel the fast forward/reverse, release
the button.
Random order
Press the button. The current track is played to the end.
Afterwards, the tracks in the current folder are
played back in random order.
To terminate the random generator:
Press the button.
Selecting a track
Select the desired list, e.g., "LIST":
1. Press the button.
2. Select the desired folder and press the but-
ton on the right.
> : press the button on the right to open
a folder
> : press the button on the right to close
a folder
3. If desired, select addi tional subfolders and
press the button on the right.
4. Select the desired track and press the button
on the right.
During playback, you can browse through the
folder.
To change to the current track:
Press the button.
Track display
You can call up any input information on the cur-
rent music track:
Press the button.
Adjusting the iPod volume*
The volume of the iPod can be lower or higher
than the audio sources for the radio.
To adjust the volume of the iPod to the volume
of the other audio sources:
1. Press the button.
2. Select the desired volume and press the but-
ton on the right.
 1
1 2
2 3
3 4
4 5
5 6
6 7
7 8
8 9
9 10
10 11
11 12
12 13
13 14
14 15
15 16
16 17
17 18
18 19
19 20
20 21
21 22
22 23
23 24
24 25
25 26
26 27
27 28
28 29
29 30
30 31
31 32
32 33
33 34
34 35
35 36
36 37
37 38
38 39
39 40
40 41
41 42
42 43
43 44
44 45
45 46
46 47
47 48
48 49
49 50
50 51
51 52
52 53
53 54
54 55
55 56
56 57
57 58
58 59
59 60
60 61
61 62
62 63
63 64
64 65
65 66
66 67
67 68
68 69
69 70
70 71
71 72
72 73
73 74
74 75
75 76
76 77
77 78
78 79
79 80
80 81
81 82
82 83
83 84
84 85
85 86
86 87
87 88
88 89
89 90
90 91
91 92
92 93
93 94
94 95
95 96
96 97
97 98
98 99
99 100
100 101
101 102
102 103
103 104
104 105
105 106
106 107
107 108
108 109
109 110
110 111
111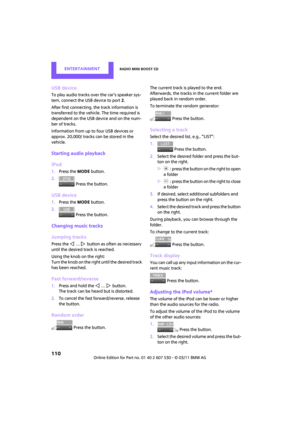 112
112 113
113 114
114 115
115 116
116 117
117 118
118 119
119 120
120 121
121 122
122 123
123 124
124 125
125 126
126 127
127 128
128 129
129 130
130 131
131 132
132 133
133 134
134 135
135 136
136 137
137 138
138 139
139 140
140 141
141 142
142 143
143 144
144 145
145 146
146 147
147 148
148 149
149 150
150 151
151 152
152 153
153 154
154 155
155 156
156 157
157 158
158 159
159 160
160 161
161 162
162 163
163 164
164 165
165 166
166 167
167 168
168 169
169 170
170 171
171 172
172 173
173 174
174 175
175 176
176 177
177 178
178 179
179 180
180 181
181 182
182 183
183 184
184 185
185 186
186 187
187 188
188 189
189 190
190 191
191 192
192 193
193 194
194 195
195