Page 145 of 199
 Owners Manual Inspecting and replenishing
144
– Open the bonnet page 139.
– Check the level of coolant in the coolant expansion bottle page 143, fig. 124 .
The coolant level when the engine is cold mus")
Inspecting and replenishing
144
– Open the bonnet page 139.
– Check the level of coolant in the coolant expansion bottle page 143, fig. 124 .
The coolant level when the engine is cold must lie between the (MIN) and
(MAX) markings. The level may also rise slightly above the (MAX) marking when
the engine is warm.
If the coolant level in the reservoir is too lo w, this is indicated by the warning light in
the instrument cluster page 25, “Coolant temperature/coolant level ”. We never-
theless recommend inspecting the coolant leve l directly at the reservoir from time to
time.
Loss of coolant
A loss of coolant is first and foremost an indication of a leak in the system. You should
not merely top up the coolant in the reservoir. It is also important to have the cooling
system inspected without delay by a specialist garage.
Losses can only occur through the pressure relief in the cap of the coolant expansion
bottle which is completely free of leaks if the coolant boils as a result of overheating
and is forced out of the cooling system.
WARNING
Read and observe the warning notes page 140, “Working in the engine
compartment” before working in the engine compartment.
Caution
One should contact a specialist garage as soon as possible if the source of overheating
itself cannot be determined and removed, since there may be grave damage to the
engine.Replenishing the coolant– Switch the engine off.
– Allow the engine to cool down.
– Place a cloth over the cap of the coolant expansion reservoir page 143, fig. 124
and unscrew the cap carefully by turning it to the left . –Top up the coolant.
– Screw the cap tight until it is heard to lock.
The coolant which you use for replenishing the system, must comply with one specific
specification
page 143. Do not use an alternative additive if the coolant additive
G13 is not available in an emergency. Just to p up the system with water and as soon as
possible arrange adjustment to correct the mixing ratio of water and coolant additive
again by a specialist garage.
Only use fresh coolant for topping up the system.
Do not fill up over the “MAX” marking! Excess coolant which is heated up is forced out
of the cooling system through the pressure relief valve in the cap of the coolant
compensation bottle.
Wait until the engine has cooled down for a system which has suffered a major loss of
coolant before pouring in coolant. This is necessary to avoid engine damage.
WARNING
The cooling system is pressurized! Do not open the cap of the coolant
expansion bottle if the engine is still hot - risk of scalding!
The coolant additive and thus all of the coolant is harmful to your health.
Avoid contact with the coolant. Coolant vapours are also harmful to the health.
It is important, therefore, to always safely store any coolant additive in its orig-
inal container out of the reach of children - risk of poisoning!
If any splashes of coolant get into yo ur eyes, rinse out your eyes immedi-
ately with clear water and contact a doctor as soon as possible.
You should also consult a doctor without delay if you have inadvertently
swallowed coolant.Caution
Do not continue your journey if for some reason it is not possible under the
conditions prevailing to top up with coolant. Switch the engine off and obtain
professional assistance from a specialist garage, otherwise it could lead to severe
engine damage.
Ab
Aa
Aa
s2bs.2.book Page 144 Monday, September 27, 2010 9:53 AM
Page 146 of 199
 Owners Manual Inspecting and replenishing145
Using the system
Safety
Driving Tips
General Maintenance
Breakdown assistance
Technical Data
For the sake of the environment
Do not re-use coolant if it is necessary to")
Inspecting and replenishing145
Using the system
Safety
Driving Tips
General Maintenance
Breakdown assistance
Technical Data
For the sake of the environment
Do not re-use coolant if it is necessary to drain the coolant in the system. It should be
collected and disposed of in compliance with environmental protection regulations.Radiator fan
The radiator fan may switch on suddenly.The radiator fan is driven by an electric motor and controlled according to the coolant
temperature.
The radiator fan may continue running for up to 10 minutes after the engine has been
switched off - even if the igni tion is also off. It may also switch on suddenly after a
certain time, if
the coolant temperature has risen beca use of an accumulation of heat or
the warm engine compartment is heated up additionally by strong sunlight.
WARNING
You must therefore be aware when workin g in the engine compartment that the
fan may switch on suddenly - risk of injury!Brake fluidInspecting the brake fluid level
The brake fluid reservoir is located on the left of the engine compartment. The brake
fluid reservoir on right-hand steering models is positioned on the other side of the
engine compartment.
– Switch the engine off.
– Open the bonnet page 139.
– Inspect the brake fluid level in the reservoir fig. 125 . The level must be between
the “MIN” and “MAX” markings.
A slight drop in the fluid level results when driving due to normal wear-and-tear and
automatic adjustment of the brak e pads, and is perfectly normal.
There may be an indication of a leak in the brake system, however, if the fluid level
drops significantly within a short time or if it drops below the “MIN” marking. If the
brake fluid level is too low, this is indicated by the warning light page 28, “Brake
system ” lighting up in the instru ment cluster. In this case stop immediately and do
not drive any further! Obtain professional assistance.
WARNING
Read and observe the warning notes page 140, “Working in the engine
compartment” before working in the engine compartment.
If the fluid level has dropped below the MIN marking, do not drive any
further - risk of accident! Obtain professional assistance.
Replacing brake fluidBrake fluid absorbs moisture. This causes the fluid to absorb moisture from the
surrounding air over a period of time. Exce ssive water in the brake fluid may be the
cause of corrosion in the brake system. The water content also lowers the boiling point
of the brake fluid.
One may only use new genuine brake fluid from Škoda Auto. The brake fluid must
comply with one of the following standards or specifications:
VW 50114
FMVSS 116 DOT4
DIN ISO 4925 CLASS 4
Fig. 125 Engine compartment: Brake
fluid reservoir
s2bs.2.book Page 145 Monday, September 27, 2010 9:53 AM
Page 147 of 199
 Owners Manual Inspecting and replenishing
146
We recommend that you have the brake fluid replaced by an authorised Škoda
Service Partner as part of an Inspection Service.
WARNING
Using old brake fluid can resul")
Inspecting and replenishing
146
We recommend that you have the brake fluid replaced by an authorised Škoda
Service Partner as part of an Inspection Service.
WARNING
Using old brake fluid can result in severe stress on the brakes because of the
formation of vapour bubbles in the br ake system. This greatly impairs the
braking efficiency and thus also the safety of your vehicle.
Caution
Brake fluid damages the paintwork of the vehicle.
For the sake of the environment
In view of the problems involved with proper disposal of brake fluid, the special tools
and the professional knowledge required, you should have the brake fluid replaced by
a Škoda Service Partner.BatteryWorking on the batteryFig. 126 Engine compartment: Polyester cover of the vehicle battery / plastic cover of the
vehicle batteryThe battery is located in the engine compartment under a polyester cover fig. 126 -
left, or it may be located under a plastic cover* fig. 126 - right. – Open the battery cover in direction of arrow
fig. 126 or press the elastic
interlock on the side of the battery cover, fold the cover up and remove it.
– The installation of the battery co ver takes place in the reverse order.
The edge of the battery cover fig. 126 - left is inserted between the battery and the
side wall of the battery cove r when working on the battery.
Removal and installation of the battery is not recommended since it can, under certain
circumstances, lead to major dama ge. Contact a specialist garage.
There is a risk of injuries, scalding, accidents and burns when carrying out any work on
the battery and on the electrical system. For th is reason, it is essential to comply with
the warning instructions stated below and with the general applicable rules of
safety.
WARNING
The battery acid is strongly corrosive and must, therefore, be handled with
the greatest of care. Always wear prot ective gloves, eye and skin protection
when handling batteries. Corrosive fumes in the air irritate the air passages and
lead to conjunctivitis and inflammation of the air passages in the lungs. Battery
acid corrodes dental enamel and crea tes deep wounds after contact with the
skin which take a long time to heal. Repeated contact with diluted acids causes
skin diseases (inflammations, ulcers, skin cracks). Acids coming into contact
with water are diluted accompanied by significant development of heat.
Do not tilt the battery otherwise battery electrolyte may flow out of the
battery vent openings. Protect the eyes with safety glasses or a shield! There is
the danger of suffering blindness! If an y battery electrolyte gets into your eye,
rinse out your eye immediately with clear water for several minutes. Contact a
doctor without delay.
Splashes of acid on your skin or clothes should be neutralised as soon as
possible using soap suds and then rinsed with plenty of water. Contact a doctor
immediately if you swallow battery electrolyte.
Keep batteries out of the reach of children.
Hydrogen is released when you charge a battery and a highly explosive gas
mixture is produced. An explosion can be caused through sparkling over during
unclamping or loosening of the cable plug while the ignition is on.
A1
A2
s2bs.2.book Page 146 Monday, September 27, 2010 9:53 AM
Page 148 of 199
 Owners Manual Inspecting and replenishing147
Using the system
Safety
Driving Tips
General Maintenance
Breakdown assistance
Technical Data
Bridging of the poles will create a short circuit (e.g. through metal ob")
Inspecting and replenishing147
Using the system
Safety
Driving Tips
General Maintenance
Breakdown assistance
Technical Data
Bridging of the poles will create a short circuit (e.g. through metal objects,
cables). Possible consequences of a short circuit: Melting of lead struts, explo-
sion and burning of the battery, jets of acid spurting out.
It is prohibited to work with a naked flame and light, to smoke or to carry out
any activities which produce sparks. Avoi d creating sparks when working with
cables and electrical devices. Strong spar k build-up represents a risk of injury.
Before carrying out any work on the electrical system, switch off the engine,
the ignition as well as all electrical components and disconnect the negative
cable (-) on the battery. If you wish to replace a bulb it is sufficient to switch off
the appropriate light.
Never charge a frozen or thawed battery - risk of explosion and caustic
burns! Replace a frozen battery.
Never jump-start the batteries which have a too low electrolyte level - risk
of explosion and caustic burns!
Never use a battery which is damaged - risk of explosion! Immediately
replace a damaged battery.Caution
You must only disconnect the battery if th e ignition is switched off, otherwise the
electrical system (electronic components ) of the vehicle may be damaged. When
disconnecting the battery from the electrical system of the vehicle, first disconnect the
negative terminal (-) of the battery. Th en disconnect the positive terminal (+).
When reconnecting the battery, first connect the positive terminal (+) and only
then the negative terminal (-) of the batt ery. You must on no account connect the
cables wrongly - risk of a cable fire.
Ensure that battery acid does not come into contact with the vehicle body other-
wise damage could occur to the paintwork.
Do not place the battery in direct daylight in order to protect the battery housing
from the effects of ultra-violet light.
For the sake of the environment
A removed battery is a special type of wa ste which is harmful to the environment -
contact your specialist garage regarding disposing of the battery.
Note
Please also refer to the guidelines page 149, also after connecting the battery.Battery with a two-tone indicatorAn indicator for the electrolyte level, the so-called magic eye fig. 127 , is located on
the top of the battery. The indicator changes its colour in line with the electrolyte level
in the battery.
Air bubbles can influence the colour of the in dicator. For this reason carefully knock on
the indicator before carrying out the check.
Black colour - electrolyte level is correct.
Colourless or light yellow colour - electrolyte level too low, the battery must be
replaced.
Batteries, which are more than 5 years old, must be replaced. We recommend you
have the battery checked or repl aced by a specialist garage.Caution
If the vehicle has not been driven for more th an 3 to 4 weeks, the battery will discharge
because certain electrical co mponents consume electricity (e.g. control units) also in
WARNING (continued)
Fig. 127 The battery: Show
s2bs.2.book Page 147 Monday, September 27, 2010 9:53 AM
Page 149 of 199
 Owners Manual Inspecting and replenishing
148
idle state. You can prevent the discharging of the battery by disconnecting the negative
terminal or charging the battery constantly with a very low charging current")
Inspecting and replenishing
148
idle state. You can prevent the discharging of the battery by disconnecting the negative
terminal or charging the battery constantly with a very low charging current. Please
also refer to the notes wh en working on the battery in “Working on the battery”
on page 146.
Note
Batteries with two-tone indicator, which are mounted as of factory, are marked
with a code which always begins with 5K0. The actual marking can be e.g.
5K0 915 105 D .
Replacement batteries with two-tone indi cator, which were obtained from Škoda
original accessories, are marked with the code 000 915 105 Dx, whereby “x” stands for
a variable. The actual marking can be e.g. 000 915 105 DB.
Battery with a three-tone indicatorAn indicator for the electrolyte level and the charge state, the so-called magic eye
page 147, fig. 127 , is located on the top of the ba ttery. The indicator changes its
colour in line with the charge state of and the electrolyte level in the battery.
Air bubbles can influence the colour of the in dicator. For this reason carefully knock on
the indicator before carrying out the check.
Green colour - the battery is adequately charged.
Dark colour - the battery has to be charged
Colourless or yellow colour - electrolyte level too low, the battery must be
replaced.
Batteries, which are more than 5 years old, must be replaced. We recommend you
have the battery checked or replaced by a specialist garage.Caution
If the vehicle has not been driven for more than 3 to 4 weeks, the battery will discharge
because certain electrical components consum e electricity (e.g. control units) also in
idle state. You can prevent the discharging of the battery by disconnecting the negative
terminal or charging the battery constantly with a very low charging current. Please
also refer to the notes wh en working on the battery in “Working on the battery”
on page 146.
Note
Batteries with three-tone indicator, which are mounted as of factory, are marked
with a code which always begins with 1J0 , 7N0 or 3B0 . The actual marking can be e.g.
1J0 915 105 AC .
Replacement batteries with three-tone indi cator, which were obtained from Škoda
original accessories, are marked with the code 000 915 105 Ax, whereby “x” stands for
a variable. The actual marking can be e.g. 000 915 105 AB.
Inspecting the electrolyte levelThe battery is practically maintenance-free under normal operating conditions. We
do, however, recommend that you have the electrolyte level inspected from time to
time by a Škoda Service Partner when outside temperatures are high or when driving
on long trips. You should also have the electrolyte level page 149 checked each time
the battery is charged.
The electrolyte level of the battery will al so be checked as part of the Inspection
Service.Operation in winterThe battery has to provide greater amounts of electricity during the winter. It also has
only part of the initial power output at low temperatures that it has at normal temper-
atures.
A discharged battery may already freez e at temperatures just below 0 °C.
We therefore recommend that you have the battery checked by a Škoda Service
Partner before the start of the winter and recharged if necessary.
WARNING
Never charge a frozen or thawed battery - risk of explosion and caustic burns.
Replace a frozen battery.
s2bs.2.book Page 148 Monday, September 27, 2010 9:53 AM
Page 150 of 199
 Owners Manual Inspecting and replenishing149
Using the system
Safety
Driving Tips
General Maintenance
Breakdown assistance
Technical Data
Charging the battery
A properly charged battery is essentia l for reliably s")
Inspecting and replenishing149
Using the system
Safety
Driving Tips
General Maintenance
Breakdown assistance
Technical Data
Charging the battery
A properly charged battery is essentia l for reliably starting the engine.– Read the warning notes in “Working on the battery” on page 146 and .
– Switch the ignition and all electrical components off.
– Only for “quick-charging”: Disconnect both battery cables (first of all “negative”,
then “positive”).
– Carefully attach the terminal clamps of the charger to the battery terminals (red = “positive”, black = “negative”).
– You can now plug the mains cable of the charger into the power socket and switch
on the charger.
– When charging is completed: switch th e charger off and unplug the mains cable
from the power socket.
– Only then should you disconnect the terminal clamps of the charger.
– Reconnect the cables to the battery (first of all “positive”, then “negative”).
It is not normally necessary to disconnect th e cables of the battery if you recharge the
battery using low amperages (as for example from a mini-charger). Please also refer
to the instructions from the charger manufacturer.
A charging current of 0.1 of the total battery capacity (or lower) is that which should be
used until full charging is achieved.
It is, however, necessary to disconnect both cables before charging the battery with
high amperages, so-called “ quick-charging”.
“Quick-charging” a battery is dangerous in “Working on the battery” on
page 146. It requires a special charger and appropriate knowledge. We therefore
recommend that you have your battery qu ick-charged only by your Škoda Service
Par tner.
A discharged battery may already freeze at temperatures just below 0 °C . We
recommend that you no longer use a batter y which has thawed out because the casing
of the battery may be cracked through th e formation of ice and this would allow
battery electrolyte to flow out.
The vent plugs of the battery should not be opened for charging.
WARNING
Never charge a frozen or thawed battery - risk of explosion and caustic
burns. Replace a frozen battery.
Never charge a battery which has a too lo w electrolyte level - risk of explo-
sion and caustic burns.
Disconnecting and reconnecting the batteryOn disconnecting and reconnecting the battery the following functions are initially
deactivated or are no longer able to operate fault-free.
We recommend having the vehicle checked by a Škoda Service Partner to ensure full
functionality of all electrical systems.Replacing the batteryYou should only replace a battery with a ne w battery of the same capacity, voltage (12
V), amperage and of the same size. Škoda Service Partners have a range of suitable
batteries available.
We recommend that you only have an old battery disposed of by your Škoda Service
Partner since it does require special disposal.
For the sake of the environment
Batteries contain poisonous substances such as sulphuric acid and lead. They must be
disposed of in accordance with local envi ronmental protection regulations and on no
account as domestic waste.Operation
Operating measure
Electrical power window (operational faults)
page 41
Enter radio code number
see Radio Operating Instructions
Set hours
page 18
Data in the multi-functional indicator* are
deleted.
page 18
s2bs.2.book Page 149 Monday, September 27, 2010 9:53 AM
Page 151 of 199
 Owners Manual Inspecting and replenishing
150
In view of the problems involved with it s proper disposal, we recommend having
the battery replaced by a specialist garage.
Windshield washer systemThe windshield")
Inspecting and replenishing
150
In view of the problems involved with it s proper disposal, we recommend having
the battery replaced by a specialist garage.
Windshield washer systemThe windshield washer reservoir contains the cleaning fluid for the windscreen or rear
window and for the headlamp cleaning system*. The reservoir is located at the front
right of the engine compartment fig. 128 .
The filling level of the container is 3 litres, 5.5 li tres on vehicles which also have a
headlight washing system.
Clear water is not sufficient to intensively clean the windscreen and headlights. We
therefore recommend using clean washing water together with the screen cleaner
from Škoda genuine accessories (in winter additionally with antifreeze) which is
capable of removing stubborn dirt. Follow the instructions for use on the packaging
when using screen cleaning products.
You should always add antifreeze to the cleani ng water in winter even if your vehicle is
fitted with heated wind screen washer nozzles*.
It is also possible in exceptional cases to use methylated spirits when no screen cleaner
with antifreeze is available. The concentratio n of methylated spirits must not be more
than 15 %. Please note, however, that the antifreeze protection at this concentration is
only adequate down to -5 °C.
WARNING
Read and observe the warning notes page 140, “Working in the engine
compartment” before working in the engine compartment.
Caution
On no account should you add radiator an tifreeze or other additives to the wind-
screen washer fluid.
If the vehicle is fitted with headlight clea ning system, you should only add cleaning
products which do not attack the polycarbonate coating of the headlights to the wind-
screen washer fluid. Please contact your Škoda Service Partner, who will tell you which
cleaning agent you can use.
Fig. 128 Engine compartment: Wind-
shield washer fluid reservoir
s2bs.2.book Page 150 Monday, September 27, 2010 9:53 AM
Page 152 of 199
 Owners Manual Wheels and Tyres151
Using the system
Safety
Driving Tips
General Maintenance
Breakdown assistance
Technical Data
Wheels and TyresWheelsGeneral information
New tyres do not offer optimal grip at fir")
Wheels and Tyres151
Using the system
Safety
Driving Tips
General Maintenance
Breakdown assistance
Technical Data
Wheels and TyresWheelsGeneral information
New tyres do not offer optimal grip at first and should therefore be run in for about
500 km at a moderate speed and an appropri ately cautious style of driving. You will
also profit from longer tyre life.
The tread depth of new tyres may differ because of design features and the config-
uration of the tread (depending on the type of tyre and the manufacturer).
Drive over curbs on the side of the road and other such obstacles slowly and,
where possible, at a right angle in order to avoid damage to tyres and wheel trims.
Inspect your tyres from time to time for damage (punctures, cuts, splits and
bulges). Remove foreign bodies from the tyre profile.
Damage to tyres and wheels is frequently not visible. Unusual vi brations or pulling
of the vehicle to one side coul d be a sign of tyre damage. Please reduce your speed
immediately and stop if you su spect that a wheel is damaged. Inspect the tyres for
signs of damage (bulges, splits, etc.) If no vi sible damage is present, please drive at an
appropriately slow speed and carefully to the nearest specialist garage in order to have
your vehicle inspected.
Also protect your tyres from contact with oil, grease and fuel.
Immediately replace any dust caps of the valves which have got lost.
Mark wheels before removing them so that their previous direction of running can
be maintained when mounted them again.
Always store wheels or tyres which been removed in a cool, dry and, where
possible, dark place. Tyres which are not fixed to a wheel trim should be stored upright.
Unidirectional tyres*
The direction of rotation of the tyres is mark ed by arrows on the wall of the tyre. This
indicates the direction of rotation of the tyre, and it is essential that the tyres are fitted
on to run in this direction. Only then are the tyres able to provide the optimal proper-
ties in terms of grip, low nois e, wear-and-tear and aquaplaning.
Further information concerning th e use of unidirectional tyres page 155.
WARNING
New tyres during the first 500 km do not offer optimal grip and should
therefore be run appropriately - risk of accident!
Never drive with damaged tyres - risk of accident!Note
Please observe the various differing legal requirements regarding tyres.Ty re l i feThe life of your tyres very much depends on the following points:
Tyre pressure
The working life of tyres will be shortened considerably if the tyres are insufficiently or
over-inflated and this will have an adverse effect on the handling of your vehicle.
Correctly inflated tyres are of particular importance when travelling at high speeds. It
is therefore good to check the pressure at least once a month and also before setting
off on a long trip. Please do not forget the spare wheel when checking the tyres.
The tyre inflation pressures for summer tyres are indicated on the inside of the fuel
filler flap fig. 129 . The inflation pressures for winter tyres are 20 kPa (0.2 bar) higher
than those for summer tyres page 155.
Fig. 129 An opened fuel filler flap with a
tyre size and tyre inflation pressure table
s2bs.2.book Page 151 Monday, September 27, 2010 9:53 AM
 1
1 2
2 3
3 4
4 5
5 6
6 7
7 8
8 9
9 10
10 11
11 12
12 13
13 14
14 15
15 16
16 17
17 18
18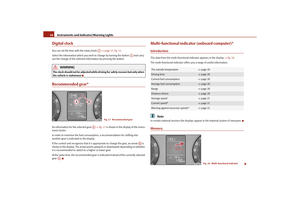 19
19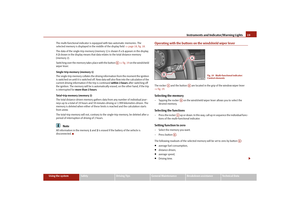 20
20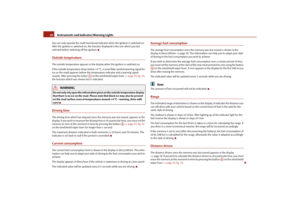 21
21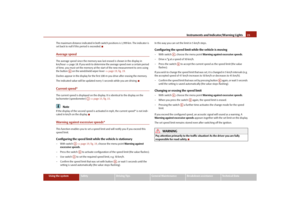 22
22 23
23 24
24 25
25 26
26 27
27 28
28 29
29 30
30 31
31 32
32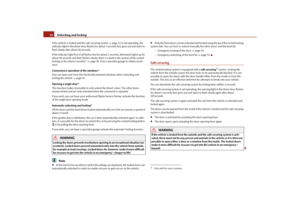 33
33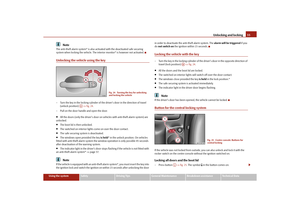 34
34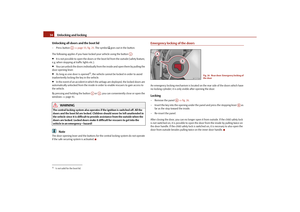 35
35 36
36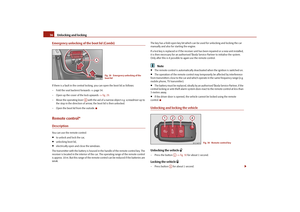 37
37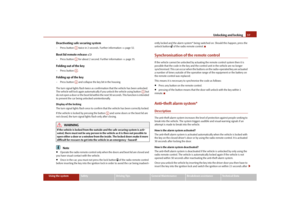 38
38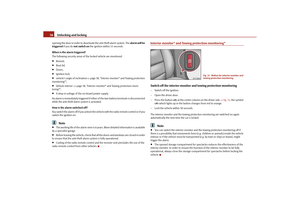 39
39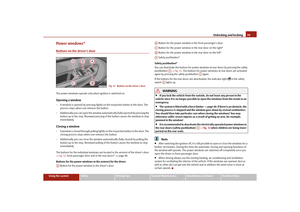 40
40 41
41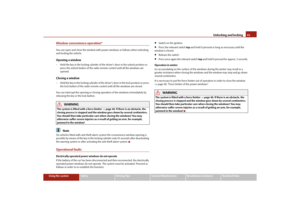 42
42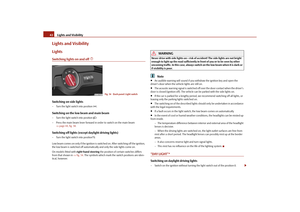 43
43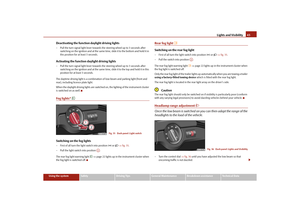 44
44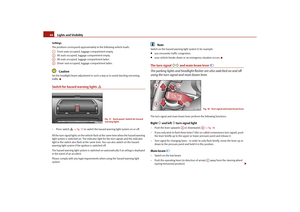 45
45 46
46 47
47 48
48 49
49 50
50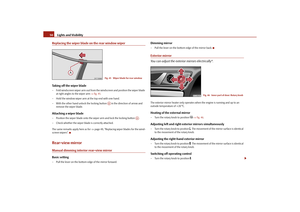 51
51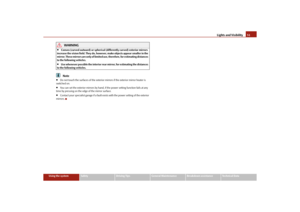 52
52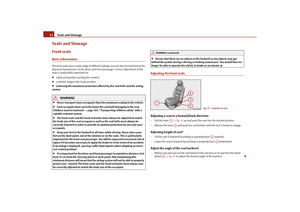 53
53 54
54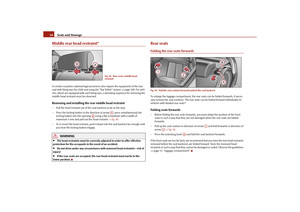 55
55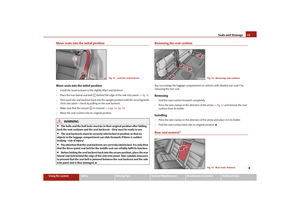 56
56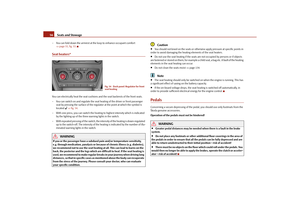 57
57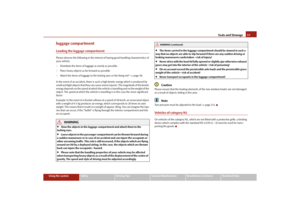 58
58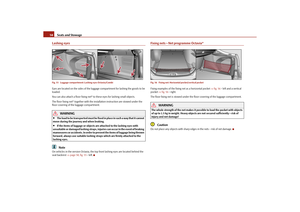 59
59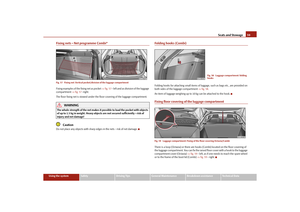 60
60 61
61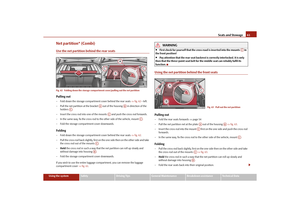 62
62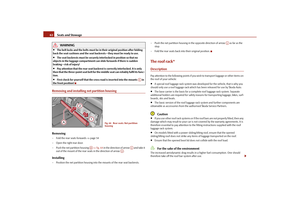 63
63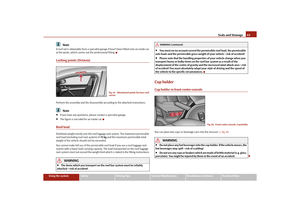 64
64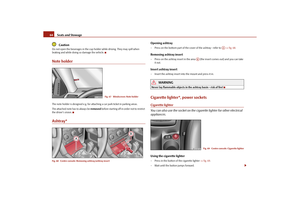 65
65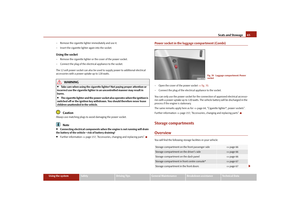 66
66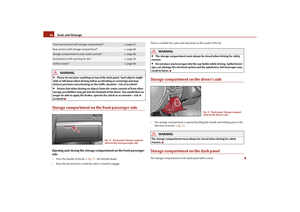 67
67 68
68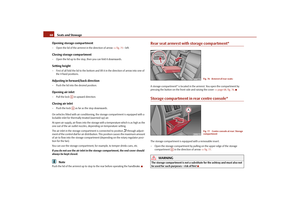 69
69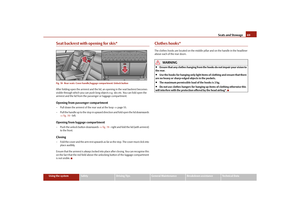 70
70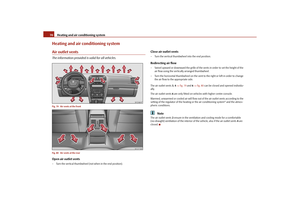 71
71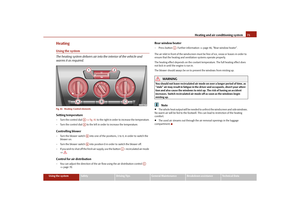 72
72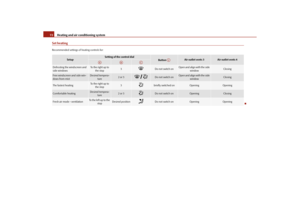 73
73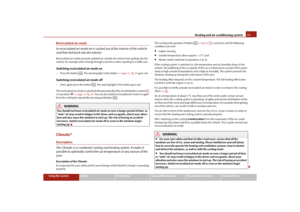 74
74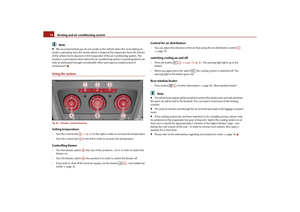 75
75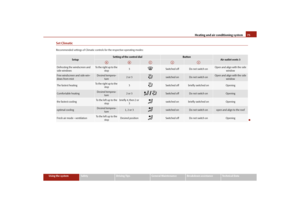 76
76 77
77 78
78 79
79 80
80 81
81 82
82 83
83 84
84 85
85 86
86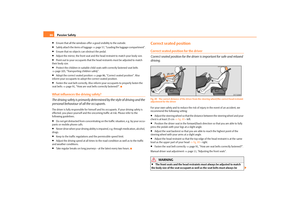 87
87 88
88 89
89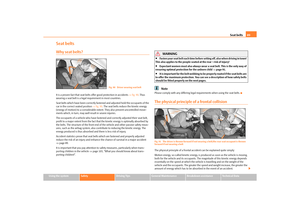 90
90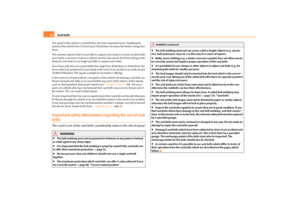 91
91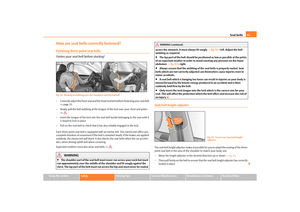 92
92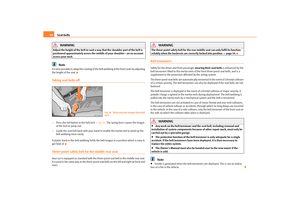 93
93 94
94 95
95 96
96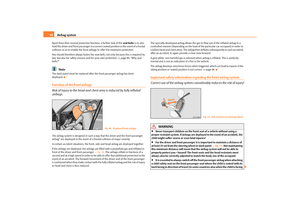 97
97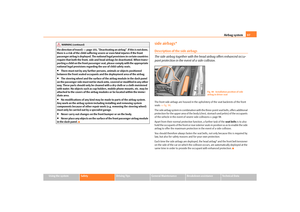 98
98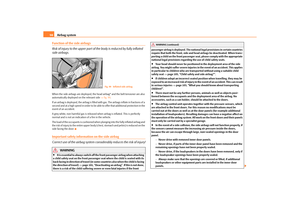 99
99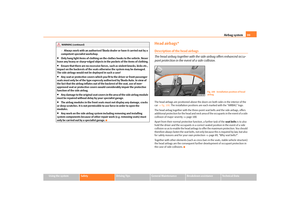 100
100 101
101 102
102 103
103 104
104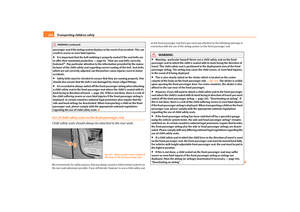 105
105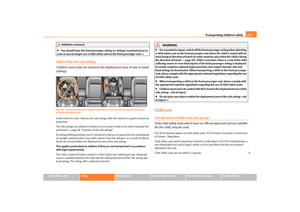 106
106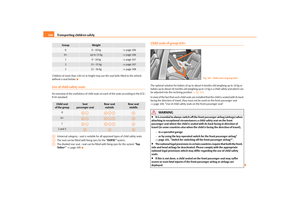 107
107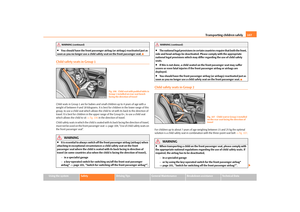 108
108 109
109 110
110 111
111 112
112 113
113 114
114 115
115 116
116 117
117 118
118 119
119 120
120 121
121 122
122 123
123 124
124 125
125 126
126 127
127 128
128 129
129 130
130 131
131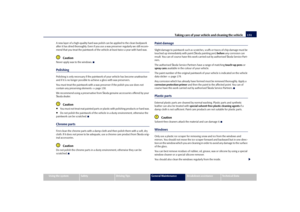 132
132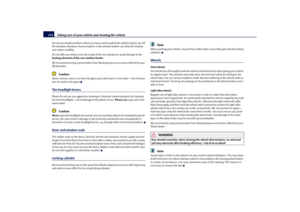 133
133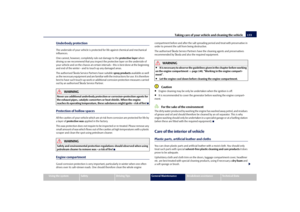 134
134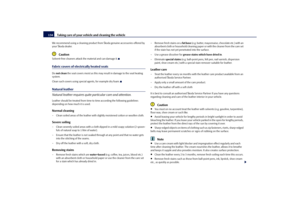 135
135 136
136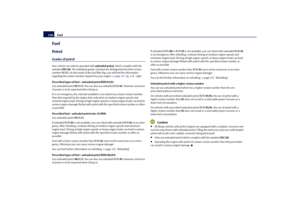 137
137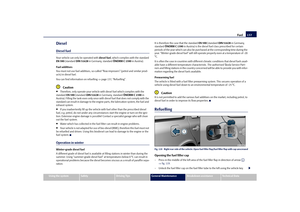 138
138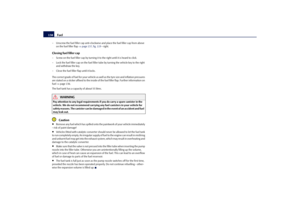 139
139 140
140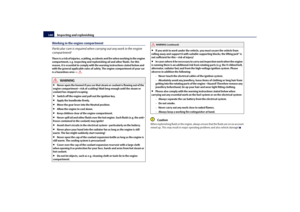 141
141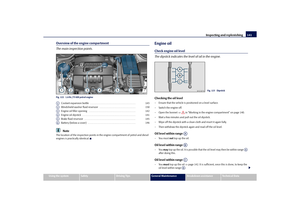 142
142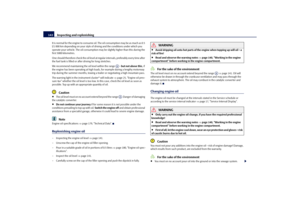 143
143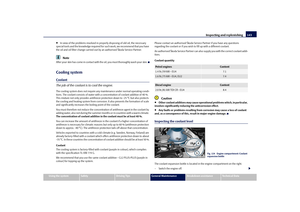 144
144 145
145 146
146 147
147 148
148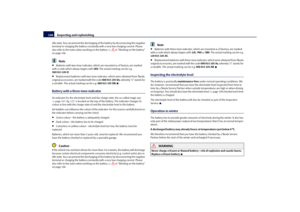 149
149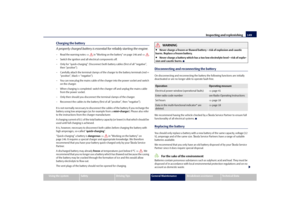 150
150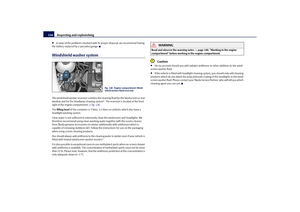 151
151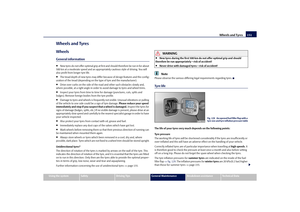 152
152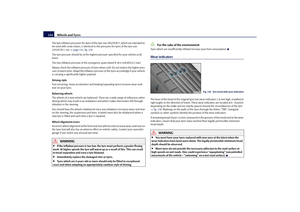 153
153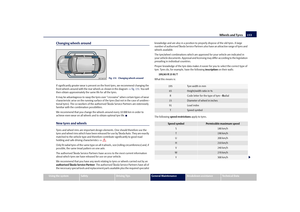 154
154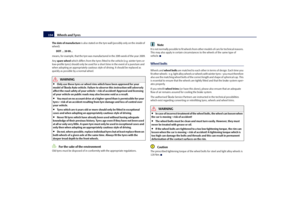 155
155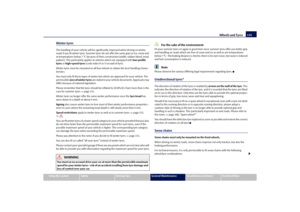 156
156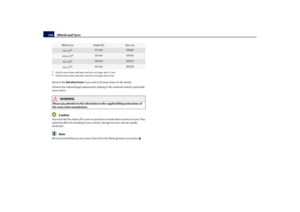 157
157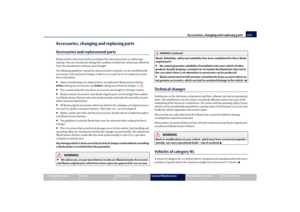 158
158 159
159 160
160 161
161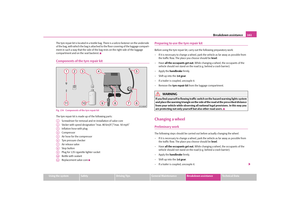 162
162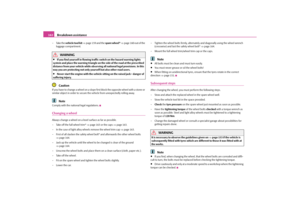 163
163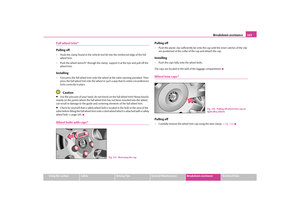 164
164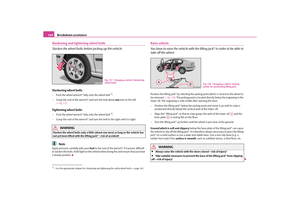 165
165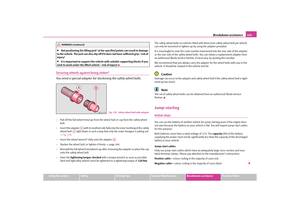 166
166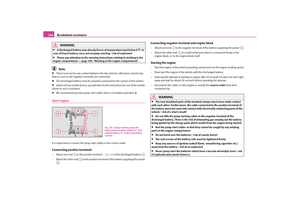 167
167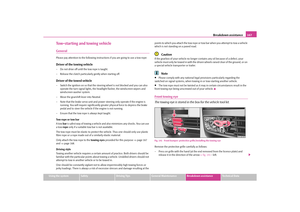 168
168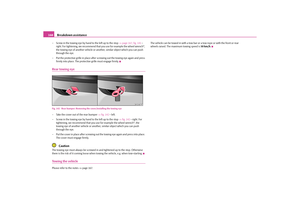 169
169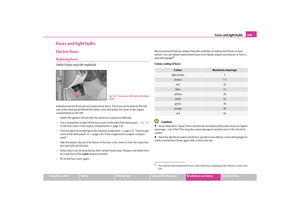 170
170 171
171 172
172 173
173 174
174 175
175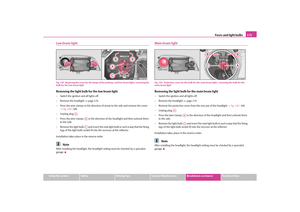 176
176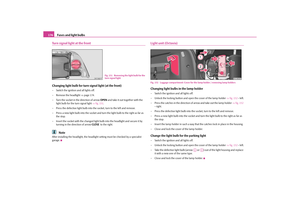 177
177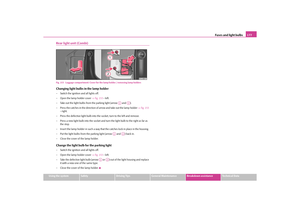 178
178 179
179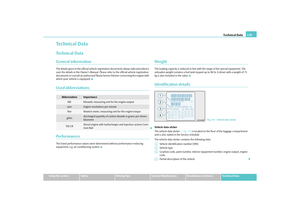 180
180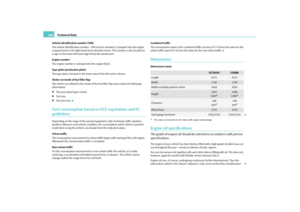 181
181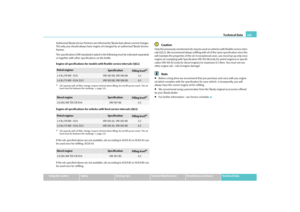 182
182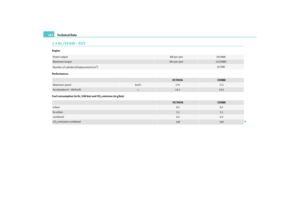 183
183 184
184 185
185 186
186 187
187 188
188 189
189 190
190 191
191 192
192 193
193 194
194 195
195 196
196 197
197 198
198