Page 185 of 548

BElapsed track timeCElapsed track time and track number
(graphical display)DSound settingsEMedium selectionFTrack searchGArtist (ID3 tags)HMP3 functions
CD/DVD/MP3 functions
Stop function
i This function is only available in audio
DVD mode.
XStopping playback: Select Audio Q
Media Q DVD-A Q ± (twice).XRestarting playback: Select Audio Q
Media Q DVD-A Q M .
Playback restarts at the beginning of the
DVD.
Pause function
In audio CD, audio DVD and MP3 mode
XPausing playback: Press button 8 on
the multifunction steering wheel briefly.XContinuing playback: Press button 8
on the multifunction steering wheel briefly
once more.
In audio DVD mode only
XPausing playback: Select Audio Q
Media Q DVD-A Q « .
M appears instead of «.XContinuing playback: Select Audio Q
Audio Q DVD-A Q M .
« appears instead of M.Selecting CD/DVD/MP3 media XSelect Audio Q Media .
The media list appears. The dot # indicates
the currently selected medium.XSelect a medium.
or
XEnter a media number with the telephone
keypad using buttons ´ - Å
( Y page 79).
Selecting a track
Selecting by skipping tracks
XSkipping forward or backward: Slide
X V Y or rotate cV d.
or
XPress button 9 or : on the
multifunction steering wheel 27
.
i The skip forward function takes you to the
next track. The skip backward function
takes you to the beginning of the current
track, provided it has been played for
longer that 8 seconds. When the track has
been played for less than 8 seconds, you
will skip to the track before the current one.
When you switch on the option Random
Tracks , the track is chosen at random.
Selecting a track using the telephone
keypad
XPress button à on the telephone
keypad ( Y page 79).XEnter track number using buttons ´ -
Å .
Fast forward/rewind
XSelect the main area.XSlide XV Y and hold until the desired track
part is reached.27 Function is only available if the Audio menu is selected in the instrument cluster.COMAND audio CD/audio DVD/MP3183Control systems221_AKB; 6; 20, en-USd2ugruen,Version: 2.11.8.12009-09-24T13:28:17+02:00 - Seite 183Z
Page 186 of 548

Track search
You can use the following criteria to search
for tracks:
RCurrent Track List
RFolder
RKeyword Search
RPlaylists
RArtists
RAlbums
RTracks
RGenres
RComposers
RYear
XPress W during playback while the main
area is selected.
or
XSelect Audio Q Search.
The list of search criteria appears.
XSelect a search criteria and press W.
The track list appears.
XSelect a track and press W.
Copying audio data to hard disk (audio
CD mode only)
You can copy audio data to the internal hard
disk while in audio CD mode using the REC
function.
XSelect Audio Q Media.XSelect an audio CD.XSelect REC.
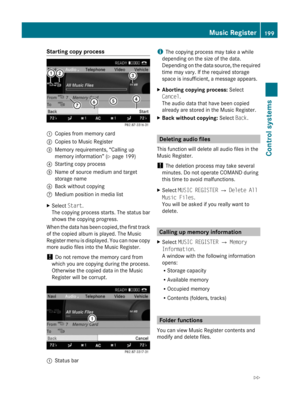
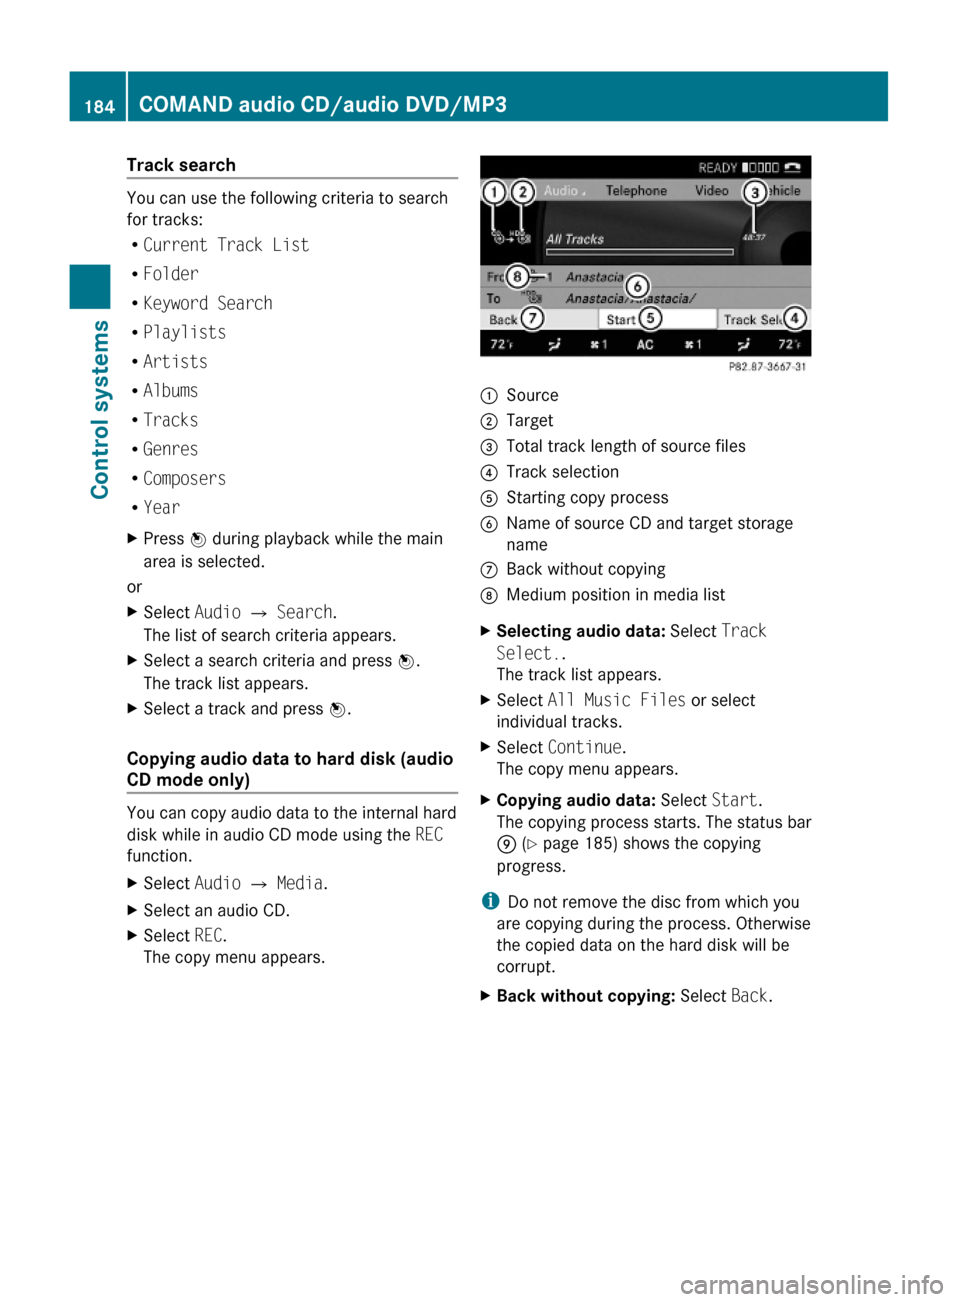
The copy menu appears.:Source;Target=Total track length of source files?Track selectionAStarting copy processBName of source CD and target storage
name
CBack without copyingDMedium position in media listXSelecting audio data: Select Track
Select..
The track list appears.
XSelect All Music Files or select
individual tracks.
XSelect Continue.
The copy menu appears.
XCopying audio data: Select Start.
The copying process starts. The status bar
E (Y page 185) shows the copying
progress.
iDo not remove the disc from which you
are copying during the process. Otherwise
the copied data on the hard disk will be
corrupt.
XBack without copying: Select Back.184COMAND audio CD/audio DVD/MP3Control systems
221_AKB; 6; 20, en-USd2ugruen,Version: 2.11.8.12009-09-24T13:28:17+02:00 - Seite 184
Page 187 of 548

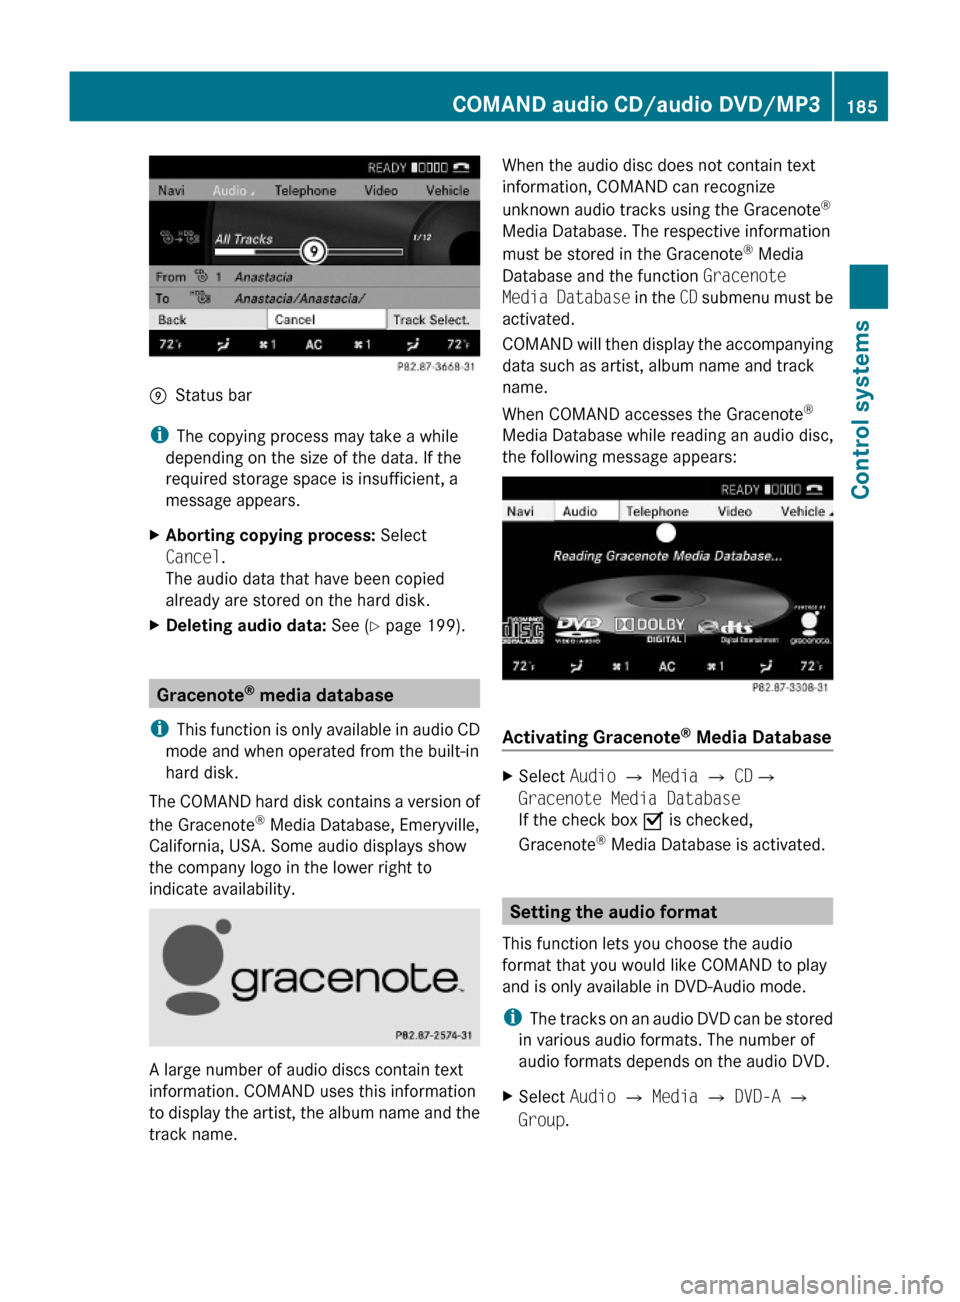
EStatus bar
iThe copying process may take a while
depending on the size of the data. If the
required storage space is insufficient, a
message appears.
XAborting copying process: Select
Cancel.
The audio data that have been copied
already are stored on the hard disk.
XDeleting audio data: See (Y page 199).
Gracenote® media database
iThis function is only available in audio CD
mode and when operated from the built-in
hard disk.
The COMAND hard disk contains a version of
the Gracenote® Media Database, Emeryville,
California, USA. Some audio displays show
the company logo in the lower right to
indicate availability.
A large number of audio discs contain text
information. COMAND uses this information
to display the artist, the album name and the
track name.
When the audio disc does not contain text
information, COMAND can recognize
unknown audio tracks using the Gracenote®
Media Database. The respective information
must be stored in the Gracenote® Media
Database and the function Gracenote
Media Database in the CD submenu must be
activated.
COMAND will then display the accompanying
data such as artist, album name and track
name.
When COMAND accesses the Gracenote®
Media Database while reading an audio disc,
the following message appears:
Activating Gracenote® Media Database
XSelect Audio £ Media £ CD£
Gracenote Media Database
If the check box Ç is checked,
Gracenote® Media Database is activated.
Setting the audio format
This function lets you choose the audio
format that you would like COMAND to play
and is only available in DVD-Audio mode.
iThe tracks on an audio DVD can be stored
in various audio formats. The number of
audio formats depends on the audio DVD.
XSelect Audio Q Media Q DVD-A Q
Group.
COMAND audio CD/audio DVD/MP3185Control systems221_AKB; 6; 20, en-USd2ugruen,Version: 2.11.8.12009-09-24T13:28:17+02:00 - Seite 185Z
Page 188 of 548

iThe Group menu item cannot be selected
if only one audio format is saved on the
DVD.
The list of available audio formats appears. A
dot # indicates the format currently
selected.XChanging setting: Slide ZV Æ or rotate
c V d.XExiting menu: Slide XV Y.
Playback options
The following options are available:
R Normal Track Sequence : Tracks are
played back in the order in which they are
stored on the disc, e.g. track 1, 2, 3, etc.
R Medium Mix : Tracks are played back in
random order, e.g. track 3, 8, 5, etc.
R Track List Mix (MP3 mode only): Tracks
of the current folder and its subfolders are
played back in random order.
XSelecting an option: Select Audio.XSelect CD, DVD-A or MP3 .
The option list appears. A dot # indicates
which option is switched on.XSelect an option and press W.
The option is switched on. For all options
except Normal Track Sequence , you will
see a corresponding indicator in the main
area.
i The Normal Track Sequence option is
automatically activated when you select a
different medium. If an option is activated,
it remains activated after COMAND is
switched on/off.
Audio AUX and video AUX
You can play back external audio or video
sources via the systems installed in your
vehicle.
The sockets for external audio and video
sources (AUX) are located
R in the glove box (COMAND)
R on the CD/DVD drive in the rear passenger
compartment
R on the head restraints
i For operation of the external audio and
video sources, refer to the operating
instructions of the respective device. You
may have to adjust the proper video
standard on the external audio and video
source to ensure proper replay.
Do not leave external devices in the vehicle.
Proper function of the device could be
impaired due to excessive temperatures,
for example when exposing to direct
sunlight or when the outside temperature
is extremely low. Mercedes-Benz does not
assume liability for damage to external
devices.GWarning!
Operating an external audio source while the
vehicle is in motion will distract you. You may
not notice changing road and/or traffic
conditions which may cause an accident.
Bear in mind that at a speed of just 30 mph
(approximately 50 km/h), your vehicle is
covering a distance of 44 feet (approximately
14 m) every second.
For your safety and the safety of others, pull
over to a safe location and stop before
operating an external audio source.
GWarning!
Due to the different volumes of the external
audio sources, system messages of the
vehicle may be much louder. You may need to
disable these system messages or adjust the
volume of these messages manually.
i The volume of external audio sources is
extremely variable. It is possible that a
device connected as an external audio
source will sound quieter or louder in the
186Audio AUX and video AUXControl systems
221_AKB; 6; 20, en-USd2ugruen,Version: 2.11.8.12009-09-24T13:28:17+02:00 - Seite 186
Page 189 of 548

vehicle or that the usual maximum volume
cannot be achieved. On certain devices the
volume can be set separately. In this case,
start at a moderate volume and increase it
slowly. In this way, you can determine
whether the system is capable of playback
without distortion, even at high volume.
XConnect external audio and video sources
as described in the following sections.
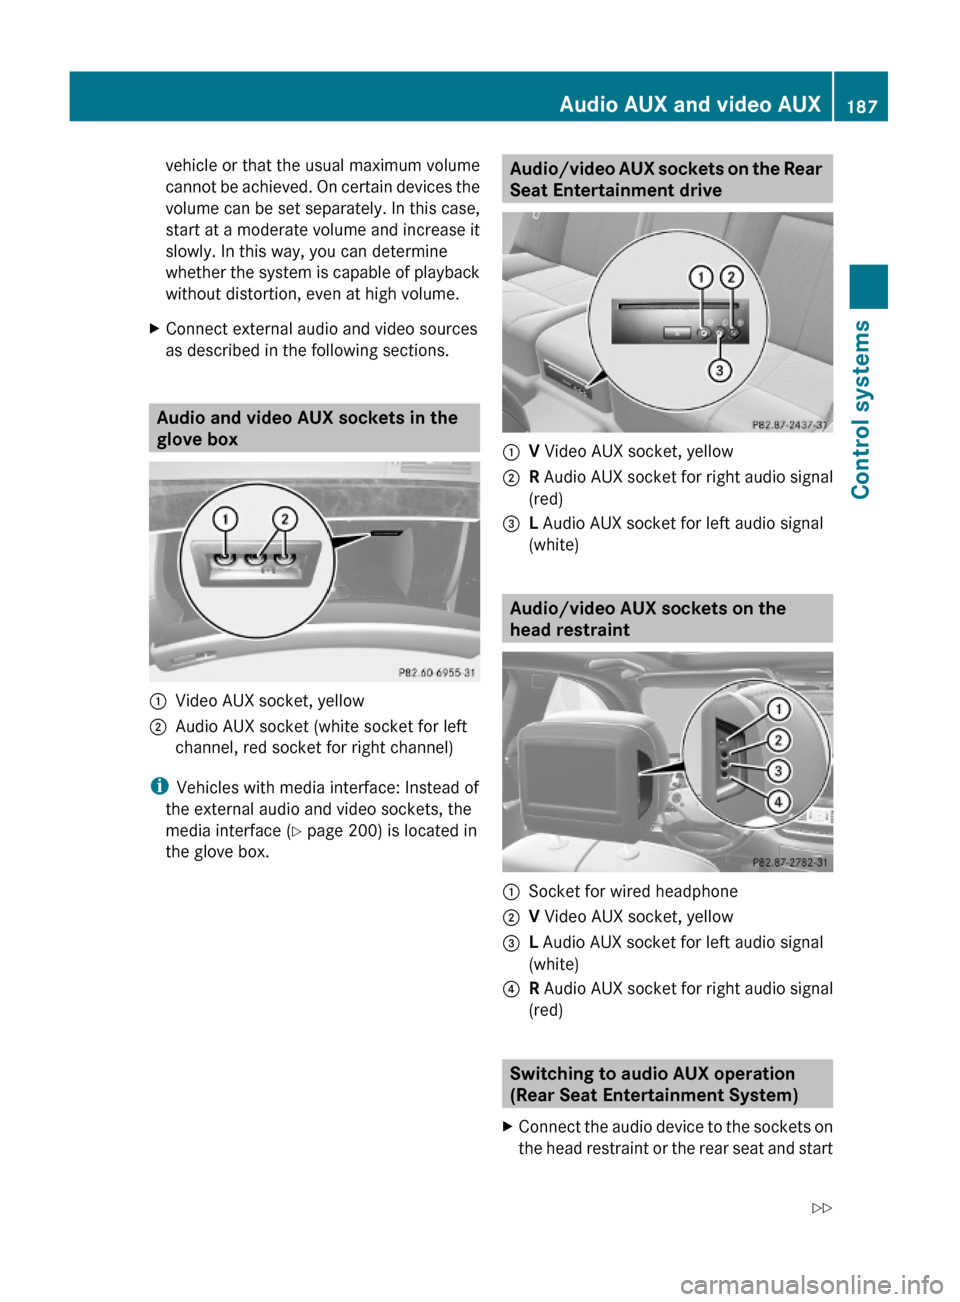
Audio and video AUX sockets in the
glove box
:Video AUX socket, yellow;Audio AUX socket (white socket for left
channel, red socket for right channel)
iVehicles with media interface: Instead of
the external audio and video sockets, the
media interface (Y page 200) is located in
the glove box.
Audio/video AUX sockets on the Rear
Seat Entertainment drive
:V Video AUX socket, yellow;R Audio AUX socket for right audio signal
(red)
=L Audio AUX socket for left audio signal
(white)
Audio/video AUX sockets on the
head restraint
:Socket for wired headphone;V Video AUX socket, yellow=L Audio AUX socket for left audio signal
(white)
?R Audio AUX socket for right audio signal
(red)
Switching to audio AUX operation
(Rear Seat Entertainment System)
XConnect the audio device to the sockets on
the head restraint or the rear seat and start
Audio AUX and video AUX187Control systems221_AKB; 6; 20, en-USd2ugruen,Version: 2.11.8.12009-09-24T13:28:17+02:00 - Seite 187Z
Page 190 of 548

playback. Refer to operating instructions of
the external device.XSelecting main function: Select Aux.XPress button ! on the remote control.XSelect Source .XSelect Display Aux for playback via the
connections in the head restraint.
or
XSelect Disk Drive Aux for playback via
the connections in the rear seat.
Switching to audio AUX operation
(COMAND)
XSelect Audio Q AUX .
The Audio AUX menu appears. You will hear
the medium in the external audio source
provided it is connected and set to
playback.
You can adjust the following during audio AUX
operation:
R Volume ( Y page 88)
R Balance and fader ( Y page 88)
R Treble and Bass (Y page 88)
R 3D Sound (Y page 89)
Switching to video AUX operation
(Rear Seat Entertainment System)
XConnect the video device to the sockets on
the head restraint or the rear seat and start
playback. Refer to operating instructions of
the external device.XSelecting main function: Select Aux.XPress button ! on the remote control.XSelect Source .XSelect Display Aux for playback via the
connections in the head restraint.
or
XSelect Disk Drive Aux for playback via
the connections in the rear seat.XSwitching from full screen to menu
system: Press button ! on the remote
control.XScreen settings: Select Display Aux .
A list appears.XProceed as described in the section
“Screen settings” ( Y page 194).
Switching to video AUX operation
(COMAND)
XSelect Video Q AUX .
The video AUX menu appears. You will hear
and see the medium in the external audio
source provided it is connected and set to
playback.
i For operation of the external video
source, refer to the operating instructions
of the respective device.
You can adjust the following during video AUX
operation:
R Brightness , Contrast and Color
( Y page 194)
R Picture format ( Y page 194)
R Volume ( Y page 88)
R Balance and fader ( Y page 88)
R Treble and Bass (Y page 88)
R 3D Sound (Y page 89)
188Audio AUX and video AUXControl systems
221_AKB; 6; 20, en-USd2ugruen,Version: 2.11.8.12009-09-24T13:28:17+02:00 - Seite 188
Page 191 of 548

Rear Seat Entertainment SystemGObserve Safety notes, see page 76.GWarning!
The driver should not wear a Rear Seat
Entertainment headphone while operating the
vehicle under any circumstances. The use of
a headphone while driving the vehicle could
drastically impair the ability to react to audible
traffic conditions (e.g. emergency sirens from
police/fire/ambulance, another car’s horn,
etc.).
GWarning!
When not in use, headphones or external
video sources should be stored in a safe
location (e.g. one of the vehicle’s storage
compartments) so that they are not loose
within the passenger compartment during
braking, vehicle maneuvers or a traffic
accident. Objects moving within the
passenger compartment could cause serious
personal injury to vehicle occupants.
GWarning!
Due to a potential choking hazard, wired
headphone usage by children should only
occur with adult supervision.
You can operate the Rear Seat Entertainment
System via the remote controls ( Y page 81)
that come with the vehicle.
The playback of audio and video sources with
the Rear Seat Entertainment System is
identical to playback with the COMAND to a
large extent.
The COMAND and the Rear Seat
Entertainment System can be operated
simultaneously almost independent of each
other. However, some menus may cause
conflicts when the systems are used by
multiple users. Conflicts can occur between
the rear screens as well as COMAND and the
Rear Seat Entertainment System.
Remote controls for Rear Seat
Entertainment System
The Rear Seat Entertainment System
contains two remote controls for the rear
passenger compartment.
For information on using the remote controls,
see ( Y page 81).
Headphones for Rear Seat
Entertainment System
The Rear Seat Entertainment System
contains two headphones for the rear
passenger compartment.
For information on using the headphones, see
( Y page 82).
Related topics
R Inserting/ejecting CDs and DVDs
( Y page 180)
R Connecting and playing back external
devices ( Y page 186)
R Remote control ( Y page 81)
R Playing back audio CDs/audio DVDs
( Y page 176)
R Playing back video CDs/audio DVDs
( Y page 191)
CD/DVD drive
GObserve Safety notes, see page 176.
When both screens are used with the CD/
DVD drive, selecting certain menus or
changing certain settings on one screen will
also be applied to the other screen.
The following functions will be applied to both
screens:
R Changing Playback options
R Selecting track
R Using Play, Pause, and Stop
Rear Seat Entertainment System189Control systems221_AKB; 6; 20, en-USd2ugruen,Version: 2.11.8.12009-09-24T13:28:17+02:00 - Seite 189Z
Page 192 of 548

RForward and Rewind as well as Skipping
tracks
RSelecting the DVD menu and moving within
that menu
RChanging language, subtitles and camera
angle
RCalling up interactive DVD contents
The following functions will be applied to one
screen only:
RChanging audio, video and screen settings
RSwitching between full screen, menu
system and control menu
Switching between main functions
By selecting the main functions you set the
playback options of the various audio and
video sources.
Main functionDiscPlayback with rear
CD/DVD drive
COMANDPlayback with
COMAND System
AuxPlayback with an
external device
connected in the
rear
SystemMenu for basic
settings
When exiting a main function, the settings are
saved. When calling up again the function
later the following is possible:
RThe main function is already running on
both screens.
RThe main function does not run on the other
screen.
In the first case, the main function appears
the way it is already displayed on the other
screen.
In the second case, the setting at which you
have exited the main function the last time
appears.
Inserting/ejecting CDs and DVDs
Loading or ejecting a disc is only displayed on
the screen on which the main function Disc
is selected. Storage of the current settings for
both screens are reset to the original settings.
Simultaneous usage of COMAND and
the Rear Seat Entertainment System
Adopting the audio signal from Rear
Seat Entertainment System for front
passenger
You can transmit the audio signal of the CD/
DVD drive of the Rear Seat Entertainment
System to the headphone of the front
passenger. The volume is adjusted on the
headphone. The audio signal is transmitted to
the COMAND when the main function Disc is
selected on either rear screen. When the
main function Disc is not selected on at least
one rear screen, the audio signal is not
transmitted to the COMAND.
XSelect Audio Q Rear in the COMAND.
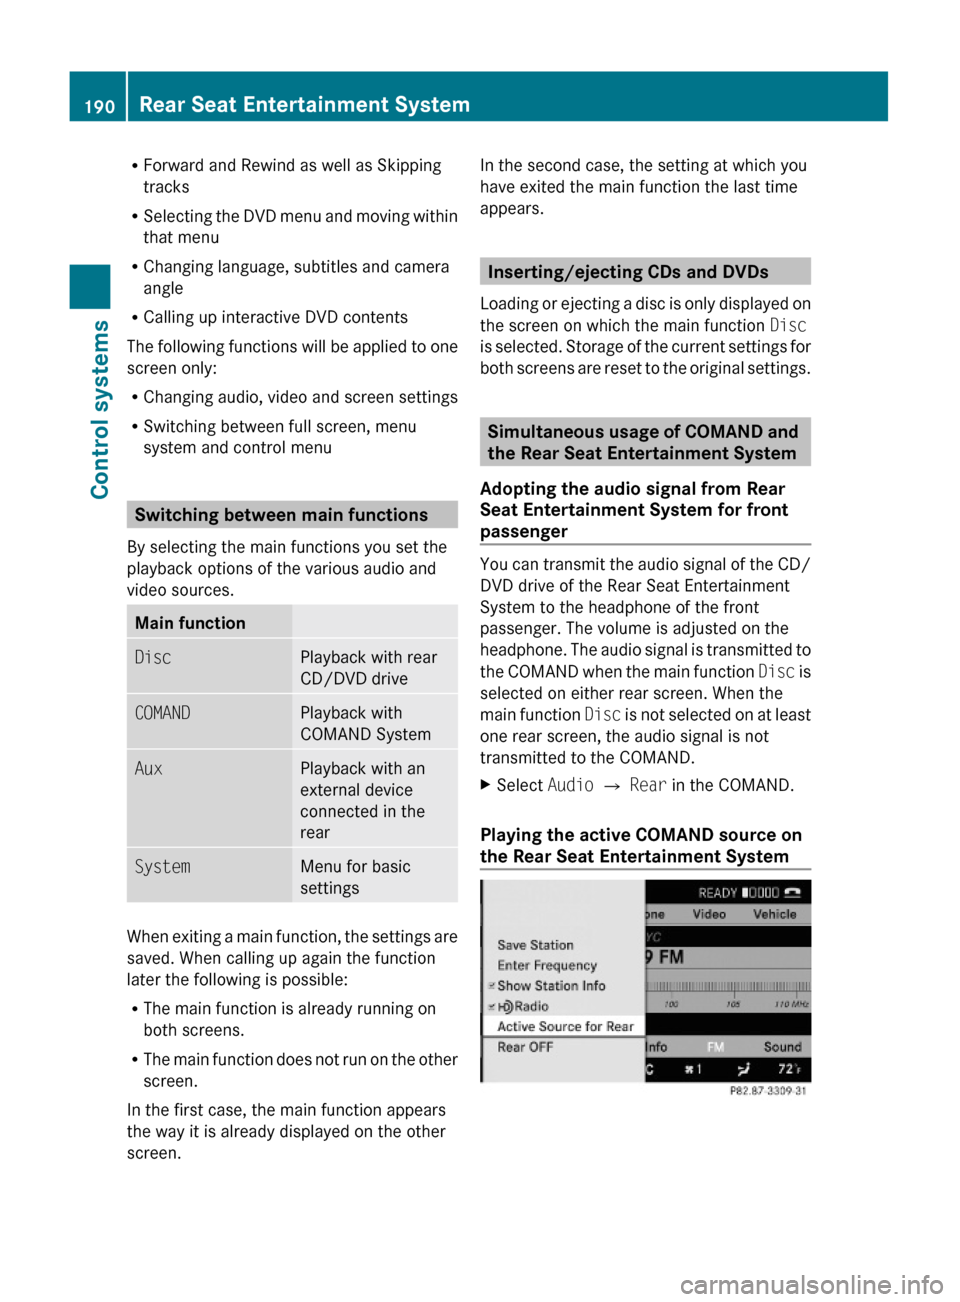
Playing the active COMAND source on
the Rear Seat Entertainment System
190Rear Seat Entertainment SystemControl systems
221_AKB; 6; 20, en-USd2ugruen,Version: 2.11.8.12009-09-24T13:28:17+02:00 - Seite 190