2010 MERCEDES-BENZ R320 lock
[x] Cancel search: lockPage 116 of 364
Parking
G
Warning!
Do not park this vehicle in areas where
combustible materials such as grass, hay or
leaves can come into contact with the hot
exhaust system. These materials could be
ignited and cause a vehicle fire.
Vehicle movement may result in serious
personal injury or damage to the vehicle or
vehicle drivetrain. Therefore, always do the
following before turning off the engine and
leaving the vehicle:
R Keep right foot on the brake pedal.
R Engage the parking brake.
R Shift the automatic transmission into park
position P.
R Slowly release the brake pedal.
R When parked on an incline, always turn the
front wheels towards the road curb.
R Turn the SmartKey in the starter switch to
position 0 and remove the SmartKey from
the starter switch, or press the KEYLESS-
GO start/stop button.
R Take the SmartKey with you and lock the
vehicle when leaving.
Parking brake G
Warning!
Engaging the parking brake while the vehicle
is in motion can cause the rear wheels to lock
up. You could lose control of the vehicle and
cause an accident. In addition, the vehicle’s
brake lights do not light up when the parking
brake is engaged. G
Warning!
When leaving the vehicle, always remove the
SmartKey from the starter switch, take it with
you, and lock the vehicle. Do not leave
children unattended in the vehicle, or with
access to an unlocked vehicle. Children could
release the parking brake and/or shift the automatic transmission out of park position
P, either of which could result in an accident
and/or serious personal injury.
X
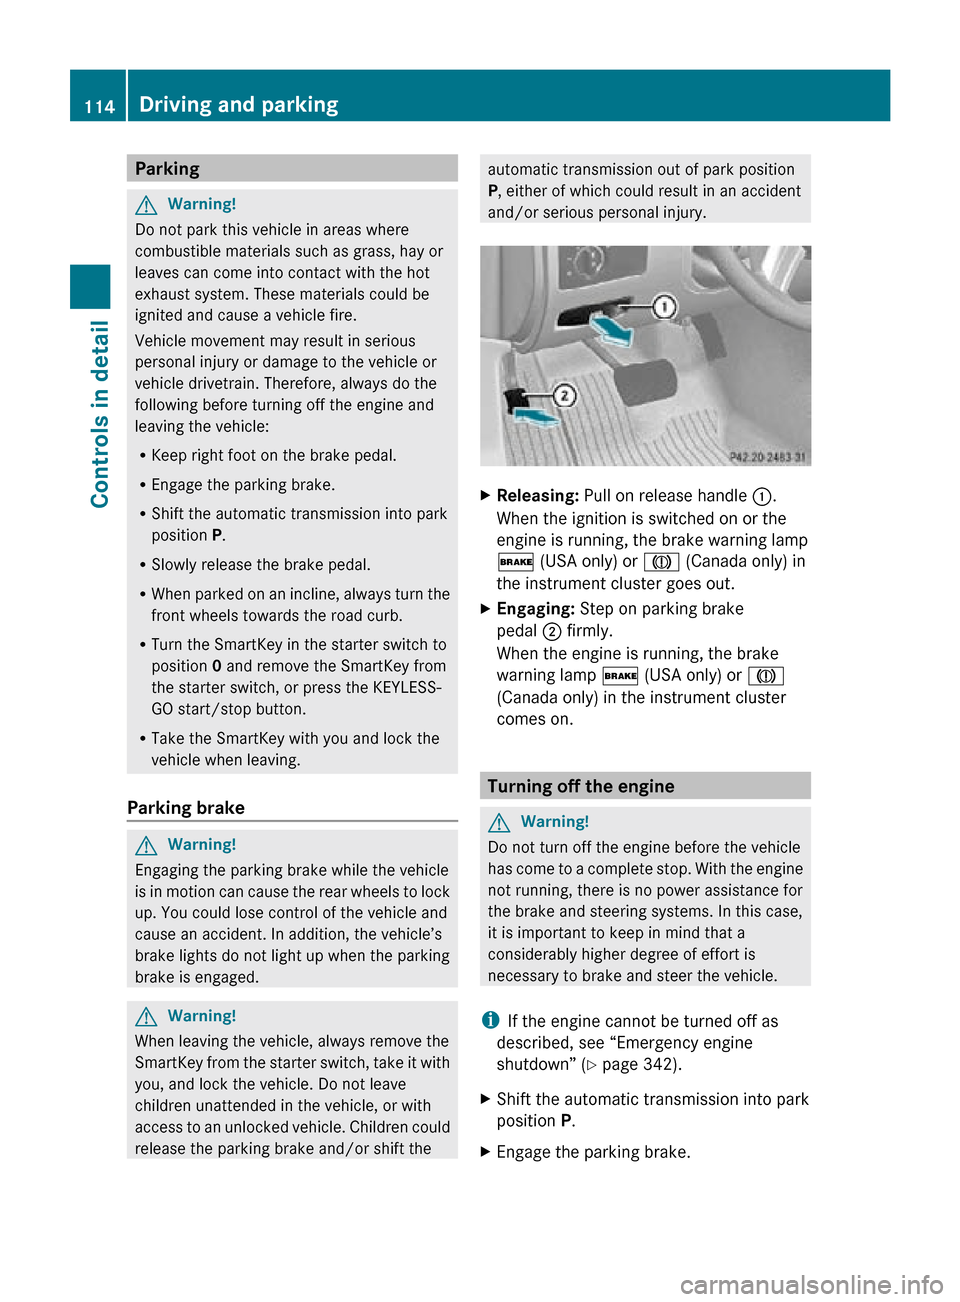
Releasing: Pull on release handle :.
When the ignition is switched on or the
engine is running, the brake warning lamp
$ (USA only) or J (Canada only) in
the instrument cluster goes out.
X Engaging: Step on parking brake
pedal ; firmly.
When the engine is running, the brake
warning lamp $ (USA only) or J
(Canada only) in the instrument cluster
comes on. Turning off the engine
G
Warning!
Do not turn off the engine before the vehicle
has come to a complete stop. With the engine
not running, there is no power assistance for
the brake and steering systems. In this case,
it is important to keep in mind that a
considerably higher degree of effort is
necessary to brake and steer the vehicle.
i If the engine cannot be turned off as
described, see “Emergency engine
shutdown” ( Y page 342).
X Shift the automatic transmission into park
position P.
X Engage the parking brake. 114
Driving and parkingControls in detail
251_AKB; 4; 52, en-US
d2ureepe,
Version: 2.11.8.1 2009-03-23T09:22:52+01:00 - Seite 114
Page 120 of 364
Shifting into reverse gear R
X
With the vehicle at a standstill, depress the
brake pedal.
X Move the gear selector lever up past the
resistance point.
Shifting into drive position D X
With the vehicle at a standstill, depress the
brake pedal.
X Move the gear selector lever down past the
resistance point. Shifting procedure
The automatic transmission selects individual
gears automatically, depending on
R the selected gear range ( Y page 119)
R the selected program mode C/S
(Y page 120)
R the position of the accelerator pedal
R the vehicle speed
With drive position D selected, you can
influence transmission shifting by limiting or
extending the gear range. Transmission positions
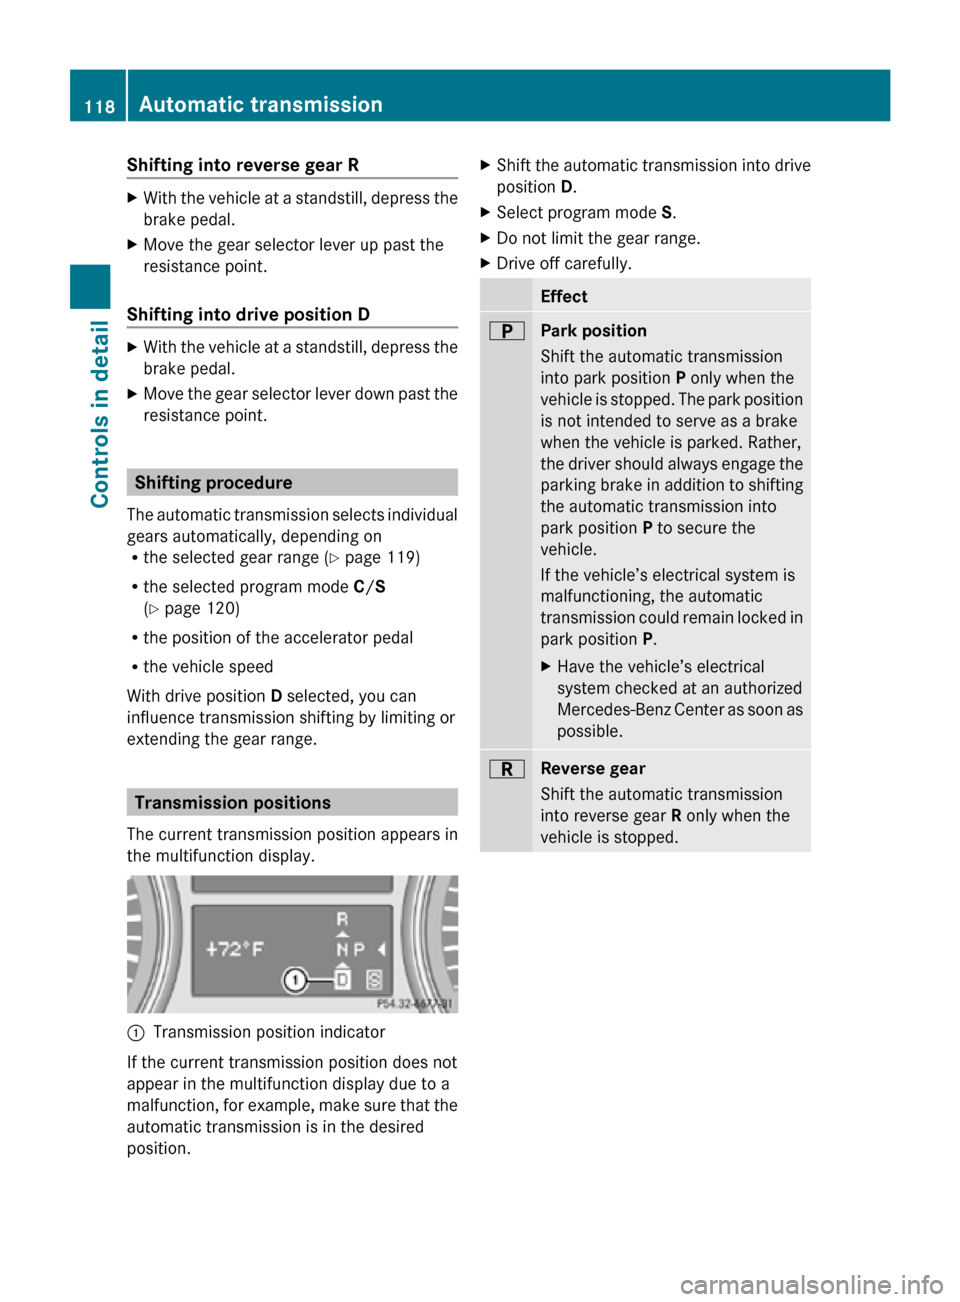
The current transmission position appears in
the multifunction display. :
Transmission position indicator
If the current transmission position does not
appear in the multifunction display due to a
malfunction, for example, make sure that the
automatic transmission is in the desired
position. X
Shift the automatic transmission into drive
position D.
X Select program mode S.
X Do not limit the gear range.
X Drive off carefully. Effect
B
Park position
Shift the automatic transmission
into park position P only when the
vehicle is stopped. The park position
is not intended to serve as a brake
when the vehicle is parked. Rather,
the driver should always engage the
parking brake in addition to shifting
the automatic transmission into
park position P to secure the
vehicle.
If the vehicle’s electrical system is
malfunctioning, the automatic
transmission could remain locked in
park position P.
X
Have the vehicle’s electrical
system checked at an authorized
Mercedes-Benz Center as soon as
possible. C
Reverse gear
Shift the automatic transmission
into reverse gear R only when the
vehicle is stopped.118
Automatic transmissionControls in detail
251_AKB; 4; 52, en-US
d2ureepe,
Version: 2.11.8.1 2009-03-23T09:22:52+01:00 - Seite 118
Page 134 of 364
R
Selecting language ( Y page 133)
R Selecting display (digital speedometer or
outside temperature) for status indicator
(Y page 133)
Time/Date submenu
R Setting the time ( Y page 133)
R Setting the date (Y page 134)
Lighting submenu
R Switching daytime running lamp mode on
or off (USA only) (Y page 134)
R Switching locator lighting on or off
(Y page 135)
R Switching night security illumination
(Headlamps delayed shut-off feature) on or
off (Y page 135)
R Switching interior lighting delayed shut-off
on or off ( Y page 136)
Vehicle submenu
R Switching automatic central locking on or
off (Y page 137)
Comfort submenu
R Activating easy-entry/exit feature
(Y page 137)
R Activating/deactivating seat belt
adjustment feature (Y page 138)
R Switching fold-in function for exterior rear
view mirrors on or off (Y page 138)
Instrument cluster submenu Access the
Instrument Cluster submenu
via the Settings menu. Use the
Instrument Cluster submenu to change
the instrument cluster display settings.
The following functions are available:
R Selecting speedometer/odometer display
mode ( Y page 132) (Canada only)
R Selecting digital speedometer display
mode ( Y page 132) R
Selecting language ( Y page 133)
R Selecting display (digital speedometer or
outside temperature) for status indicator
(Y page 133)
Selecting speedometer/odometer
display mode (Canada only)
X Press button V or U repeatedly until
the Settings menu appears in the
multifunction display.
X Press button &.
X Move the selection marker with button
W or X to the Instrument
Cluster submenu.
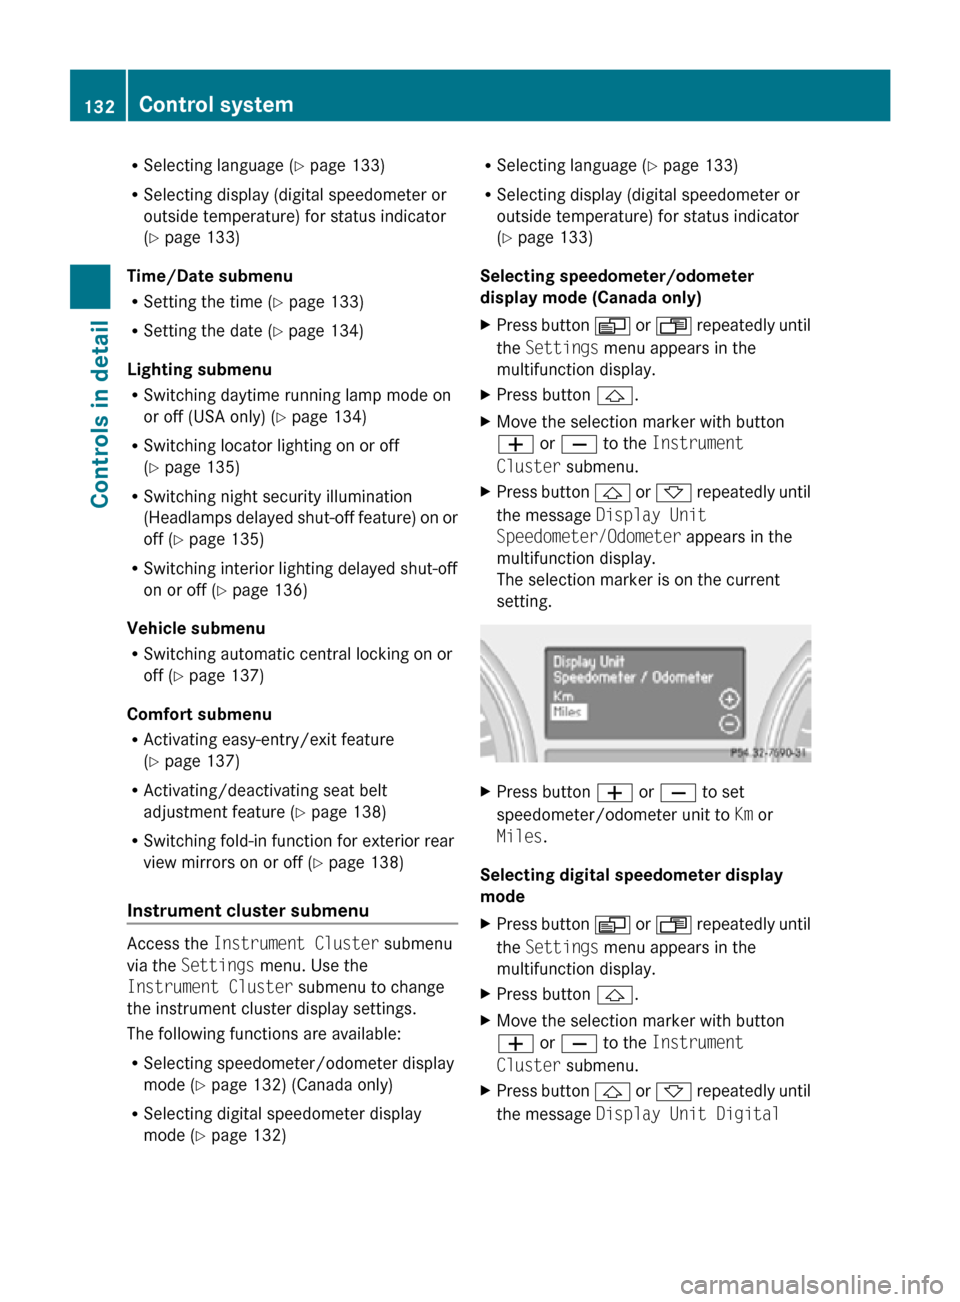
X Press button & or * repeatedly until
the message Display Unit
Speedometer/Odometer appears in the
multifunction display.
The selection marker is on the current
setting. X
Press button W or X to set
speedometer/odometer unit to Km or
Miles.
Selecting digital speedometer display
mode
X Press button V or U repeatedly until
the Settings menu appears in the
multifunction display.
X Press button &.
X Move the selection marker with button
W or X to the Instrument
Cluster submenu.
X Press button & or * repeatedly until
the message Display Unit Digital 132
Control systemControls in detail
251_AKB; 4; 52, en-US
d2ureepe,
Version: 2.11.8.1 2009-03-23T09:22:52+01:00 - Seite 132
Page 136 of 364

X
Press button V or U repeatedly until
the Settings menu appears in the
multifunction display.
X Press button &.
X Move the selection marker with button
W or X to the Time/Date submenu.
X Press button & or * repeatedly until
the message Clock Set Hour or Clock
Set Minute(s) appears in the
multifunction display.
The selection marker is on the current
setting. Example illustration for setting the hour
X
Press button W or X to set the hours
or minute(s).
Setting the date
This function is not available if your vehicle is
equipped with the COMAND system and
navigation module.
X Press button V or U repeatedly until
the Settings menu appears in the
multifunction display.
X Press button &.
X Move the selection marker with button
W or X to the Time/Date submenu.
X Press button & or * repeatedly until
the message Date Set Month , Date Set
Day, or Date Set Year appears in the
multifunction display.
The selection marker is on the current
setting. Example illustration for setting the month
X
Press button W or X to set the
month, day, or year.
Lighting submenu Access the
Lighting submenu via the
Settings menu. Use the Lighting submenu
to change the lamp and lighting settings on
your vehicle.
The following functions are available:
R Switching daytime running lamp mode on
or off (USA only) (Y page 134)
R Switching locator lighting on or off
(Y page 135)
R Switching night security illumination on or
off (Y page 135)
R Switching interior lighting delayed shut-off
on or off ( Y page 136)
Switching daytime running lamp mode on
or off (USA only)
X Press button V or U repeatedly until
the Settings menu appears in the
multifunction display.
X Press button &.
X Move the selection marker with button
W or X to the Lighting submenu.
X Press button & or * repeatedly until
the message Daytime Running Lamps
appears in the multifunction display.
The selection marker is on the current
setting. 134
Control systemControls in detail
251_AKB; 4; 52, en-US
d2ureepe,
Version: 2.11.8.1 2009-03-23T09:22:52+01:00 - Seite 134
Page 137 of 364
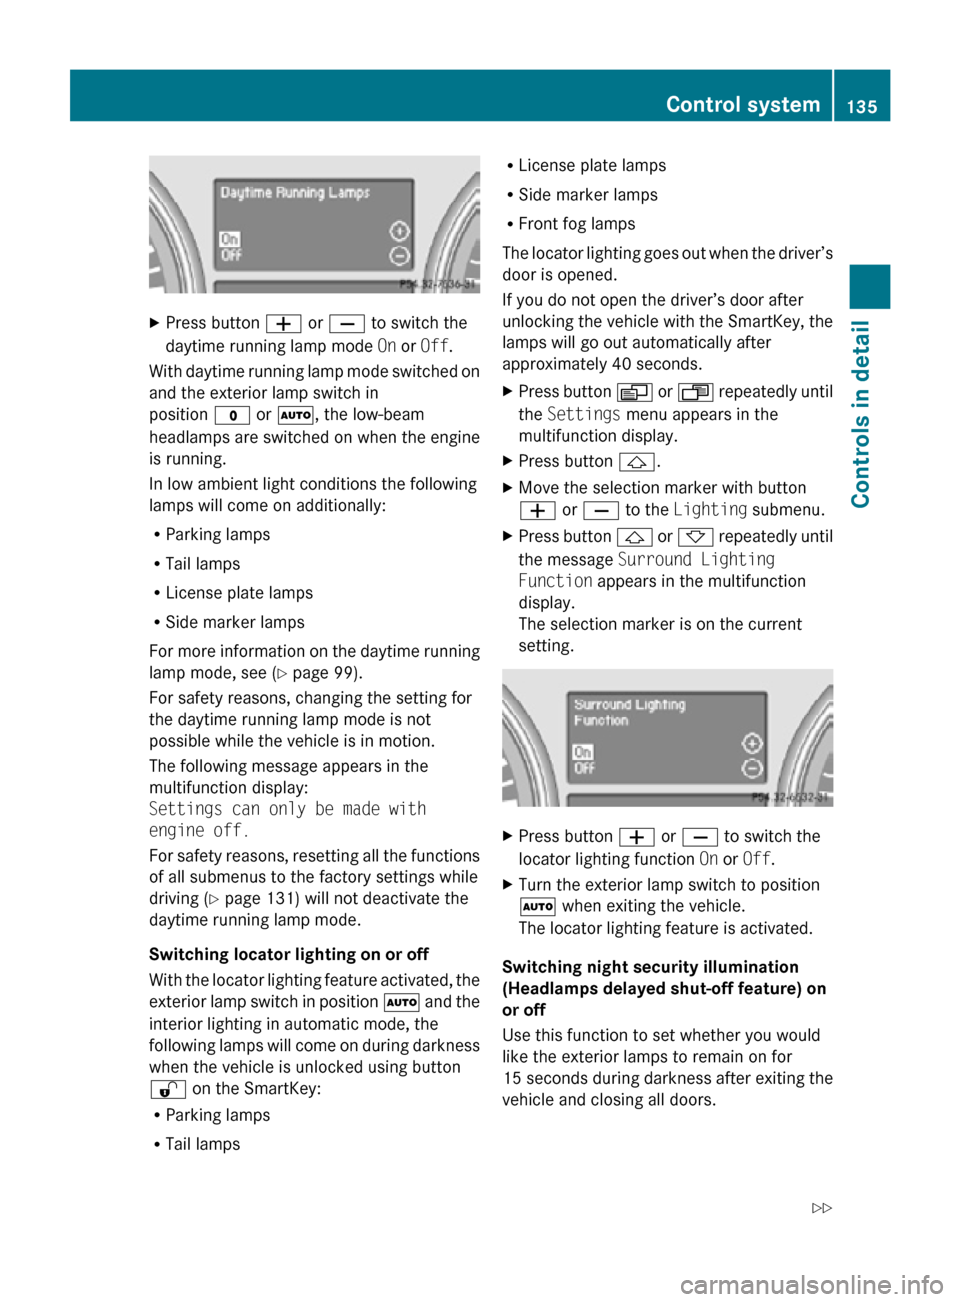
X
Press button W or X to switch the
daytime running lamp mode On or Off.
With daytime running lamp mode switched on
and the exterior lamp switch in
position $ or Ã, the low-beam
headlamps are switched on when the engine
is running.
In low ambient light conditions the following
lamps will come on additionally:
R Parking lamps
R Tail lamps
R License plate lamps
R Side marker lamps
For more information on the daytime running
lamp mode, see ( Y page 99).
For safety reasons, changing the setting for
the daytime running lamp mode is not
possible while the vehicle is in motion.
The following message appears in the
multifunction display:
Settings can only be made with
engine off.
For safety reasons, resetting all the functions
of all submenus to the factory settings while
driving ( Y page 131) will not deactivate the
daytime running lamp mode.
Switching locator lighting on or off
With the locator lighting feature activated, the
exterior lamp switch in position à and the
interior lighting in automatic mode, the
following lamps will come on during darkness
when the vehicle is unlocked using button
% on the SmartKey:
R Parking lamps
R Tail lamps R
License plate lamps
R Side marker lamps
R Front fog lamps
The locator lighting goes out when the driver’s
door is opened.
If you do not open the driver’s door after
unlocking the vehicle with the SmartKey, the
lamps will go out automatically after
approximately 40 seconds.
X Press button V or U repeatedly until
the Settings menu appears in the
multifunction display.
X Press button &.
X Move the selection marker with button
W or X to the Lighting submenu.
X Press button & or * repeatedly until
the message Surround Lighting
Function appears in the multifunction
display.
The selection marker is on the current
setting. X
Press button W or X to switch the
locator lighting function On or Off.
X Turn the exterior lamp switch to position
à when exiting the vehicle.
The locator lighting feature is activated.
Switching night security illumination
(Headlamps delayed shut-off feature) on
or off
Use this function to set whether you would
like the exterior lamps to remain on for
15 seconds during darkness after exiting the
vehicle and closing all doors. Control system
135Controls in detail
251_AKB; 4; 52, en-US
d2ureepe, Version: 2.11.8.1 2009-03-23T09:22:52+01:00 - Seite 135 Z
Page 139 of 364
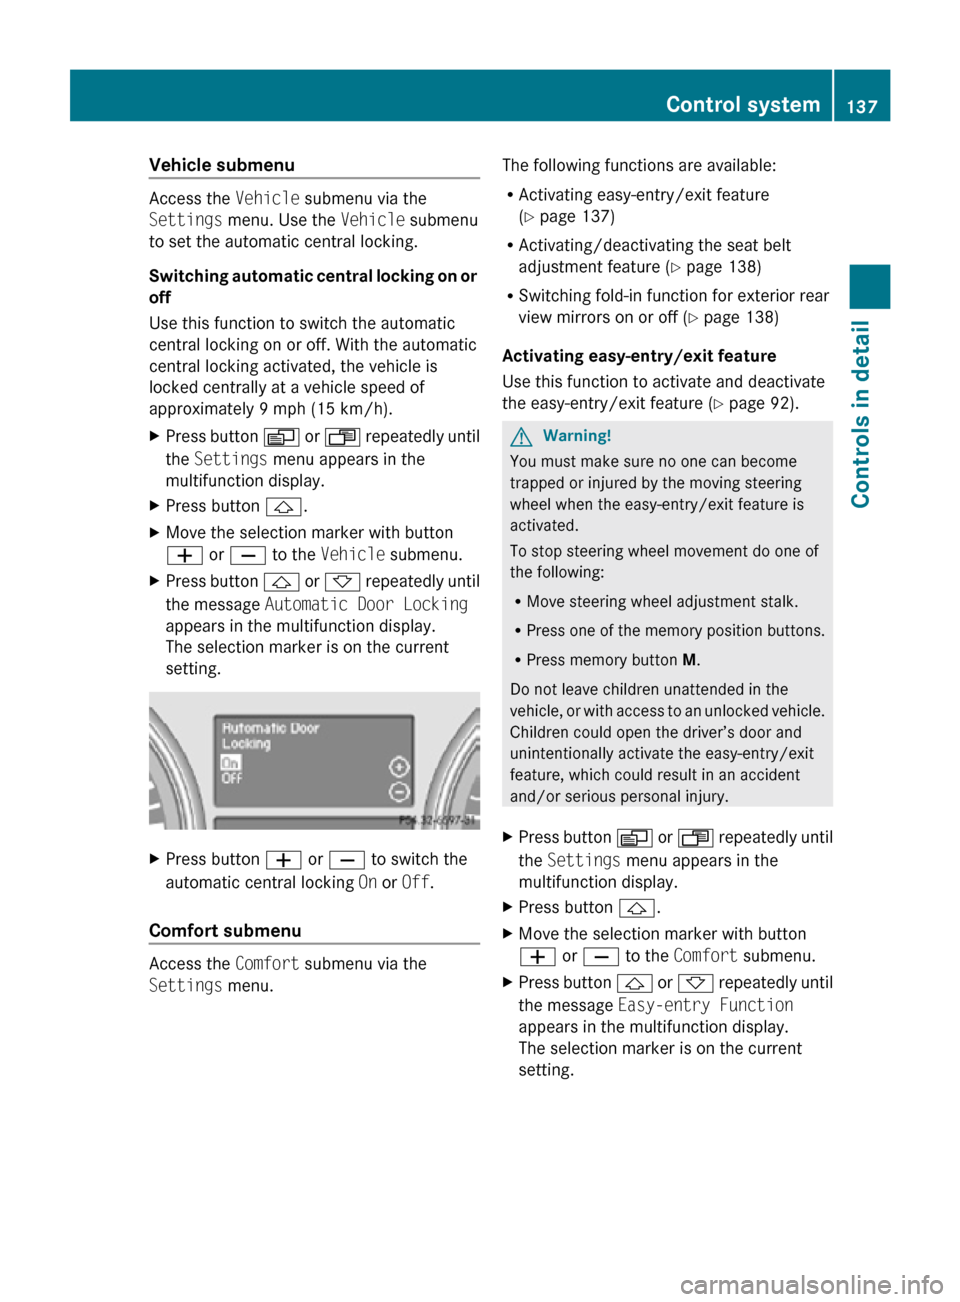
Vehicle submenu
Access the
Vehicle submenu via the
Settings menu. Use the Vehicle submenu
to set the automatic central locking.
Switching automatic central locking on or
off
Use this function to switch the automatic
central locking on or off. With the automatic
central locking activated, the vehicle is
locked centrally at a vehicle speed of
approximately 9 mph (15 km/h).
X Press button V or U repeatedly until
the Settings menu appears in the
multifunction display.
X Press button &.
X Move the selection marker with button
W or X to the Vehicle submenu.
X Press button & or * repeatedly until
the message Automatic Door Locking
appears in the multifunction display.
The selection marker is on the current
setting. X
Press button W or X to switch the
automatic central locking On or Off.
Comfort submenu Access the
Comfort submenu via the
Settings menu. The following functions are available:
R
Activating easy-entry/exit feature
(Y page 137)
R Activating/deactivating the seat belt
adjustment feature (Y page 138)
R Switching fold-in function for exterior rear
view mirrors on or off (Y page 138)
Activating easy-entry/exit feature
Use this function to activate and deactivate
the easy-entry/exit feature (Y page 92). G
Warning!
You must make sure no one can become
trapped or injured by the moving steering
wheel when the easy-entry/exit feature is
activated.
To stop steering wheel movement do one of
the following:
R Move steering wheel adjustment stalk.
R Press one of the memory position buttons.
R Press memory button M.
Do not leave children unattended in the
vehicle, or with access to an unlocked vehicle.
Children could open the driver’s door and
unintentionally activate the easy-entry/exit
feature, which could result in an accident
and/or serious personal injury.
X Press button V or U repeatedly until
the Settings menu appears in the
multifunction display.
X Press button &.
X Move the selection marker with button
W or X to the Comfort submenu.
X Press button & or * repeatedly until
the message Easy-entry Function
appears in the multifunction display.
The selection marker is on the current
setting. Control system
137Controls in detail
251_AKB; 4; 52, en-US
d2ureepe, Version: 2.11.8.1 2009-03-23T09:22:52+01:00 - Seite 137 Z
Page 140 of 364
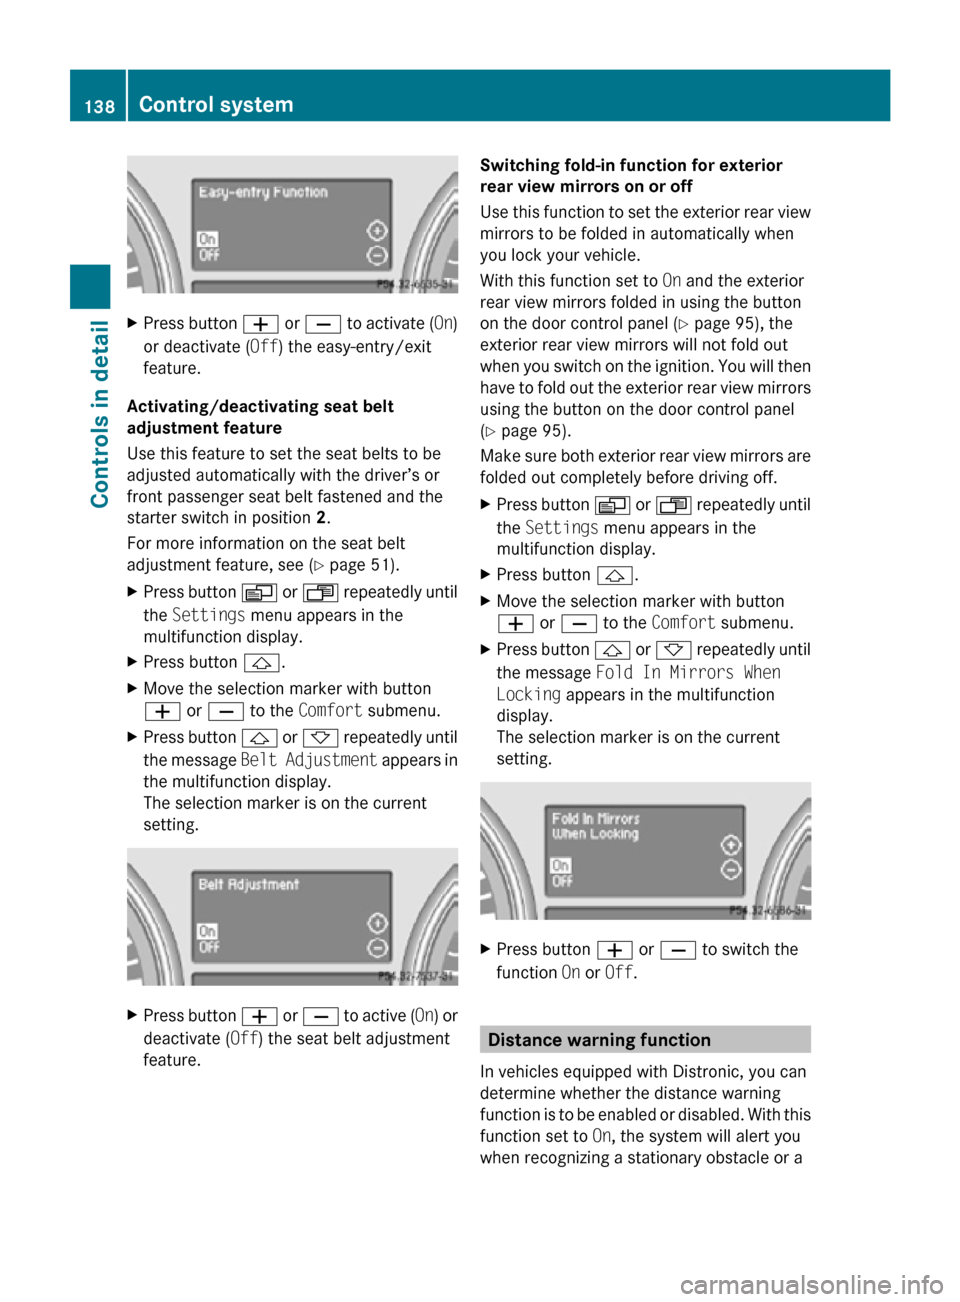
X
Press button W or X to activate ( On)
or deactivate (Off) the easy-entry/exit
feature.
Activating/deactivating seat belt
adjustment feature
Use this feature to set the seat belts to be
adjusted automatically with the driver’s or
front passenger seat belt fastened and the
starter switch in position 2.
For more information on the seat belt
adjustment feature, see ( Y page 51).
X Press button V or U repeatedly until
the Settings menu appears in the
multifunction display.
X Press button &.
X Move the selection marker with button
W or X to the Comfort submenu.
X Press button & or * repeatedly until
the message Belt Adjustment appears in
the multifunction display.
The selection marker is on the current
setting. X
Press button W or X to active ( On) or
deactivate (Off) the seat belt adjustment
feature. Switching fold-in function for exterior
rear view mirrors on or off
Use this function to set the exterior rear view
mirrors to be folded in automatically when
you lock your vehicle.
With this function set to
On and the exterior
rear view mirrors folded in using the button
on the door control panel ( Y page 95), the
exterior rear view mirrors will not fold out
when you switch on the ignition. You will then
have to fold out the exterior rear view mirrors
using the button on the door control panel
(Y page 95).
Make sure both exterior rear view mirrors are
folded out completely before driving off.
X Press button V or U repeatedly until
the Settings menu appears in the
multifunction display.
X Press button &.
X Move the selection marker with button
W or X to the Comfort submenu.
X Press button & or * repeatedly until
the message Fold In Mirrors When
Locking appears in the multifunction
display.
The selection marker is on the current
setting. X
Press button W or X to switch the
function On or Off. Distance warning function
In vehicles equipped with Distronic, you can
determine whether the distance warning
function is to be enabled or disabled. With this
function set to On, the system will alert you
when recognizing a stationary obstacle or a 138
Control systemControls in detail
251_AKB; 4; 52, en-US
d2ureepe,
Version: 2.11.8.1 2009-03-23T09:22:52+01:00 - Seite 138
Page 156 of 364

Indicator lamps ; and = are off.
R SPORT (for sporty driving)
Indicator lamp ; comes on.
R COMF (for comfort driving)
Indicator lamp = comes on.
X Start the engine.
X Press ADS switch : repeatedly until the
desired suspension tuning is reached.
The setting remains stored when you turn off
the engine. Vehicle level control
Your vehicle automatically adjusts its ride
height.
The all-around vehicle level control provides
best possible suspension and constant
ground clearance. The vehicle lowers at high
speed automatically in order to increase
driving safety and to reduce fuel
consumption.
Changes to the vehicle level should be made
while the vehicle is moving. The vehicle will
then reach the set level as fast as possible.
When you park the vehicle and the ambient
temperature changes, the vehicle level may
change visibly. When the temperature drops,
the vehicle lowers. When the temperature
rises, the vehicle raises.
The vehicle begins adjusting to the set vehicle
level as soon as the doors or tailgate are
unlocked or opened or closed with the vehicle
unlocked.
For major changes in vehicle level, the engine
must be running. G
Warning!
Make sure no one is near the wheel housing
or under the vehicle when you lower the
vehicle while it is standing still. Limbs could
become wedged into or under the vehicle.
For safety reasons, the vehicle can only be
lowered with all doors and the tailgate closed.
Lowering is interrupted if a door or the tailgate is opened and will continue after the door is
closed again.
! Keep in mind that on rough or uneven
roads, adjusting the vehicle to a lower level
may cause the vehicle underbody to come
in contact with the road and result in
damage to the vehicle underbody. Always
make sure the vehicle has sufficient ground
clearance before adjusting it to a lower
level.
! Before jacking up the vehicle with
equipment that lifts one or more of the
wheels completely off of the ground,
remove the SmartKey from the starter
switch.
i The activation threshold is defined by the
ADS setting (Y page 153). Basic settings
The following vehicle chassis ride heights can
be selected using vehicle level control
switch : in the center console:
Level Driving situation
Raised level For driving on rough roads.
Indicator lamp ; is on.
Highway
level For driving on paved roads
in fair or better condition.
Indicator lamp ; is off.154
Driving systemsControls in detail
251_AKB; 4; 52, en-US
d2ureepe,
Version: 2.11.8.1 2009-03-23T09:22:52+01:00 - Seite 154