2010 MERCEDES-BENZ C350S ESP
[x] Cancel search: ESPPage 153 of 364
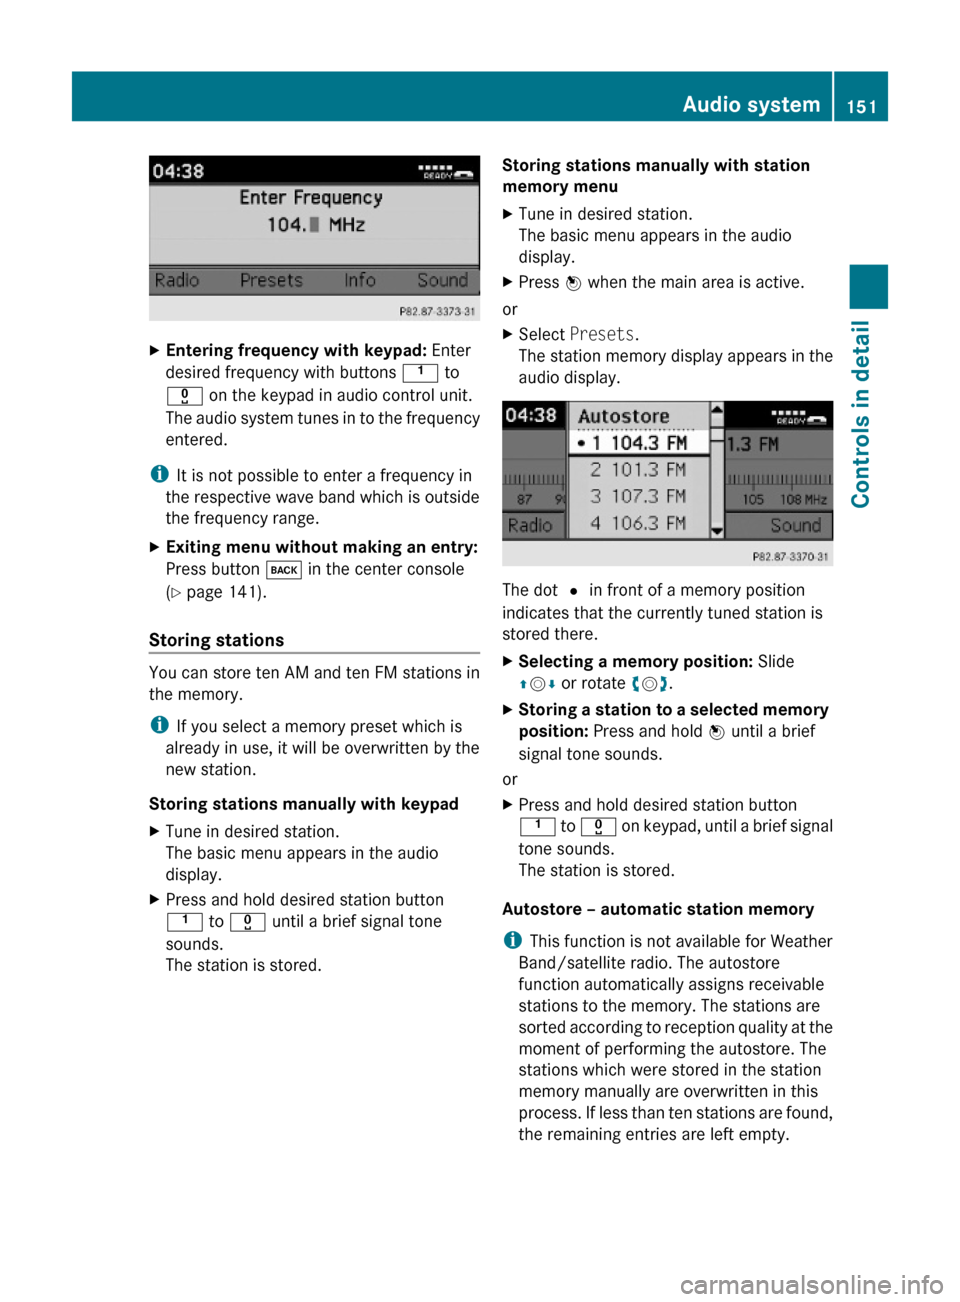
XEntering frequency with keypad: Enter
desired frequency with buttons k to
x on the keypad in audio control unit.
The audio system tunes in to the frequency
entered.
iIt is not possible to enter a frequency in
the respective wave band which is outside
the frequency range.
XExiting menu without making an entry:
Press button k in the center console
(Y page 141).
Storing stations
You can store ten AM and ten FM stations in
the memory.
iIf you select a memory preset which is
already in use, it will be overwritten by the
new station.
Storing stations manually with keypad
XTune in desired station.
The basic menu appears in the audio
display.
XPress and hold desired station button
k to x until a brief signal tone
sounds.
The station is stored.
Storing stations manually with station
memory menu
XTune in desired station.
The basic menu appears in the audio
display.
XPress W when the main area is active.
or
XSelect Presets.
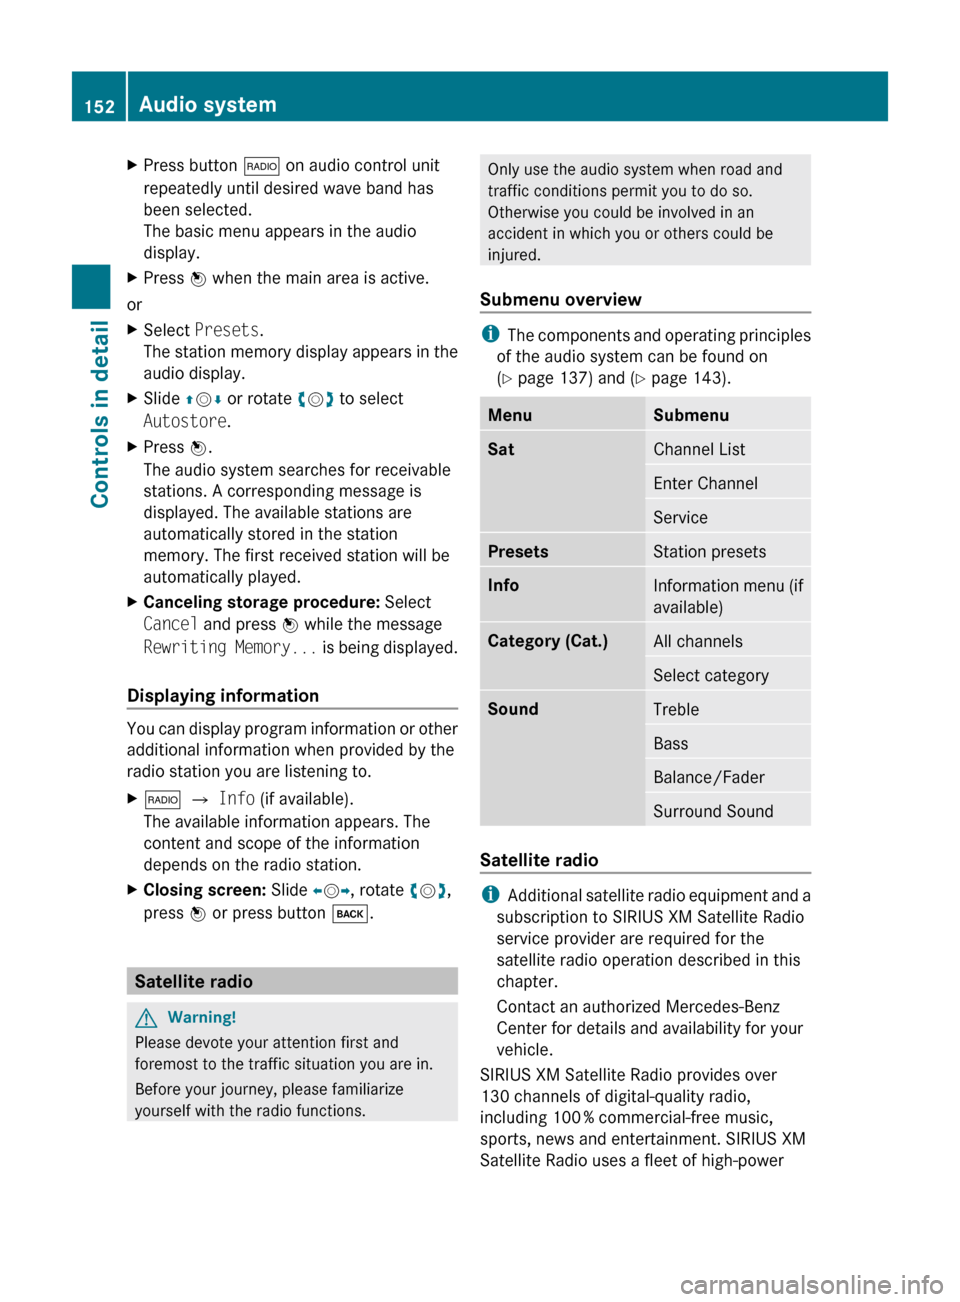
The station memory display appears in the
audio display.
The dot # in front of a memory position
indicates that the currently tuned station is
stored there.
XSelecting a memory position: Slide
ZVÆ or rotate cVd.
XStoring a station to a selected memory
position: Press and hold W until a brief
signal tone sounds.
or
XPress and hold desired station button
k to x on keypad, until a brief signal
tone sounds.
The station is stored.
Autostore – automatic station memory
iThis function is not available for Weather
Band/satellite radio. The autostore
function automatically assigns receivable
stations to the memory. The stations are
sorted according to reception quality at the
moment of performing the autostore. The
stations which were stored in the station
memory manually are overwritten in this
process. If less than ten stations are found,
the remaining entries are left empty.
Audio system151Controls in detail204_AKB; 5; 23, en-USd2ureepe,Version: 2.11.8.12009-07-16T17:54:06+02:00 - Seite 151Z
Page 154 of 364
XPress button $ on audio control unit
repeatedly until desired wave band has
been selected.
The basic menu appears in the audio
display.XPress W when the main area is active.
or
XSelect Presets .
The station memory display appears in the
audio display.XSlide ZV Æ or rotate cV d to select
Autostore .XPress W.
The audio system searches for receivable
stations. A corresponding message is
displayed. The available stations are
automatically stored in the station
memory. The first received station will be
automatically played.XCanceling storage procedure: Select
Cancel and press W while the message
Rewriting Memory... is being displayed.
Displaying information
You can display program information or other
additional information when provided by the
radio station you are listening to.
X$ Q Info (if available).
The available information appears. The
content and scope of the information
depends on the radio station.XClosing screen: Slide XV Y, rotate cV d,
press W or press button k.
Satellite radio
GWarning!
Please devote your attention first and
foremost to the traffic situation you are in.
Before your journey, please familiarize
yourself with the radio functions.
Only use the audio system when road and
traffic conditions permit you to do so.
Otherwise you could be involved in an
accident in which you or others could be
injured.
Submenu overview
i The components and operating principles
of the audio system can be found on
( Y page 137) and ( Y page 143).
MenuSubmenuSatChannel ListEnter ChannelServicePresetsStation presetsInfoInformation menu (if
available)Category (Cat.)All channelsSelect categorySoundTrebleBassBalance/FaderSurround Sound
Satellite radio
i Additional satellite radio equipment and a
subscription to SIRIUS XM Satellite Radio
service provider are required for the
satellite radio operation described in this
chapter.
Contact an authorized Mercedes-Benz
Center for details and availability for your
vehicle.
SIRIUS XM Satellite Radio provides over
130 channels of digital-quality radio,
including 100 % commercial-free music,
sports, news and entertainment. SIRIUS XM
Satellite Radio uses a fleet of high-power
152Audio systemControls in detail
204_AKB; 5; 23, en-USd2ureepe,Version: 2.11.8.12009-07-16T17:54:06+02:00 - Seite 152
Page 158 of 364
Tuning in channels using the satellite
radio channel list
X$ (repeatedly, if necessary) Q Sat
Q Channel List.
The channel list appears. The dot # in
front of a list entry indicates the currently
selected channel.
XSelect channel by rotating cVd or sliding
ZVÆ.
XPress W to confirm.
iThe contents of the channel list depends
on which channels are included in your
subscription and which program category
you have selected (Y page 154). The
channel list contains only the preview
channel if the satellite radio service has not
been subscribed to.
Tuning in channels using satellite radio
channel presets
X$ (repeatedly, if necessary) Q
Presets.
or
XPress W when the main area is selected in
Sat mode.
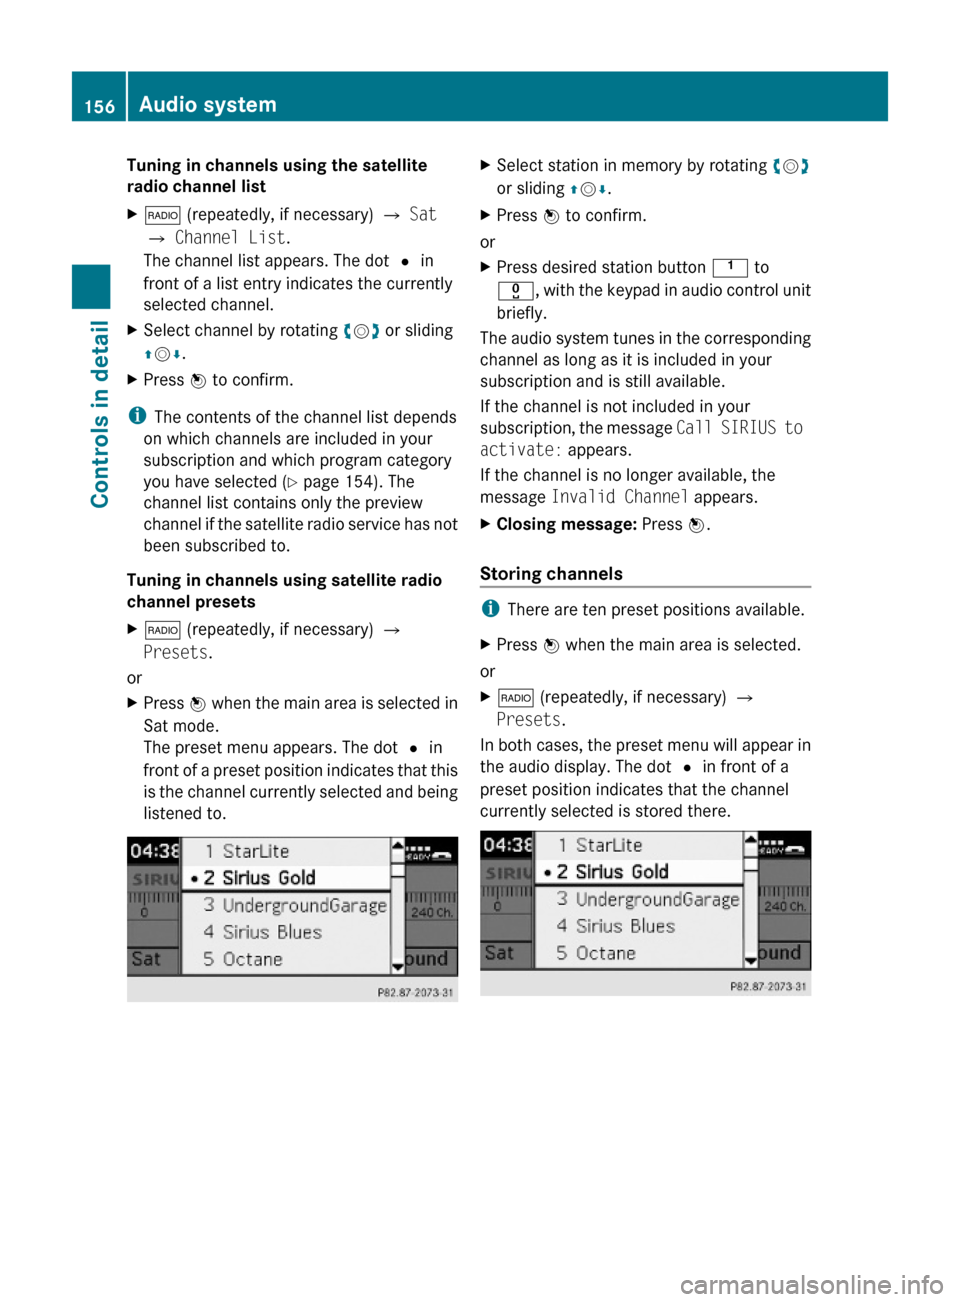
The preset menu appears. The dot # in
front of a preset position indicates that this
is the channel currently selected and being
listened to.
XSelect station in memory by rotating cVd
or sliding ZVÆ.
XPress W to confirm.
or
XPress desired station button k to
x, with the keypad in audio control unit
briefly.
The audio system tunes in the corresponding
channel as long as it is included in your
subscription and is still available.
If the channel is not included in your
subscription, the message Call SIRIUS to
activate: appears.
If the channel is no longer available, the
message Invalid Channel appears.
XClosing message: Press W.
Storing channels
iThere are ten preset positions available.
XPress W when the main area is selected.
or
X$ (repeatedly, if necessary) Q
Presets.
In both cases, the preset menu will appear in
the audio display. The dot # in front of a
preset position indicates that the channel
currently selected is stored there.
156Audio systemControls in detail
204_AKB; 5; 23, en-USd2ureepe,Version: 2.11.8.12009-07-16T17:54:06+02:00 - Seite 156
Page 161 of 364
! Do not affix stickers or labels to the CDs,
they can become warped due to the heat
that develops in the CD drive or CD
changer.
In certain situations, the CDs can then no
longer be ejected and cause damage to the
drive. Such damage is not covered by the
Mercedes-Benz Limited Warranty.
! Your CD drive or CD changer has been
designed to play CDs which correspond to
the IEC 60908 standard. You can therefore
only use CDs with a maximum thickness of
1.3 mm.
If you insert thicker discs, e.g. ones that
have data on both sides (one side with DVD
data, the other side with audio data), they
cannot be ejected and will damage the
drive.
Do not use CDs with a diameter of 8 cm.
Attempting to play CDs with a diameter of
8 cm or playing such CDs with an adapter may
cause damage to the CD drive. Such damage
is not covered by the Mercedes-Benz Limited
Warranty.
Only use round discs with a diameter of
12 cm.
Should excessively high or low temperatures
occur while in CD changer mode, a message
will appear in the display, and the CD will be
muted until the temperature has reached an
acceptable level for the system to continue
operation.
Tips on handling CDs
R Only touch the CDs at the edges.
R Handle CDs carefully to prevent
interference during playback.
R Avoid scratches, fingerprints and dust on
the CDs.
R The CDs must only be labeled using pens
specially designed for this purpose.
R Clean CDs from time to time with a
commercially available cleaning cloth.
Never wipe the CD in a circular motion;instead, wipe it in a straight line starting in
the center and moving outward. Do not use
solvents, anti-static sprays, etc. for
cleaning.
R Replace the CD in its case after use.
R Protect CDs from heat and direct sunlight.
Notes about MP3 mode
The single CD player and the CD changer can
play audio CDs as well as CDs with MP3/
WMA files.
i Due to the branched data structure,
playback of the first track may be delayed
slightly.
Permissible media for MP3/WMA files
R CD-R
R CD-RW
Permissible file systems
R ISO9660/Joliet for CDs
Multisession CDs
For multisession CDs, the first session type
of the CD determines how the audio system
will process the CD.
For example, if the first session type is
according to the audio CD standard and the
second session type is according to the data
CD standard containing MP3/WMA tracks,
the audio system will treat the CD as a
conventional audio CD. This means that it is
only possible to access the audio CD tracks.
Access to the MP3/WMA tracks is not
possible.
Similarly, if the first session type is according
to the data CD standard containing MP3/
WMA tracks and the second session type is
according to the audio CD standard, the audio
system will treat the CD as a data CD. This
means that it is only possible to access the
MP3/WMA tracks. Access to the audio CD
tracks is not possible.
Audio system159Controls in detail204_AKB; 5; 23, en-USd2ureepe,Version: 2.11.8.12009-07-16T17:54:06+02:00 - Seite 159Z
Page 162 of 364

File structure on a disc
When you create an MP3/WMA disc, the
MP3/WMA tracks can be organized in
folders.
A folder can also contain other folders.
A disc can contain a maximum of 255 folders.
A folder can contain a maximum of 255 tracks
and 255 subfolders.
A data medium may contain a maximum of
500 tracks.
The directory depth may not exceed a
maximum of 8 levels. The system will ignore
files in lower levels.
Track and folder names
When you create an MP3/WMA disc, you can
assign names to the MP3/WMA tracks and
folders.
The audio system uses these names for the
corresponding display in MP3 mode. Empty
folders or folders which contain data other
than MP3/WMA tracks are not displayed by
the audio system.
If MP3/WMA files are saved in the root
directory itself (uppermost directory on
storage medium), the root directory will also
be treated as a folder. The audio system will
then show the name of the root directory as
the folder name.
You must observe the following when
assigning track names:
R Track names must have at least one
character.
R Track names must have the extension
“mp3” or “wma”.
R There must be a period between the track
name and the extension.
Example of a correct track name:
Track1.mp3
The audio system is unable to recognize an
MP3/WMA track if
R there is no period between the track title
and the extension
R there is no extensioni The audio system does not support ID3
tags.
Supported file formats
Supported file formats are:
R MP3
R WMA
i If music files of file formats other than
MP3 are stored together with MP3 files on
one disc, the loading process may take
longer.
Permissible MP3 formats
The audio system supports the MPEG1 Audio
Layer 3 format.
i This format is generally known as “MP3”.
Permissible bit and sampling rates are:
R fixed and variable bit rates up to
320 kbit/s
R Sampling rates of 24 kHz – 48 kHz
i Only use MP3 tracks with a bit rate of at
least 128 kbit/s or higher and a sampling
rate of at least 44.1 kHz or higher. Smaller
rates can cause a noticeable deterioration
in sound quality. This is especially the case
if you have the surround sound function
activated.
WMA (Windows Media ®
Audio)
Windows Media ®
Audio (WMA) is an audio
data compression technology developed by
Microsoft ®
.
The audio system supports the following
types of audio files:
R fixed bit rates of 5 kbit/s up to
384 kbit/s
R Sampling rates from 8 kHz to 48 kHz
The audio system does not support the
following WMA files:
R DRM (Digital Rights Management) coded
files
R variable bit rates160Audio systemControls in detail
204_AKB; 5; 23, en-USd2ureepe,Version: 2.11.8.12009-07-16T17:54:06+02:00 - Seite 160
Page 168 of 364
Xh Q Folder.
or
XPress W when the main area is selected.
The track list of the current folder appears.
XMove to the superordinate folder: Select
the U symbol.
The display now shows the next higher
folder level.
XSelecting a folder: Slide ZVÆ or rotate
cVd the audio controller, to select the
desired folder.
XPress W to confirm.
You will see the tracks in the folder.
iDue to the large amount of information on
an MP3 disc it may take a while before all
folder and track information becomes
available. During this time the folder list
may be unavailable or slow.
XSelect a track by sliding ZVÆ or rotating
cVd the audio controller.
XPress W to confirm.
The track is played and the corresponding
folder is now the active folder.
Playback options
The following options are available:
RNormal Track Sequence
Tracks playback in the order on the disc
(e.g. track 1, 2, 3, etc.).
RRandom Tracks
Tracks playback in a random order (e.g.
track 3, 8, 5, etc.).
RRandom Folder (in MP3 mode only)
Tracks in the active folder and any
subfolders playback in random order.
XSelecting an option: h Q CD/MP3.
The option list appears. A dot # indicates
which option is switched on.
XSelect an option and press W.
The option is switched on. For all options
except Normal Track Sequence, you will
see a corresponding indicator in the main
area.
iThe Normal Track Sequence option is
automatically activated when you select a
different medium. If an option is activated,
it remains activated after the audio system
is switched on/off.
Audio AUX mode
An external audio source can be connected
to the AUX socket of the audio system. Please
contact an authorized Mercedes-Benz Center
for more information.
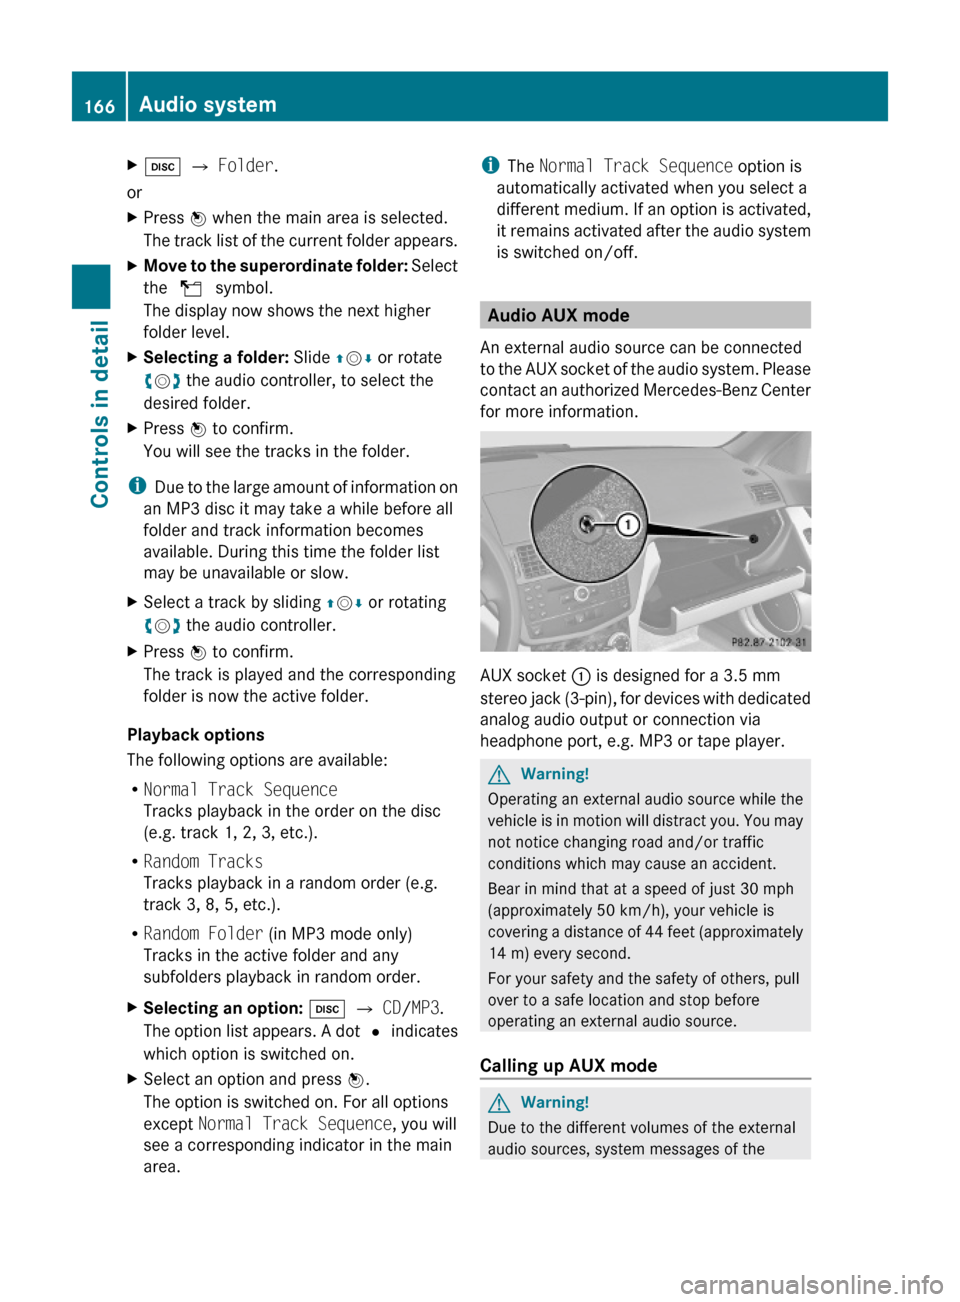
AUX socket : is designed for a 3.5 mm
stereo jack (3-pin), for devices with dedicated
analog audio output or connection via
headphone port, e.g. MP3 or tape player.
GWarning!
Operating an external audio source while the
vehicle is in motion will distract you. You may
not notice changing road and/or traffic
conditions which may cause an accident.
Bear in mind that at a speed of just 30 mph
(approximately 50 km/h), your vehicle is
covering a distance of 44 feet (approximately
14 m) every second.
For your safety and the safety of others, pull
over to a safe location and stop before
operating an external audio source.
Calling up AUX mode
GWarning!
Due to the different volumes of the external
audio sources, system messages of the
166Audio systemControls in detail
204_AKB; 5; 23, en-USd2ureepe,Version: 2.11.8.12009-07-16T17:54:06+02:00 - Seite 166
Page 169 of 364
vehicle may be much louder. You may need to
disable these system messages or adjust the
volume of these messages manually.
XSelecting audio AUX mode:
Press button h repeatedly until the
main menu for AUX operation appears.
or
XIn CD mode: Select CD/MP3 Q Aux.
The audio AUX menu appears. The medium in
the external audio source is heard, provided
it is connected and switched to playback.
iPlease refer to the relevant operating
guide for operation of the external audio
source.
The following settings can be made in the
audio AUX mode:
RVolume (Y page 144)
RBalance control and fader (Y page 145)
RBass and treble control (Y page 145)
RSurround sound (Y page 146)
iThe volume of external audio sources is
extremely variable. It is possible that a
device connected as an external audio
source will sound quieter or louder in the
vehicle or that the usual maximum volume
cannot be achieved. On certain devices the
volume can be set separately. In this case,
start at a moderate volume and increase it
slowly. In this way, you can determine
whether the system is capable of playback
without distortion, even at high volume.
Volume adjustment for the audio device
You can increase the volume for the AUX
socket in case the internal volume of the
connected audio device is too low. Use the
setting Boost for such devices.
You should set the system back to
Standard before connecting a different audio
device to the AUX socket.
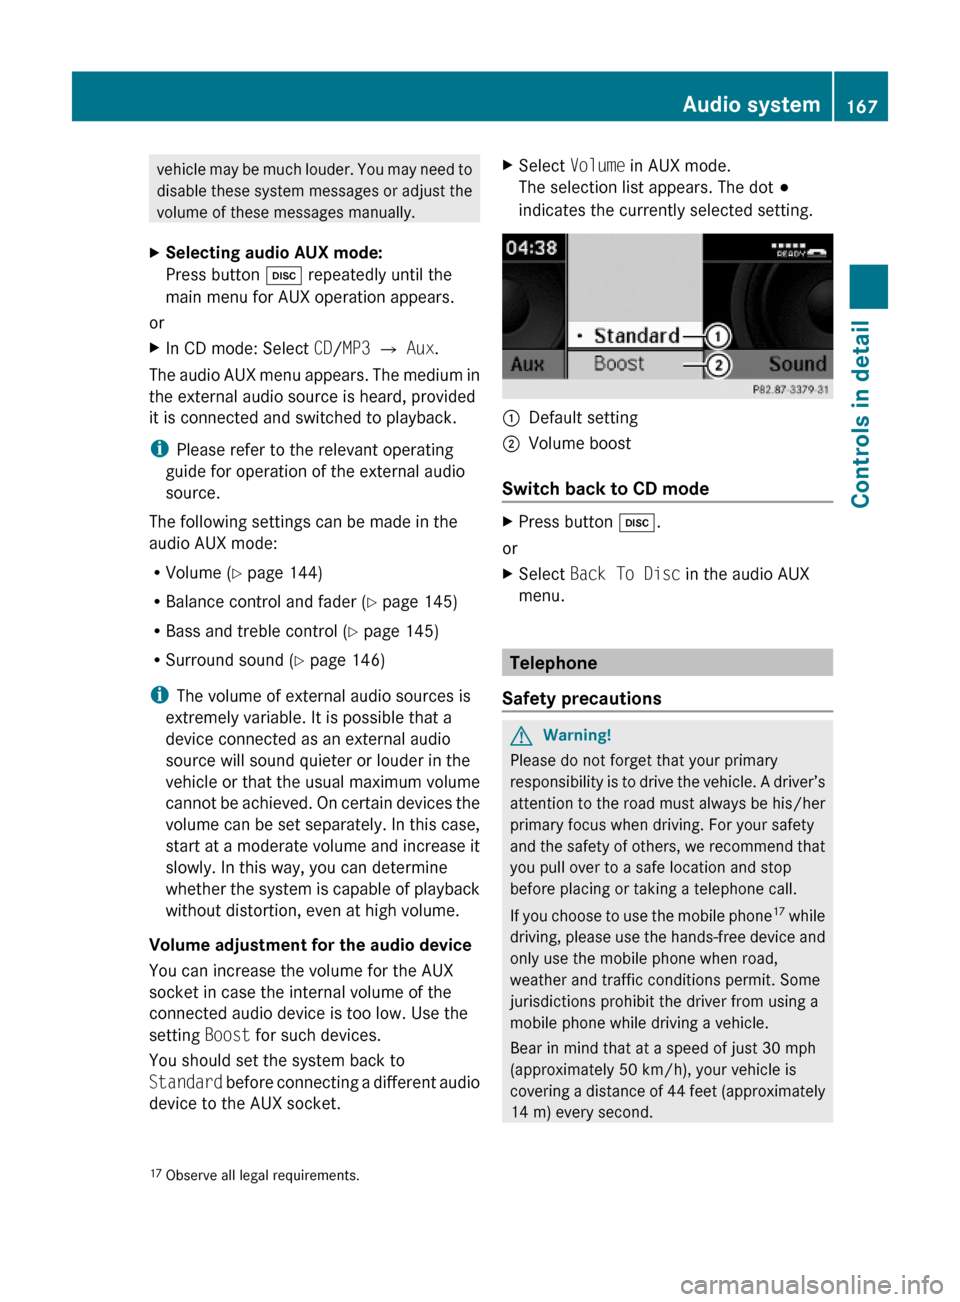
XSelect Volume in AUX mode.
The selection list appears. The dot #
indicates the currently selected setting.
:Default setting;Volume boost
Switch back to CD mode
XPress button h.
or
XSelect Back To Disc in the audio AUX
menu.
Telephone
Safety precautions
GWarning!
Please do not forget that your primary
responsibility is to drive the vehicle. A driver’s
attention to the road must always be his/her
primary focus when driving. For your safety
and the safety of others, we recommend that
you pull over to a safe location and stop
before placing or taking a telephone call.
If you choose to use the mobile phone17 while
driving, please use the hands-free device and
only use the mobile phone when road,
weather and traffic conditions permit. Some
jurisdictions prohibit the driver from using a
mobile phone while driving a vehicle.
Bear in mind that at a speed of just 30 mph
(approximately 50 km/h), your vehicle is
covering a distance of 44 feet (approximately
14 m) every second.
17Observe all legal requirements.Audio system167Controls in detail204_AKB; 5; 23, en-USd2ureepe,Version: 2.11.8.12009-07-16T17:54:06+02:00 - Seite 167Z
Page 171 of 364

system. Please make sure any other
Bluetooth ®
device linked with the mobile
phone is switched off before you use the
telephone functions with the audio system.
Changes or modifications not expressly
approved by the party responsible for
compliance could void the user’s authority to
operate the equipment.
The head unit internal Bluetooth ®
transmitter
must not be co-located or operated in
conjunction with any other antenna or
transmitter.
This equipment complies with FCC/IC
radiation exposure limits set forth for
uncontrolled equipment and meets the FCC
radio frequency (RF) Exposure Guidelines in
Supplement C to OET65 and RSS-102 of the
IC radio frequency (RF) Exposure rules. This
equipment has very low levels of RF energy
that it is deemed to comply without testing of
specific absorption ratio (SAR).
Unless otherwise indicated, the descriptions
and illustrations in this section refer to the
audio system.
Caller ID
The audio system can display the telephone
number and the name of the caller, e.g. for an
incoming call and also in other menus or
displays.
For the telephone number to be displayed,
the caller must transmit their telephone
number. Otherwise Unknown will be shown on
the audio display.
This is also the case for name displays. For
this, the telephone number and the name of
the caller must also be saved in the telephone
book.
Functional restrictions
You will not be able to use the mobile phone,
or you may have to wait a while, in the
following situations:
R If the mobile phone is switched off.
R If the mobile phone is not connected via the
Bluetooth ®
interface to the audio system.R If the mobile phone is locked.
R If the mobile phone has not yet acquired a
network signal.
The mobile phone automatically tries to log
into a network. If no network is available,
you will also not be able to make a “911”
emergency call. If you attempt to make an
outgoing call, the No Service message will
appear for a short while.
R If you switch off the audio system in the
middle of a call, e.g. by switching off the
ignition, that call will be cut off. You can
prevent this from happening as follows:
- Switch the mobile phone to “private
mode” before switching the audio
system off (see mobile phone operating
instructions).
Activating the mobile phone
Prerequisites for the mobile phone
For making calls using the audio system via
the Bluetooth ®
interface, you will need a
Bluetooth ®
enabled mobile phone.
Your mobile phone must support the
Bluetooth ®
hands-free profile 1.0 or higher to
make or receive calls (see mobile phone
operating instructions).
i For further information on suitable mobile
phones and connecting Bluetooth ®
-
enabled mobile phones to the audio system
R visit www.mbusa-mobile.com
R call the Mercedes-Benz Customer
Assistance Center at
1-800-FOR-MERCedes
(1-800-367-6372) (in the USA)
R call Customer Service at
1-800-387-0100 (in Canada)
Activating Bluetooth ®
XSwitch on the mobile phone (see mobile
phone operating instructions).XEnter the PIN (not necessary with some
mobile phones or network).Audio system169Controls in detail204_AKB; 5; 23, en-USd2ureepe,Version: 2.11.8.12009-07-16T17:54:06+02:00 - Seite 169Z