2010 MERCEDES-BENZ C350S ESP
[x] Cancel search: ESPPage 174 of 364
XSelect Options Q Details.
The details screen for the device is shown
in the audio display.
XClosing details screen: Slide XVY, rotate
cVd or press W, or press button k.
De-authorizing a Bluetooth® device
X% Q Tel Q Bluetooth Phones.XSelect authorized device.XSelect Options Q De-Authorize.
A prompt appears asking whether you
really want to de-authorize this device.
XSelect Yes or No.
If you select Yes, the device will be de-
authorized.
iIf you de-authorize a device which has
been authorized in the past and which is not
detected in the search, this device will no
longer be displayed in the device list.
Devices which have been authorized in the
past but which are not detected in the
search are either not switched on or not in
the vehicle.
Activating another mobile phone
If you have several authorized mobile phones,
you can switch between the individual mobile
phones.
iYou cannot switch to another authorized
mobile phone during a call.
When you authorize a new mobile phone, it is
automatically activated. Only one mobile
phone can be active at a time.
X% Q Tel Q Bluetooth Phones.XSelect an authorized mobile phone from
the list.
XPress W to confirm.
The selected mobile phone will be searched
for and connected if it is located in the
Bluetooth® range and Bluetooth® is
activated on the corresponding device.
The selected mobile phone is activated.
A dot # in front of the entry, indicates the
current active mobile phone in the phone
list.
Receiving business cards
You can import business cards (vCards) into
the address book from external Bluetooth®
devices (Y page 174).
TEL-Basic display
XPress button % on the audio control unit
to call up the telephone mode.
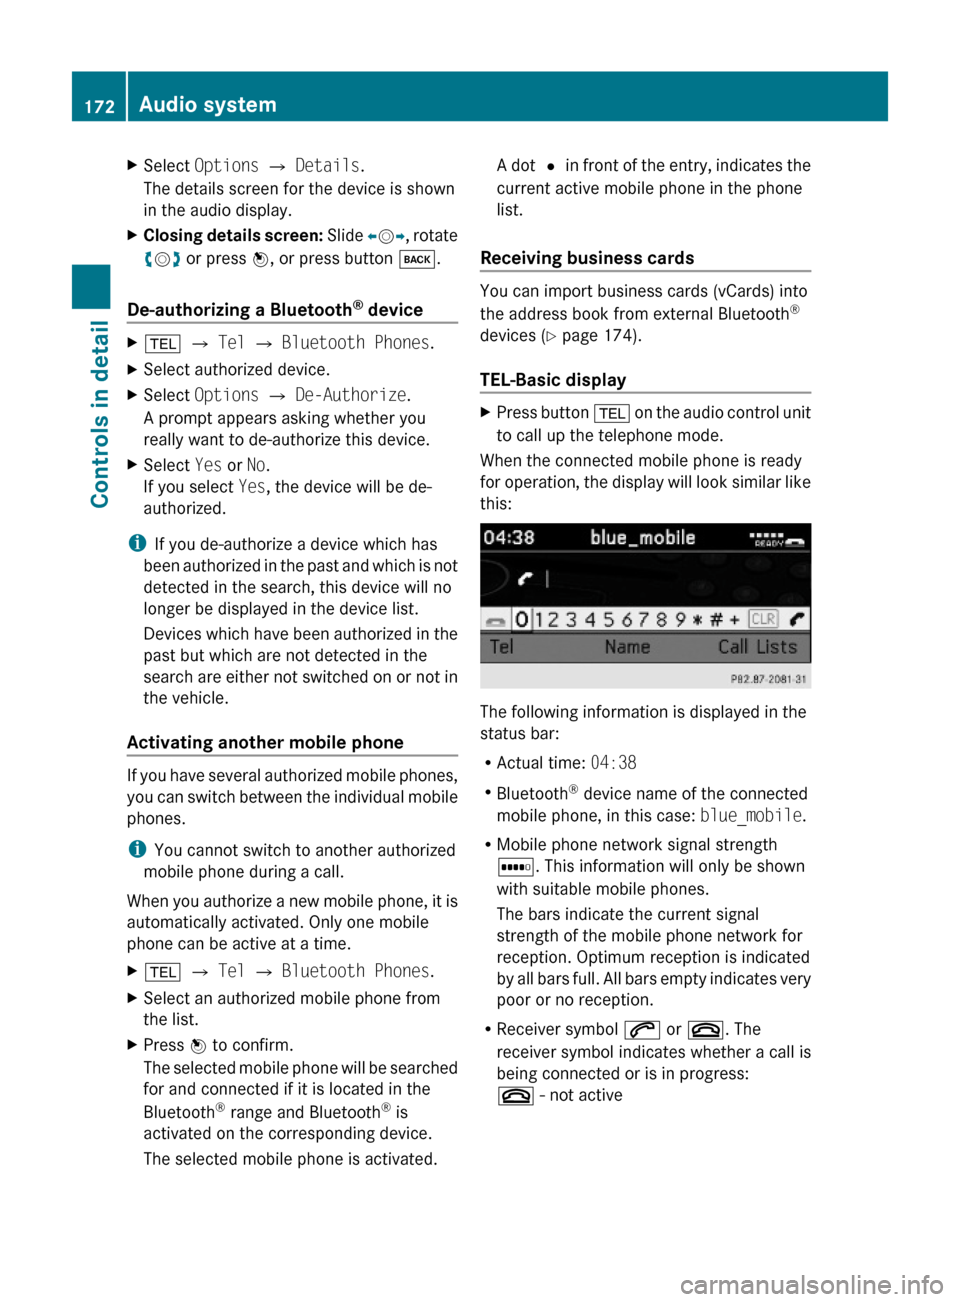
When the connected mobile phone is ready
for operation, the display will look similar like
this:
The following information is displayed in the
status bar:
RActual time: 04:38
RBluetooth® device name of the connected
mobile phone, in this case: blue_mobile.
RMobile phone network signal strength
r. This information will only be shown
with suitable mobile phones.
The bars indicate the current signal
strength of the mobile phone network for
reception. Optimum reception is indicated
by all bars full. All bars empty indicates very
poor or no reception.
RReceiver symbol 6 or ~. The
receiver symbol indicates whether a call is
being connected or is in progress:
~ - not active
172Audio systemControls in detail
204_AKB; 5; 23, en-USd2ureepe,Version: 2.11.8.12009-07-16T17:54:06+02:00 - Seite 172
Page 175 of 364
RREADY indicates that a call is possible.
R NO SERVICE indicates that the mobile
network is not available.
Setting transmit and receive volume
i These settings should normally not be
changed as the factory settings are
matched to most mobile phones. Find out
about the optimum settings for your mobile
phone at an authorized Mercedes-Benz
Center.
i Changes may result in significant
impairments to the transmission quality.
These settings may not be changed during
an active phone call.
X% Q Tel Q Bluetooth Phones .XSelect a mobile phone from the list.XSelect Options Q Reception Volume or
Transmission Volume .XSetting the volume: Slide ZV Æ or rotate
c V d the audio controller.
The volume bar moves up or down.XExiting menu: Press W or slide XV Y the
audio controller or press button k.
Emergency calls “911”
i The “911” emergency call system is a
public service. Using it without due cause
is a criminal offense.
i This function places a call to the local
“911” provider. It does not initiate a Tele
Aid call.
The following describes how to dial a “911”
emergency call using the audio system head
unit when a Mercedes-Benz specified mobile
phone is connected via the Bluetooth ®
interface to the audio system. Unless
otherwise specified, the descriptions refer to
the audio system head unit.
Consult the separate mobile phone operating
instructions that came with your mobile
phone for information on how to place a
“911” emergency call on the mobile phone.
The following conditions must be met for a
“911” emergency call via the audio system:
R Mobile phone must be switched on.
R The corresponding mobile
communications network must be
available.
i Emergency calls may not be possible with
all telephone networks or if certain network
services and/or telephone functions are
active. Check with your local service
providers and mobile phone instructions.
If you cannot make an emergency call, you
will have to initiate rescue measures yourself.
Placing a “911” emergency call using
audio control unit with the mobile
phone unlockedXPress button % to switch to telephone
mode.XEnter 911 using the number keypad on the
audio control unit.XPress button 6.
or
XPress W for dialing to begin.
Connecting... appears in the audio
display while the mobile phone establishes
the connection.XWait until the emergency call center
answers, then describe the emergency.
i Depending on the phone type, if no SIM
card is inserted in a GSM mobile phone or
if there is no service on a CDMA mobile
phone, NO SERVICE may appear in the
audio display. In that case, you only can
make an emergency call on the mobile
phone itself, without the use of the audio
control unit.
Audio system173Controls in detail204_AKB; 5; 23, en-USd2ureepe,Version: 2.11.8.12009-07-16T17:54:06+02:00 - Seite 173Z
Page 182 of 364
Sending DTMF tones
iThis function is not possible with all
mobile phones.
Answering machines or other devices can be
controlled via DTMF tones, e.g. for remote
query functions.
XTransmitting individual characters:
During a call select the required
characters.
or
XPress the corresponding button on the
audio control unit.
Every selected character is transmitted
immediately.
XTransmitting a phone number of a
phone book entry as a sequence of
characters: Select Name.
XSelect the desired phone book entry.
The entry is transmitted immediately as a
sequence of characters.
XSwitching back to call display: Select
Back.
Driving systems
Introduction
This section describes the following driving
systems of your vehicle:
RCruise control
RHill-start assist system
RAll-wheel drive (4MATIC)
RDynamic handling package with sport
driving mode
RParktronic system, Canada only
RRear view camera
The driving safety systems ABS, Adaptive
Brake, BAS, EBP and ESP® are described in
the “Safety and security” section
(Y page 60).
Cruise control
The cruise control maintains the speed you
set for your vehicle automatically.
The use of the cruise control is recommended
for driving at a constant speed for extended
periods of time.
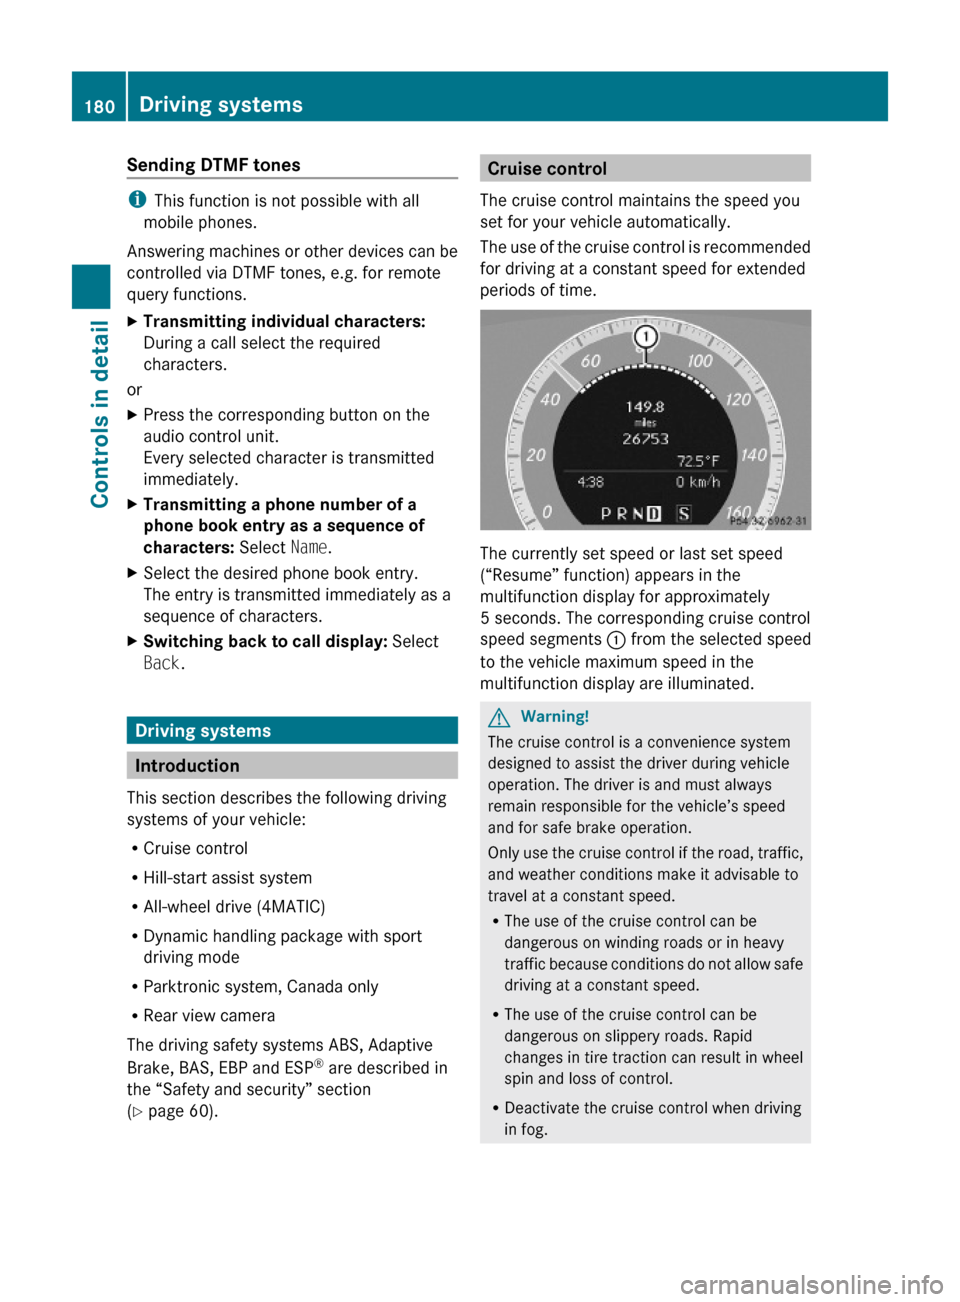
The currently set speed or last set speed
(“Resume” function) appears in the
multifunction display for approximately
5 seconds. The corresponding cruise control
speed segments : from the selected speed
to the vehicle maximum speed in the
multifunction display are illuminated.
GWarning!
The cruise control is a convenience system
designed to assist the driver during vehicle
operation. The driver is and must always
remain responsible for the vehicle’s speed
and for safe brake operation.
Only use the cruise control if the road, traffic,
and weather conditions make it advisable to
travel at a constant speed.
RThe use of the cruise control can be
dangerous on winding roads or in heavy
traffic because conditions do not allow safe
driving at a constant speed.
RThe use of the cruise control can be
dangerous on slippery roads. Rapid
changes in tire traction can result in wheel
spin and loss of control.
RDeactivate the cruise control when driving
in fog.
180Driving systemsControls in detail
204_AKB; 5; 23, en-USd2ureepe,Version: 2.11.8.12009-07-16T17:54:06+02:00 - Seite 180
Page 183 of 364
The “Resume” function should only be
operated if the driver is fully aware of the
previously set speed and wishes to resume
this particular preset speed.
GWarning!
The cruise control brakes automatically so
that the set speed is not exceeded.
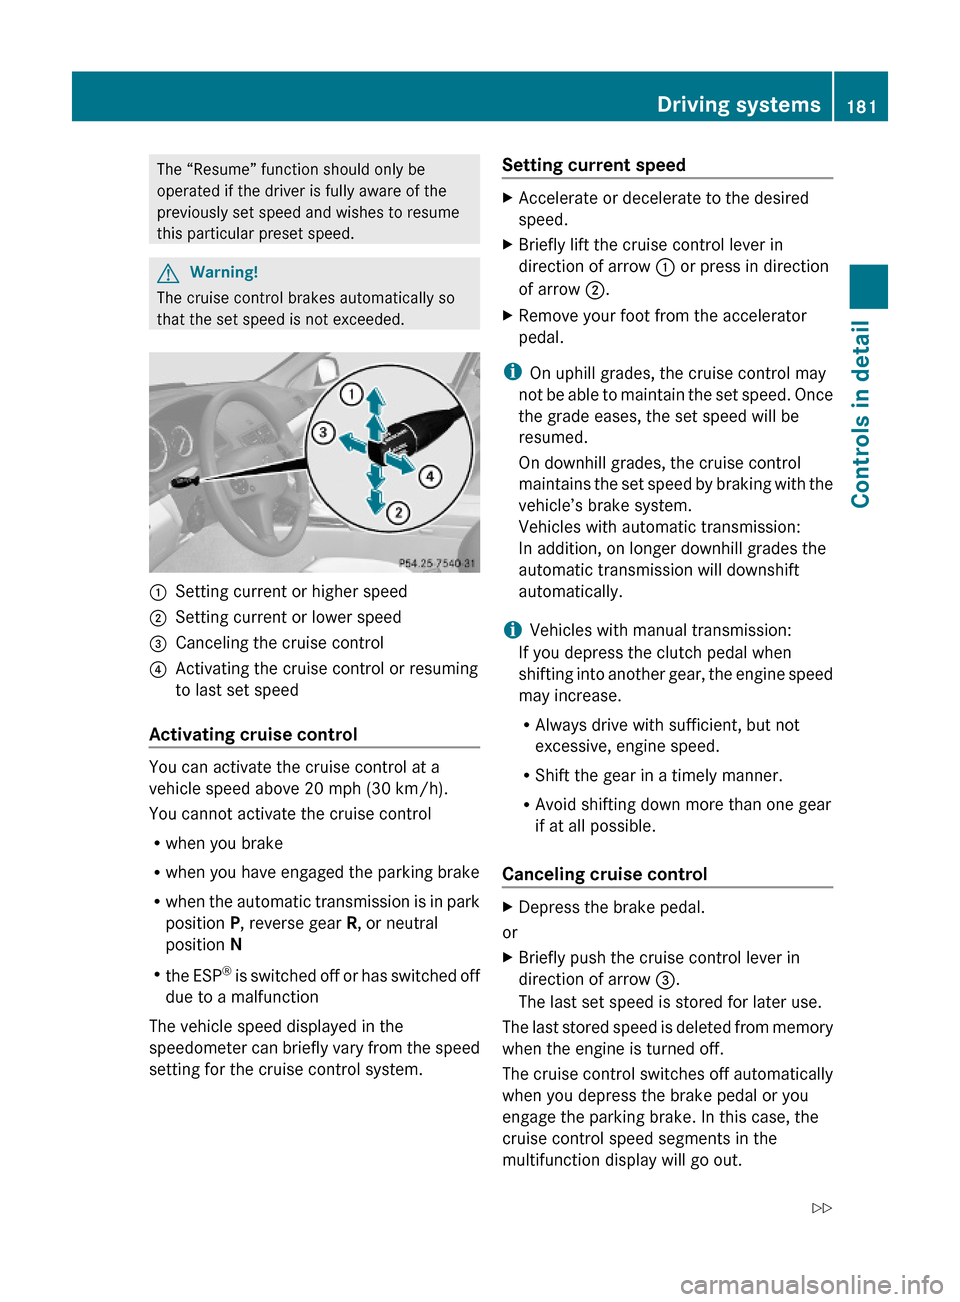
:Setting current or higher speed ;Setting current or lower speed=Canceling the cruise control?Activating the cruise control or resuming
to last set speed
Activating cruise control
You can activate the cruise control at a
vehicle speed above 20 mph (30 km/h).
You cannot activate the cruise control
Rwhen you brake
Rwhen you have engaged the parking brake
Rwhen the automatic transmission is in park
position P, reverse gear R, or neutral
position N
Rthe ESP® is switched off or has switched off
due to a malfunction
The vehicle speed displayed in the
speedometer can briefly vary from the speed
setting for the cruise control system.
Setting current speed XAccelerate or decelerate to the desired
speed.
XBriefly lift the cruise control lever in
direction of arrow : or press in direction
of arrow ;.
XRemove your foot from the accelerator
pedal.
iOn uphill grades, the cruise control may
not be able to maintain the set speed. Once
the grade eases, the set speed will be
resumed.
On downhill grades, the cruise control
maintains the set speed by braking with the
vehicle’s brake system.
Vehicles with automatic transmission:
In addition, on longer downhill grades the
automatic transmission will downshift
automatically.
iVehicles with manual transmission:
If you depress the clutch pedal when
shifting into another gear, the engine speed
may increase.
RAlways drive with sufficient, but not
excessive, engine speed.
RShift the gear in a timely manner.
RAvoid shifting down more than one gear
if at all possible.
Canceling cruise control
XDepress the brake pedal.
or
XBriefly push the cruise control lever in
direction of arrow =.
The last set speed is stored for later use.
The last stored speed is deleted from memory
when the engine is turned off.
The cruise control switches off automatically
when you depress the brake pedal or you
engage the parking brake. In this case, the
cruise control speed segments in the
multifunction display will go out.
Driving systems181Controls in detail204_AKB; 5; 23, en-USd2ureepe,Version: 2.11.8.12009-07-16T17:54:06+02:00 - Seite 181Z
Page 184 of 364
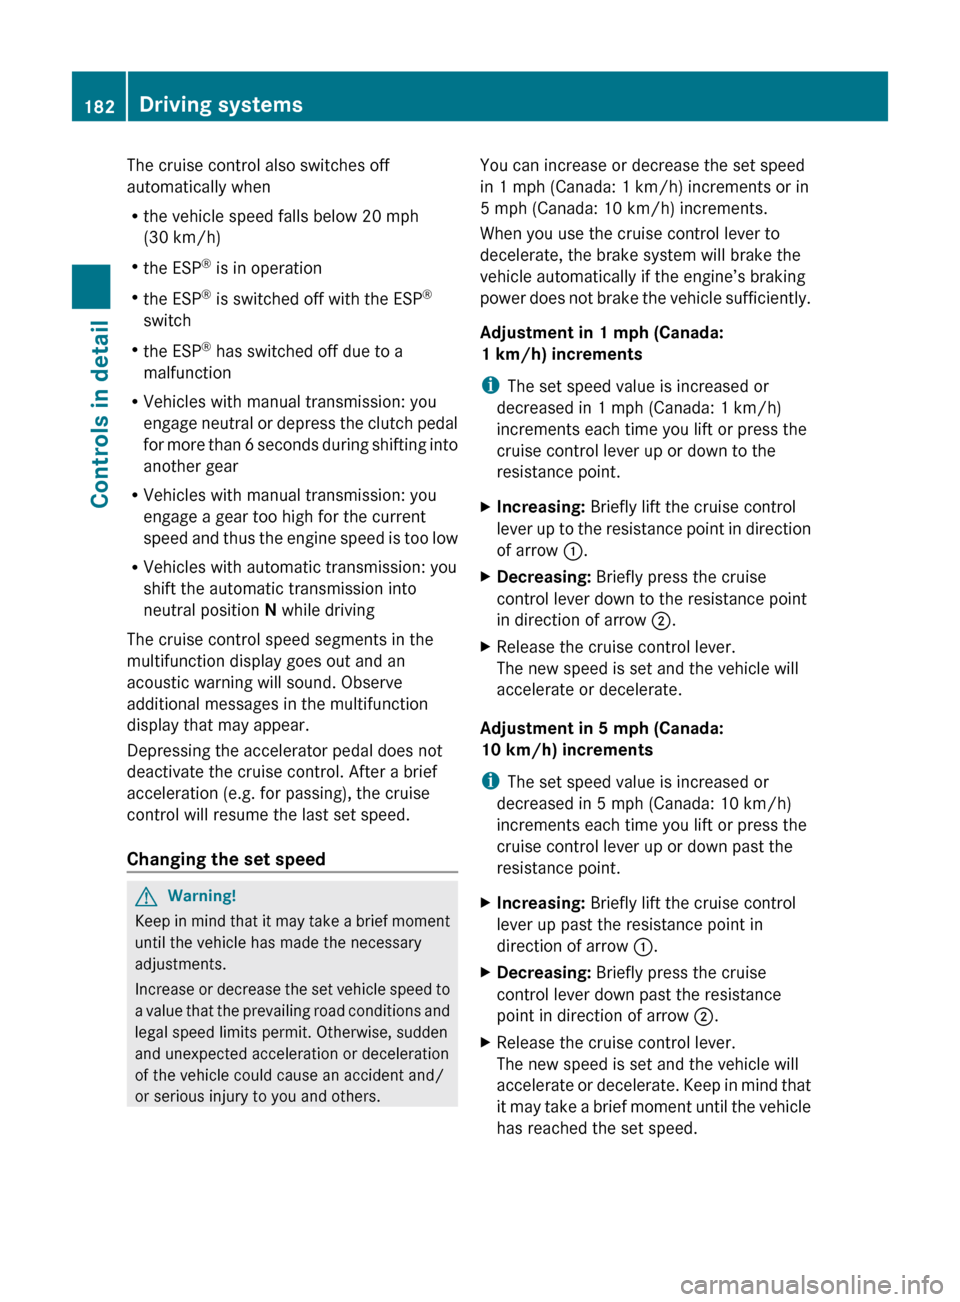
The cruise control also switches off
automatically when
R the vehicle speed falls below 20 mph
(30 km/h)
R the ESP ®
is in operation
R the ESP ®
is switched off with the ESP ®
switch
R the ESP ®
has switched off due to a
malfunction
R Vehicles with manual transmission: you
engage neutral or depress the clutch pedal
for more than 6 seconds during shifting into
another gear
R Vehicles with manual transmission: you
engage a gear too high for the current
speed and thus the engine speed is too low
R Vehicles with automatic transmission: you
shift the automatic transmission into
neutral position N while driving
The cruise control speed segments in the
multifunction display goes out and an
acoustic warning will sound. Observe
additional messages in the multifunction
display that may appear.
Depressing the accelerator pedal does not
deactivate the cruise control. After a brief
acceleration (e.g. for passing), the cruise
control will resume the last set speed.
Changing the set speed GWarning!
Keep in mind that it may take a brief moment
until the vehicle has made the necessary
adjustments.
Increase or decrease the set vehicle speed to
a value that the prevailing road conditions and
legal speed limits permit. Otherwise, sudden
and unexpected acceleration or deceleration
of the vehicle could cause an accident and/
or serious injury to you and others.
You can increase or decrease the set speed
in 1 mph (Canada: 1 km/h) increments or in
5 mph (Canada: 10 km/h) increments.
When you use the cruise control lever to
decelerate, the brake system will brake the
vehicle automatically if the engine’s braking
power does not brake the vehicle sufficiently.
Adjustment in 1 mph (Canada:
1 km/h) increments
i The set speed value is increased or
decreased in 1 mph (Canada: 1 km/h)
increments each time you lift or press the
cruise control lever up or down to the
resistance point.XIncreasing: Briefly lift the cruise control
lever up to the resistance point in direction
of arrow :.XDecreasing: Briefly press the cruise
control lever down to the resistance point
in direction of arrow ;.XRelease the cruise control lever.
The new speed is set and the vehicle will
accelerate or decelerate.
Adjustment in 5 mph (Canada:
10 km/h) increments
i The set speed value is increased or
decreased in 5 mph (Canada: 10 km/h)
increments each time you lift or press the
cruise control lever up or down past the
resistance point.
XIncreasing: Briefly lift the cruise control
lever up past the resistance point in
direction of arrow :.XDecreasing: Briefly press the cruise
control lever down past the resistance
point in direction of arrow ;.XRelease the cruise control lever.
The new speed is set and the vehicle will
accelerate or decelerate. Keep in mind that
it may take a brief moment until the vehicle
has reached the set speed.182Driving systemsControls in detail
204_AKB; 5; 23, en-USd2ureepe,Version: 2.11.8.12009-07-16T17:54:06+02:00 - Seite 182
Page 185 of 364
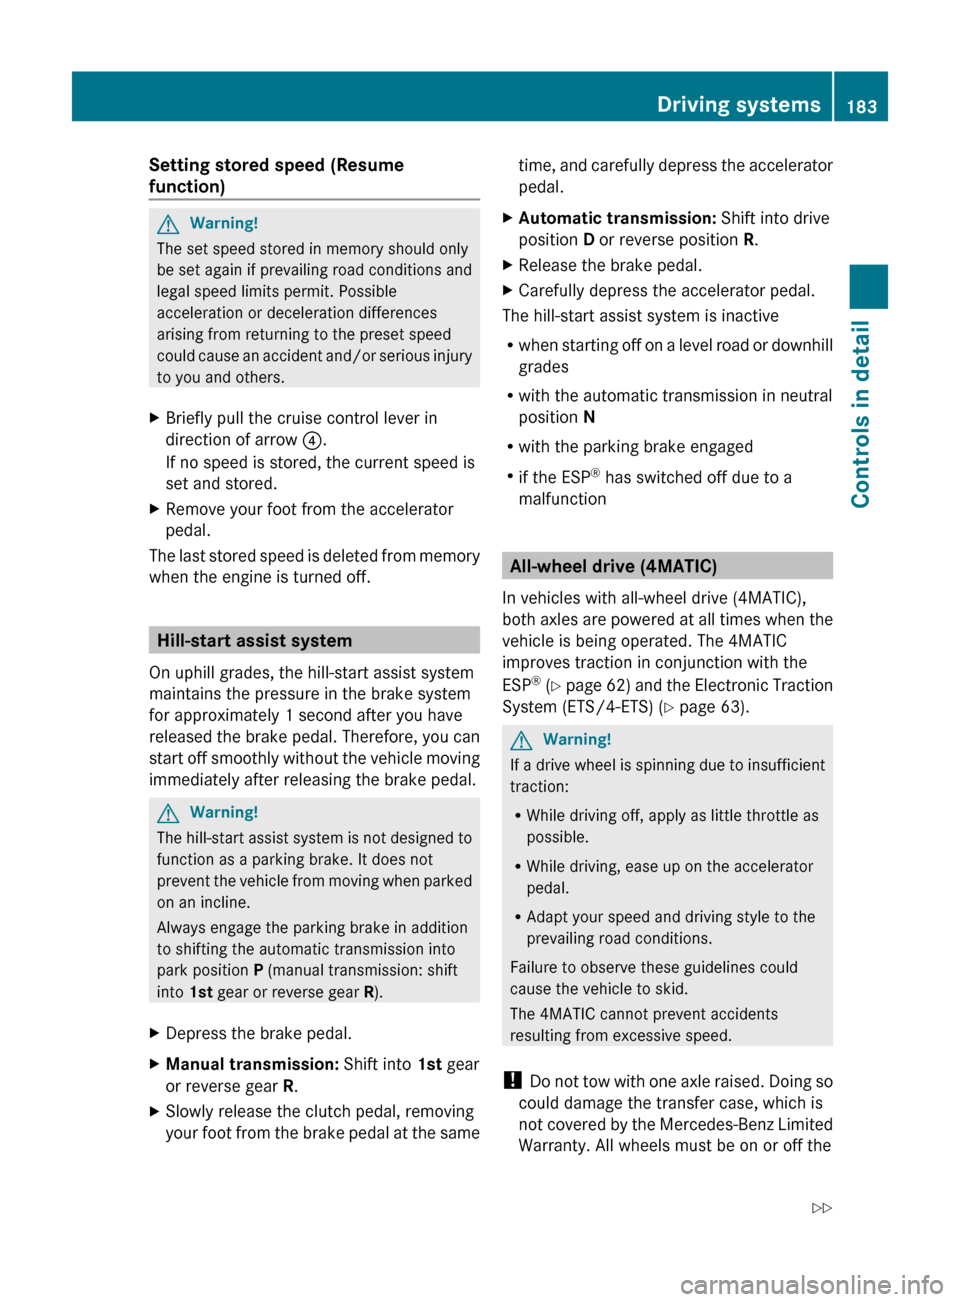
Setting stored speed (Resume
function) GWarning!
The set speed stored in memory should only
be set again if prevailing road conditions and
legal speed limits permit. Possible
acceleration or deceleration differences
arising from returning to the preset speed
could cause an accident and/or serious injury
to you and others.
XBriefly pull the cruise control lever in
direction of arrow ?.
If no speed is stored, the current speed is
set and stored.XRemove your foot from the accelerator
pedal.
The last stored speed is deleted from memory
when the engine is turned off.
Hill-start assist system
On uphill grades, the hill-start assist system
maintains the pressure in the brake system
for approximately 1 second after you have
released the brake pedal. Therefore, you can
start off smoothly without the vehicle moving
immediately after releasing the brake pedal.
GWarning!
The hill-start assist system is not designed to
function as a parking brake. It does not
prevent the vehicle from moving when parked
on an incline.
Always engage the parking brake in addition
to shifting the automatic transmission into
park position P (manual transmission: shift
into 1st gear or reverse gear R).
XDepress the brake pedal.XManual transmission: Shift into 1st gear
or reverse gear R.XSlowly release the clutch pedal, removing
your foot from the brake pedal at the sametime, and carefully depress the accelerator
pedal.XAutomatic transmission: Shift into drive
position D or reverse position R.XRelease the brake pedal.XCarefully depress the accelerator pedal.
The hill-start assist system is inactive
R when starting off on a level road or downhill
grades
R with the automatic transmission in neutral
position N
R with the parking brake engaged
R if the ESP ®
has switched off due to a
malfunction
All-wheel drive (4MATIC)
In vehicles with all-wheel drive (4MATIC),
both axles are powered at all times when the
vehicle is being operated. The 4MATIC
improves traction in conjunction with the
ESP ®
( Y page 62) and the Electronic Traction
System (ETS/4-ETS) ( Y page 63).
GWarning!
If a drive wheel is spinning due to insufficient
traction:
R While driving off, apply as little throttle as
possible.
R While driving, ease up on the accelerator
pedal.
R Adapt your speed and driving style to the
prevailing road conditions.
Failure to observe these guidelines could
cause the vehicle to skid.
The 4MATIC cannot prevent accidents
resulting from excessive speed.
! Do not tow with one axle raised. Doing so
could damage the transfer case, which is
not covered by the Mercedes-Benz Limited
Warranty. All wheels must be on or off the
Driving systems183Controls in detail204_AKB; 5; 23, en-USd2ureepe,Version: 2.11.8.12009-07-16T17:54:06+02:00 - Seite 183Z
Page 186 of 364

ground. Observe instructions for towing the
vehicle with all wheels on the ground.
! Only conduct operational or performance
tests on a two-axle dynamometer. If such
tests are necessary, contact an authorized
Mercedes-Benz Center. You could
otherwise seriously damage the brake
system and/or the transfer case which is
not covered by the Mercedes-Benz Limited
Warranty.
iIn winter operation, the maximum
effectiveness of the 4MATIC is only
achieved with winter tires (Y page 252) or
snow chains as required.
Dynamic handling package with sport
driving mode
The most important part of the dynamic
handling package with sport driving mode is
the variable damping system. It adjusts the
damping to the respective driving condition
automatically.
The damping adjustment depends on
Ryour driving style
Rthe road condition
Ryour individual selection, see the following
description
Vehicles with automatic transmission: The
sport driving mode button selects the
automatic shift programs C/S. For
information on the automatic shift programs,
see “Automatic shift programs”
(Y page 111). The automatic transmission
with dynamic handling package with sport
driving mode contains additional steering
wheel gearshift controls, see “One-touch
gearshifting” (Y page 112).
XStart the engine.
Sport driving mode
The firmer suspension tuning in sport driving
mode provides enhanced road contact.
Select this mode for example, on winding
highways.
The setting remains stored until you turn off
the engine.
XPress button ;.
Indicator lamp : comes on. The sport
driving mode is selected. Depending on
engine version, the accelerator pedal may
respond more immediate. In vehicles with
automatic transmission, automatic
program mode S is selected and will be
displayed in the multifunction display
(Y page 112).
Comfort driving mode
Vehicle handling in comfort driving mode is
softer. Select this mode when you prefer a
more comfortable driving style on straight
freeways.
XPress button ;.
Indicator lamp : goes out. The comfort
driving mode is selected. In vehicles with
automatic transmission, automatic
program mode C is selected and will be
displayed in the multifunction display
(Y page 112).
184Driving systemsControls in detail
204_AKB; 5; 23, en-USd2ureepe,Version: 2.11.8.12009-07-16T17:54:06+02:00 - Seite 184
Page 187 of 364

Parktronic system (Parking assist)
This feature is only available in Canada
vehicles.
The Parktronic system is an electronic
parking aid with ultrasonic sensors designed
to assist the driver during parking maneuvers.
The Parktronic system indicates the relative
distance between the vehicle and an obstacle
visually and audibly.
The Parktronic system is activated
automatically when
Ryou switch on the ignition
and
Ryou release the parking brake
and
Rvehicles with automatic transmission: the
automatic transmission is in drive position
D, reverse gear R, or neutral position N
The Parktronic system deactivates at speeds
above approximately 11 mph (18 km/h). At
lower speeds, the Parktronic system
activates again.
The Parktronic system also deactivates when
you shift the automatic transmission into
park position P or engage the parking brake.
The Parktronic system monitors the
surroundings of your vehicle with six sensors
in the front bumper and four sensors in the
rear bumper.
Example illustration, sensors in the front bumper
To function properly, sensors : must be free
of dirt, ice, snow and slush. Clean
sensors : regularly. Be careful not to
scratch or damage sensors :, see “Cleaning
the driving systems sensors” (Y page 263).
GWarning!
The Parktronic is a supplemental system. It is
not intended to, nor does it replace, the need
for extreme care. The responsibility during
parking and other critical maneuvers always
remains with the driver.
GWarning!
Make sure no persons or animals are in or
near the area in which you are parking/
maneuvering. Otherwise, they could be
injured.
! Special attention must be paid to objects
with smooth surfaces or low silhouettes
(e.g. trailer couplings, painted posts,
elevated crossbars or road curbs). Such
objects may not be detected by the system
and can damage the vehicle.
During parking maneuvers, pay special
attention to objects located above or below
the height of the sensors (e.g. street curbs,
painted posts, or trailer hitches etc.). The
Parktronic system will not detect such
objects at close range and damage to your
vehicle or the object may result.
! Ultrasonic signals from outside sources
(e.g. truck air brakes, car wash, or
jackhammers) may impair the operation of
the Parktronic system.
Range of the sensors
Driving systems185Controls in detail204_AKB; 5; 23, en-USd2ureepe,Version: 2.11.8.12009-07-16T17:54:06+02:00 - Seite 185Z