2010 JAGUAR XFR window
[x] Cancel search: windowPage 1973 of 3039

Published: 11-May-2011
Information and Entertainment System - Navigation System - Overview
Description and Operation
OVERVIEW
The navigation system provides audible and visual route guidance information to enable the driver to reach a desired
destination. The system allows the driver to choose the desired route using minor or major roads and will present 3 routes to
the driver based on user preferences. Directions to hospitals, museums, monuments and hotels are also available. The
navigation computer uses map information stored on a DVD (digital versatile disc) to determine the best route for the journey
and provide the driver with details of directions and approaching junctions.
The navigation system has various levels of user control through the Touch-screen and JaguarVoice system. System volume
adjustment can be made using the ICP (integrated control panel), Touch-screen and steering wheel controls.
There are 3 navigation system variants specific to various markets. On all systems the GPS (global positioning system) signal
is received by the GPS (global positioning system) antenna located in the roof pod antenna module.
The European navigation system includes the TMC (traffic messaging channel) function, which receives traffic information from
an FM antenna integrated into the heated rear window. On a pre-selected route the system will offer re-routing options
depending on traffic conditions.
The Japanese navigation system includes the VICS (vehicle information and communication systems) function. The VICS
(vehicle information and communication systems) supplies information to enable the navigation computer to re-route the
navigation guidance or to inform the vehicle driver of traffic conditions in the vehicles vicinity. Information is provided to the
system through an FM antenna integrated into the heated rear window and a VICS beacon located in the LH upper side of the
instrument panel.
The NAS (North American specification) variant does not include any additional traffic information systems.
The navigation system is primarily controlled from the Touch-screen which is located in the center of the instrument panel.
Control signals from the Touch-screen are sent on the MOST (media oriented systems transport) ring to the navigation
computer. The navigation computer uses a dedicated GVIF (gigabit video interface) bus to transmit video signals to the Touch-
screen.
Depending upon the audio system version fitted the navigation audio output signals are sent on the MOST (media oriented
systems transport) ring to the IAM (integrated audio module) or the power amplifier for speaker output.
Page 1980 of 3039

the roof pod and is shared with the DAB (digital audio broadcasting) band L antenna or satellite radio antenna where fitted.
The roof pod is located externally in a central position towards the rear of the roof.
The GPS antenna is designed with 50 ohm output impedance. The navigation computer is fitted with 50 ohm fakra II connectors to ensure compatibility with the antenna. For optimum performance 50 ohm low loss coaxial cable is used between
the antenna and navigation computer.
It is possible for the GPS antenna to lose the signal from the GPS satellites; In hilly or tree lined areas
Built up areas with tall buildings
In multi storey car parks
In garages
In tunnels
On bridges
During heavy rain or thunderstorms
When the signal is lost the navigation computer will continue to give guidance using memory mapped data from the DVD map until the signal is restored.
TMC/VICS FM Antenna
Data messages for both TMC (traffic message channel) and VICS (vehicle information and communication system) are received
through the FM antennas and diversity antenna module located in the heated rear window.
VICS Beacon Antenna (Japan Only)
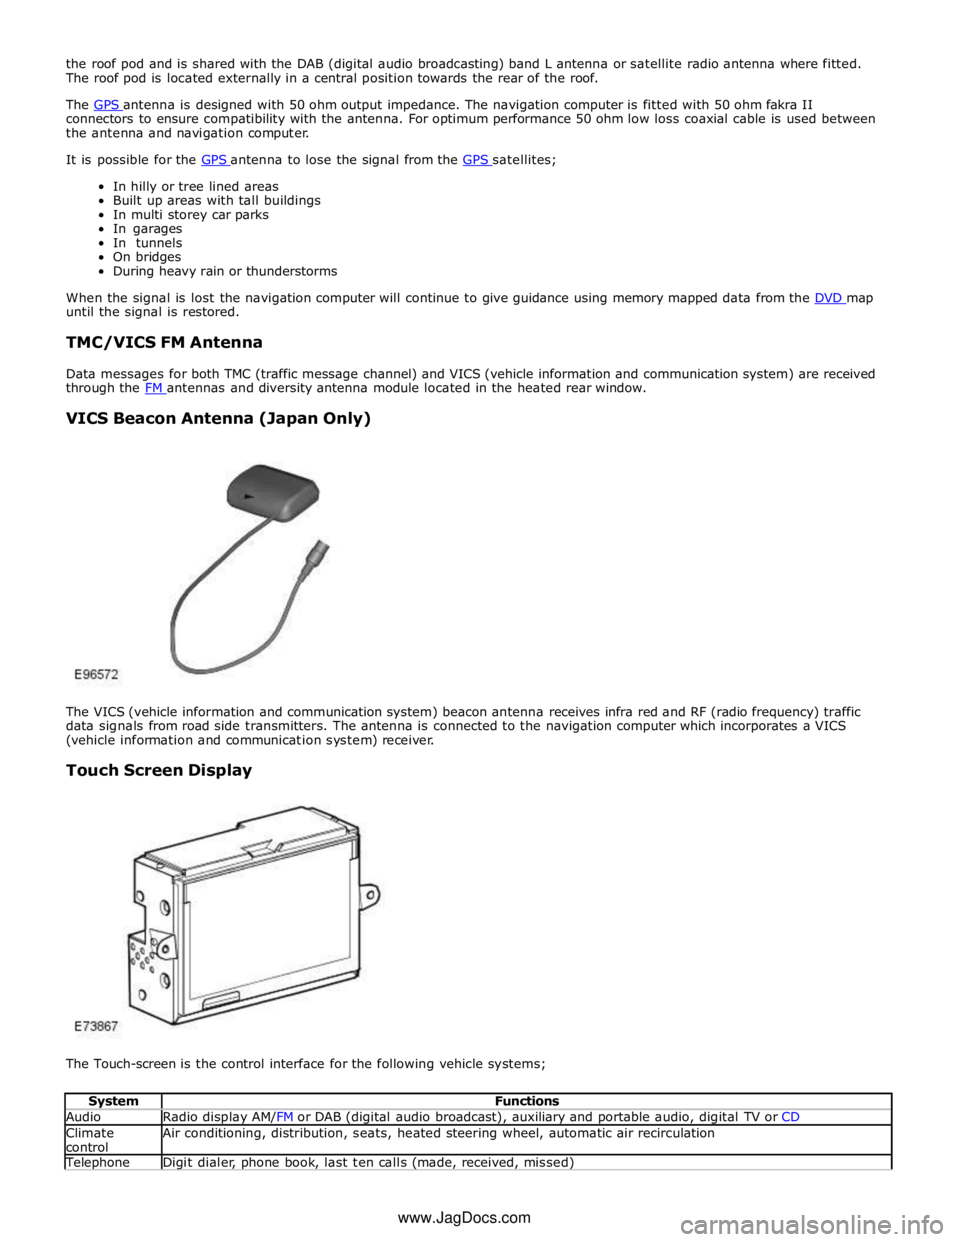
The VICS (vehicle information and communication system) beacon antenna receives infra red and RF (radio frequency) traffic
data signals from road side transmitters. The antenna is connected to the navigation computer which incorporates a VICS
(vehicle information and communication system) receiver.
Touch Screen Display
The Touch-screen is the control interface for the following vehicle systems;
System Functions Audio Radio display AM/FM or DAB (digital audio broadcast), auxiliary and portable audio, digital TV or CD Climate
control Air conditioning, distribution, seats, heated steering wheel, automatic air recirculation Telephone Digit dialer, phone book, last ten calls (made, received, missed) www.JagDocs.com
Page 1982 of 3039

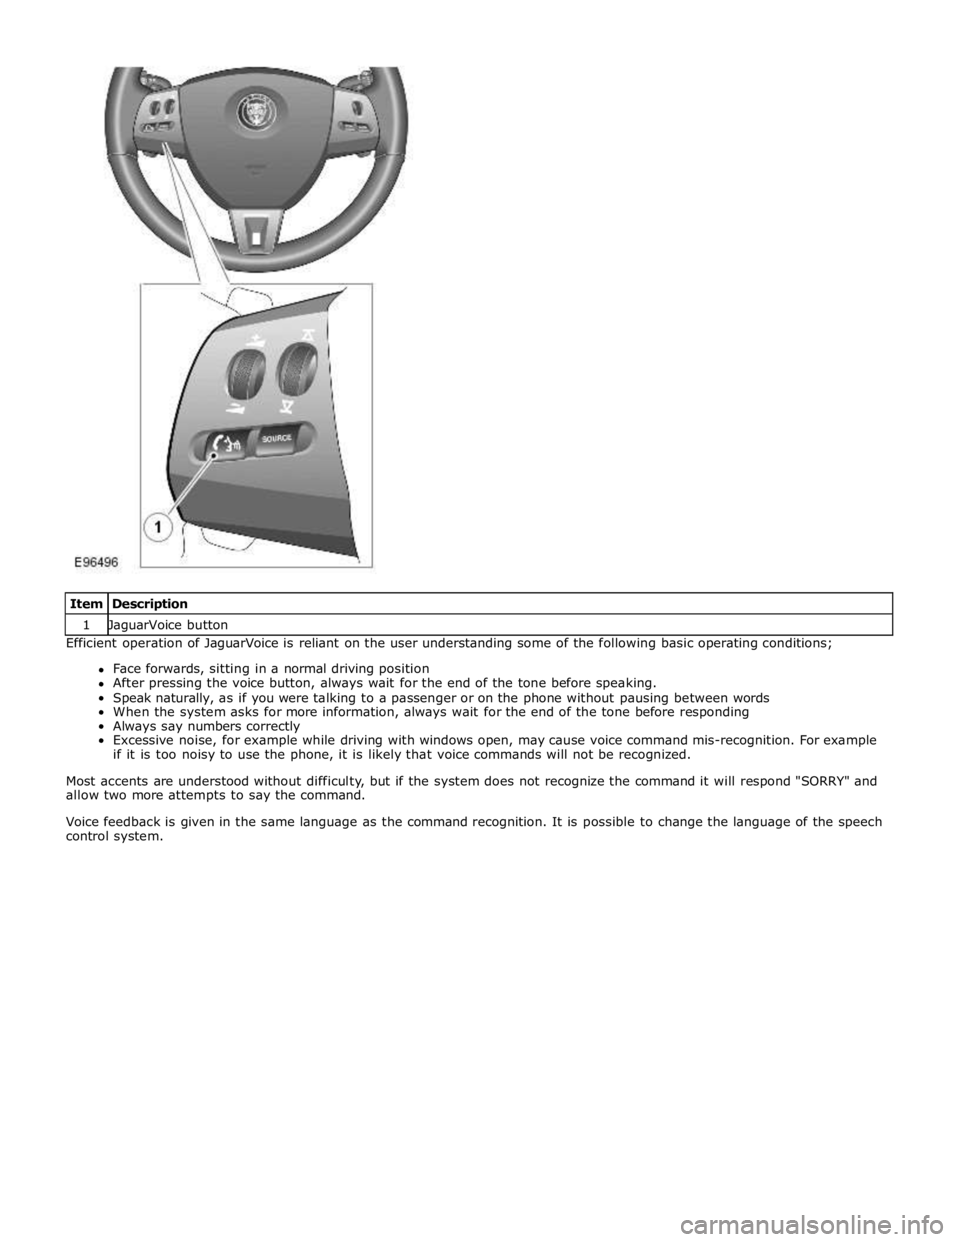
1 JaguarVoice button Efficient operation of JaguarVoice is reliant on the user understanding some of the following basic operating conditions;
Face forwards, sitting in a normal driving position
After pressing the voice button, always wait for the end of the tone before speaking.
Speak naturally, as if you were talking to a passenger or on the phone without pausing between words
When the system asks for more information, always wait for the end of the tone before responding
Always say numbers correctly
Excessive noise, for example while driving with windows open, may cause voice command mis-recognition. For example
if it is too noisy to use the phone, it is likely that voice commands will not be recognized.
Most accents are understood without difficulty, but if the system does not recognize the command it will respond "SORRY" and
allow two more attempts to say the command.
Voice feedback is given in the same language as the command recognition. It is possible to change the language of the speech
control system.
Page 1987 of 3039

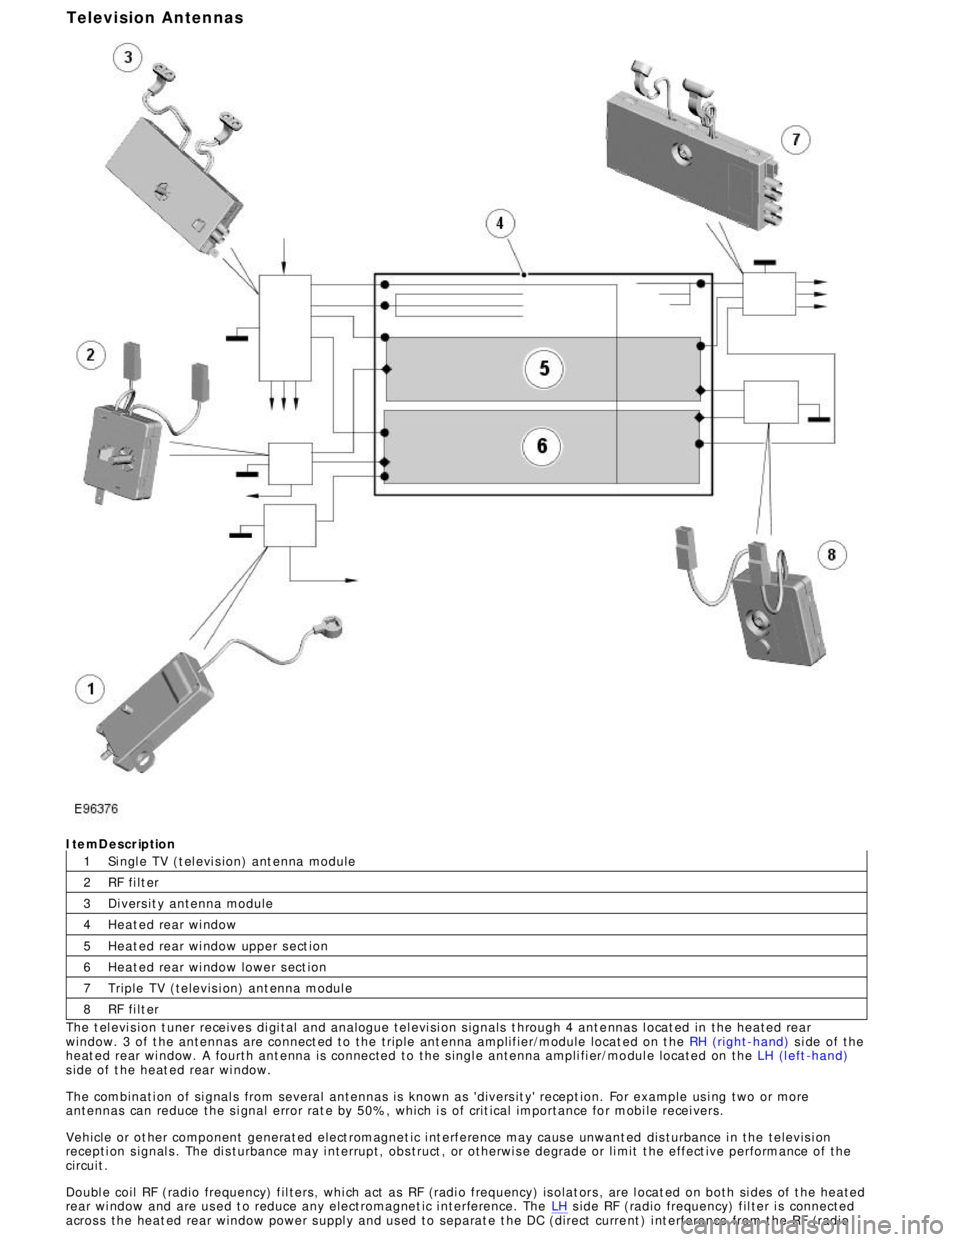
1
2
3
4
5
6
7
8ItemDescription
Si ngl e TV (t el evi s ion) ant enna module
RF fi lt er
Di vers it y antenna module
Heat ed rear wi ndow
Heat ed rear wi ndow upper s ect ion
Heat ed rear wi ndow lower s ect ion
Triple TV (televis i on) ant enna modul e
RF fi lt er
The t el evi s ion t uner receives di gi tal and analogue tel evi si on s ignals t hrough 4 ant e nnas l ocat ed in the heated rear
window. 3 of t he antennas are connect ed to the triple ant enna amplifier/module locat ed on t he RH (right-hand) s i de of the
heat ed rear wi ndow. A fourth ant enna is connected to the s ingl e antenna ampli fi er/mo dul e located on the LH (l eft -hand)
s ide of t he heat ed rear wi ndow.
The combinati on of si gnal s from several antennas is known as 'divers it y' recept ion. For example us i ng two or more
antennas can reduce the s i gnal error rat e by 50%, which i s of crit ical importance for mobi le recei vers.
Vehicle or ot her component generat ed elect romagnet ic i nt erference may caus e unwant ed dis turbance i n the televis i on
recepti on s ignal s . The di s turbance may i nterrupt, obs truct , or otherwi s e degrade or li mit t he effect ive performance of t he
circuit .
Doubl e coil RF (radio frequency) fil ters, whi ch act as RF (radi o frequency) is olat ors , are l ocat ed on both si des of t he heated
rear wi ndow and are us ed t o reduce any electromagnet ic i nterference. The LH s ide RF (radio frequency) fil ter i s connected
acros s the heat ed rear window power s uppl y and us ed to separat e t he DC (direct curre nt ) i nt erference from t he RF (radioTelevision Antennas
Page 2099 of 3039

DTC Description Possible Causes Action B124812
Right Rear Turn
Indicator
Right rear turn signal
lamp control circuit -
short to power Refer to the electrical circuit diagrams and check right rear turn
signal lamp control circuit for short to power B124813
Right Rear Turn
Indicator
Right rear turn signal
lamp control circuit -
open circuit Refer to the electrical circuit diagrams and check right rear turn
signal lamp control circuit for open circuit B1248-15
Right Rear Turn
Indicator - circuit
short to battery
or open
Right rear turn signal
lamp control circuit -
short circuit to power,
open circuit, high
resistance
Refer to electrical circuit diagrams and check right rear
turn signal lamp control circuit for short circuit to power,
open circuit, high resistance. Repair wiring harness as
required. Clear DTC and retest B126113
Fuel Flap/Door
Release Switch
Fuel filler flap digital
input signal circuit - open
circuit Refer to the electrical circuit diagrams and check fuel filler flap
digital input signal circuit for open circuit B1A7911 Rear Fog Lamp
Rear fog lamp control
circuit - short to ground Carry out any pinpoint test associated with this DTC using the
manufacturer approved diagnostic system. Refer to the electrical
circuit diagrams and check rear fog lamp control circuit for short
to ground B1A7912 Rear Fog Lamp
Rear fog lamp control
circuit - short to power Refer to the electrical circuit diagrams and check rear fog lamp
control circuit for short to power B1A7913 Rear Fog Lamp
Rear fog lamp control
circuit - open circuit Refer to the electrical circuit diagrams and check rear fog lamp
control circuit for open circuit B1C5512 Horn Relay
Horn control circuit -
short to power Refer to the electrical circuit diagrams and check horn control
circuit for short to power B1C5514 Horn Relay
Horn control circuit -
short to ground, open
circuit Refer to the electrical circuit diagrams and check horn control
circuit for short to ground, open circuit B1C8312 Rear Defog Relay
High Side output not
driven - diagnosis
feedback indicates output
is short to power Refer to the electrical circuit diagrams and check heated rear
window power supply circuit for short to power B1C8314 Rear Defog Relay
High Side output not
driven - diagnosis
feedback indicates output
is short to ground, open
circuit Refer to the electrical circuit diagrams and check heated rear
window power supply circuit for short to ground, open circuit B1C8393 Rear Defog Relay
High Side output not
driven - diagnosis
feedback indicates output
is at open load or short
to power Carry out any pinpoint test associated with this DTC using the
manufacturer approved diagnostic system. Refer to the electrical
circuit diagrams and check heated rear window power supply
circuit for open load and short to power B1C9112
Fuel Flap/Door
Lock Relay Coil
Circuit
Fuel filler flap locking
motor control circuit -
short to power Refer to the electrical circuit diagrams and check fuel filler flap
locking motor control circuit for short to power B1C9114
Fuel Flap/Door
Lock Relay Coil
Circuit
Fuel filler flap locking
motor control circuit -
short to ground, open
circuit Refer to the electrical circuit diagrams and check fuel filler flap
locking motor control circuit for short to ground, open circuit B1D3512 Hazard Switch
Hazard warning lamp
switch digital input circuit
- short to power Refer to the electrical circuit diagrams and check hazard warning
lamp switch digital input circuit for short to power
Page 2115 of 3039

length.
4.
5.
6.
7.
8.
9.
10.
11.
12.
13.
14.
15. NOTE: See illustration: Stripping Insulation
From the Relationship Table, find the correct length of insulation to be stripped from the pre-terminated wiring harness
and set the adjustable cable length stop to the correct length. Place the pre-terminated wiring harness in the wire
stripper and remove the insulation.
Put the cable identification sleeve(s) on to the wiring harness with the main cable colour nearest to the terminal.
During this next step do not over tighten. Place the selected butt splice connector in the crimping tool, matching the
aperture and the butt connector colours. Make sure that the window indentation in the butt connector is resting over
the guide bar on the lower jaw. Partially close the grip until the butt connector is securely held in the aperture. This will
give support to the butt connector while the pre-terminated wiring harness is inserted into it.
NOTE: See illustration: Splice Correctly Located
Insert the pre-terminated wiring harness into the butt connector and make sure that the wire is against the wire stop.
Close the grip firmly, crimping the lead to the butt connector. When the handles have been completely closed the butt
connector will be freed from the tool as the handles are released. If the handles have not been completely closed then
the jaws will hold the butt connector and it cannot be removed from the tool until the crimp is fully made by closing the
handles completely.
Make sure that the harness cable has been squarely cut and the correct length of insulation removed. If more than one
splice is needed the butt connectors must be not be crimped to the wiring harness at the same distance from the
connector. The splices must be staggered to prevent a bulk of splices in the same area of the wiring harness.
It is preferable to cover the butt splice joint with heat shrink sleeve. This is desirable not essential, except where the
electrical connector is a sealed electrical connector. Use the smaller diameter sleeve for red and blue pre-terminated
wiring harness(s) and the large diameter sleeve for the yellow pre-terminated wiring harness(s). It is advisable to place
the heat shrink over the completed joint but in some instances the sleeve will not pass over the terminal. Check, and if
required, place the correct size sleeve onto the harness cable or pre-terminated wiring harness before crimping the butt
splice to the wiring harness.
Place the harness cable into the butt splice with the splice window over the guide bar. Make sure that the cable harness
wire is against the stop in the butt splice, crimp the butt splice connector to the wiring harness.
Gently pull the harness cables each side of the butt splice to make sure that a secure joint has been made.
WARNING: Do not use a naked flame in areas where fuel or oil have been spilt. Clean the area of residual oil and
fuel and wait until the fuel spill has fully evaporated.
CAUTIONS:
When using a heat source make sure that it is localised and causes no damage to surrounding materials.
Where the repair procedure indicates that a glue lined heat shrink sleeve should be applied, apply sufficient heat
to the glue lined heat shrink to melt the glue in order to provide a water tight seal. Do not over heat the glue lined
heat shrink sleeve so that the wiring harness insulation becomes damaged.
Using a suitable heat source, shrink the sleeve over the butt splice.
If further pre-terminated wiring harness(s) are to be installed to the same electrical connector, make sure that the lead
is cut at a different length to the previous joint. This makes sure that the splices will, where possible, be staggered on
the wiring harness and prevent a bulk of splices in one area.
When all of the splices have been made, fit the terminal(s) to the electrical connector, taking care that the terminals
are correctly orientated.
Install the wiring harness cover and secure with adhesive electrical tape. Do not cover the wiring harness right to the
electrical connector as the terminals must have a little movement and not be firmly bound to the electrical connector or
wiring harness. Make sure that the cable identification sleeve(s) are showing at the wiring harness electrical connector.
www.JagDocs.com
Page 2129 of 3039

DTC Description Possible Causes Action B1163-15
Left Mirror Heater
Output Short To Power -
Circuit short to battery
or open
Short to power or open circuit
Refer to the electrical circuit diagrams and
test left mirror heater output circuit for short
to power or open circuit B1164-11
Right Mirror Heater
Output Short To Ground
- Circuit short to ground
Short to ground
Refer to the electrical circuit diagrams and
test right mirror heater output circuit for
short to ground B1164-15
Right Mirror Heater
Output Short To Power -
Circuit short to battery
or open
Short to power or open circuit
Refer to the electrical circuit diagrams and
test right mirror heater output circuit for
short to power or open circuit B1165-11
Left Front Puddle Lamp
Output Short To Ground
- Circuit short to ground
Short to ground
Refer to the electrical circuit diagrams and
test left front puddle lamp output circuit for
short to ground B1165-15
Left Front Puddle Lamp
Output Open Load Or
Short To Power - Circuit
short to battery or open
Short to power or open circuit
Refer to the electrical circuit diagrams and
test left front puddle lamp output circuit for
short to power or open circuit B1166-11
Right Front Puddle Lamp
Output Short To Ground
- Circuit short to ground
Short to ground
Refer to the electrical circuit diagrams and
test right front puddle lamp output circuit
for short to ground B1166-15
Right Front Puddle Lamp
Output Open Load Or
Short To Battery -
Circuit short to battery
or open
Short to power or open circuit
Refer to the electrical circuit diagrams and
test right front puddle lamp output circuit
for short to power or open circuit B1175-13
Driver Door Ajar Switch -
Circuit open
Driver door ajar switch signal
circuit - open circuit
Refer to the electrical circuit diagrams and
check driver door ajar switch signal circuit
for open circuit B1176-13
Passenger Door Ajar
Switch - Circuit open
Passenger door ajar switch
signal circuit - open circuit
Refer to the electrical circuit diagrams and
check passenger door ajar switch signal
circuit for open circuit B117C-07
Rear Power Window Up -
Mechanical failures
Set when window is reversed
during window up due to
mechanical problems, window
channel restriction preventing
window closure or Window
mechanism fault
Check for mechanical problems with the
window operation. Check for obstructions in
the window channels and that the glass is
not restricted in the full range of travel B117C-72
Rear Power Window Up -
Actuator stuck open
Door module internal relay
sticking open
Renew the relevant rear door module. Refer
to the warranty policy and procedures
manual if a module is suspect B117C-73
Rear Power Window Up -
Actuator stuck closed
Door module internal relay
sticking closed
Renew the relevant rear door module. Refer
to the warranty policy and procedures
manual if a module is suspect B117C-92
Rear Power Window Up -
Performance or incorrect
operation
Set when auto window up was
interrupted (e.g. by pressing
local switch)
Check the window operation. Clear the DTC
and retest B117D-72
Rear Power Window
Down - Actuator stuck
open
Door module internal relay
sticking open
Renew the relevant rear door module. Refer
to the warranty policy and procedures
manual if a module is suspect B117D-73
Rear Power Window
Down - Actuator stuck
closed
Door module internal relay
sticking closed
Renew the relevant rear door module. Refer
to the warranty policy and procedures
manual if a module is suspect
Page 2130 of 3039

DTC Description Possible Causes Action B117E-07 Front Power Window Up
- Mechanical failures
Set when window is reversed
during window up due to
mechanical problems, window
channel restriction preventing
window closure or Window
mechanism fault
Check for mechanical problems with the
window operation. Check for obstructions in
the window channels and that the glass is
not restricted in the full range of travel B117E-72 Front Power Window Up
- Actuator stuck open
Door module internal relay
sticking open
Renew the relevant front door module. Refer
to the warranty policy and procedures
manual if a module is suspect B117E-73 Front Power Window Up
- Actuator stuck closed
Door module internal relay
sticking closed
Renew the relevant front door module. Refer
to the warranty policy and procedures
manual if a module is suspect B117E-92 Front Power Window Up
- Performance or
incorrect operation
Set when auto window up was
interrupted (e.g. by pressing
local switch)
Check the window operation. Clear the DTC
and retest B117F-72
Front Power Window
Down - Actuator stuck
open
Door module internal relay
sticking open
Renew the relevant front door module. Refer
to the warranty policy and procedures
manual if a module is suspect B117F-73
Front Power Window
Down - Actuator stuck
closed
Door module internal relay
sticking closed
Renew the relevant front door module. Refer
to the warranty policy and procedures
manual if a module is suspect B1189-29
Front Window Position
Sensor - Signal invalid
Missing signal from position
sensor 1 or 2
Sensor circuit fault
Position sensor fault
Refer to the electrical circuit diagrams and
check the position sensor circuit between
the door module and window motor. Repair
as necessary. If the problem persists, renew
the window motor B118A-29
Rear Window Position
Sensor - Signal invalid
Missing signal from position
sensor 1 or 2
Sensor circuit fault
Position sensor fault
Refer to the electrical circuit diagrams and
check the position sensor circuit between
the door module and window motor. Repair
as necessary. If the problem persists, renew
the window motor B11C0-13
Driver Side Rear Door
Ajar Switch - Circuit
open
Left rear door ajar switch signal
circuit - open circuit
Refer to the electrical circuit diagrams and
check left rear door ajar switch signal circuit
for open circuit B11C1-13
Passenger Side Rear
Door Ajar Switch -
Circuit open
Right rear door ajar switch
signal circuit - open circuit
Refer to the electrical circuit diagrams and
check right rear door ajar switch signal
circuit for open circuit B11D1-83
LIN Bus "C" - Value of
signal protection
calculation incorrect
LIN Bus checksum error; driver
switchpack internal fault
Refer to the electrical circuit diagrams and
check the LIN Bus circuit between the driver
door window switch and the door module.
Check the connectors for integrity and
security. Clear the DTC and retest. If the
problem persists, renew the driver door
window switch B11D1-86
LIN Bus "C" - Signal
invalid
LIN Bus header error; driver
switchpack internal fault
Refer to the electrical circuit diagrams and
check the LIN Bus circuit between the driver
door window switch and the door module.
Check the connectors for integrity and
security. Clear the DTC and retest. If the
problem persists, renew the driver door
window switch B11D1-87
LIN Bus "C" - Missing
message
Slave node communication
missing; driver switchpack
internal fault
Refer to the electrical circuit diagrams and
check the LIN Bus circuit between the driver
door window switch and the door module.
Check the connectors for integrity and www.JagDocs.com