2010 JAGUAR XFR Engine
[x] Cancel search: EnginePage 702 of 3039

ABS Module
Item Description 1 LH front brake 2 RH rear brake 3 LH rear brake 4 RH front brake 5 Primary inlet 6 Secondary inlet The ABS module is located in the passenger side, rear engine bay and incorporates the HCU. The module is mounted on the rear face of the HCU, which it uses to control all braking and stability functions by modulating hydraulic pressure to the individual wheel brakes.
Two types of ABS modules are available; one for vehicles with standard Speed Control, one for vehicles fitted with Adaptive Speed Control.
If an ABS modulator fault is detected, 'ABS FAULT' will be displayed in the instrument cluster message center and the amber warning indicator will illuminate.
Refer to: Information and Message Center (413-08 Information and Message Center, Description and Operation).
CAUTION: The ABS module and the HCU comprise a single unit and must not be separated.
Hydraulic Control Unit
The HCU is a four channel unit, secured to a mounting bracket located in the passenger side, rear engine bay. The HCU modulates the supply of hydraulic pressure to the brakes under the control of the ABS module. Refer to: Hydraulic Brake Actuation (206-06 Hydraulic Brake Actuation, Description and Operation).
Page 724 of 3039

2. Free play should be between 0 and 6 mm (0 and 0.24 in) at the steering wheel rim. If the free play exceeds this limit,
either the ball joints are worn, the lower steering column joints are worn or the backlash of the steering gear is
excessive.
CAUTION: DO NOT attempt to adjust the steering gear yoke. Failure to follow this instruction will invalidate the steering
gear warranty.
3. The backlash of the steering gear cannot be adjusted, install a new steering gear if excessive backlash is diagnosed.
4. Grasp the steering wheel firmly and move it up and down and to the left and right without turning the wheel to check
for column bearing wear, steering wheel or steering column.
Power Steering Fluid Condition Check
1. Run the engine for 2 minutes.
2. Check the power steering fluid system level.
3. Observe the color and the odor. The color under normal circumstances should be dark reddish, not brown or black.
4. Using a suitable clean syringe extract a suitable amount of fluid from the reservoir.
5. Allow the fluid to drip onto a facial tissue and examine the stain.
6. If evidence of solid material is found, the power steering fluid system should be drained for further inspection.
7. If fluid contamination or steering component failure is confirmed by the sediment in the power steering fluid system,
refer to Steering Fault Diagnosis by Symptom Charts in this section.
Power Steering Pressure Test
Test Equipment
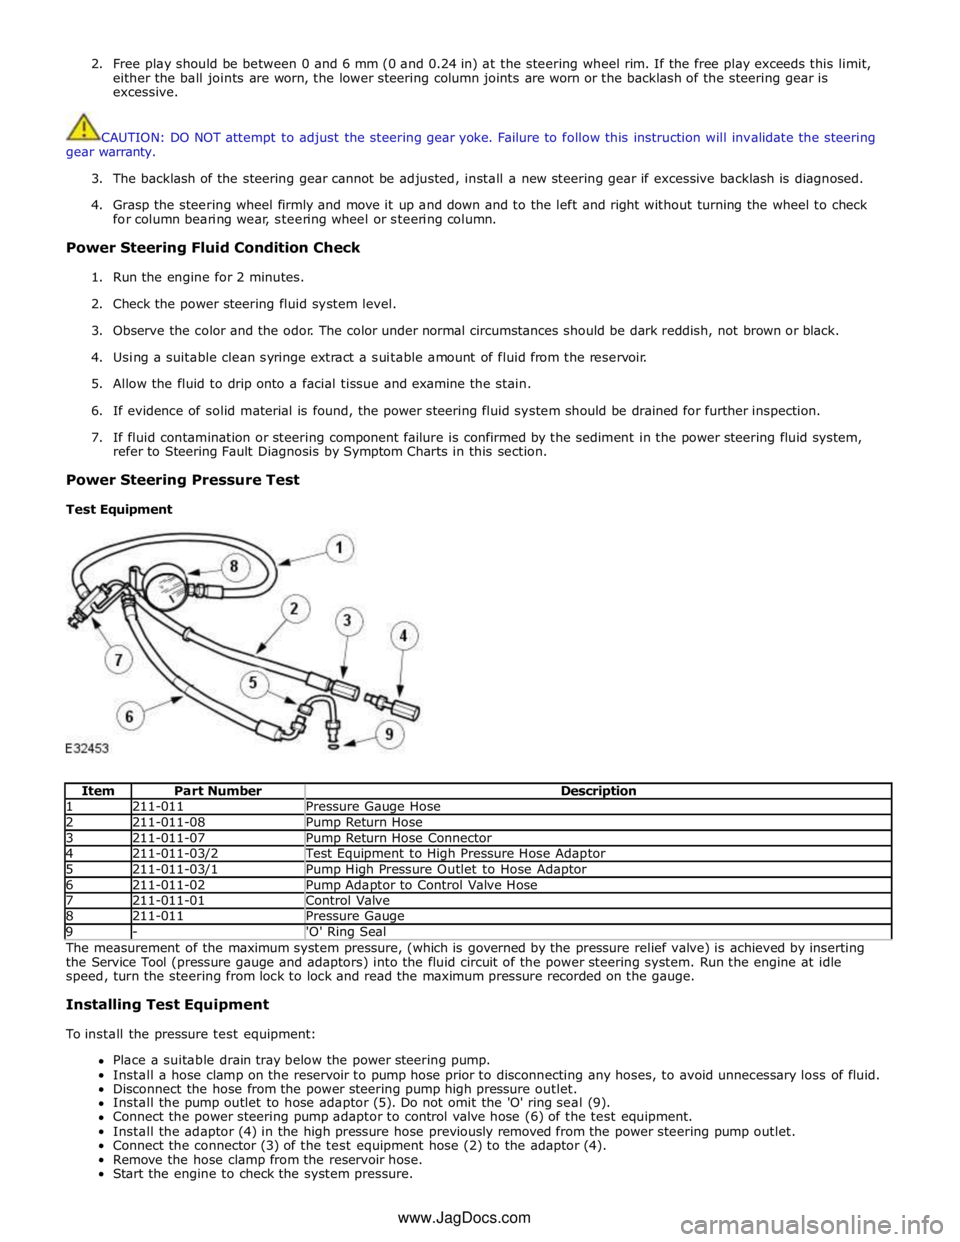
Item Part Number Description 1 211-011 Pressure Gauge Hose 2 211-011-08 Pump Return Hose 3 211-011-07 Pump Return Hose Connector 4 211-011-03/2 Test Equipment to High Pressure Hose Adaptor 5 211-011-03/1 Pump High Pressure Outlet to Hose Adaptor 6 211-011-02 Pump Adaptor to Control Valve Hose 7 211-011-01 Control Valve 8 211-011 Pressure Gauge 9 - 'O' Ring Seal The measurement of the maximum system pressure, (which is governed by the pressure relief valve) is achieved by inserting
the Service Tool (pressure gauge and adaptors) into the fluid circuit of the power steering system. Run the engine at idle
speed, turn the steering from lock to lock and read the maximum pressure recorded on the gauge.
Installing Test Equipment
To install the pressure test equipment:
Place a suitable drain tray below the power steering pump.
Install a hose clamp on the reservoir to pump hose prior to disconnecting any hoses, to avoid unnecessary loss of fluid.
Disconnect the hose from the power steering pump high pressure outlet.
Install the pump outlet to hose adaptor (5). Do not omit the 'O' ring seal (9).
Connect the power steering pump adaptor to control valve hose (6) of the test equipment.
Install the adaptor (4) in the high pressure hose previously removed from the power steering pump outlet.
Connect the connector (3) of the test equipment hose (2) to the adaptor (4).
Remove the hose clamp from the reservoir hose.
Start the engine to check the system pressure. www.JagDocs.com
Page 725 of 3039

With the control valve (7) OPEN and the engine idling, the following system pressures may be checked:
During turning when static (dry parking pressure).
When the steering is held on full lock (maximum system pressure or pressure relief).
With the steering at rest (idle pressure or back pressure).
CAUTIONS:
To avoid excessive heating of the power steering pump when checking the pressure, do not close the valve for more than
5 seconds maximum.
When checking the pump pressure DO NOT drive the vehicle with the test equipment installed.
With the control valve (7) CLOSED the power steering pump maximum output pressure can be checked.
Removing Test Equipment
To remove the test equipment:
Install a hose clamp on the reservoir to power steering pump hose.
Removing the test equipment is a reversal of the installation instructions.
Install a new 'O' ring seal (9) to the power steering pump high pressure outlet to hose connection.
Install the original hose to the power steering pump.
Remove the clamp from the reservoir to the power steering pump hose.
Top-up the reservoir fluid.
Bleed the power steering system.
REFER to: Power Steering System Bleeding (211-00 Steering System - General Information, General Procedures).
Description of Terms General Steering System Noises
Boom
Rhythmic sound like a drum roll or distant thunder. May cause pressure on the ear drum.
Buzz
Low-pitched sound, like a bee. Usually associated with vibrations.
Chatter
Rapidly repeating metallic sound.
Chuckle
Rapid noise that sounds like a stick against the spokes of a spinning bicycle wheel.
Chirp
High pitched rapidly repeating sound, like chirping birds.
Click
Light sound, like a ball point pen being clicked.
Click/Thump
Heavy metal-to-metal sound, like a hammer striking steel.
Grind
Abrasive sound, like a grinding wheel or sandpaper rubbing against wood.
Groan/Moan
Continuous, low-pitched humming sound.
Groan/Howl
Low, guttural sound, like an angry dog.
Hiss
Continuous sound like air escaping from a tire valve.
Page 727 of 3039

between moving components such as the steering wheel to steering column shroud.
Grunt (Squawk/Whoop)
Grunt is a 'honking' sound elicited when coming off one of the steering stops. Grunt is generally excited during parking
manoeuvres with a low to medium speed steering input.
Hiss (Swish)
Hiss or Valve Hiss is a high-frequency sound coming from the steering gear when the system is loaded. It is a rushing or
'swish' noise that doesn't change frequency with RPM. Hiss is the general noise generated by the flow of hydraulic fluid through
restrictions in the steering system. Restrictions include the rotary steering valve, power steering tubes, connectors, tuning
orifices, etc. Hiss can be air-borne and structure-borne, but the structure-borne path through the steering intermediate shaft is
usually dominant.
Moan (Groan)
Moan is the general structure-borne noise of the steering system. Moan is primarily transmitted to the driver via the body
structure through the pump mount, engine mounts, power steering lines and power steering brackets. On some vehicles, moan
is a loud humming noise, often present when the wheel is turned and the system is loaded. It may change frequency with
engine RPM and if the system is loaded or unloaded.
Steering Gear Knock (Steering Gear Slap)
CAUTION: DO NOT attempt to adjust the steering gear yoke. Failure to follow this instruction will invalidate the steering
gear warranty.
Steering gear knock is a rattle sound and steering wheel vibration caused by separation of the steering gear and pinion while
driving over bumps. It is a structure-borne noise transmitted through the intermediate shaft and column. Steering gear knock
can also be heard as a 'thump' or impact noise that occurs with the vehicle stationary when the steering wheel is released
from a loaded position and allowed to return to rest. Noise occurs with the engine on or off.
Rattles
Rattles are noises caused by knocking or hitting of components in the steering system. Steering rattles can occur in the engine
compartment, the suspension, or the passenger compartment. Rattles can be caused by loose components, movable and
flexible components, and improper clearances.
Squeaks/Scrapes
Squeaks/Scrapes are noises due to friction or component rubbing anywhere in the steering system. Squeaks/Scrapes have
appeared in steering linkages and joints, in column components and in column and steering wheel trim.
Weep
Weep is an air-borne noise, occasionally generated when turning the steering across lock at a constant rate. When present on
a vehicle the noise, once initiated can often be maintained across a large proportion of the available steering movement.
Whistle
Whistle is similar to hiss but is louder and of a higher frequency. It is also more of a pure tone noise than hiss. Whistle is
air-borne and is generated by a high flow rate of hydraulic fluid through a small restriction.
Zip
Zip noise is the air-borne noise generated by power steering pump cavitation when power steering fluid does not flow freely
through the suction hose from the reservoir to the pump. Zip primarily occurs during cold weather at start-up.
Steering System Vibrations and Harshness
Buzz
Buzz is a tactile rotary vibration felt in the steering wheel when steering inputs are slow. Buzz can also be called a grinding
feel and it is closely related to grunt and is caused by high system gain with low damping. Buzz is generally excited during
parking manoeuvres with low to medium speed steering input.
Buzz (Electrical)
A different steering buzz can be caused by pulse width modulated (PWM) electric actuators used in variable assist steering
systems. This buzz is felt by turning the ignition key to run without starting the engine and holding onto the steering wheel.
In extreme cases, the buzz can be felt with the engine running also.
Column/Steering Wheel Shake
Column shake is a low frequency vertical vibration excited by primary engine vibrations.
Nibble (Shimmy)
Page 729 of 3039

Published: 07-Jul-2011
Steering System - General Information - Power Steering System Bleeding
General Procedures
NOTE: Some variation in the illustrations may occur, but the essential information is always correct.
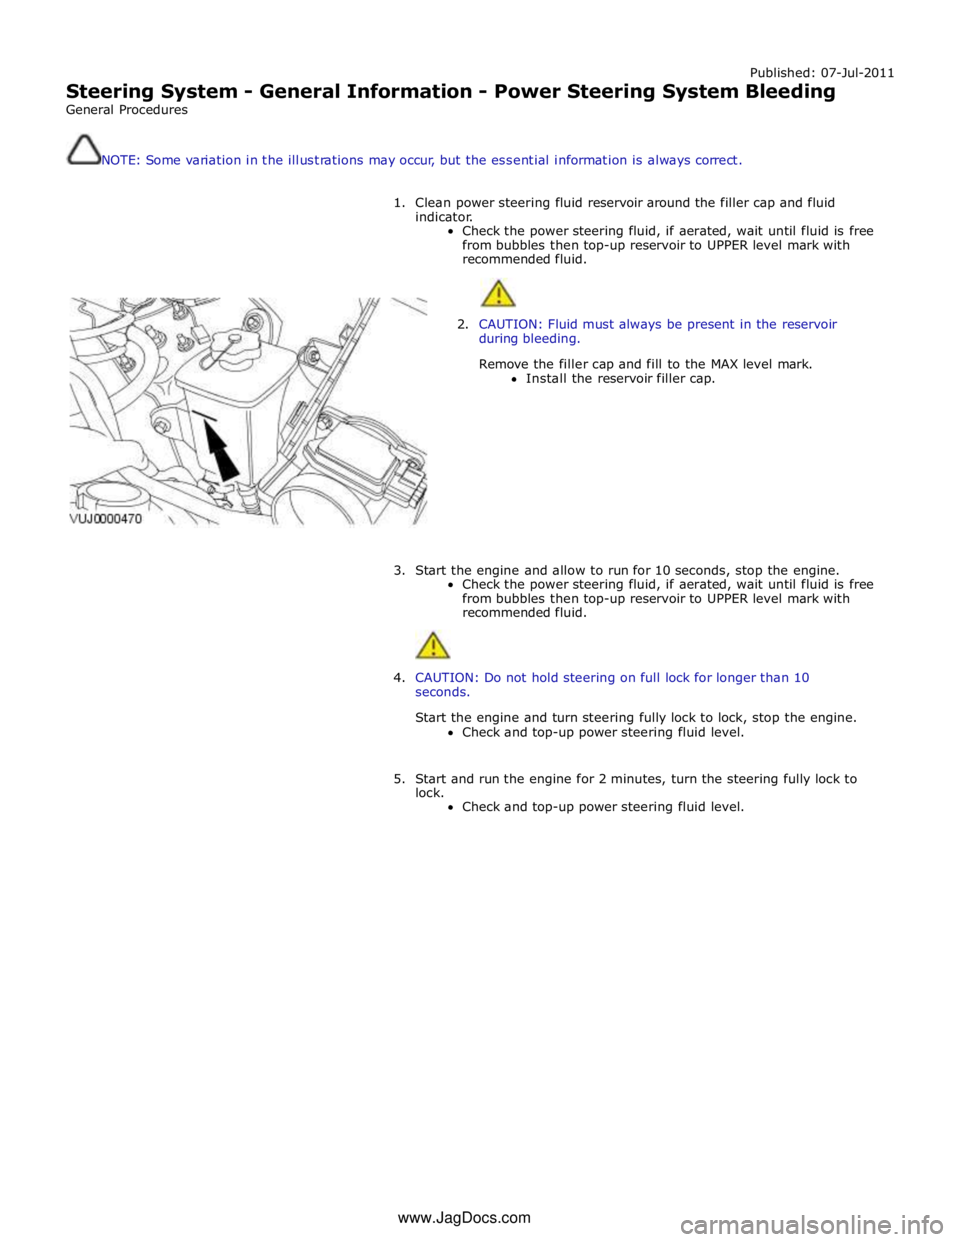
1. Clean power steering fluid reservoir around the filler cap and fluid
indicator.
Check the power steering fluid, if aerated, wait until fluid is free
from bubbles then top-up reservoir to UPPER level mark with
recommended fluid.
2. CAUTION: Fluid must always be present in the reservoir
during bleeding.
Remove the filler cap and fill to the MAX level mark.
Install the reservoir filler cap.
3. Start the engine and allow to run for 10 seconds, stop the engine.
Check the power steering fluid, if aerated, wait until fluid is free
from bubbles then top-up reservoir to UPPER level mark with
recommended fluid.
4. CAUTION: Do not hold steering on full lock for longer than 10
seconds.
Start the engine and turn steering fully lock to lock, stop the engine.
Check and top-up power steering fluid level.
5. Start and run the engine for 2 minutes, turn the steering fully lock to
lock.
Check and top-up power steering fluid level. www.JagDocs.com
Page 732 of 3039

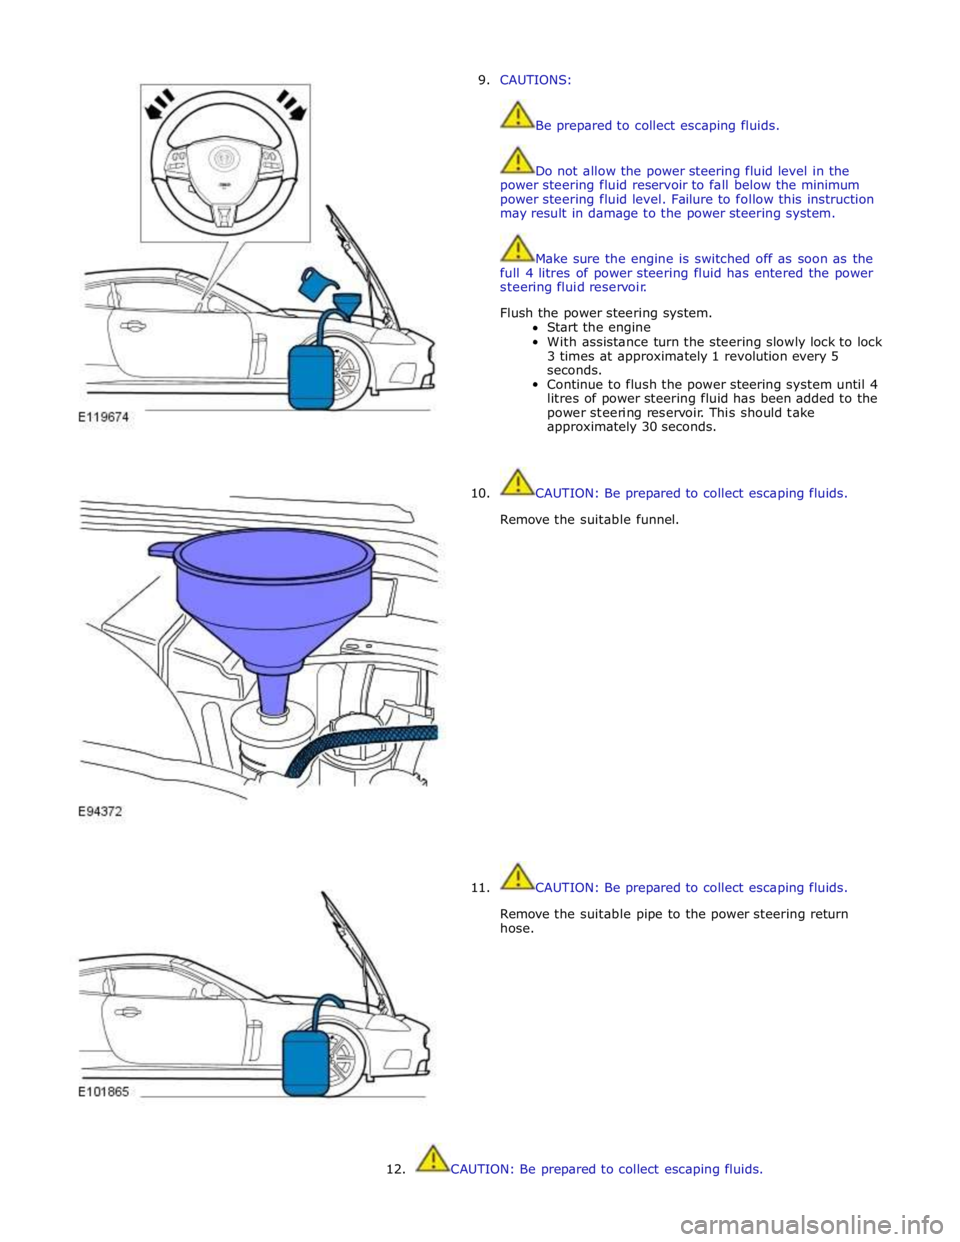
9. CAUTIONS:
Be prepared to collect escaping fluids.
Do not allow the power steering fluid level in the
power steering fluid reservoir to fall below the minimum
power steering fluid level. Failure to follow this instruction
may result in damage to the power steering system.
Make sure the engine is switched off as soon as the
full 4 litres of power steering fluid has entered the power
steering fluid reservoir.
Flush the power steering system.
Start the engine
With assistance turn the steering slowly lock to lock
3 times at approximately 1 revolution every 5
seconds.
Continue to flush the power steering system until 4
litres of power steering fluid has been added to the
power steering reservoir. This should take
approximately 30 seconds.
10.
11. CAUTION: Be prepared to collect escaping fluids.
Remove the suitable funnel.
CAUTION: Be prepared to collect escaping fluids.
Remove the suitable pipe to the power steering return
hose.
12.
CAUTION: Be prepared to collect escaping fluids.
Page 736 of 3039

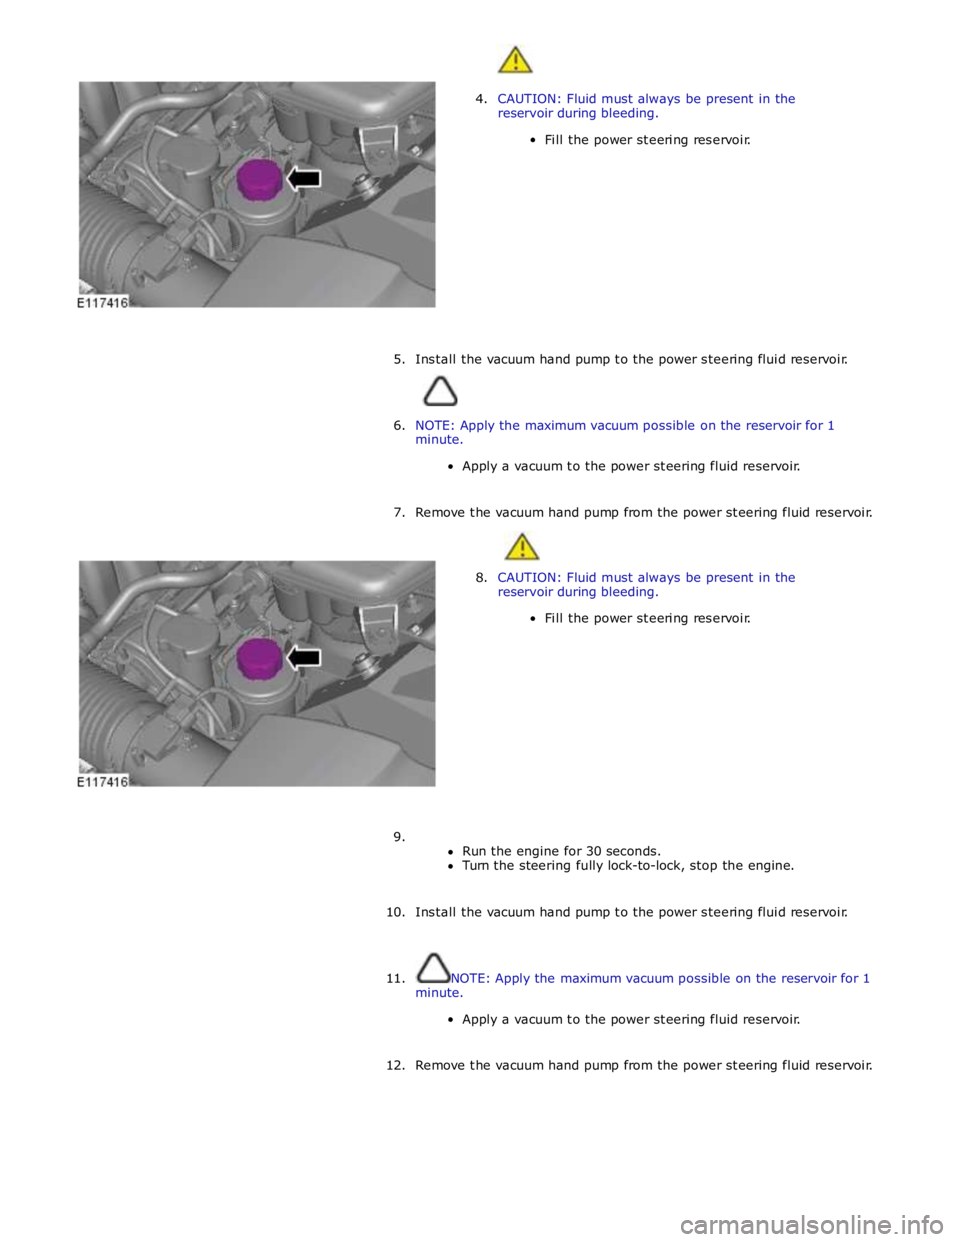
4. CAUTION: Fluid must always be present in the
reservoir during bleeding.
Fill the power steering reservoir.
5. Install the vacuum hand pump to the power steering fluid reservoir.
6. NOTE: Apply the maximum vacuum possible on the reservoir for 1
minute.
Apply a vacuum to the power steering fluid reservoir.
7. Remove the vacuum hand pump from the power steering fluid reservoir.
8. CAUTION: Fluid must always be present in the
reservoir during bleeding.
Fill the power steering reservoir.
9.
Run the engine for 30 seconds.
Turn the steering fully lock-to-lock, stop the engine.
10. Install the vacuum hand pump to the power steering fluid reservoir.
11. NOTE: Apply the maximum vacuum possible on the reservoir for 1
minute.
Apply a vacuum to the power steering fluid reservoir.
12. Remove the vacuum hand pump from the power steering fluid reservoir.
Page 737 of 3039

13. CAUTION: Fluid must always be present in the
reservoir during bleeding.
Fill the power steering reservoir.
14.
Run the engine for 30 seconds.
Turn the steering fully lock-to-lock, stop the engine.
15. Install the vacuum hand pump to the power steering fluid reservoir.
16. NOTE: Apply the maximum vacuum possible on the reservoir for 1
minute.
Apply a vacuum to the power steering fluid reservoir.
17. Remove the vacuum hand pump from the power steering fluid reservoir.
18. CAUTION: Fluid must always be present in the
reservoir during bleeding.
Fill the power steering reservoir.
19.
Run the engine for 30 seconds.
Turn the steering fully lock-to-lock, stop the engine.