Page 2535 of 3039

Wipers and Washers - Wipers and Washers - Overview
Description and Operation
OVERVIEW Published: 11-May-2011
The wipers and washers comprise a windshield wiper system with a conventional wiper linkage and 2 wiper blades and a
windshield washer with jets located on the wiper arms. A headlamp powerwash is available on certain models.
The front wipers have 4 operational states:
Flick wipe
Auto
Slow wipe
Fast wipe.
Operation of the windshield wipers and washers and the headlamp powerwash is controlled by the CJB (central junction box) in
response to driver inputs and signals from the rain/light sensor. The instrument cluster monitors the condition of the
wiper/washer control switch and transmits driver requests to the CJB over the medium speed CAN (controller area network) bus.
The 'Auto' function requires an input from the rain sensor. The rain sensor is mounted on the inner surface of the windshield
and transmits an infra-red signal to determine the amount of water on the outer surface of the windshield. A value is then
transmitted to the CJB over the LIN (local interconnect network) bus.
Page 2540 of 3039

and is connected at the opposite end to the LH pivot housing via a crank. The LH pivot housing crank is fitted with a second link rod which is connected directly to the crank on the RH pivot housing.
The motor crank converts rotary motion from the motor output shaft into linear movement of the link rods. The cranks
connected to each pivot housing, convert the linear motion of the link rods back to rotary motion of the pivot housings. This
rotary motion is passed to the wiper arms and blades causing the blades to wipe an arc across the windshield.
Each wiper arm is located on a taper spline on the respective pivot housing. A nut is screwed on the end of the pivot housing
shaft and positively secures the wiper arm on the taper spline.
The wiper blades are attached to the wiper arms with a quick release fittings. The blades are of the flat blade type. These
blades have an integral spring along their full length which curves the blade to match the windshield and provides even blade
to windshield contact pressure along the entire length of the blade.
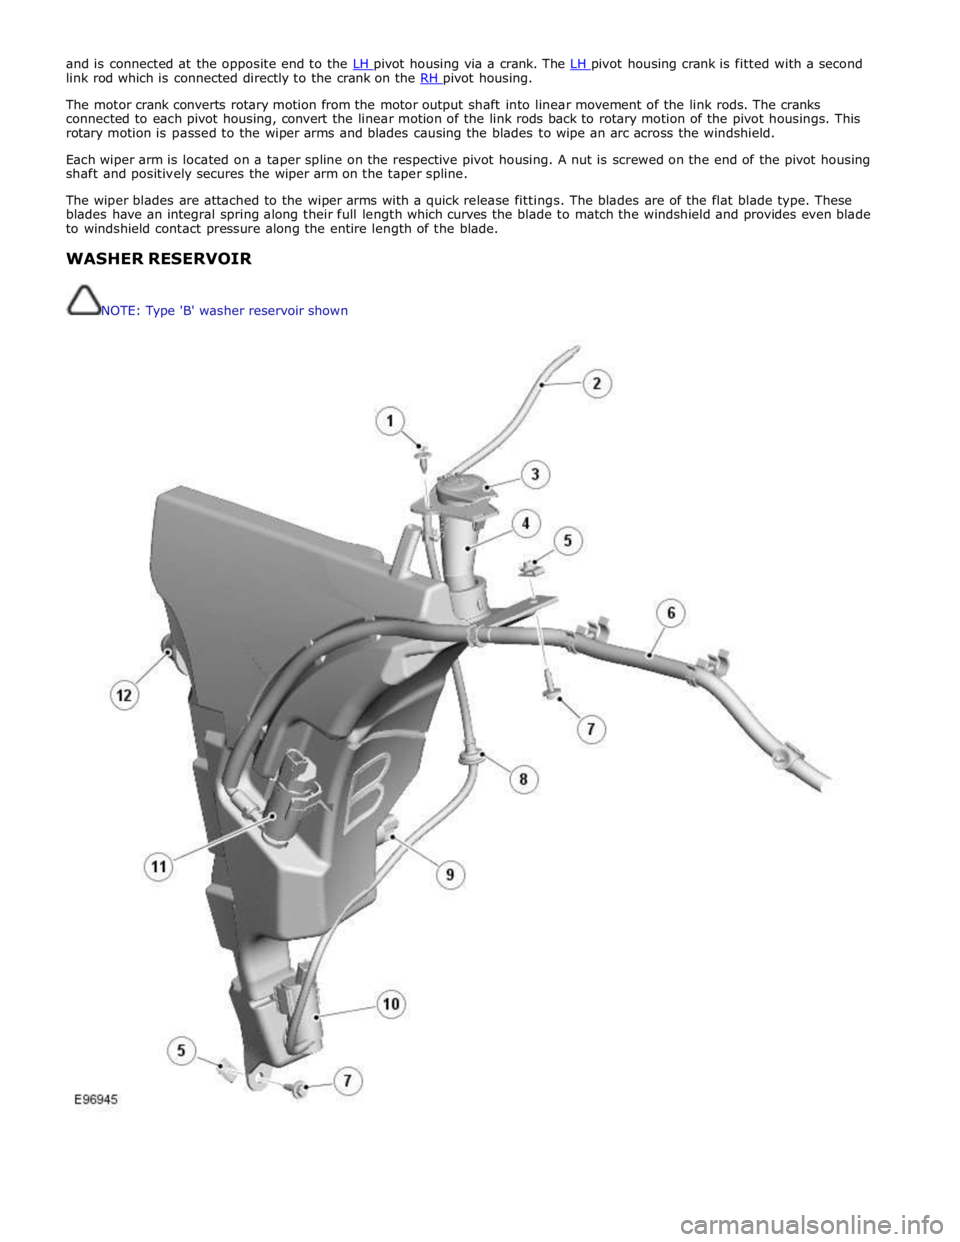
WASHER RESERVOIR
NOTE: Type 'B' washer reservoir shown
Page 2542 of 3039

On vehicles with headlamp powerwash, each headlamp assembly is fitted with a headlamp powerwasher. The powerwasher is
located on the underside of the headlamp assembly. The powerwasher is located in a clip at the front of the headlamp and
secured with 2 self tapping screws to the headlamp body.
The powerwasher is a telescopic unit which extends forwards from the headlamp assembly under washer fluid pressure
supplied by the headlamp powerwash pump. When the pump pressure decreases the powerwasher is automatically retracted
back into the housing. The outer end of the powerwasher is fitted with a trim which blends the powerwasher into the headlamp
when it is not operating. The powerwasher has two washer jets which direct washer fluid under high pressure onto the
headlamp lens when the powerwasher is extended.
RAIN/LIGHT SENSOR
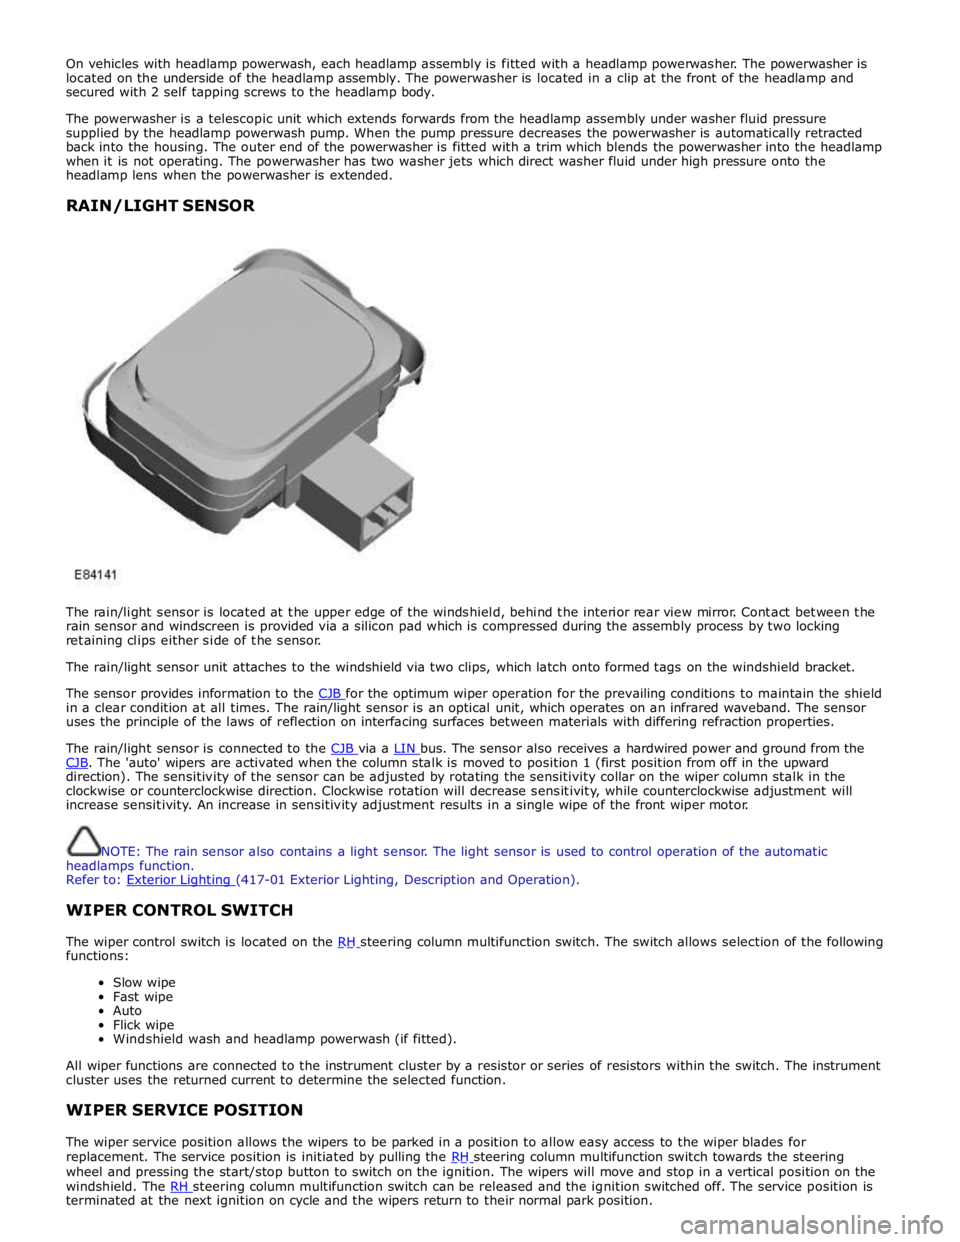
The rain/light sensor is located at the upper edge of the windshield, behind the interior rear view mirror. Contact between the
rain sensor and windscreen is provided via a silicon pad which is compressed during the assembly process by two locking
retaining clips either side of the sensor.
The rain/light sensor unit attaches to the windshield via two clips, which latch onto formed tags on the windshield bracket.
The sensor provides information to the CJB for the optimum wiper operation for the prevailing conditions to maintain the shield in a clear condition at all times. The rain/light sensor is an optical unit, which operates on an infrared waveband. The sensor
uses the principle of the laws of reflection on interfacing surfaces between materials with differing refraction properties.
The rain/light sensor is connected to the CJB via a LIN bus. The sensor also receives a hardwired power and ground from the CJB. The 'auto' wipers are activated when the column stalk is moved to position 1 (first position from off in the upward direction). The sensitivity of the sensor can be adjusted by rotating the sensitivity collar on the wiper column stalk in the
clockwise or counterclockwise direction. Clockwise rotation will decrease sensitivity, while counterclockwise adjustment will
increase sensitivity. An increase in sensitivity adjustment results in a single wipe of the front wiper motor.
NOTE: The rain sensor also contains a light sensor. The light sensor is used to control operation of the automatic
headlamps function.
Refer to: Exterior Lighting (417-01 Exterior Lighting, Description and Operation).
WIPER CONTROL SWITCH
The wiper control switch is located on the RH steering column multifunction switch. The switch allows selection of the following functions:
Slow wipe
Fast wipe
Auto
Flick wipe
Windshield wash and headlamp powerwash (if fitted).
All wiper functions are connected to the instrument cluster by a resistor or series of resistors within the switch. The instrument
cluster uses the returned current to determine the selected function.
WIPER SERVICE POSITION
The wiper service position allows the wipers to be parked in a position to allow easy access to the wiper blades for
replacement. The service position is initiated by pulling the RH steering column multifunction switch towards the steering wheel and pressing the start/stop button to switch on the ignition. The wipers will move and stop in a vertical position on the
windshield. The RH steering column multifunction switch can be released and the ignition switched off. The service position is terminated at the next ignition on cycle and the wipers return to their normal park position.
Page 2555 of 3039
Wipers and Washers - Windshield Wiper Pivot Arm
Removal and Installation
Removal
CAUTION: Always protect paintwork and glass when removing exterior components.
1. Published: 11-May-2011
Installation
2. NOTE: Do not disassemble further if the component is
removed for access only.
1. Install the wiper blade.
2. CAUTION: Align the wiper blades onto the centre of the
windshield circle mark.
NOTE: After the wiper pivot arm nuts have been
tightened to the correct torque value, lift the wiper pivot
arm from the windshield and return to the windshield. Make
sure that wiper blades are not positioned below any point
of the windshield circle mark.