2010 CHEVROLET IMPALA air condition
[x] Cancel search: air conditionPage 5 of 432

Vehicle Symbol ChartHere are some additional symbols that may be found on
the vehicle and what they mean. For more information
on the symbol, refer to the index.9
:Airbag Readiness Light
#
:Air Conditioning
!
:Antilock Brake System (ABS)
g
:Audio Steering Wheel Controls or OnStar
®
$
:Brake System Warning Light
"
:Charging System
I
:Cruise Control
B
:Engine Coolant Temperature
O
:Exterior Lamps
#
:Fog Lamps
.
:Fuel Gage
+
:Fuses
i
:Headlamp High/Low-Beam Changer
j
:LATCH System Child Restraints
*
:Malfunction Indicator Lamp
:
:Oil Pressure
}
:Power
/
:Remote Vehicle Start
>
:Safety Belt Reminders
7
:Tire Pressure Monitor
F
:Traction Control
M
:Windshield Washer Fluid
v
Page 15 of 432
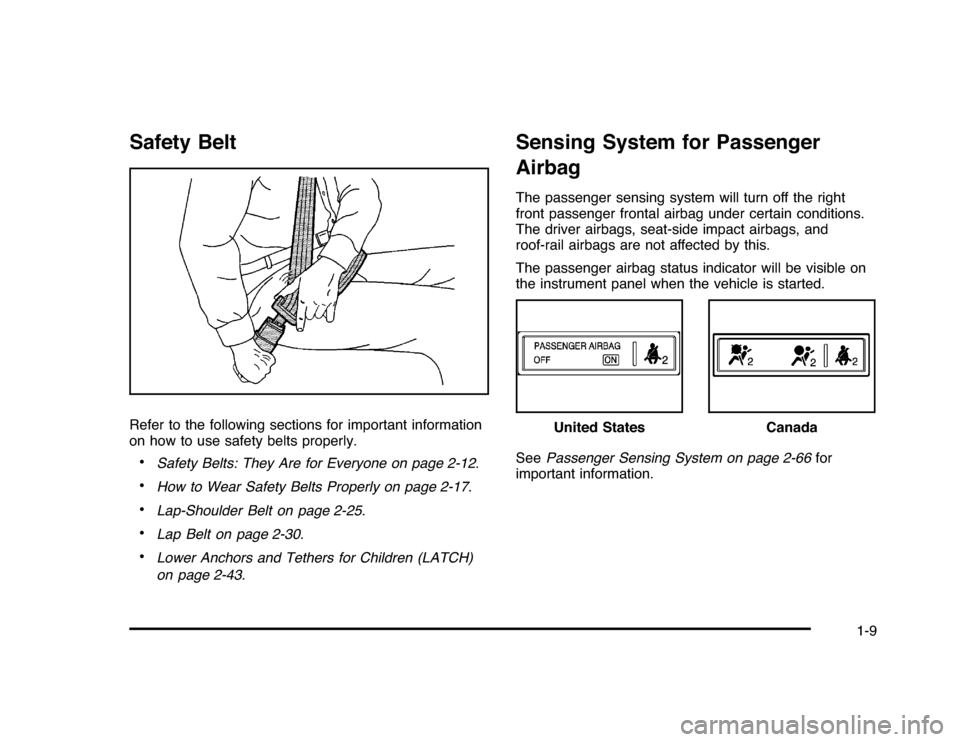
Safety BeltRefer to the following sections for important information
on how to use safety belts properly.•
Safety Belts: They Are for Everyone on page 2-12.
•
How to Wear Safety Belts Properly on page 2-17.
•
Lap-Shoulder Belt on page 2-25.
•
Lap Belt on page 2-30.
•
Lower Anchors and Tethers for Children (LATCH)
on page 2-43.
Sensing System for Passenger
AirbagThe passenger sensing system will turn off the right
front passenger frontal airbag under certain conditions.
The driver airbags, seat-side impact airbags, and
roof-rail airbags are not affected by this.
The passenger airbag status indicator will be visible on
the instrument panel when the vehicle is started.
SeePassenger Sensing System on page 2-66for
important information.
United States
Canada
1-9
Page 20 of 432

Climate ControlsThis vehicle may have a dual or single climate control
system. The heating, cooling, defrost, defog and
ventilation can be controlled with either of these systems.
A. Fan Control
B. Outside Air
C. Recirculation
D. Air Delivery Mode
Control
E. Air Conditioning
F. Driver and
Passenger
Heated SeatsG. Driver and
Passenger
Temperature
Controls
H. Rear Window
DefoggerA. Fan Control
B. Outside Air
C. Temperature
Control
D. RecirculationE. Air Delivery Mode
Control
F. Air Conditioning
G. Rear Window
Defogger
SeeClimate Control System on page 4-16. Dual Zone with Optional Heated Seat Controls
Single Zone
1-14
Page 27 of 432
Driving for Better Fuel EconomyDriving habits can affect fuel mileage. Here are some
driving tips to get the best fuel economy possible.•
Avoid fast starts and accelerate smoothly.
•
Brake gradually and avoid abrupt stops.
•
Avoid idling the engine for long periods of time.
•
When road and weather conditions are appropriate,
use cruise control, if equipped.
•
Always follow posted speed limits or drive more
slowly when conditions require.
•
Keep vehicle tires properly inflated.
•
Combine several trips into a single trip.
•
Replace the vehicle’s tires with the same TPC Spec
number molded into the tire’s sidewall near the size.
•
Follow recommended scheduled maintenance.
Roadside Assistance ProgramU.S.:1-800-CHEV-USA (1-800-243-8872)
TTY Users:1-888-889-2438
Canada:1-800-268-6800
As the owner of a new Chevrolet, you are automatically
enrolled in the Roadside Assistance program. This
program provides technically trained advisors who are
available 24 hours a day, 365 days a year, minor repair
information or towing arrangements.Roadside Assistance and OnStarIf you have a current OnStar subscription, press the
OnStar button and the current GPS location will be sent
to an OnStar Advisor who will assess your problem,
contact Roadside Assistance, and relay exact location
to get you the help you need.Online Owner CenterThe Online Owner Center is a complimentary service
that includes online service reminders, vehicle
maintenance tips, online owner manual, special
privileges and more.
Sign up today at:www.gmownercenter.com/chevrolet
(U.S.) orwww.gm.ca(Canada).
1-21
Page 57 of 432
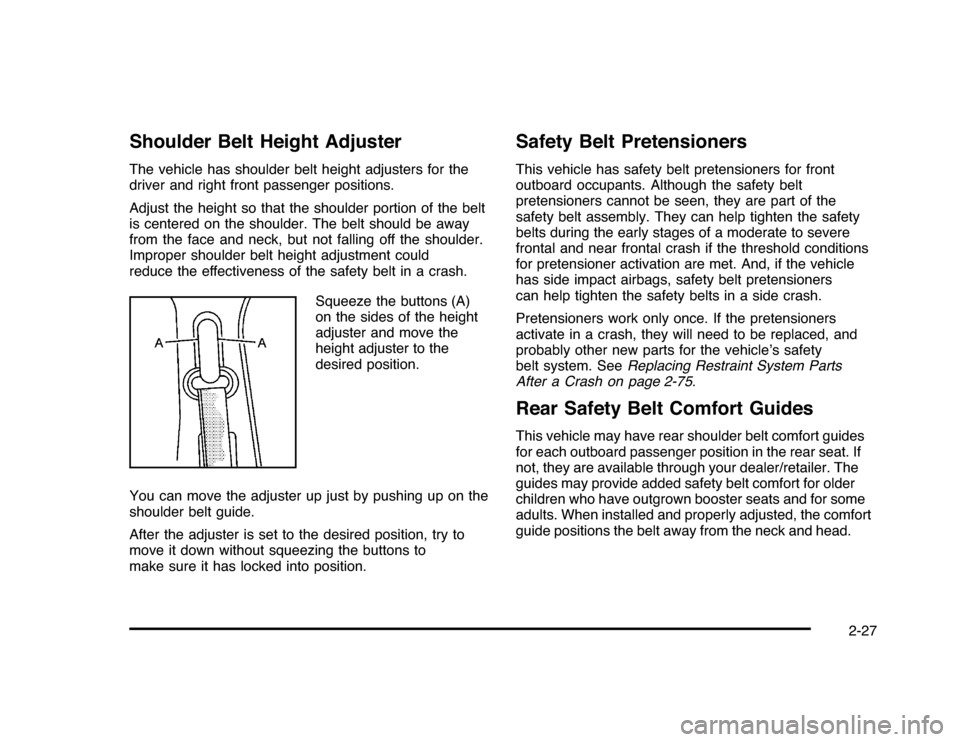
Shoulder Belt Height AdjusterThe vehicle has shoulder belt height adjusters for the
driver and right front passenger positions.
Adjust the height so that the shoulder portion of the belt
is centered on the shoulder. The belt should be away
from the face and neck, but not falling off the shoulder.
Improper shoulder belt height adjustment could
reduce the effectiveness of the safety belt in a crash.
Squeeze the buttons (A)
on the sides of the height
adjuster and move the
height adjuster to the
desired position.
You can move the adjuster up just by pushing up on the
shoulder belt guide.
After the adjuster is set to the desired position, try to
move it down without squeezing the buttons to
make sure it has locked into position.
Safety Belt PretensionersThis vehicle has safety belt pretensioners for front
outboard occupants. Although the safety belt
pretensioners cannot be seen, they are part of the
safety belt assembly. They can help tighten the safety
belts during the early stages of a moderate to severe
frontal and near frontal crash if the threshold conditions
for pretensioner activation are met. And, if the vehicle
has side impact airbags, safety belt pretensioners
can help tighten the safety belts in a side crash.
Pretensioners work only once. If the pretensioners
activate in a crash, they will need to be replaced, and
probably other new parts for the vehicle’s safety
belt system. SeeReplacing Restraint System Parts
After a Crash on page 2-75.Rear Safety Belt Comfort GuidesThis vehicle may have rear shoulder belt comfort guides
for each outboard passenger position in the rear seat. If
not, they are available through your dealer/retailer. The
guides may provide added safety belt comfort for older
children who have outgrown booster seats and for some
adults. When installed and properly adjusted, the comfort
guide positions the belt away from the neck and head.
2-27
Page 82 of 432
Securing a Child Restraint in the
Center Front Seat Position
{
WARNING:
A child in a child restraint in the center front seat
can be badly injured or killed by the frontal airbags
if they inflate. Never secure a child restraint in the
center front seat. It is always better to secure a
child restraint in a rear seat.
Do not use child restraints in the center front seat
position.
Securing a Child Restraint in the
Right Front Seat PositionThis vehicle has airbags. A rear seat is a safer place to
secure a forward-facing child restraint. SeeWhere to
Put the Restraint on page 2-42.
In addition, the vehicle has a passenger sensing system
which is designed to turn off the right front passenger
frontal airbag under certain conditions. SeePassenger
Sensing System on page 2-66andPassenger Airbag
Status Indicator on page 4-25for more information,
including important safety information.
A label on the sun visor says, “Never put a rear-facing
child seat in the front.” This is because the risk to
the rear-facing child is so great, if the airbag deploys.
2-52
Page 96 of 432
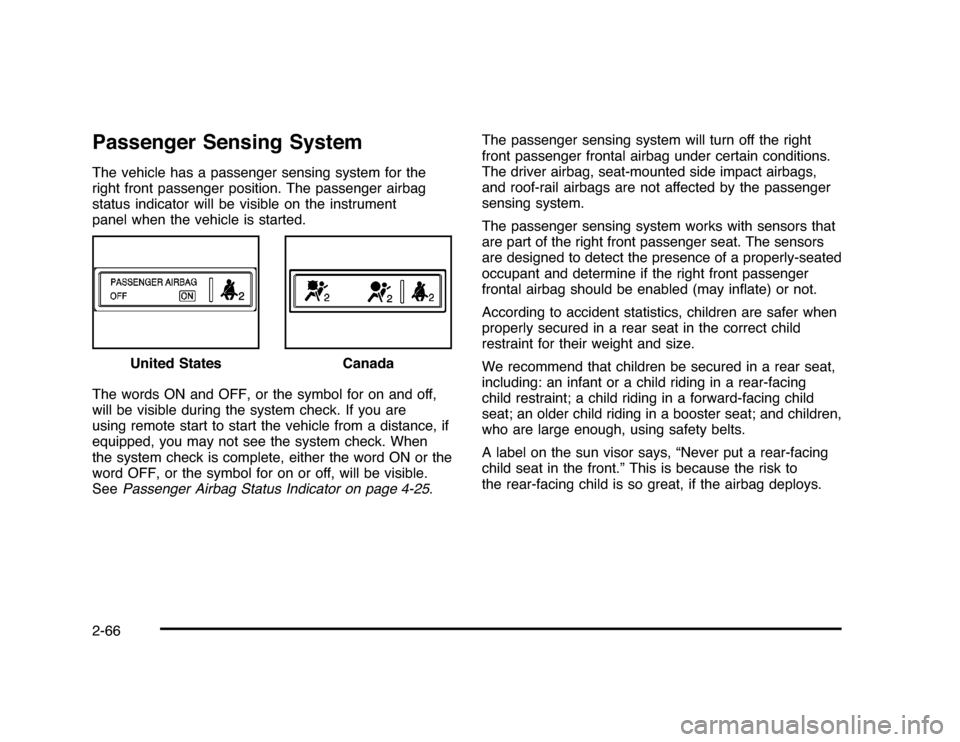
Passenger Sensing SystemThe vehicle has a passenger sensing system for the
right front passenger position. The passenger airbag
status indicator will be visible on the instrument
panel when the vehicle is started.
The words ON and OFF, or the symbol for on and off,
will be visible during the system check. If you are
using remote start to start the vehicle from a distance, if
equipped, you may not see the system check. When
the system check is complete, either the word ON or the
word OFF, or the symbol for on or off, will be visible.
SeePassenger Airbag Status Indicator on page 4-25.The passenger sensing system will turn off the right
front passenger frontal airbag under certain conditions.
The driver airbag, seat-mounted side impact airbags,
and roof-rail airbags are not affected by the passenger
sensing system.
The passenger sensing system works with sensors that
are part of the right front passenger seat. The sensors
are designed to detect the presence of a properly-seated
occupant and determine if the right front passenger
frontal airbag should be enabled (may inflate) or not.
According to accident statistics, children are safer when
properly secured in a rear seat in the correct child
restraint for their weight and size.
We recommend that children be secured in a rear seat,
including: an infant or a child riding in a rear-facing
child restraint; a child riding in a forward-facing child
seat; an older child riding in a booster seat; and children,
who are large enough, using safety belts.
A label on the sun visor says, “Never put a rear-facing
child seat in the front.” This is because the risk to
the rear-facing child is so great, if the airbag deploys. United States
Canada
2-66
Page 113 of 432

Remote Vehicle StartYour vehicle may have a remote starting feature that
allows you to start the engine from outside the vehicle.
It may also start the vehicle’s heating or air conditioning
systems and rear window defogger. When the remote
start system is active and the vehicle has an automatic
climate control system, it will automatically regulate
the inside temperature. Normal operation of these
systems will return after the ignition key is turned to
ON/RUN.
Laws in some communities may restrict the use of
remote starters. For example, some laws may require
a person using remote start to have the vehicle in
view when doing so. Check local regulations for any
requirements on remote starting of vehicles.
Do not use the remote start feature if your vehicle is low
on fuel. Your vehicle may run out of fuel.
If your vehicle has the remote start feature, the RKE
transmitter functions will have an increased range
of operation. However, the range may be less while
the vehicle is running.
There are other conditions which can affect the
performance of the transmitter, seeRemote Keyless
Entry (RKE) System on page 3-4
/
(Remote Start):This button will be on the RKE
transmitter if you have remote start.
To start the vehicle using the remote start feature:
1. Aim the transmitter at the vehicle.
2. Press and release
Q
, then immediately press and
hold
/
for two to four seconds or until the vehicle’s
turn signal lamps flash. The doors will lock.
When the vehicle starts, the parking lamps turn on
and remain on while the engine is running.
The remote start feature provides two separate starts per
ignition cycle, each with 10 minutes of engine running
time, or one start with a time extension. The first start
must expire or be canceled to get two separate 10 minute
starts.
If it is the first remote start since the vehicle has been
driven, repeat the previous steps, while the engine is still
running, to extend the engine running time by 10 minutes
from the time you repeat the steps for remote starting.
The remote start running time can be extended one time
and only after the first remote start.
After entering the vehicle during a remote start, insert
and turn the key to ON/RUN to drive the vehicle.
3-7