2010 CHEVROLET CORVETTE display
[x] Cancel search: displayPage 9 of 472

A.Outlet Adjustment on page 4‑27.
B. Head-Up Display (HUD)
on page 4‑16(If Equipped).
C. Turn Signal/Multifunction Lever
on page 4‑4.
Cruise Controlon page 4‑7. Fog Lampson
page 4‑13. Exterior Lamps on page 4‑11.
D. Manual Shift Paddles (If Equipped). See Automatic
Transmission Operation on page 3‑26.
E. Driver Information Center (DIC) on page 4‑47.
F. Instrument Panel Cluster on page 4‑30.
G. Windshield Wipers
on page 4‑6and Windshield
Washer on page 4‑6.
H. DIC Operation and Displays on page 4‑47.
I. Hazard Warning Flashers on page 4‑3.
J. Audio System(s) on page 4‑80.
K. Dual Automatic Climate Control System
on
page 4‑22.
L. Fuel Door Release Button. See Filling the
Tank
on page 6‑9. Hatch/Trunk Release Button.
See “Hatch/Trunk Lid Release” underHatchon
page 3‑14.
M. Instrument Panel Brightness on page 4‑15.
N. Power Folding Top Switch (If Equipped). See Convertible Top (Manual)
on page 3‑59orConvertible Top (Power) on page 3‑66. O.
Bluetooth
®on page 4‑96(If Equipped).
Audio Steering Wheel Controlson page 4‑107(If Equipped).
P. Tilt Wheel on page 4‑3.
Q. Horn on page 4‑3.
R. Telescopic Wheel Button (If Equipped). See Tilt Wheel on page 4‑3.
S. Ignition Positions on page 3‑23.
T. Heated Seats
on page 2‑4(If Equipped).
U. Shift Lever (Automatic Shown). See Automatic
Transmission Operation
on page 3‑26or Manual
Transmission Operation on page 3‑32.
V. Active Handling System on page 5‑8.
W. Accessory Power Outlet(s) on page 4‑20.
X. Selective Ride Control on page 5‑14.
Y. Cupholders on page 3‑50.
Z. Ashtray(s) and Cigarette Lighter on page 4‑21.
AA. Parking Brake on page 3‑34.
AB. Glove Box on page 3‑50.
AC. Instrument Panel Fuse Block on page 6‑101.
1-3
Page 21 of 472
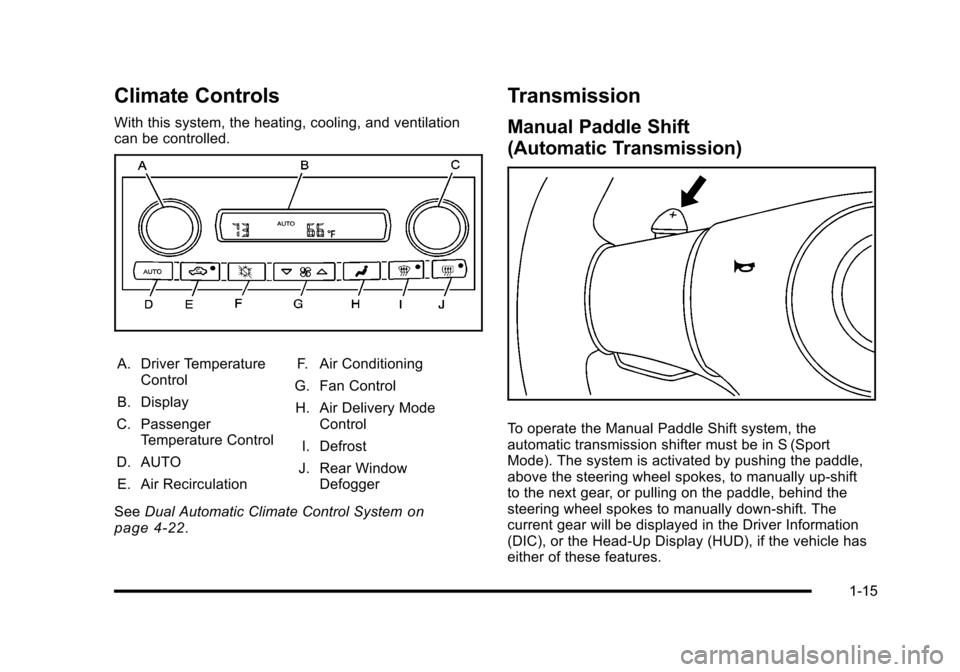
Climate Controls
With this system, the heating, cooling, and ventilation
can be controlled.
A. Driver Temperature Control
B. Display
C. Passenger Temperature Control
D. AUTO E. Air Recirculation F. Air Conditioning
G. Fan Control H. Air Delivery Mode Control
I. Defrost
J. Rear Window Defogger
See Dual Automatic Climate Control System
on
page 4‑22.
Transmission
Manual Paddle Shift
(Automatic Transmission)
To operate the Manual Paddle Shift system, the
automatic transmission shifter must be in S (Sport
Mode). The system is activated by pushing the paddle,
above the steering wheel spokes, to manually up-shift
to the next gear, or pulling on the paddle, behind the
steering wheel spokes to manually down-shift. The
current gear will be displayed in the Driver Information
(DIC), or the Head-Up Display (HUD), if the vehicle has
either of these features.
1-15
Page 23 of 472

Oe:Turn to select radio stations.
tSEEKu:Press to seek stations.
tSCANu: Press and hold to scan stations.
4:Press to change the information that shows on
the display while listening to the radio.
For more information about these and other radio
features, see Audio System(s)
on page 4‑80and
Radio(s) on page 4‑81.
Setting Preset Stations
Up to 30 stations (six FM1, six FM2, and six AM, and if
equipped, six XM1, and six XM2) can be programmed.
To program presets:
1. Turn the radio on.
2. Press BAND to select FM1, FM2, AM, or XM1 or XM2.
3. Tune in the desired station.
4. Press AUTO EQ to select the equalization.
5. Press and hold one of the six numbered pushbuttons until the radio beeps once.
6. Repeat the steps for each pushbutton.
See Radio(s) on page 4‑81.
Setting the Clock
To set the clock:
1. Press and hold H until the correct hour displays.
2. Press and hold M until the correct minute displays.
See Setting the Clock on page 4‑80.
Satellite Radio
XM is a satellite radio service that is based in the
48 contiguous United States and 10 Canadian
provinces. XM satellite radio has a wide variety
of programming and commercial-free music,
coast-to-coast, and in digital-quality sound.
A fee is required to receive the XM service.
For more information, refer to:
.www.xmradio.com or call 1-800-929-2100 (U.S.)
.www.xmradio.ca or call 1-877-438-9677 (Canada)
See “XM Satellite Radio Service” underRadio(s)
on
page 4‑81.
1-17
Page 25 of 472
Navigation System
The vehicle's navigation system provides detailed
maps of most major freeways and roads throughout the
United States and Canada. After a destination has been
set, the system provides turn-by-turn instructions for
reaching the destination. In addition, the system can
help locate a variety of points of interest (POI), such
as banks, airports, restaurants, and more.
See the vehicle's Navigation System manual for more
information.
Driver Information Center (DIC)
The DIC display is located at the bottom of the
instrument panel cluster. It shows the status of
many vehicle systems and enables access to the
personalization menu.
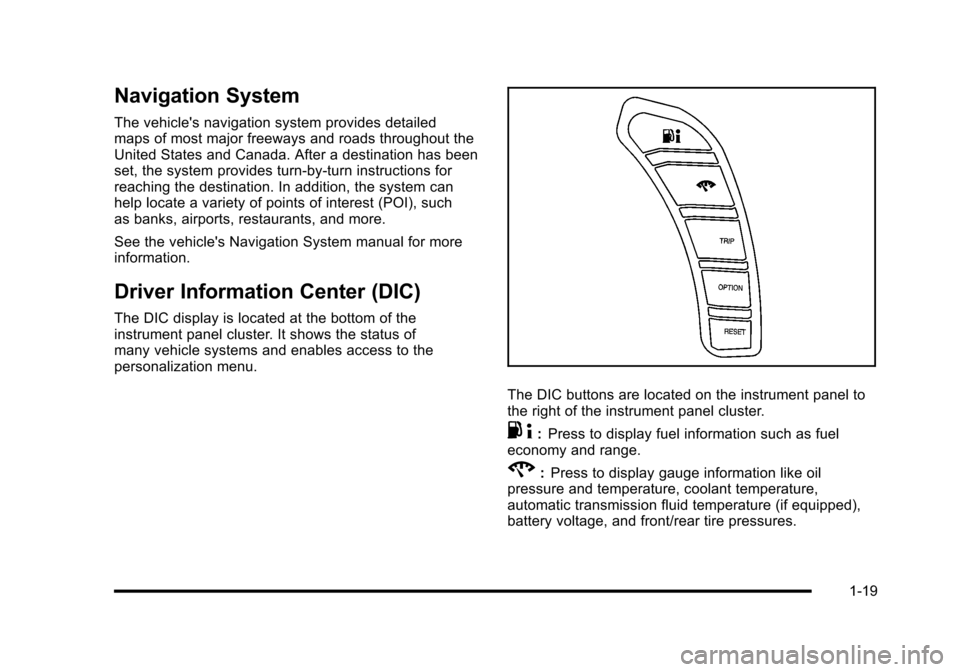
The DIC buttons are located on the instrument panel to
the right of the instrument panel cluster.
. 4:Press to display fuel information such as fuel
economy and range.
2: Press to display gauge information like oil
pressure and temperature, coolant temperature,
automatic transmission fluid temperature (if equipped),
battery voltage, and front/rear tire pressures.
1-19
Page 26 of 472
TRIP :Press to display your total and trip distance
driven, the elapsed time function, your average speed,
and the engine oil life.
OPTION : Press to choose personal options that are
available on your vehicle, depending on the options
your vehicle is equipped with, such as door locks, easy
entry seats, and language.
RESET : Press, along with the other buttons, to reset
system functions, select personal options, and turn off
or acknowledge messages on the DIC.
For more information, see Driver Information Center
(DIC) on page 4‑47.
Vehicle Personalization
Some vehicle features can be programmed by using
the DIC buttons on the left side of the steering wheel.
The features that can be programmed include:
.Units
.Memory Features
.Lighting Features
.Lock and Unlock Feedback
.Door Lock and Unlock Settings
.Language
.Personalization Name
See DIC Vehicle Personalization on page 4‑71.
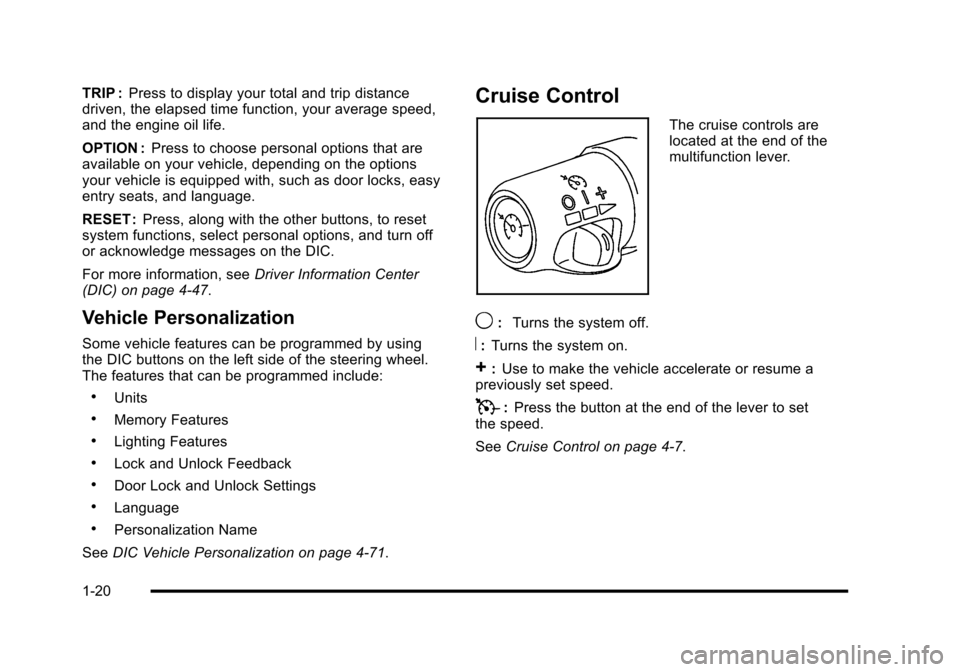
Cruise Control
The cruise controls are
located at the end of the
multifunction lever.
9: Turns the system off.
R:Turns the system on.
+:Use to make the vehicle accelerate or resume a
previously set speed.
T: Press the button at the end of the lever to set
the speed.
See Cruise Control on page 4‑7.
1-20
Page 27 of 472
Power Outlets
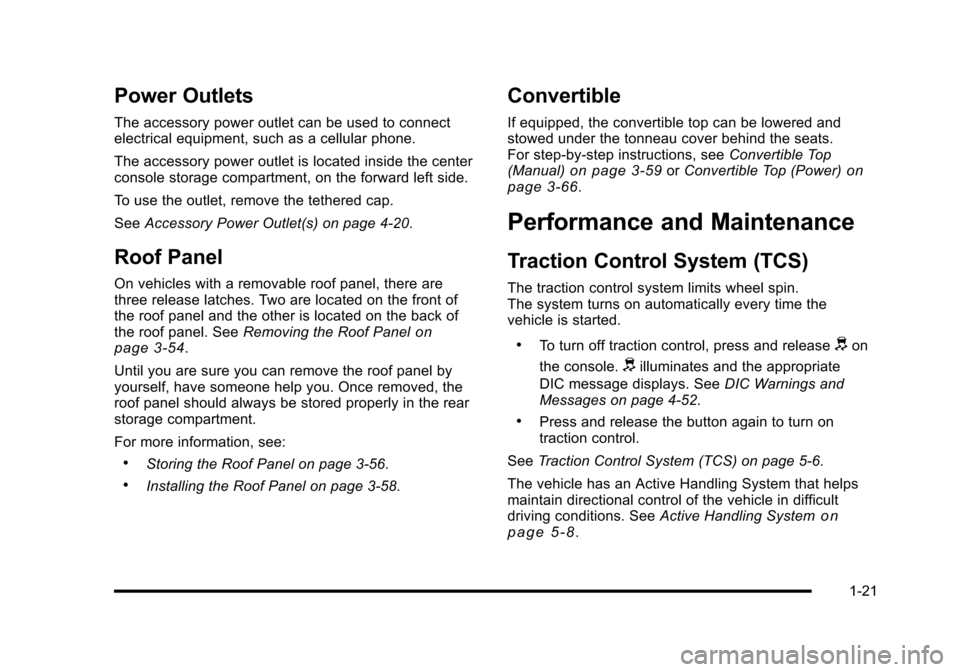
The accessory power outlet can be used to connect
electrical equipment, such as a cellular phone.
The accessory power outlet is located inside the center
console storage compartment, on the forward left side.
To use the outlet, remove the tethered cap.
See Accessory Power Outlet(s) on page 4‑20.
Roof Panel
On vehicles with a removable roof panel, there are
three release latches. Two are located on the front of
the roof panel and the other is located on the back of
the roof panel. See Removing the Roof Panel
on
page 3‑54.
Until you are sure you can remove the roof panel by
yourself, have someone help you. Once removed, the
roof panel should always be stored properly in the rear
storage compartment.
For more information, see:
.Storing the Roof Panel on page 3‑56.
.Installing the Roof Panel on page 3‑58.
Convertible
If equipped, the convertible top can be lowered and
stowed under the tonneau cover behind the seats.
For step-by-step instructions, see Convertible Top
(Manual)
on page 3‑59or Convertible Top (Power)on
page 3‑66.
Performance and Maintenance
Traction Control System (TCS)
The traction control system limits wheel spin.
The system turns on automatically every time the
vehicle is started.
.To turn off traction control, press and releasedon
the console.
dilluminates and the appropriate
DIC message displays. See DIC Warnings and
Messages on page 4‑52.
.Press and release the button again to turn on
traction control.
See Traction Control System (TCS) on page 5‑6.
The vehicle has an Active Handling System that helps
maintain directional control of the vehicle in difficult
driving conditions. See Active Handling System
on
page 5‑8.
1-21
Page 30 of 472
Engine Oil Life System
The engine oil life system calculates engine oil life
based on vehicle use and displays a DIC message
when it is necessary to change the engine oil and filter.
The oil life system should be reset to 100% only
following an oil change.
Resetting the Oil Life System
1. Press the TRIP button so the OIL LIFE percentageis displayed.
2. Press RESET and hold for two seconds. OIL LIFE REMAINING 100% will appear.
See Engine Oil Life System on page 6‑25.
Driving for Better Fuel Economy
Driving habits can affect fuel mileage. Here are some
driving tips to get the best fuel economy possible.
.Avoid fast starts and accelerate smoothly.
.Brake gradually and avoid abrupt stops.
.Avoid idling the engine for long periods of time.
.When road and weather conditions are
appropriate, use cruise control, if equipped.
.Always follow posted speed limits or drive more
slowly when conditions require.
.Keep vehicle tires properly inflated.
.Combine several trips into a single trip.
.Replace the vehicle's tires with the same
TPC Spec number molded into the tire's
sidewall near the size.
.Follow recommended scheduled maintenance.
Premium Fuel
This vehicle's engine was designed to use premium
unleaded gasoline. See Gasoline Octane on page 6‑7.
Battery
This vehicle has a maintenance free battery. See
Batteryon page 6‑49and Jump Starting on page 6‑50.
For ZO6, ZR1, and Grand Sport models the battery is
located in the rear hatch/trunk area. Access to the
battery is not necessary to jump start the vehicle.
There are positive (+) and negative (−) terminals in
the engine compartment.
1-24
Page 103 of 472
Programming Transmitters to the
Vehicle
Only keyless access transmitters programmed to
this vehicle will work. If a transmitter is lost or stolen,
a replacement can be purchased and programmed
through your dealer/retailer. The vehicle can be
reprogrammed so that lost or stolen transmitters
no longer work. Each vehicle can have up to
four transmitters programmed to it.
Programming with a Recognized
Transmitter
A new transmitter can be programmed to the vehicle
when there is one recognized transmitter. For vehicles
sold in Canada, two recognized transmitters are
required to program a new transmitter. 1. The vehicle must be off.
2. Both the recognized and new transmitters must be with you.
3. Insert the vehicle key into the key cylinder located above the license plate.
4. Open the hatch/trunk.
5. Turn the key five times within five seconds.
6. The DIC displays READY FOR FOB #2, 3 or 4.
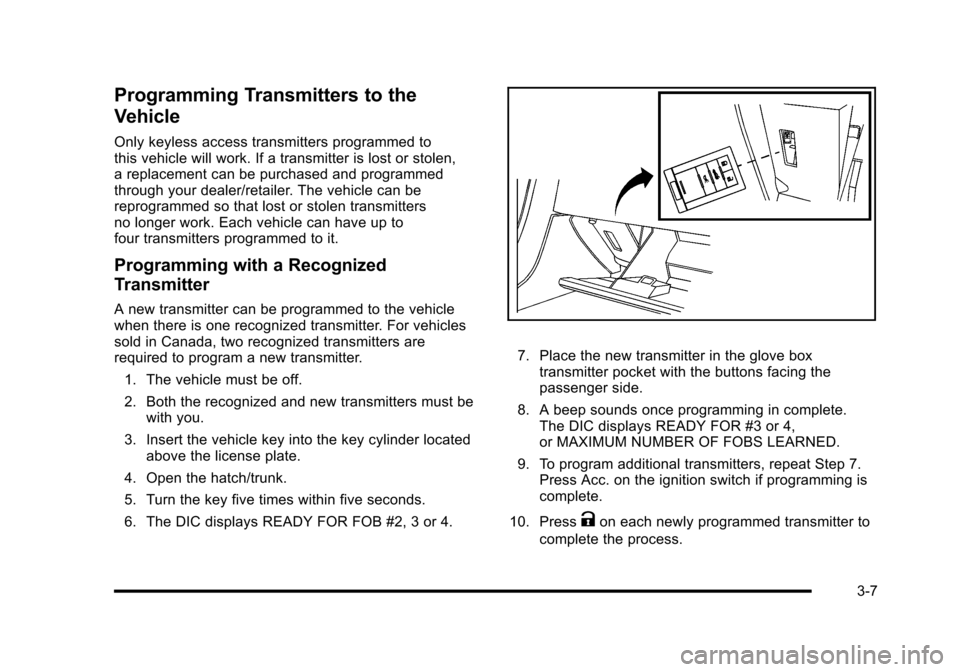
7. Place the new transmitter in the glove box transmitter pocket with the buttons facing the
passenger side.
8. A beep sounds once programming in complete. The DIC displays READY FOR #3 or 4,
or MAXIMUM NUMBER OF FOBS LEARNED.
9. To program additional transmitters, repeat Step 7. Press Acc. on the ignition switch if programming is
complete.
10. Press
Kon each newly programmed transmitter to
complete the process.
3-7