Page 974 of 2453

TPM(diag)-24
Tire Pressure Warning Light/Trouble Indicator Light Illumination Pattern (DTC)
TIRE PRESSURE MONITORING SYSTEM (DIAGNOSTICS)
D: TIRE PRESSURE WARNING LIGHT IS BLINKING
DETECTING CONDITION:
•Tire pressure monitoring control module is faulty.
•Defective harness
•Transmitter is faulty.
TROUBLE SYMPTOM:
Tire pressure warning light blinks continuously after engine starting.
WIRING DIAGRAM:
TPM00019
TO POWER SUPPLY CIRCUIT
FB-36 F/B FUSE NO.5(IG)
26
COMBINATIONMETERA:i10
A3
A10
TIRE INFLATION PRESSURE WARNINGLIGHT
FB-17F/B FUSE NO. 7 (B)
i102
R167
R211
FB-48F/B FUSE NO. 4 (IG)
A4
INVERTING CIRCUIT
15
5
9
TPM CONTROL MODULE
i102
1238910411 12 1314 15 16567
A:i10
12345 678910111219 20 2113 14 15 161718 22
R211
123456789101112
Step Check Yes No
1CHECK DIAGNOSTIC TROUBLE CODE
(DTC)
Connect Subaru Select Monitor, read Diagnos-
tic Trouble Code.
DIAGNOSTIC TROUBLE CODE (DTC),
OPERATION, Subaru Select Monitor.>
Is diagnostics code (DTC) dis-
played?
Pe r for m t h e d ia g -
nosis according to
DTC.
TPM(diag)-26, List
of Diagnostic Trou-
ble Code (DTC).>
Go to step 2.
Page 975 of 2453

TPM(diag)-25
Tire Pressure Warning Light/Trouble Indicator Light Illumination Pattern (DTC)
TIRE PRESSURE MONITORING SYSTEM (DIAGNOSTICS)
2CHECK HARNESS.
1) Disconnect the tire pressure monitoring
control module connector.
2) Short the terminal No. 2 of the tire pressure
monitoring control module harness connector
(R211) with the chassis ground, and turn the
ignition switch to ON.
Is the tire pressure warning
light lit?
Go to step 3.Replace the tire
pressure monitor-
ing control module.
3CHECK HARNESS.
1) Connect the tester to the terminal No. 2 of
the tire pressure monitoring control module
connector (R211).
2) Turn the ignition switch to ON, and mea-
sure the voltage.
Connector & terminal
(R211) No. 2 (+) — Chassis ground (–):
Is the voltage more than 10 V? Go to step 4.Replace the com-
bination meter.
REMOVAL, Com-
bination Meter.>
4CHECK COMBINATION METER.
1) Short between the combination meter con-
nector (i10) No. 10 and the chassis ground.
2) Turn the ignition switch to ON.
Is the tire pressure warning
light lit?
Go to step 5.There is an open
circuit between the
combination meter
connector and the
tire pressure moni-
toring control mod-
ule harness.
Repair or replace
the harness.
5CHECK HARNESS.
1) Disconnect the combination meter connec-
tor (i10).
2) Measure the resistance between tire pres-
sure monitoring control module connector (i10)
and chassis ground.
Connector & terminal
(i10) No. 10 — Chassis ground:
Is the resistance more than 1
MΩ?
Replace the com-
bination meter.
REMOVAL, Com-
bination Meter.>
Repair or replace
the harness con-
nector short cir-
cuit between the
combination meter
connector and the
tire pressure moni-
toring control mod-
ule connector.
Step Check Yes No
Page 985 of 2453
TPM(diag)-35
Diagnostic Procedure with Diagnostic Trouble Code (DTC)
TIRE PRESSURE MONITORING SYSTEM (DIAGNOSTICS)
Step Check Yes No
1CHECK TIRE PRESSURE MONITORING
CONTROL MODULE.
1) Connect an oscilloscope to the terminal No.
4 of the tire pressure monitoring control mod-
ule connector (R211)
2) Drive the vehicle at 40 km/h (25 MPH) for
20 seconds and check the vehicle speed signal
at that time.
Is the vehicle speed being
input?
Replace the tire
pressure monitor-
ing control module.
REMOVAL, Tire
Pressure Monitor-
ing System.>
Go to step 2.
2CHECK HARNESS.
1) Disconnect the combination meter connec-
tor (i10).
2) Connect the tire pressure monitoring con-
trol module connector (R211) and combination
meter connector (i10) and measure the resis-
tance.
Is the resistance less than 0.5
Ω?
Check the combi-
nation meter.
REMOVAL, Com-
bination Meter.>
Repair or replace
the open circuit of
the harness.
Page 986 of 2453
TPM(diag)-36
General Diagnostic Table
TIRE PRESSURE MONITORING SYSTEM (DIAGNOSTICS)
12.General Diagnostic Table
A: INSPECTION
Symptom Problem parts
Tire pressure warning light illumi-
nates.Tire pressure is reduced.•Improper tire pressure adjustment.
•Punctured tire
Tire pressure warning light blinks.
TIRE PRESSURE MONITOR-
ING SYSTEM HAS MALFUNC-
TION
•AIR PRESSURE SENSOR MALFUNCTION
•AIR PRESSURE SENSOR IS OUT OF BATTERY
•Tire pressure monitoring control module is faulty.
•Defective vehicle harness
Tire pressure is dropping but the
warning light does not illuminate.
TIRE PRESSURE WARNING
LIGHT DOES NOT ILLUMINATE
•AIR PRESSURE SENSOR IS FAULTY.
•Tire pressure monitoring control module is faulty.
•Defective vehicle harness
Page 994 of 2453

VDC(diag)-2
Basic Diagnostic Procedure
VEHICLE DYNAMICS CONTROL (VDC) (DIAGNOSTICS)
1. Basic Diagnostic Procedure
A: PROCEDURE
NOTE:
•To check the harness for broken wires or short circuits, shake problem spot or connector.
•Refer to “Check List for Interview”.
Step Check Yes No
1CHECK PRE-INSPECTION.
1) Ask the customer when and how the trou-
ble occurred using the interview checklist.
view.>
2) Before performing diagnostics, check the
component which might affect VDC problems.
Description.>
Is the component that might
influence the VDC problem
normal?
Go to step 2.Repair or replace
each component.
2CHECK INDICATION OF DTC.
1) Turn the ignition switch to OFF.
2) Connect the Subaru Select Monitor to data
link connector.
3) Turn the ignition switch to ON, and the Sub-
aru Select Monitor power switch to ON.
4) Read the DTC.
OPERATION, Read Diagnostic Trouble Code
(DTC).>
NOTE:If the communication function of the Subaru Se-
lect Monitor cannot be executed normally,
check the communication circuit.
VDC(diag)-19, COMMUNICATION FOR INI-
TIALIZING IMPOSSIBLE, INSPECTION, Sub-
aru Select Monitor.>
5) Record all DTCs and freeze frame data.
Is DTC displayed? Go to step 4.Go to step 3.
3PERFORM GENERAL DIAGNOSTICS.
1) Inspect using “General Diagnostic Table”.
Diagnostic Table.>
2) Perform the clear memory mode.
VDC(diag)-24, OPERATION, Clear Memory
Mode.>
3) Perform the inspection mode.
VDC(diag)-23, PROCEDURE, Inspection
Mode.>
4) Read the DTC.
OPERATION, Read Diagnostic Trouble Code
(DTC).>
5) Check the DTC is not displayed.
Do the VDC warning light and
ABS warning light go off after
starting the engine?
Finish the diagno-
sis.
Check the combi-
nation meter cir-
cuit.
VDC(diag)-29,
ABS WARNING
LIGHT DOES NOT
GO OFF, Warning
Light Illumination
Patter n.>
VDC(diag)-26,
VDC WARNING
LIGHT, TCS OFF
INDICATOR
LIGHT AND VDC
INDICATOR
LIGHT DO NOT
COME ON, Warn-
ing Light Illumina-
tion Pattern.>
Page 1001 of 2453

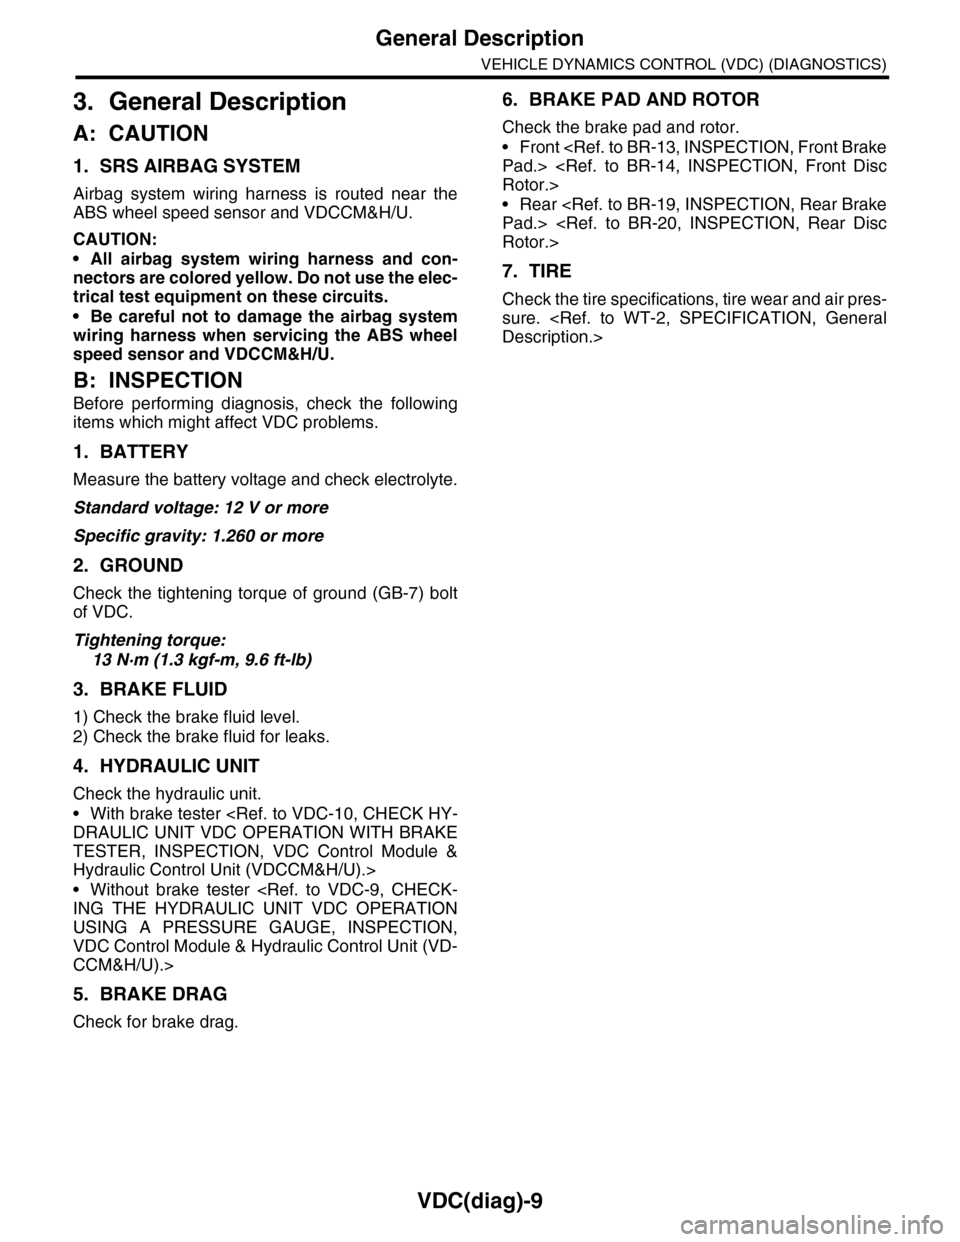
VDC(diag)-9
General Description
VEHICLE DYNAMICS CONTROL (VDC) (DIAGNOSTICS)
3. General Description
A: CAUTION
1. SRS AIRBAG SYSTEM
Airbag system wiring harness is routed near the
ABS wheel speed sensor and VDCCM&H/U.
CAUTION:
•All airbag system wiring harness and con-
nectors are colored yellow. Do not use the elec-
trical test equipment on these circuits.
•Be careful not to damage the airbag system
wiring harness when servicing the ABS wheel
speed sensor and VDCCM&H/U.
B: INSPECTION
Before performing diagnosis, check the following
items which might affect VDC problems.
1. BATTERY
Measure the battery voltage and check electrolyte.
Standard voltage: 12 V or more
Specific gravity: 1.260 or more
2. GROUND
Check the tightening torque of ground (GB-7) bolt
of VDC.
Tightening torque:
13 N·m (1.3 kgf-m, 9.6 ft-lb)
3. BRAKE FLUID
1) Check the brake fluid level.
2) Check the brake fluid for leaks.
4. HYDRAULIC UNIT
Check the hydraulic unit.
•With brake tester
DRAULIC UNIT VDC OPERATION WITH BRAKE
TESTER, INSPECTION, VDC Control Module &
Hydraulic Control Unit (VDCCM&H/U).>
•Without brake tester
ING THE HYDRAULIC UNIT VDC OPERATION
USING A PRESSURE GAUGE, INSPECTION,
VDC Control Module & Hydraulic Control Unit (VD-
CCM&H/U).>
5. BRAKE DRAG
Check for brake drag.
6. BRAKE PAD AND ROTOR
Check the brake pad and rotor.
•Front
Pad.>
Rotor.>
•Rear
Pad.>
Rotor.>
7. TIRE
Check the tire specifications, tire wear and air pres-
sure.
Description.>
Page 1011 of 2453
VDC(diag)-19
Subaru Select Monitor
VEHICLE DYNAMICS CONTROL (VDC) (DIAGNOSTICS)
B: INSPECTION
1. COMMUNICATION FOR INITIALIZING IMPOSSIBLE
DETECTING CONDITION:
Defective harness connector
TROUBLE SYMPTOM:
Communication is impossible between VDC and Subaru Select Monitor.
WIRING DIAGRAM:
MAIN SBF
SBF-6
NO.33
B310
E
E
32431
VDCCM & H/U
B402
12345678
910 11 12 13 14 15 16
BATTERY
IGNITIONSWITCH
DATA LINKCONNECTOR
B402
10
1
B310
1234
1516171819202122232425262728293031323334353637383940414245464344568910 11 12 13 147
VDC00368
Page 1012 of 2453

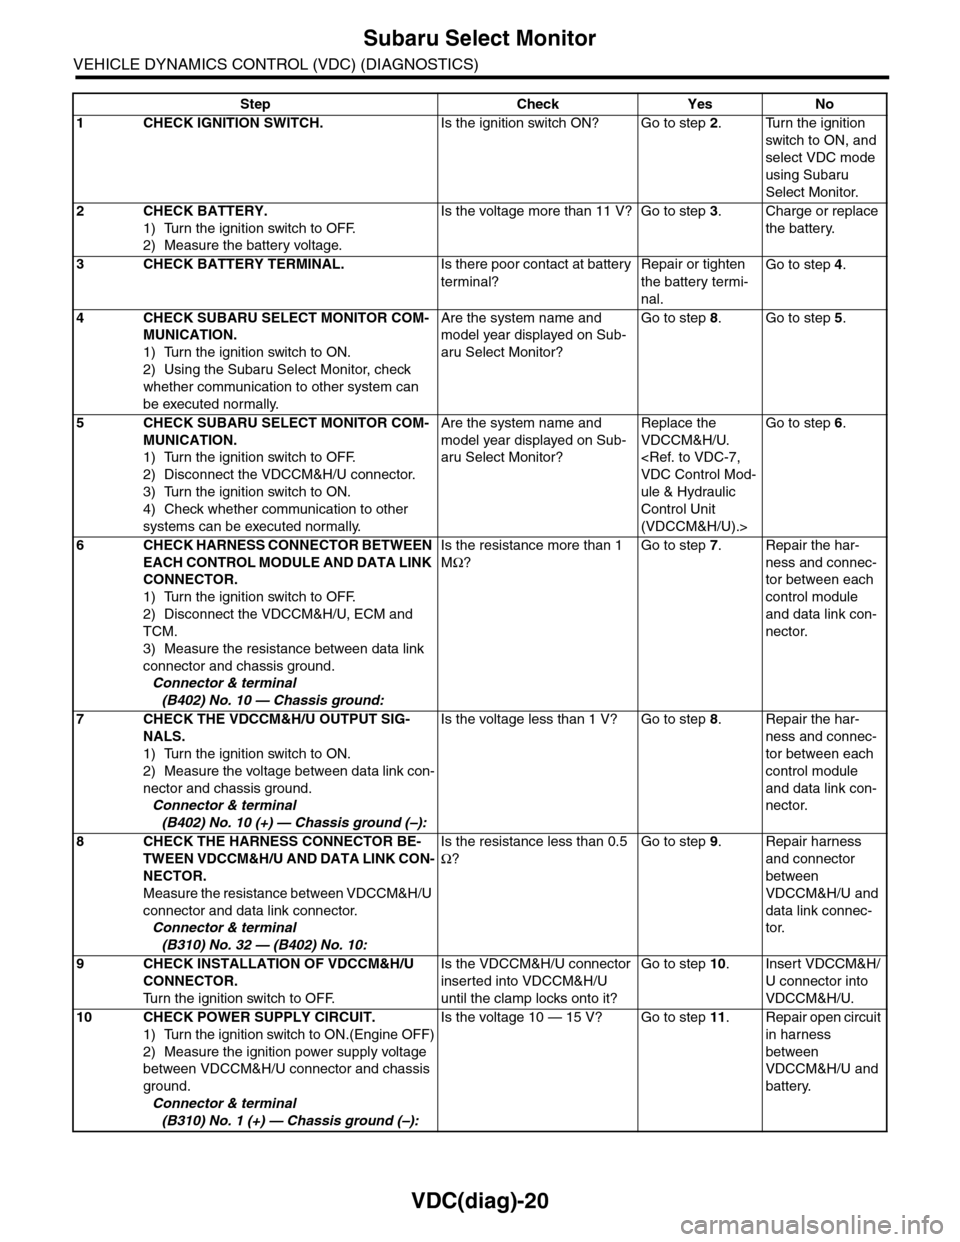
VDC(diag)-20
Subaru Select Monitor
VEHICLE DYNAMICS CONTROL (VDC) (DIAGNOSTICS)
Step Check Yes No
1CHECK IGNITION SWITCH.Is the ignition switch ON? Go to step 2.Turn the ignition
switch to ON, and
select VDC mode
using Subaru
Select Monitor.
2CHECK BATTERY.
1) Turn the ignition switch to OFF.
2) Measure the battery voltage.
Is the voltage more than 11 V? Go to step 3.Charge or replace
the battery.
3CHECK BATTERY TERMINAL.Is there poor contact at battery
terminal?
Repair or tighten
the battery termi-
nal.
Go to step 4.
4CHECK SUBARU SELECT MONITOR COM-
MUNICATION.
1) Turn the ignition switch to ON.
2) Using the Subaru Select Monitor, check
whether communication to other system can
be executed normally.
Are the system name and
model year displayed on Sub-
aru Select Monitor?
Go to step 8.Go to step 5.
5CHECK SUBARU SELECT MONITOR COM-
MUNICATION.
1) Turn the ignition switch to OFF.
2) Disconnect the VDCCM&H/U connector.
3) Turn the ignition switch to ON.
4) Check whether communication to other
systems can be executed normally.
Are the system name and
model year displayed on Sub-
aru Select Monitor?
Replace the
VDCCM&H/U.
VDC Control Mod-
ule & Hydraulic
Control Unit
(VDCCM&H/U).>
Go to step 6.
6CHECK HARNESS CONNECTOR BETWEEN
EACH CONTROL MODULE AND DATA LINK
CONNECTOR.
1) Turn the ignition switch to OFF.
2) Disconnect the VDCCM&H/U, ECM and
TCM.
3) Measure the resistance between data link
connector and chassis ground.
Connector & terminal
(B402) No. 10 — Chassis ground:
Is the resistance more than 1
MΩ?
Go to step 7.Repair the har-
ness and connec-
tor between each
control module
and data link con-
nector.
7CHECK THE VDCCM&H/U OUTPUT SIG-
NALS.
1) Turn the ignition switch to ON.
2) Measure the voltage between data link con-
nector and chassis ground.
Connector & terminal
(B402) No. 10 (+) — Chassis ground (–):
Is the voltage less than 1 V? Go to step 8.Repair the har-
ness and connec-
tor between each
control module
and data link con-
nector.
8CHECK THE HARNESS CONNECTOR BE-
TWEEN VDCCM&H/U AND DATA LINK CON-
NECTOR.
Measure the resistance between VDCCM&H/U
connector and data link connector.
Connector & terminal
(B310) No. 32 — (B402) No. 10:
Is the resistance less than 0.5
Ω?
Go to step 9.Repair harness
and connector
between
VDCCM&H/U and
data link connec-
tor.
9CHECK INSTALLATION OF VDCCM&H/U
CONNECTOR.
Tu r n t h e i g n i t i o n s w i t c h t o O F F.
Is the VDCCM&H/U connector
inserted into VDCCM&H/U
until the clamp locks onto it?
Go to step 10.Insert VDCCM&H/
U connector into
VDCCM&H/U.
10 CHECK POWER SUPPLY CIRCUIT.
1) Turn the ignition switch to ON.(Engine OFF)
2) Measure the ignition power supply voltage
between VDCCM&H/U connector and chassis
ground.
Connector & terminal
(B310) No. 1 (+) — Chassis ground (–):
Is the voltage 10 — 15 V? Go to step 11.Repair open circuit
in harness
between
VDCCM&H/U and
battery.