Page 126 of 4331
DTC P0734 A/T 4TH GEAR FUNCTION
AT-121
< SERVICE INFORMATION >
D
E
F
G H
I
J
K L
M A
B AT
N
O P 3.
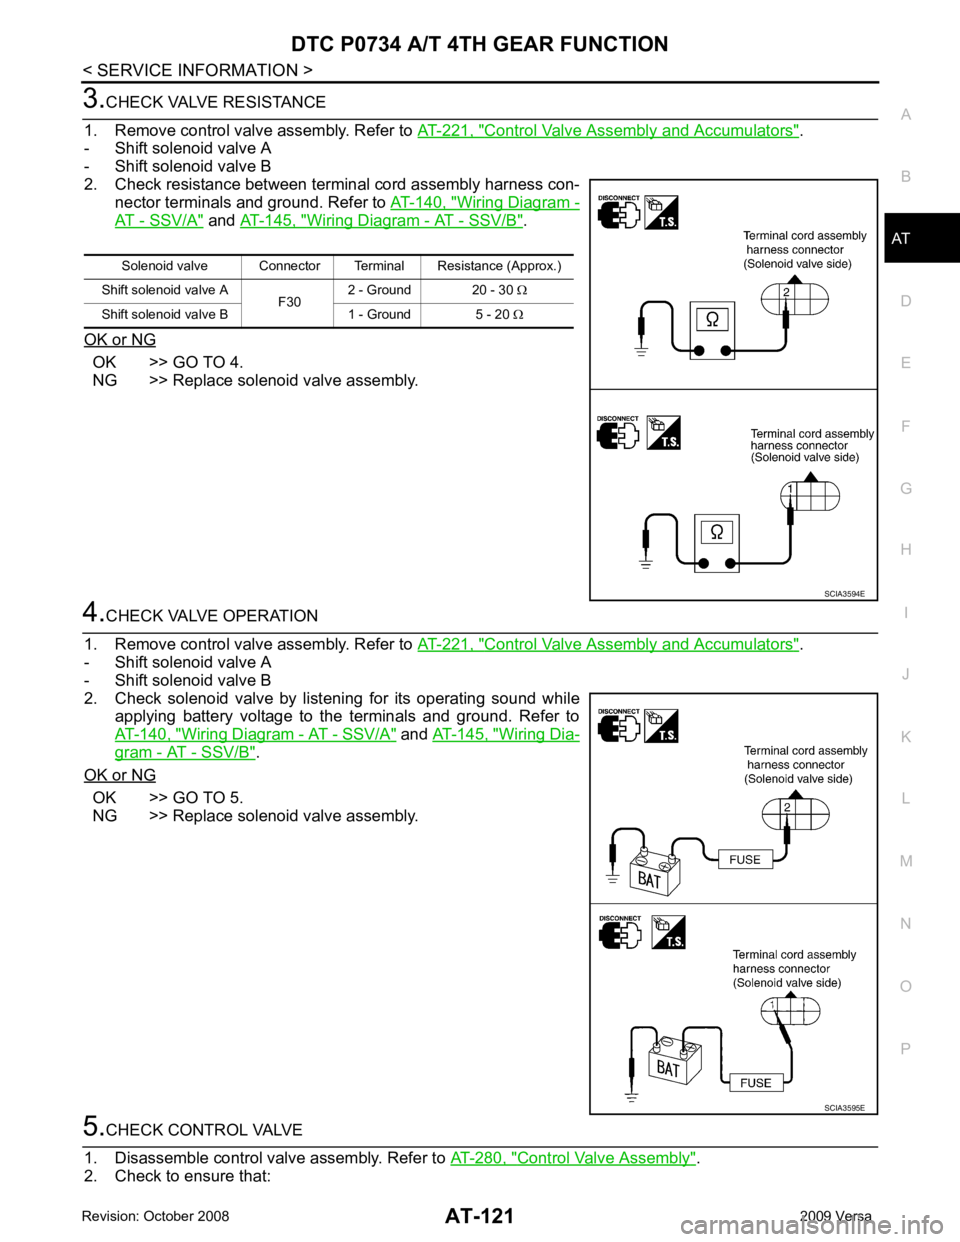
CHECK VALVE RESISTANCE
1. Remove control valve assembly. Refer to AT-221, " Control Valve Assembly and Accumulators " .
- Shift solenoid valve A
- Shift solenoid valve B
2. Check resistance between terminal cord assembly harness con- nector terminals and ground. Refer to AT-140, " Wiring Diagram -
AT - SSV/A " and
AT-145, " Wiring Diagram - AT - SSV/B " .
OK or NG OK >> GO TO 4.
NG >> Replace solenoid valve assembly. 4.
CHECK VALVE OPERATION
1. Remove control valve assembly. Refer to AT-221, " Control Valve Assembly and Accumulators " .
- Shift solenoid valve A
- Shift solenoid valve B
2. Check solenoid valve by listening for its operating sound while applying battery voltage to the terminals and ground. Refer to
AT-140, " Wiring Diagram - AT - SSV/A " and
AT-145, " Wiring Dia-
gram - AT - SSV/B " .
OK or NG OK >> GO TO 5.
NG >> Replace solenoid valve assembly. 5.
CHECK CONTROL VALVE
1. Disassemble control valve assembly. Refer to AT-280, " Control Valve Assembly " .
2. Check to ensure that: Solenoid valve Connector Terminal Resistance (Approx.)
Shift solenoid valve A F302 - Ground 20 - 30
Ω
Shift solenoid valve B 1 - Ground 5 - 20 Ω SCIA3594E
SCIA3595E
Page 127 of 4331
AT-122< SERVICE INFORMATION >
DTC P0734 A/T 4TH GEAR FUNCTION
- Valve, sleeve and plug slide along valve bore under their own weight.
- Valve, sleeve and plug are free from burrs, dents and scratches.
- Control valve springs are free from damage, deformation and fatigue.
- Hydraulic line is free from obstacles.
OK or NG OK >> GO TO 6.
NG >> Repair control valve. 6.
CHECK SHIFT-UP (D 3 TO D 4)
During AT-58, " Cruise Test - Part 1 " .
Does A/T shift from D 3 to D 4 at the specified speed?
YES >> GO TO 11.
NO >> Check control valve again. Repair or replace control
valve assembly. 7.
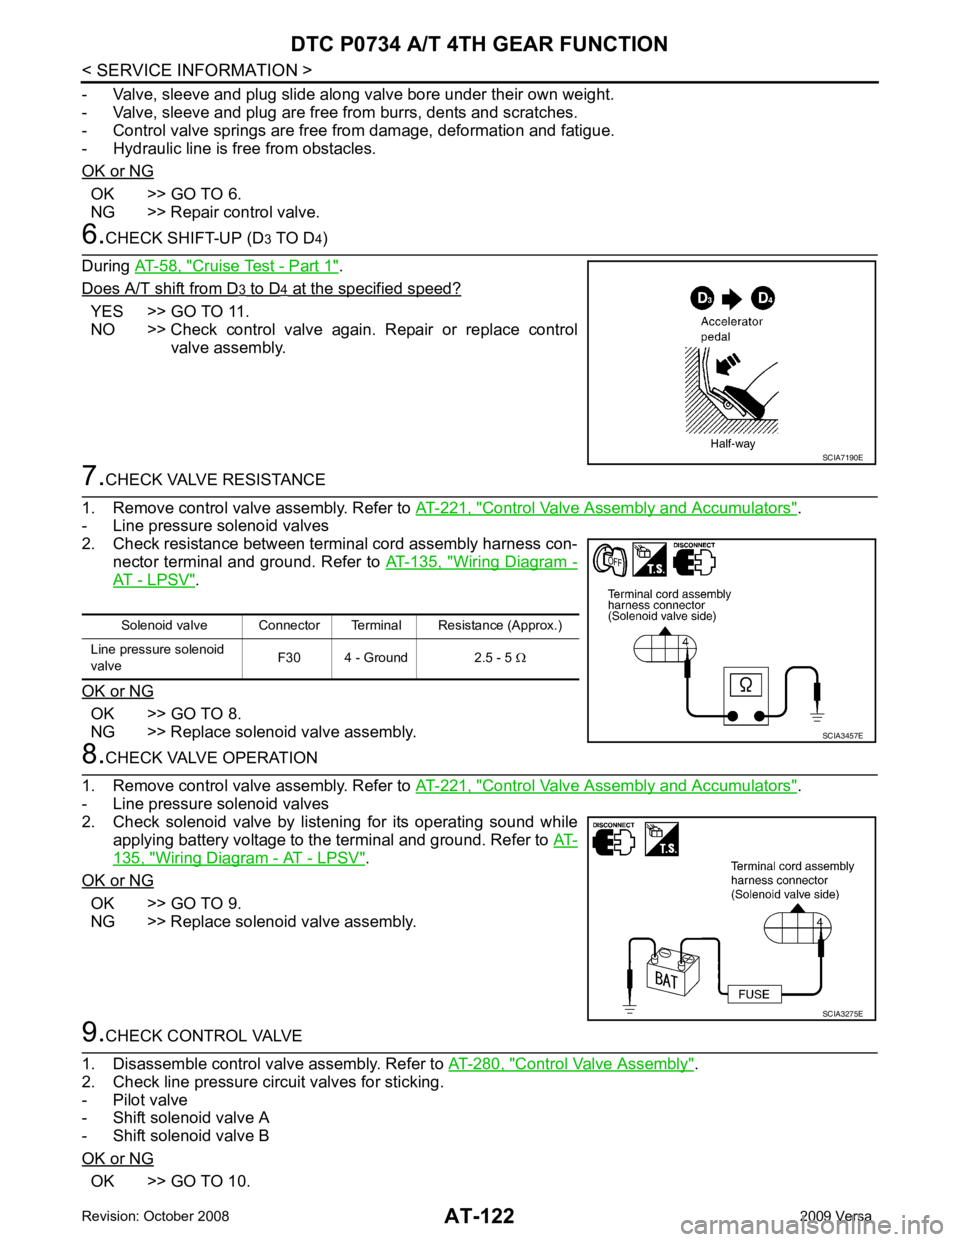
CHECK VALVE RESISTANCE
1. Remove control valve assembly. Refer to AT-221, " Control Valve Assembly and Accumulators " .
- Line pressure solenoid valves
2. Check resistance between terminal cord assembly harness con- nector terminal and ground. Refer to AT-135, " Wiring Diagram -
AT - LPSV " .
OK or NG OK >> GO TO 8.
NG >> Replace solenoid valve assembly. 8.
CHECK VALVE OPERATION
1. Remove control valve assembly. Refer to AT-221, " Control Valve Assembly and Accumulators " .
- Line pressure solenoid valves
2. Check solenoid valve by listening for its operating sound while
applying battery voltage to the terminal and ground. Refer to AT-135, " Wiring Diagram - AT - LPSV " .
OK or NG OK >> GO TO 9.
NG >> Replace solenoid valve assembly. 9.
CHECK CONTROL VALVE
1. Disassemble control valve assembly. Refer to AT-280, " Control Valve Assembly " .
2. Check line pressure circuit valves for sticking.
- Pilot valve
- Shift solenoid valve A
- Shift solenoid valve B
OK or NG OK >> GO TO 10. SCIA7190E
Solenoid valve Connector Terminal Resistance (Approx.)
Line pressure solenoid
valve F30 4 - Ground 2.5 - 5
Ω SCIA3457E
SCIA3275E
Page 128 of 4331
DTC P0734 A/T 4TH GEAR FUNCTION
AT-123
< SERVICE INFORMATION >
D
E
F
G H
I
J
K L
M A
B AT
N
O P
NG >> Repair control valve. 10.
CHECK SHIFT-UP (D 3 TO D 4)
During AT-58, " Cruise Test - Part 1 " .
Does A/T shift from D 3 to D 4 at the specified speed?
YES >> GO TO 11.
NO >> Check control valve again. Repair or replace control
valve assembly. 11.
CHECK DTC
Perform AT-119, " DTC Confirmation Procedure " .
OK or NG OK >>
INSPECTION END
NG >> Perform AT-58, " Cruise Test - Part 1 " again and return to the start point of this test group. SCIA7190E
Page 135 of 4331
AT-130< SERVICE INFORMATION >
DTC P0744 A/T TCC S/V FUNCTION (LOCK-UP)
5. Accelerate vehicle to more than 80 km/h (50 MPH) and maintain the following conditions continuously until “TESTING” has turned to “COMPLETE”. (It wi ll take approximately 30 seconds after “TESTING”
shows.)
THROTTLE POSI: 1.0/8 - 2.0/8 (at all times during step 4)
SLCT LVR POSI: “D” position
TCC S/V DUTY: More than 94%
VEHICLE SPEED: Constant speed of more than 80 km/h (50 MPH)
- Make sure that “GEAR” shows “4”.
- For shift schedule, refer to AT-64, " Vehicle Speed at Which Gear Shifting Occurs " .
- If “TESTING” does not ap pear on CONSULT-III for a long ti me, select “SELF-DIAG RESULTS”. In
case a DTC other than “P0744 A/T TCC S/ V FNCTN” is shown, refer to AT-79, " CONSULT-III Func-
tion (TRANSMISSION) " .
6. Make sure that “OK” is displayed. (If “NG” is displayed, refer to “DIAGNOSTIC PROCEDURE”.)
Refer to AT-130, " Diagnosis Procedure " .
Refer to AT-64, " Vehicle Speed at Which Lock-up Occurs/Releases " .
WITH GST
Follow the procedure “WITH CONSULT-III”.
Diagnosis Procedure INFOID:00000000043054021.
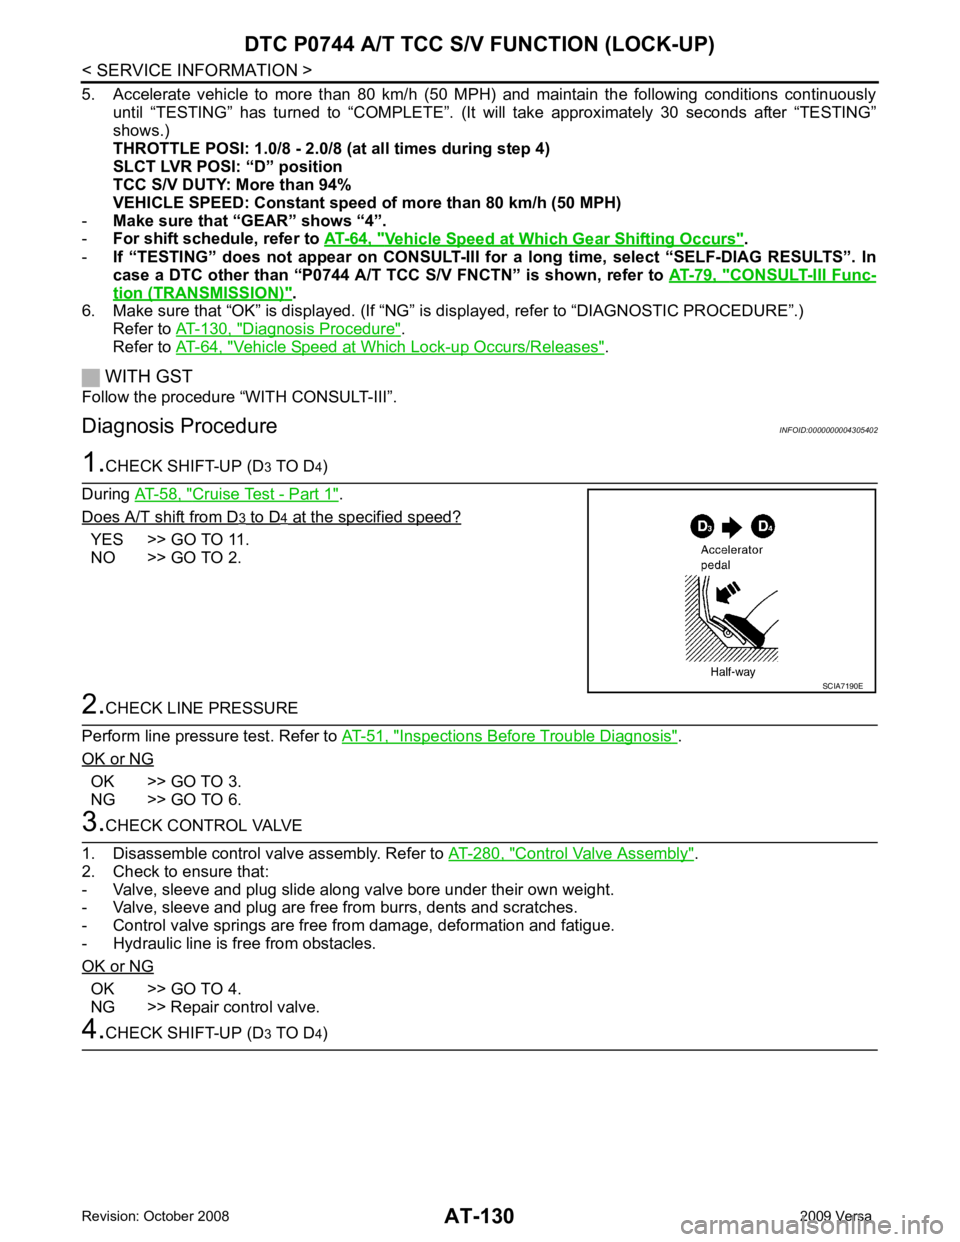
CHECK SHIFT-UP (D 3 TO D 4)
During AT-58, " Cruise Test - Part 1 " .
Does A/T shift from D 3 to D 4 at the specified speed?
YES >> GO TO 11.
NO >> GO TO 2. 2.
CHECK LINE PRESSURE
Perform line pressure test. Refer to AT-51, " Inspections Before Trouble Diagnosis " .
OK or NG OK >> GO TO 3.
NG >> GO TO 6. 3.
CHECK CONTROL VALVE
1. Disassemble control valve assembly. Refer to AT-280, " Control Valve Assembly " .
2. Check to ensure that:
- Valve, sleeve and plug slide along valve bore under their own weight.
- Valve, sleeve and plug are free from burrs, dents and scratches.
- Control valve springs are free from damage, deformation and fatigue.
- Hydraulic line is free from obstacles.
OK or NG OK >> GO TO 4.
NG >> Repair control valve. 4.
CHECK SHIFT-UP (D 3 TO D 4) SCIA7190E
Page 136 of 4331
DTC P0744 A/T TCC S/
V FUNCTION (LOCK-UP)
AT-131
< SERVICE INFORMATION >
D
E
F
G H
I
J
K L
M A
B AT
N
O P
During
AT-58, " Cruise Test - Part 1 " .
Does A/T shift from D 3 to D 4 at the specified speed?
YES >> GO TO 5.
NO >> Check control valve again. Repair or replace control valve assembly. 5.
CHECK DTC
Perform AT-129, " DTC Confirmation Procedure " .
OK or NG OK >>
INSPECTION END
NG >> GO TO 11. Check for proper lock-up. 6.
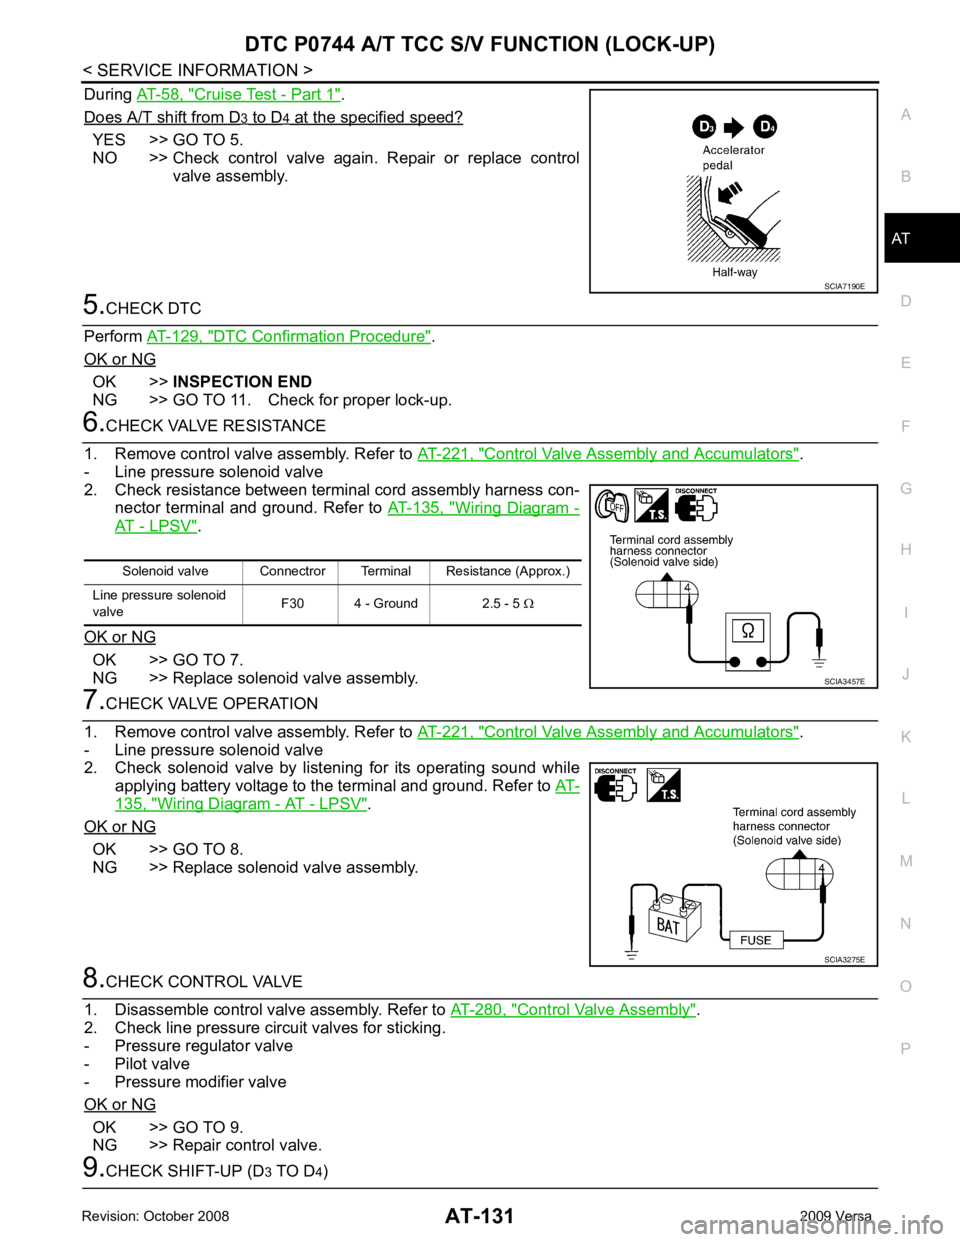
CHECK VALVE RESISTANCE
1. Remove control valve assembly. Refer to AT-221, " Control Valve Assembly and Accumulators " .
- Line pressure solenoid valve
2. Check resistance between terminal cord assembly harness con- nector terminal and ground. Refer to AT-135, " Wiring Diagram -
AT - LPSV " .
OK or NG OK >> GO TO 7.
NG >> Replace solenoid valve assembly. 7.
CHECK VALVE OPERATION
1. Remove control valve assembly. Refer to AT-221, " Control Valve Assembly and Accumulators " .
- Line pressure solenoid valve
2. Check solenoid valve by listening for its operating sound while
applying battery voltage to the terminal and ground. Refer to AT-135, " Wiring Diagram - AT - LPSV " .
OK or NG OK >> GO TO 8.
NG >> Replace solenoid valve assembly. 8.
CHECK CONTROL VALVE
1. Disassemble control valve assembly. Refer to AT-280, " Control Valve Assembly " .
2. Check line pressure circuit valves for sticking.
- Pressure regulator valve
- Pilot valve
- Pressure modifier valve
OK or NG OK >> GO TO 9.
NG >> Repair control valve. 9.
CHECK SHIFT-UP (D 3 TO D 4) SCIA7190E
Solenoid valve Connectror Terminal Resistance (Approx.)
Line pressure solenoid
valve F30 4 - Ground 2.5 - 5
Ω SCIA3457E
SCIA3275E
Page 137 of 4331
AT-132< SERVICE INFORMATION >
DTC P0744 A/T TCC S/V FUNCTION (LOCK-UP)
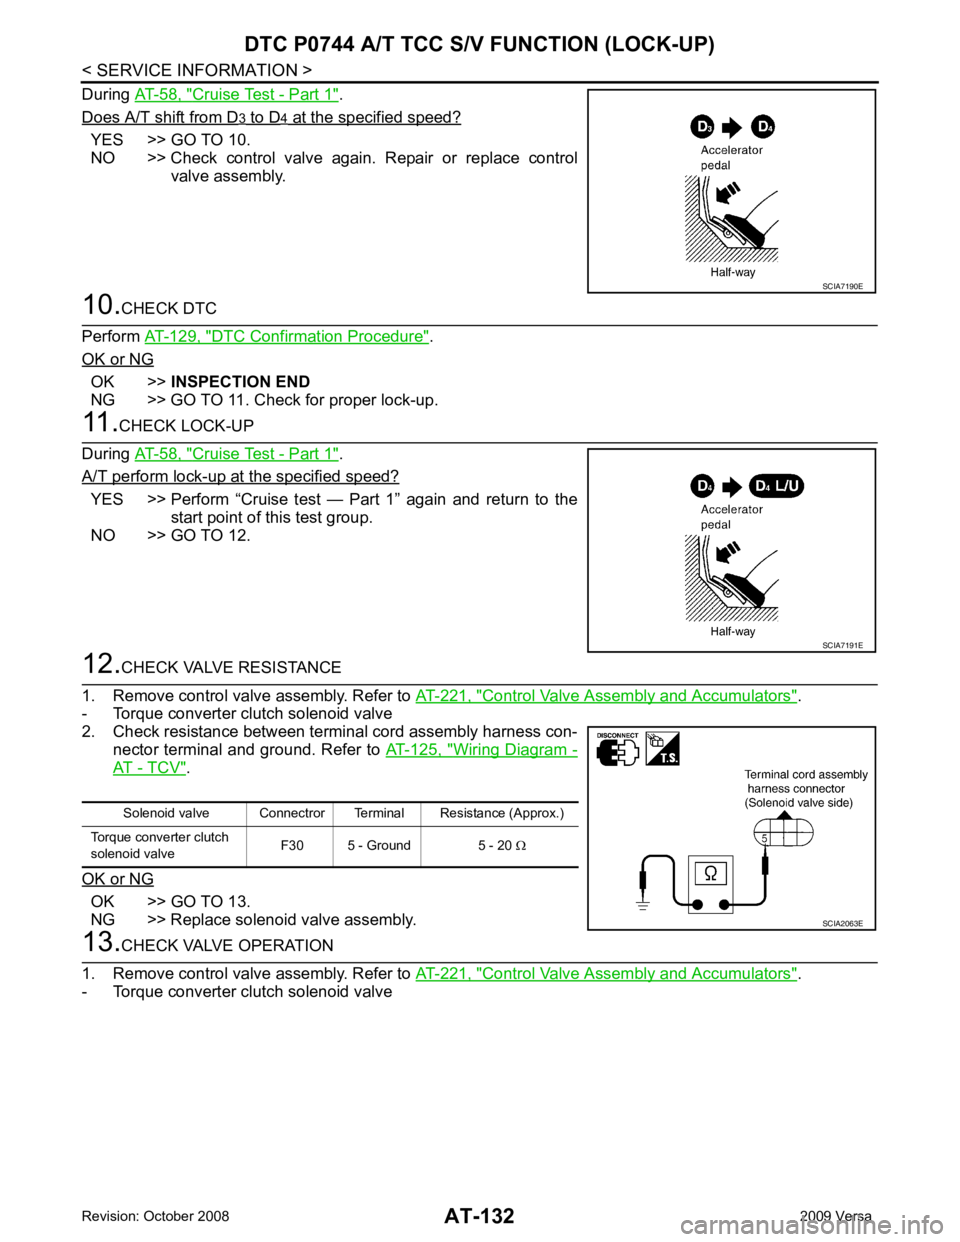
During AT-58, " Cruise Test - Part 1 " .
Does A/T shift from D 3 to D 4 at the specified speed?
YES >> GO TO 10.
NO >> Check control valve again. Repair or replace control valve assembly. 10.
CHECK DTC
Perform AT-129, " DTC Confirmation Procedure " .
OK or NG OK >>
INSPECTION END
NG >> GO TO 11. Check for proper lock-up. 11.
CHECK LOCK-UP
During AT-58, " Cruise Test - Part 1 " .
A/T perform lock-up at the specified speed? YES >> Perform “Cruise test — Part 1” again and return to the
start point of this test group.
NO >> GO TO 12. 12.
CHECK VALVE RESISTANCE
1. Remove control valve assembly. Refer to AT-221, " Control Valve Assembly and Accumulators " .
- Torque converter clutch solenoid valve
2. Check resistance between terminal cord assembly harness con-
nector terminal and ground. Refer to AT-125, " Wiring Diagram -
AT - TCV " .
OK or NG OK >> GO TO 13.
NG >> Replace solenoid valve assembly. 13.
CHECK VALVE OPERATION
1. Remove control valve assembly. Refer to AT-221, " Control Valve Assembly and Accumulators " .
- Torque converter clutch solenoid valve SCIA7190E
SCIA7191E
Solenoid valve Connectror Terminal Resistance (Approx.)
Torque converter clutch
solenoid valve F30 5 - Ground 5 - 20
Ω SCIA2063E
Page 138 of 4331
DTC P0744 A/T TCC S/
V FUNCTION (LOCK-UP)
AT-133
< SERVICE INFORMATION >
D
E
F
G H
I
J
K L
M A
B AT
N
O P
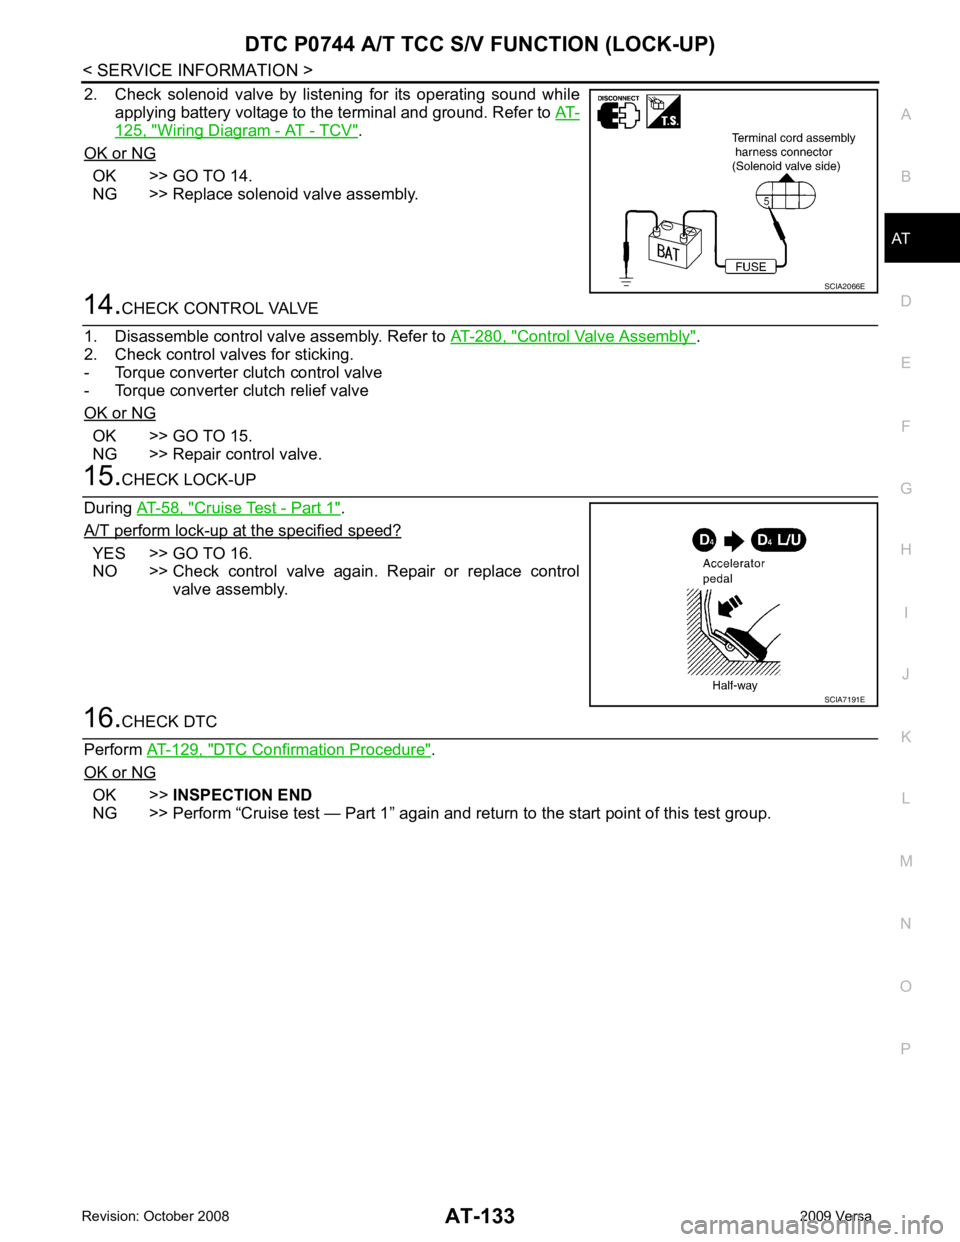
2. Check solenoid valve by listening for its operating sound while
applying battery voltage to the terminal and ground. Refer to AT-125, " Wiring Diagram - AT - TCV " .
OK or NG OK >> GO TO 14.
NG >> Replace solenoid valve assembly. 14.
CHECK CONTROL VALVE
1. Disassemble control valve assembly. Refer to AT-280, " Control Valve Assembly " .
2. Check control valves for sticking.
- Torque converter clutch control valve
- Torque converter clutch relief valve
OK or NG OK >> GO TO 15.
NG >> Repair control valve. 15.
CHECK LOCK-UP
During AT-58, " Cruise Test - Part 1 " .
A/T perform lock-up at the specified speed? YES >> GO TO 16.
NO >> Check control valve again. Repair or replace control
valve assembly. 16.
CHECK DTC
Perform AT-129, " DTC Confirmation Procedure " .
OK or NG OK >>
INSPECTION END
NG >> Perform “Cruise test — Part 1” again and re turn to the start point of this test group. SCIA2066E
SCIA7191E
Page 143 of 4331
AT-138< SERVICE INFORMATION >
DTC P0745 LINE PRESS
URE SOLENOID VALVE
NG >> GO TO 6. 6.
CHECK TCM
1. Check TCM input/output signal. Refer to AT-77, " TCM Terminal and Reference Value " .
2. If NG, recheck TCM pin terminals for damage or loose connection with harness connector.
OK or NG OK >>
INSPECTION END
NG >> Repair or replace damaged parts.
Component Inspection INFOID:0000000004305410
LINE PRESSURE SOLENOID VALVE
• For removal, refer to AT-221, " Control Valve Assembly and Accumulators " .
Resistance Check
• Check resistance between terminal and ground.
Operation Check
• Check solenoid valve by listening for its operating sound while applying battery voltage to the terminal and ground.
DROPPING RESISTOR
• Check resistance between terminals. Solenoid valve Connector Terminal Resistance (Approx.)
Line pressure solenoid
valve F30 4 - Ground 2.5 - 5
Ω SCIA3457E
SCIA3275E
Item Connector Terminal Resistance (Approx.)
Dropping resistor E49 1 - 2 12 Ω SCIA4950E