Page 65 of 313

Opening and closing
Key
The key centrally locks/unlocks:
R the doors
R the boot lid
R the fuel filler flap G
Risk of accident
If children are left unsupervised in the vehicle,
they could:
R open adoor from the inside at any time,
even if it has been locked
R start the vehicle using akey which has been
left in the vehicle
R release the parking brake
They could thereby endanger themselves and
others. Never leave children unsupervised in
the vehicle. Always take the key with you
when leaving the vehicle, even if you are only
leaving it for ashort time. 0046
0037 Locksthe vehicle
0047 0054 Unlocks the boot lid
008A 0036 Unlocks the vehicle
0088 Battery chec klamp
When unlocking, the turn signals flash once.
When locking, they flash three times.
The vehicle relock sautomatically if you do not
open adoor or the boot lid within 40 seconds
of unlocking the vehicle. The time until it locks
is approximately 40 seconds. KEYLESS GO* You can start
,lock or unlock the vehicle using
the KEYLESS GO key. To do this, you only
need carry the key with you. When you touch
the surface of the sensor sonthe vehicle's
door handles, KEYLESS GO establishes a
radio connection between the vehicle and the
key.
The distanc etothe door handle from which
you wish to lock or unlock the vehicle must
not be greater than 1m.
When starting the engin eand whilst driving,
KEYLESS GO also checks whether avalid key
is in the vehicle by periodically establishing
radio contact. X
To unlock the vehicle: touch the inner
surface of the door handle.
X To lock the vehicle: touch sensor sur-
face 0046.
If you pull the boot lid handle, only the boot
of the vehicle is unlocked.
i If the vehicle has been parked for along
time, you must pull the door handle to acti-
vate KEYLESS GO.
Individua lsettings You can change the setting of the locking
system in such
away that only the driver's
door and the fuel filler flap are unlocked. This
could be useful if you frequently travel on your
own.
X To change the setting: press the0036
and 0037 button ssimultaneously for 62
Opening and closingControls
*o
ptional
207_AKB
;2;3,en-GB
mkalafa, Version:2.11.8.1
2009-07-23T10:23:49+02:00
-Seite 62
Page 66 of 313

approximately six seconds until th
ebattery
check lamp flashes twice.
The ke ynow function sasfollows:
X To unlock th edriver's door: pressthe
0036 buttononce.
X To unlock centrally: pressthe 0036 but-
to nt wice.
X To lock centrally: pressthe 0037 button.
The KEYLESS GO* function is changed as fol-
lows:
X To unlock th edriver's door: touch the
inner surface of th edoor handle on the
driver' sdoor.
X To unlock centrally: touch theinner sur-
fac eoft hefront-passenger door handle.
X To lock centrally: touch sensor sur-
face 0046on on eofthedoor handles.
Restoring th efactor ysettings X
Press the 0036and0037 buttons simulta-
neously for approximately six seconds until
th eb attery check lamp flashes twice.
Additional information R
Convenience opening (Y page 96)
R Convenience closin g(Ypage 97)
R Opening and closin ginanemergency
(Y page 249) Opening th
edoor sfromt heinside
You can open adoor from th einside eve nifit
has been locked. X
Pull door handle 0047.
If th edoor is locked, lockin gknob 0046pops
up. The door is unlocked and can be
opened.
i When adoor is opened, th eside window
on that side open sslightly. When th edoor
is closed, th eside window closes again.
! The side windows will no topen/close if
th eb attery is discharged or if th eside win-
dows have ice dup. It will then no tbepos-
sible to close th edoor .Don otattempt to
force th edoor to close. You could other-
wise damag ethe door or th eside window. Automatic lockin
gfeature
The vehicle will loc kautomaticall yoncey ou
have pulled away.
You can also switch th eautomatic locking
function on and off usin gthe on-board com-
puter (Y page 120).
i The vehicle is locke dautomaticall ywhen
th ei gnition is switched on and th ewheels
begin to turn. Ther eisariskofb einglocked
out when th evehicle is bein gpushe dor
tested on adynamometer. Opening and closing
63Controls
*optional
207_AKB
;2;3,en-GB
mkalafa ,V ersion: 2.11.8.1
2009-07-23T10:23:49+02:00
-Seite 63 Z
Page 67 of 313

X
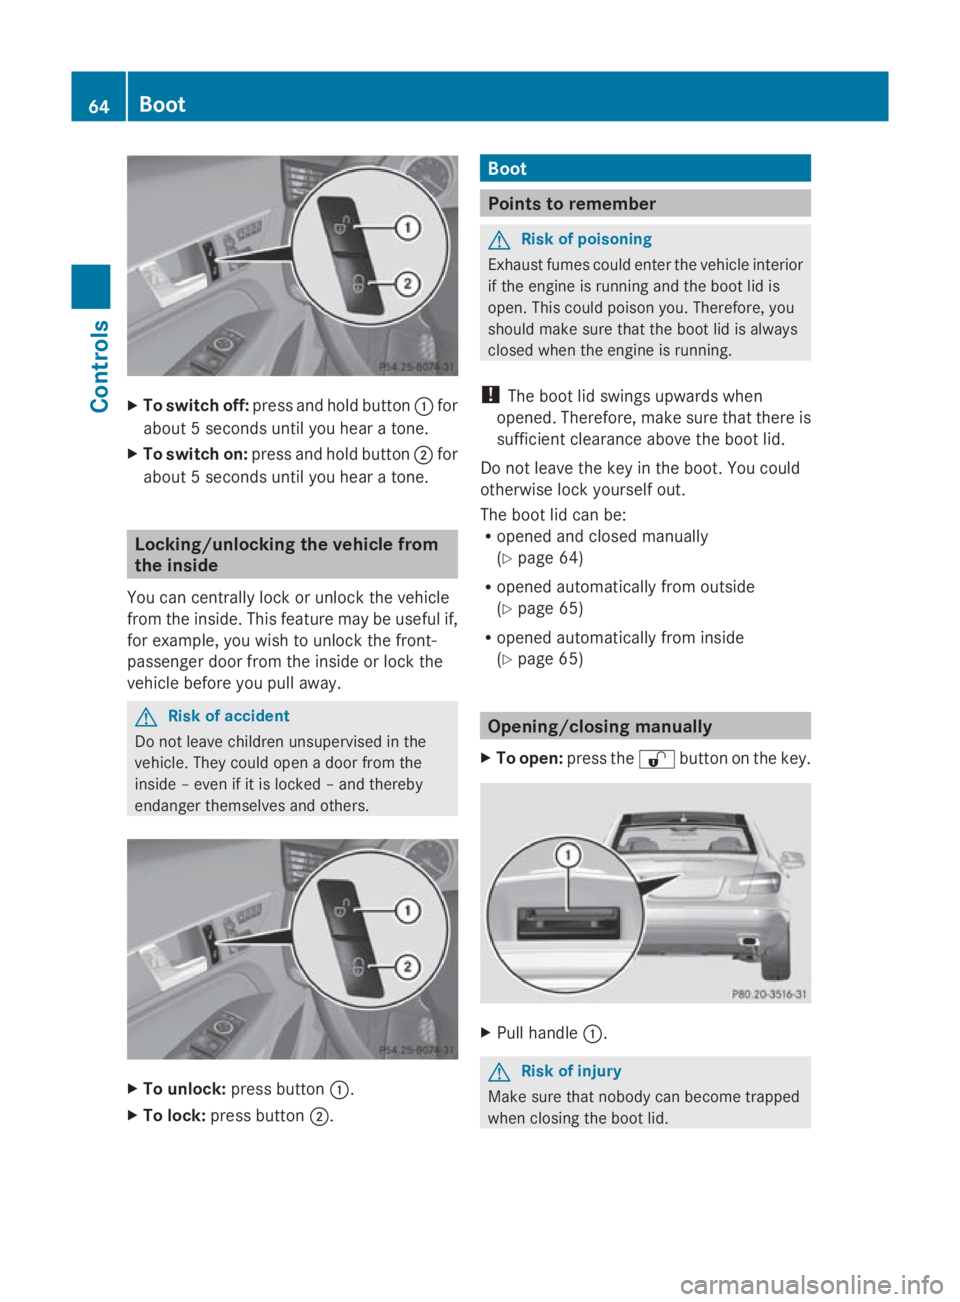
To switc hoff:press and hol dbutton 0046for
abou t5second suntilyou hea rat one.
X To switc hon:press and hol dbutton 0047for
abou t5second suntilyou hea rat one. Locking/unlockin
gthe vehicle from
the inside
Yo uc an centrall yloc koru nlock the vehicle
from the inside. Thi sfeatur emaybe usefu lif,
for example, yo uwishtou nlock the front-
passenge rdoorfrom the insid eorlockt he
vehicl ebefore yo upulla way. G
Ris
kofa ccident
Do not leav echildren unsupervised in the
vehicle. The ycould open adoorfrom the
insid e–e venifiti sloc ked –and thereby
endanger themselves and others. X
To unlock: press button 0046.
X To lock: press button 0047. Boot
Points to remember
G
Ris
kofp oisoning
Exhaus tfum es could ente rthe vehicl einterior
if the engine is running and the boot li dis
open. Thi scould poison you. Therefore ,you
shoul dmakes uret hatthe boot li disalways
closed when the engine is running.
! The boot li dswing su pwar ds when
opened. Therefore ,makes uret hatther eis
sufficient clearance above the boot lid.
Do not leav ethe key in the boot. Yo ucould
otherwise lock yoursel fout.
The boot li dcan be:
R opene dand closed manually
(Y page 64)
R opene dautomaticall yfrom outside
(Y page 65)
R opene dautomaticall yfrom inside
(Y page 65) Opening/closing manually
X To open: press the 0036button on the key. X
Pull handle 0046. G
Ris
kofi njury
Make sure tha tnobod ycan become trapped
when closing the boot lid. 64
BootControls
207_AKB; 2; 3, en-GB
mkalafa,
Version: 2.11.8.1 2009-07-23T10:23:49+02:00-Seite 64
Page 68 of 313

X
To close: pull the boot li ddownfirmly using
recess 0047or008A.
X Lock the vehicle, if necessary ,with
the 0037 button on the key or with KEY-
LESS-GO* (Y page 62).
i If yo uleave aKEYLESS-GO key *inthe
boot, the boot li dwilln ot lock.
Lockin gthe boot separately Yo
uc an lock the boot separately 17
.Ify outhen
unlock the vehicl ecentrally, the boot remains
locked and canno tbeo pened.
X Close the boot lid.
X Remov ethe emergency key element from
the key (Y page 249). X
Insert the emergency key element into the
boot li dlocka sfar as the stop.
X Turn the emergency key element clockwise
from position 004Ato position 004B.
X Remov ethe emergency key element. Opening automaticall
yfrom outside
Yo uc an unlock and open the boot li dsimul-
taneousl ywitht he key.
X To unloc kand open: press and hold
the 0054 button on the key unti lthe boot
li do pens. Opening automaticall
yfrom inside
Yo uc an open the tailgate from the driver's
sea twhent he vehicl eisstationary. X
To open: pull remote operating switch for
boot lid 0046unti lthe boot li dopens. Ke
yp ositions Key
005D
To remove the key
004A Power supply for som econsumers, such
as the windscree nwipers
17 Not availabl einallcountries. Ke
yp ositions
65Controls
*optional
207_AKB; 2; 3, en-GB
mkalafa,
Version: 2.11.8.1 2009-07-23T10:23:49+02:00-Seite 65 Z
Page 69 of 313

004B
Ignition (power supply for all consumers)
and drive position
004C To start the engine
i Even if the key is not for the vehicle in
question, it wills till turn in the ignition lock.
The ignition is not switched on. The engine
cannot be started. KEYLESS-GO*
Pressing the Start/Stop button repeatedly
corresponds to the different key positions in
the ignition lock. This requires that you do not
depres sthe brake pedal.
If you depres sthe brake pedala nd press the
Start/Stop button, the engine starts immedi-
ately. X
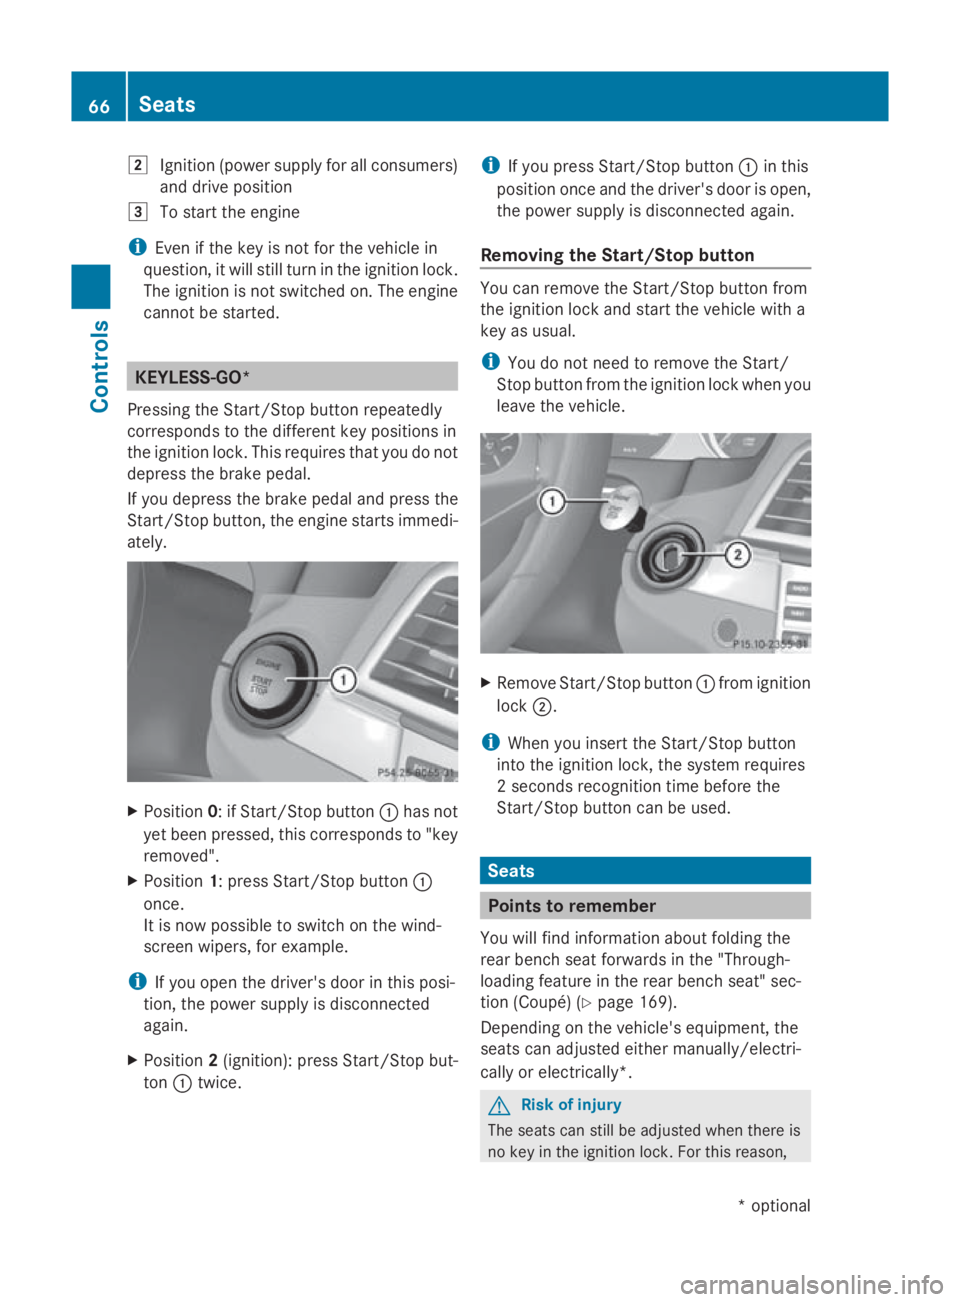
Position 0:ifStart/Stop button 0046has not
yet been pressed ,this corresponds to "key
removed".
X Position 1:press Start/Stop button 0046
once.
It is now possible to switch on the wind-
screen wipers, for example.
i If you open the driver's door in this posi-
tion, the powers upply is disconnected
again.
X Position 2(ignition): press Start/Stop but-
ton 0046twice. i
If you press Start/Stop button 0046in this
positio nonce and the driver's door is open,
the powers upply is disconnected again.
Removing the Start/Stop button You can remove the Start/Stop button from
the ignition lock and start the vehicle with a
key as usual.
i
You do not need to remove the Start/
Stop button from the ignition lock when you
leave the vehicle. X
Remove Start/Stop button 0046from ignition
lock 0047.
i When you insert the Start/Stop button
into the ignition lock, the system requires
2s econds recognition time before the
Start/Stop button can be used. Seats
Points to remember
You willf ind information aboutf olding the
rear bench seat forward sinthe "Through-
loading feature in the rear bench seat" sec-
tion (Coupé) (Y page 169).
Depending on the vehicle's equipment, the
seats can adjusted either manually/electri-
cally or electrically*. G
Risk of injury
The seats can still be adjusted when there is
no key in the ignition lock. For this reason, 66
SeatsControls
*o
ptional
207_AKB; 2; 3, en-GB
mkalafa
,V ersion: 2.11.8.1
2009-07-23T10:23:49+02:00
-Seite 66
Page 70 of 313

childre
nshoul dnever be left unsupervised in
the vehicle .The yc ould become trapped when
adjusting aseat G
Risk of accident
Only adjust the driver' sseatw hent he vehicle
is stationary. You will otherwise be distracted
from the roa dand traffi cconditions and you
could los econtrol of the vehicle as aresult of
the sea tmoving. Thi scould cause an acci-
dent. G
Risk of injury
Make sure that nobody can become trapped
whe nyou adjust the seat.
Observe the notes concerning the airba gsys-
tem.
Secure childre nasrecommended; see the
"Childre ninthe vehicle "section. G
Risk of injury
Make sure that the centra lareaoft he head
restraint supports the back of your hea dat
abou teye level .You could seriously injure
your neck if your hea disnot correctly sup-
ported by the hea drestraint in the event of an
accident. Neve rtrave lwithou tac orrectly
adjuste dand engaged hea drestraint.
! Whe nyou move the seats, make sure that
there are no objects in the footwel lor
behind the seats. Otherwise, yo ucould
damag ethe seats and the objects.
i The hea drestraints in the front seats are
fitted with the NECK-PR Osystem
(Y page 41). For this reason, it is not pos-
sible to remove the hea drestraints from
the front seats.
Pleas econtact aMercedes-Benz Service
Centre for more information. Adjusting the seats manually and
electrically
Seat fore-and-aft adjustment
X
Lift handle 0088and slide the sea tforwards
or backwards.
Backrest angle X
Slide the button forward sorbackint he
direction of arrow 0046.
Seat height X
Slide the button up or dow ninthe direction
of arrow 0047.
Seat cushio nangle Adjus
tthe angl esothat your thighs are gently
supported.
X Turn thumbwheel 008Ain the desire ddirec-
tion. Seats
67Controls
207_AKB;2;3,en-GB
mkalafa ,V ersion: 2.11.8.1
2009-07-23T10:23:49+02:00
-Seite 67 Z
Page 71 of 313

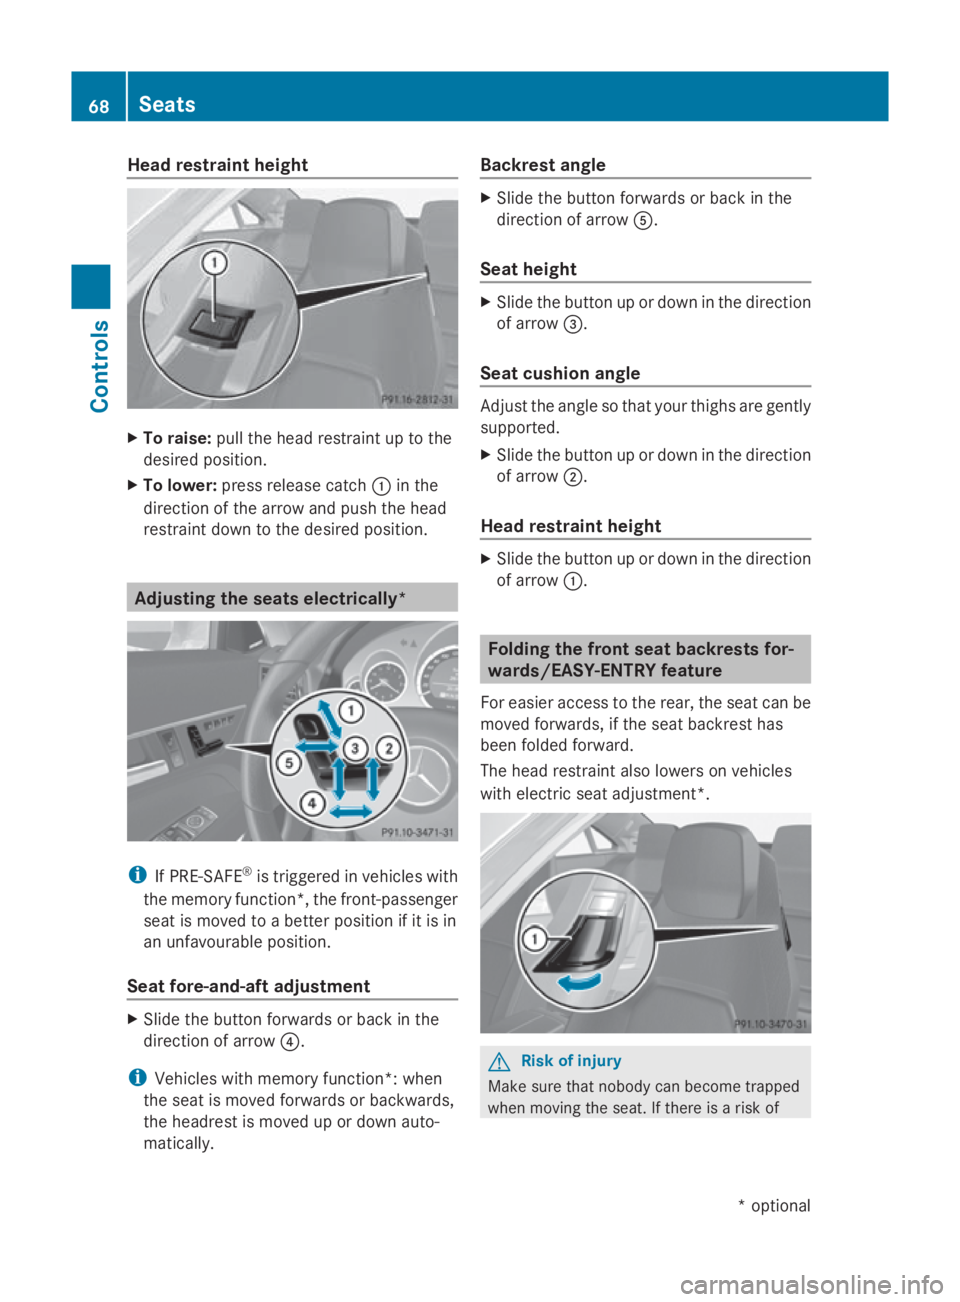
Head restraint height
X
To raise: pullthe headr estraint up to the
desired position.
X To lower: press release catch 0046in the
direction of the arrow and pusht he head
restraint downtot he desired position.Adjusting the seats electrically*
i
If PRE-SAFE ®
is triggere dinvehicles with
the memory function*, the front-passenger
seatism oved toabetter position if it is in
an unfavourable position.
Seat fore-and-aft adjustment X
Slid ethe button forwards or back in the
direction of arrow 0088.
i Vehicles with memory function*: when
the seatism oved forwards or backwards,
the headrest is moved up or downa uto-
matically. Backrest angle X
Slid ethe button forwards or back in the
direction of arrow 0086.
Seat height X
Slid ethe button up or downint he direction
of arrow 008A.
Seat cushion angle Adjust the angle so that yourt
highs are gently
supported.
X Slid ethe button up or downint he direction
of arrow 0047.
Head restraint height X
Slid ethe button up or downint he direction
of arrow 0046. Folding the front seat backrests for-
wards/EASY-ENTRY feature
For easier access to the rear, the seatc an be
moved forwards, if the seatb ackrest has
been folde dforward.
The headr estraint alsol owers on vehicles
with electric seata djustment*. G
Risk of injury
Make sure that nobody can become trapped
when moving the seat. If there is arisk of 68
SeatsControls
*o
ptional
207_AKB; 2; 3, en-GB
mkalafa,
Version: 2.11.8.1 2009-07-23T10:23:49+02:00-Seite 68
Page 72 of 313

someone becoming trapped, press the seat
adjustment switch on the door.
Folding the backrest forwards X
Vehicles without the memory func-
tion*: if necessary, release the head
restraint and push it down.
X Pull seat release handle 0046forwards and
fold the backrest forwards, until the seat
backrest engages.
X Push the seat as far forwards as it will go.
X Vehicles with the memory function*:
pull seat release handle 0046forwards and
fold the backrest forwards as far as it will
go.
The seat moves automaticallytot he fore-
most position.
Folding back the backrest X
Vehicles without the memory func-
tion*: push the seat backrest back hori-
zontally until the seat reaches the position
that was previouslys et.
X Swing back the seat backrest evenly below
release handle 0046until it engages, doing so
in as mooth manner.
X If the head restraint has been moved, check
the position of the head restraint and set it
to the correct position after the seat back-
rest has been folded back.
X Vehicles with the memory function*:
swing back the seat backrest.
The seat moves automaticallytot he stored
position. G
Risk of injury
Make sure that the backrest engages fully.If
the seat backrest is not engaged, the mes-
sage Front right seat backrest not
locked orFront left seat backrest
not locked appears in the multi-function dis-
play.S top the vehicle as soon as road and
traffic conditions permit and remove any
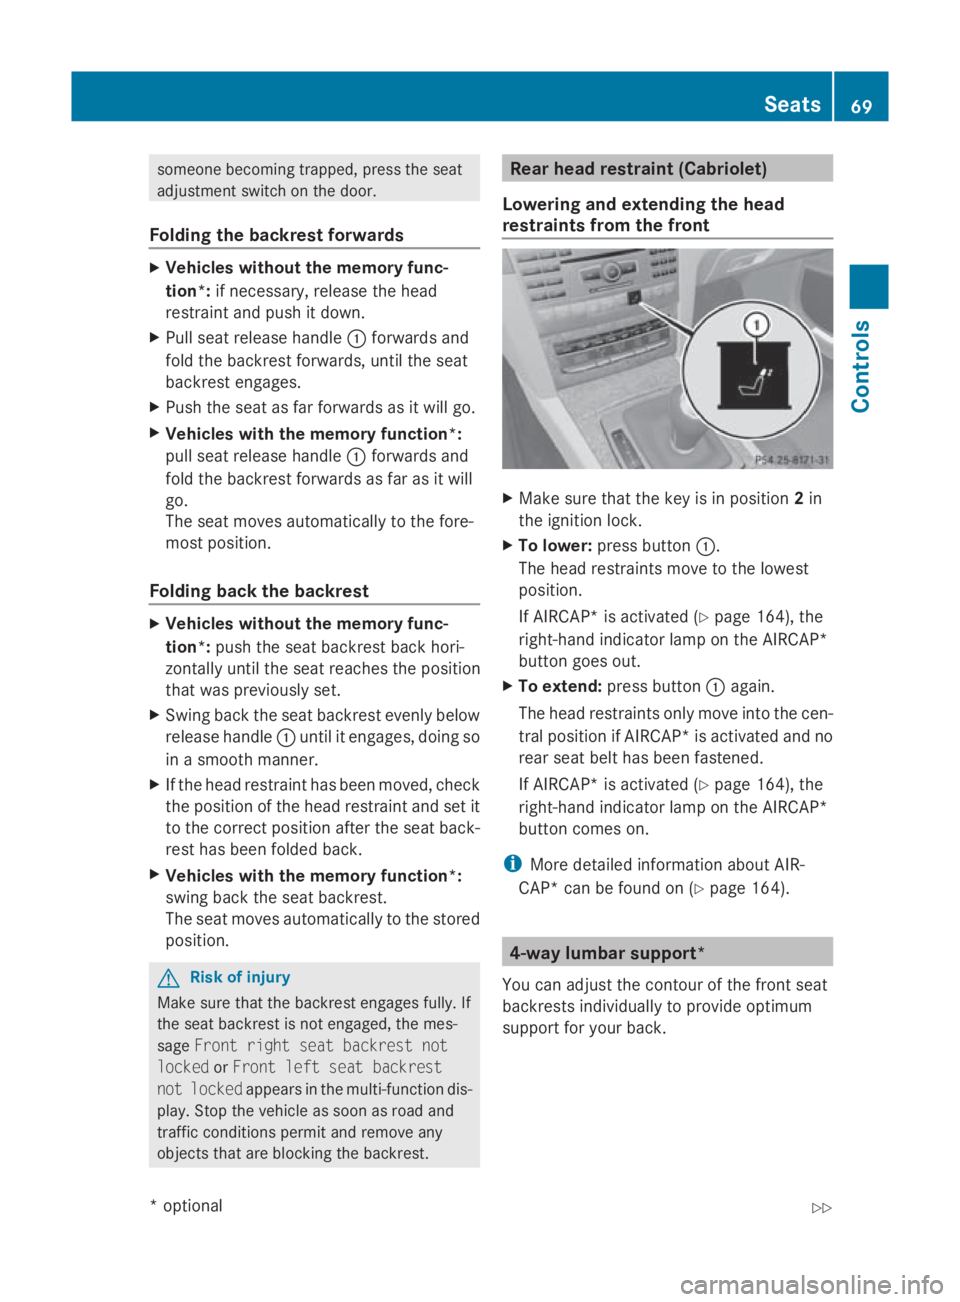
objects that are blocking the backrest. Rear head restraint (Cabriolet)
Lowering and extending the head
restraints from the front X
Make sure that the key is in position 2in
the ignition lock.
X To lower: press button 0046.
The head restraints move to the lowest
position.
If AIRCAP* is activated (Y page 164), the
right-hand indicator lamp on the AIRCAP*
button goes out.
X To extend: press button 0046again.
The head restraints only move into the cen-
tral position if AIRCAP* is activated and no
rear seat belt has been fastened.
If AIRCAP* is activated (Y page 164), the
right-hand indicator lamp on the AIRCAP*
button comes on.
i More detailed information aboutA IR-
CAP* can be found on (Y page 164). 4-way lumbar support*
You can adjust the contour of the front seat
backrests individually to provide optimum
support for your back. Seats
69Controls
*optional
207_AKB;2;3,e
n-GB
mkalafa, Version: 2.11.8.1 2009-07-23T10:23:49+02:00-Seite 69 Z