2009 MERCEDES-BENZ E-CLASS COUPE remove seats
[x] Cancel search: remove seatsPage 69 of 313

004B
Ignition (power supply for all consumers)
and drive position
004C To start the engine
i Even if the key is not for the vehicle in
question, it wills till turn in the ignition lock.
The ignition is not switched on. The engine
cannot be started. KEYLESS-GO*
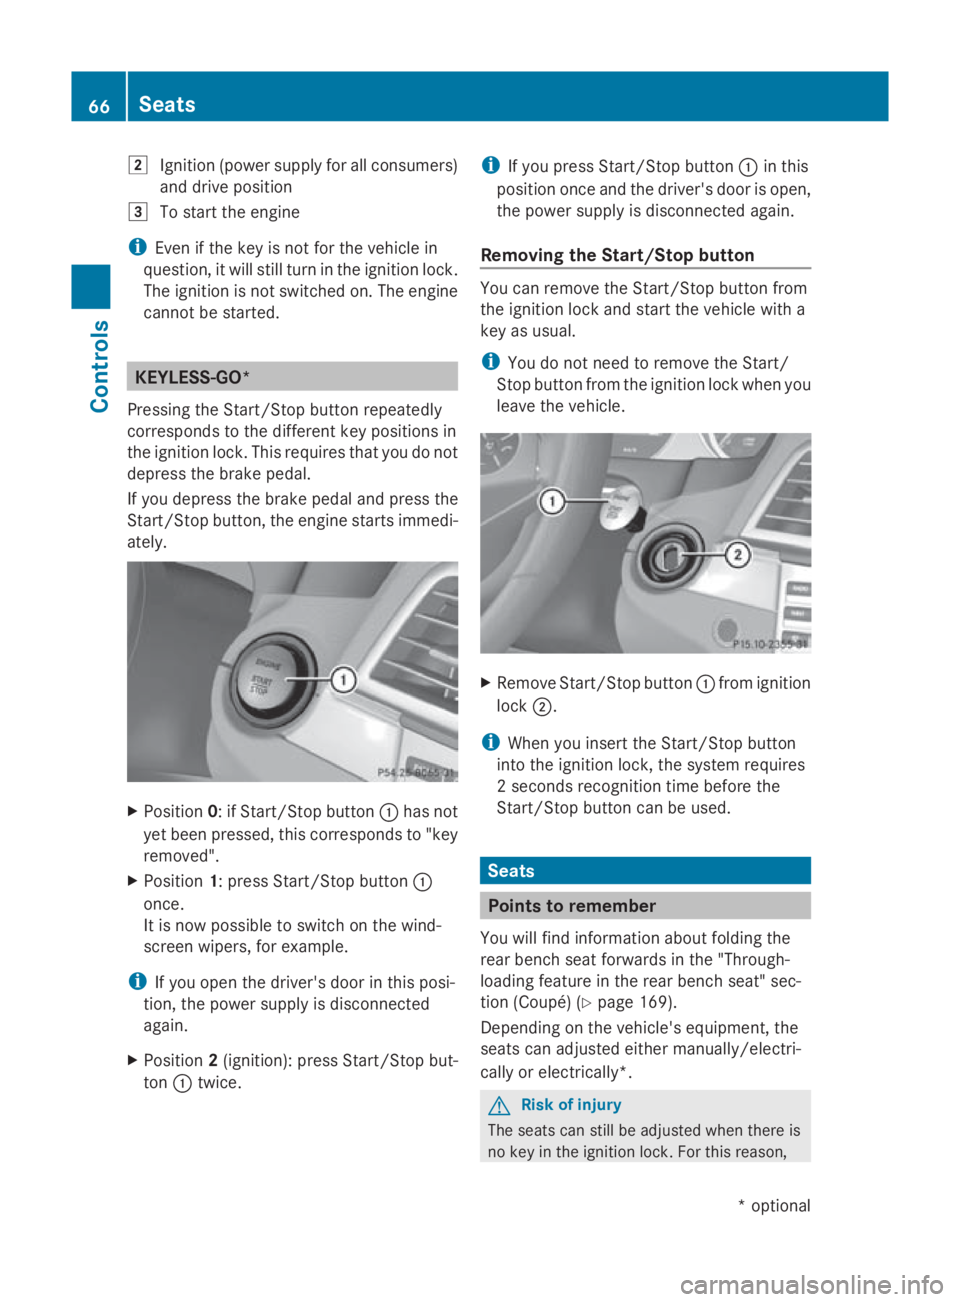
Pressing the Start/Stop button repeatedly
corresponds to the different key positions in
the ignition lock. This requires that you do not
depres sthe brake pedal.
If you depres sthe brake pedala nd press the
Start/Stop button, the engine starts immedi-
ately. X
Position 0:ifStart/Stop button 0046has not
yet been pressed ,this corresponds to "key
removed".
X Position 1:press Start/Stop button 0046
once.
It is now possible to switch on the wind-
screen wipers, for example.
i If you open the driver's door in this posi-
tion, the powers upply is disconnected
again.
X Position 2(ignition): press Start/Stop but-
ton 0046twice. i
If you press Start/Stop button 0046in this
positio nonce and the driver's door is open,
the powers upply is disconnected again.
Removing the Start/Stop button You can remove the Start/Stop button from
the ignition lock and start the vehicle with a
key as usual.
i
You do not need to remove the Start/
Stop button from the ignition lock when you
leave the vehicle. X
Remove Start/Stop button 0046from ignition
lock 0047.
i When you insert the Start/Stop button
into the ignition lock, the system requires
2s econds recognition time before the
Start/Stop button can be used. Seats
Points to remember
You willf ind information aboutf olding the
rear bench seat forward sinthe "Through-
loading feature in the rear bench seat" sec-
tion (Coupé) (Y page 169).
Depending on the vehicle's equipment, the
seats can adjusted either manually/electri-
cally or electrically*. G
Risk of injury
The seats can still be adjusted when there is
no key in the ignition lock. For this reason, 66
SeatsControls
*o
ptional
207_AKB; 2; 3, en-GB
mkalafa
,V ersion: 2.11.8.1
2009-07-23T10:23:49+02:00
-Seite 66
Page 70 of 313

childre
nshoul dnever be left unsupervised in
the vehicle .The yc ould become trapped when
adjusting aseat G
Risk of accident
Only adjust the driver' sseatw hent he vehicle
is stationary. You will otherwise be distracted
from the roa dand traffi cconditions and you
could los econtrol of the vehicle as aresult of
the sea tmoving. Thi scould cause an acci-
dent. G
Risk of injury
Make sure that nobody can become trapped
whe nyou adjust the seat.
Observe the notes concerning the airba gsys-
tem.
Secure childre nasrecommended; see the
"Childre ninthe vehicle "section. G
Risk of injury
Make sure that the centra lareaoft he head
restraint supports the back of your hea dat
abou teye level .You could seriously injure
your neck if your hea disnot correctly sup-
ported by the hea drestraint in the event of an
accident. Neve rtrave lwithou tac orrectly
adjuste dand engaged hea drestraint.
! Whe nyou move the seats, make sure that
there are no objects in the footwel lor
behind the seats. Otherwise, yo ucould
damag ethe seats and the objects.
i The hea drestraints in the front seats are
fitted with the NECK-PR Osystem
(Y page 41). For this reason, it is not pos-
sible to remove the hea drestraints from
the front seats.
Pleas econtact aMercedes-Benz Service
Centre for more information. Adjusting the seats manually and
electrically
Seat fore-and-aft adjustment
X
Lift handle 0088and slide the sea tforwards
or backwards.
Backrest angle X
Slide the button forward sorbackint he
direction of arrow 0046.
Seat height X
Slide the button up or dow ninthe direction
of arrow 0047.
Seat cushio nangle Adjus
tthe angl esothat your thighs are gently
supported.
X Turn thumbwheel 008Ain the desire ddirec-
tion. Seats
67Controls
207_AKB;2;3,en-GB
mkalafa ,V ersion: 2.11.8.1
2009-07-23T10:23:49+02:00
-Seite 67 Z
Page 72 of 313

someone becoming trapped, press the seat
adjustment switch on the door.
Folding the backrest forwards X
Vehicles without the memory func-
tion*: if necessary, release the head
restraint and push it down.
X Pull seat release handle 0046forwards and
fold the backrest forwards, until the seat
backrest engages.
X Push the seat as far forwards as it will go.
X Vehicles with the memory function*:
pull seat release handle 0046forwards and
fold the backrest forwards as far as it will
go.
The seat moves automaticallytot he fore-
most position.
Folding back the backrest X
Vehicles without the memory func-
tion*: push the seat backrest back hori-
zontally until the seat reaches the position
that was previouslys et.
X Swing back the seat backrest evenly below
release handle 0046until it engages, doing so
in as mooth manner.
X If the head restraint has been moved, check
the position of the head restraint and set it
to the correct position after the seat back-
rest has been folded back.
X Vehicles with the memory function*:
swing back the seat backrest.
The seat moves automaticallytot he stored
position. G
Risk of injury
Make sure that the backrest engages fully.If
the seat backrest is not engaged, the mes-
sage Front right seat backrest not
locked orFront left seat backrest
not locked appears in the multi-function dis-
play.S top the vehicle as soon as road and
traffic conditions permit and remove any
objects that are blocking the backrest. Rear head restraint (Cabriolet)
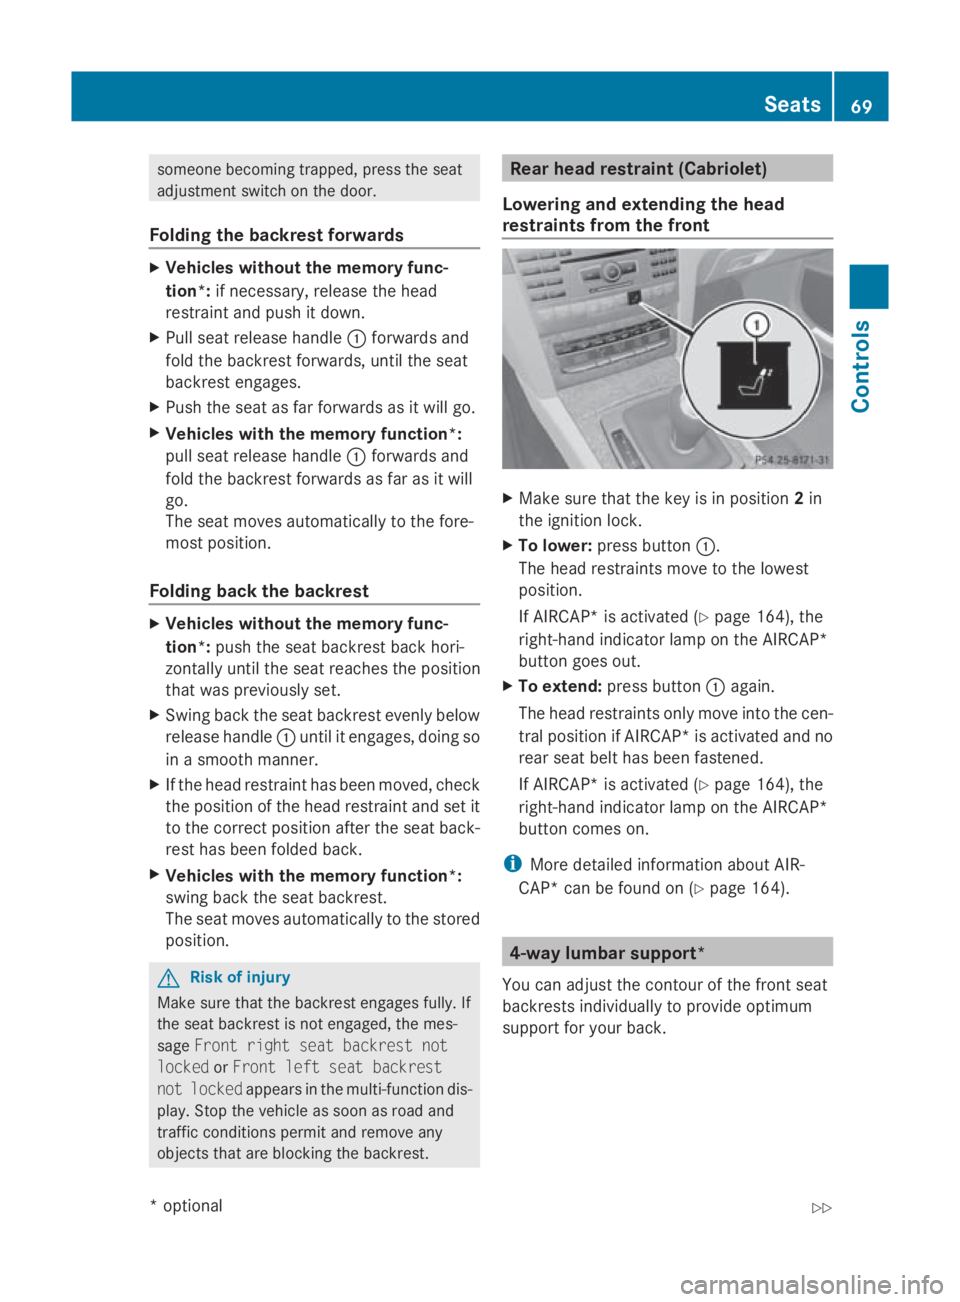
Lowering and extending the head
restraints from the front X
Make sure that the key is in position 2in
the ignition lock.
X To lower: press button 0046.
The head restraints move to the lowest
position.
If AIRCAP* is activated (Y page 164), the
right-hand indicator lamp on the AIRCAP*
button goes out.
X To extend: press button 0046again.
The head restraints only move into the cen-
tral position if AIRCAP* is activated and no
rear seat belt has been fastened.
If AIRCAP* is activated (Y page 164), the
right-hand indicator lamp on the AIRCAP*
button comes on.
i More detailed information aboutA IR-
CAP* can be found on (Y page 164). 4-way lumbar support*
You can adjust the contour of the front seat
backrests individually to provide optimum
support for your back. Seats
69Controls
*optional
207_AKB;2;3,e
n-GB
mkalafa, Version: 2.11.8.1 2009-07-23T10:23:49+02:00-Seite 69 Z
Page 96 of 313

Not active:
if youaredrivin gatspeeds above
100 km/h or yo uswitch off the rea rfoglamp
Adjusting the headlamp rang e(ha logen
headlamps) Headlam
prange control
005D Driver' sseata nd front-passenge rseat
occupied
004A Driver' sseat, front-passenge rseata nd
rea rseats occupied
004B Driver' sseat, front-passenge rseata nd
rea rseats occupied ,boo tladen
004C Driver' sand front-passenge rseats occu-
pied and maximum permissibl ereara xle
load utilised, e.g .whent owing atrailer
Th eh eadlam prange contro lallow syou to
adjus tthe cone of light fro mthe headlamps
to suit the vehicl eload.
X Star tthe engine.
X Turn the headlamp range contro ltothe cor-
responding position. Headlamp cleaning system*
Th eh eadlam ps arecleane dautomaticall yif
the "Wip ewithw ashe rfluid "fun ctio niso per-
ate dw hile the lights ar eonand the engine is
running .The headlamps ar ecleane dagain
every tenth time the windscree nisw iped with
washe rfluid .Wheny ou switch off the ignition,
the automatic headlamp cleaning syste mis
reset and counting is resumed fro m0. Interior lighting
Overhead control panel (example: Coupé)
0046
004E To switch the rea rinterior lighting
on/off (Coupé only)
0047 003F To switch the automatic interior
lighting contro lon/off
008A 0049 To switch the right-hand reading
lamp on/off
0088 0056 To switch the front interior lighting
on/off
0086 0049 To switch the left-hand reading lamp
on/off
Automati cinterior lighting control X
To switc hon/of f:press the 003Fbutton.
The 003F button pops up or goes down.
Th einterior lighting switches on automati-
cally when yo uunlock the vehicle, open a
door or remove the key fro mthe ignition lock.
Th einterior lighting switches off after adelay.
Yo uc an se tthe delaye dswitch-off using the
on-board compute r(Ypage 120) .Ifthe door
is left open, the interior lighting goes ou tafter
approximately fiv eminutes.
Emergenc yaccident lighting If the interior lighting is se
ttoautomatic, the
interior lighting is activated automaticall yif
the vehicl eisinvolved in an accident. Lights
93Controls
*optional
207_AKB; 2; 3, en-GB
mkalafa
,V ersion: 2.11.8.1
2009-07-23T10:23:49+02:00
-Seite 93 Z
Page 168 of 313

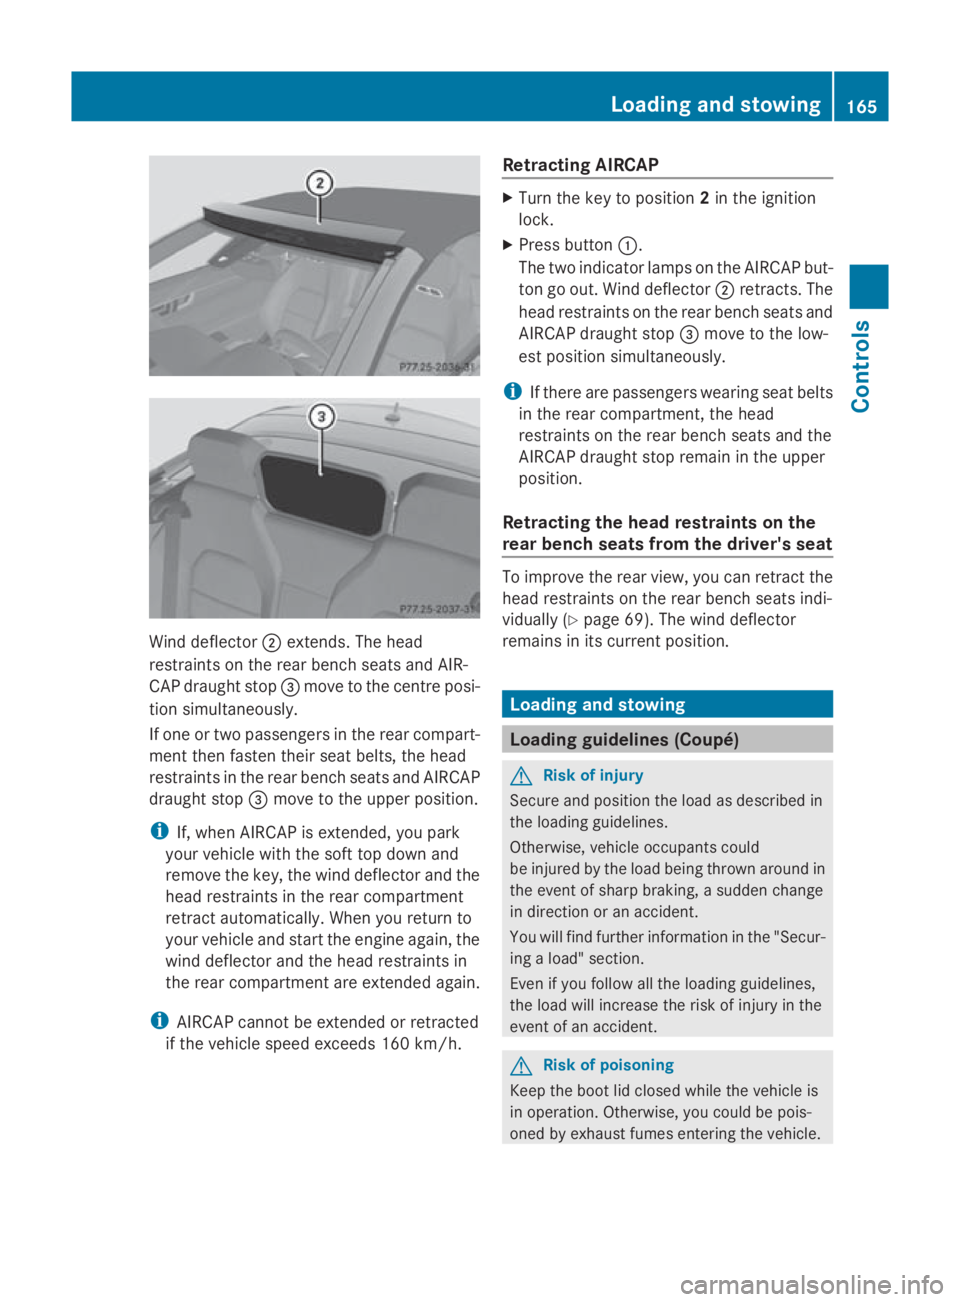
Wind deflector
0047extends. The head
restraints on the rear bench seats and AIR-
CAP draught stop 008Amove to the centre posi-
tion simultaneously.
If one or two passengers in the rear compart-
ment then fasten their seat belts, the head
restraints in the rear bench seats and AIRCAP
draught stop 008Amove to the upper position.
i If, when AIRCAP is extended, you park
your vehicle with the soft top down and
remove the key, the wind deflector and the
head restraints in the rear compartment
retract automatically. When you return to
your vehicle and start the engine again, the
wind deflector and the head restraints in
the rear compartment are extended again.
i AIRCAP cannot be extended or retracted
if the vehicle speed exceeds 160 km/h. Retracting AIRCAP X
Turn the key to position 2in the ignition
lock.
X Press button 0046.
The two indicato rlamps on the AIRCAP but-
ton go out. Wind deflector 0047retracts. The
head restraints on the rear bench seats and
AIRCAP draught stop 008Amove to the low-
est position simultaneously.
i If there are passengers wearing seat belts
in the rear compartment ,the head
restraints on the rear bench seats and the
AIRCAP draught stop remain in the upper
position.
Retracting the head restraints on the
rear bench seats from the driver's seat To improve the rear view, you can retract the
head restraints on the rear bench seats indi-
vidually (Y
page 69). The wind deflector
remains in its curren tposition. Loading and stowing
Loading guidelines (Coupé)
G
Risk of injury
Secure and position the load as described in
the loading guidelines.
Otherwise, vehicle occupant scould
be injured by the load being thrown around in
the event of sharp braking, asudden change
in direction or an accident.
You will find further information in the "Secur-
ing aload" section.
Even if you follow all the loading guidelines,
the load will increase the risk of injury in the
event of an accident. G
Risk of poisoning
Keep the boot lid closed while the vehicle is
in operation .Otherwise, you could be pois-
oned by exhaust fumes entering the vehicle. Loading and stowing
165Controls
207_AKB; 2; 3, en-GB
mkalafa, Version: 2.11.8.1 2009-07-23T10:23:49+02:00-Seite 165 Z
Page 241 of 313

Problem Possible causes/consequences and
0050
0050Solutions You hear
awarning
tone. The red distance warning lamp*
00BAlights up while the vehicle
is in motion.
X Observe the explanations for the distance warning lamp*
(Y page 232). Accident
Problem Possible causes/consequences and
0050 0050Solutions Fuel is leaking from the
vehicle.
G
Risk of fire
The fuel line or the fuel tank has been damaged. The leaking fuel
creates arisk of fire or explosion.
X Switch off the ignition immediately.
X Remove the ignition key.
Do not restart the engine under any circumstances. The leaking
fuel creates arisk of fire or explosion.
X Consult aqualified specialist workshop. You are unable to
determine the extentof
the damage.
X
Consult aqualified specialist workshop. You cannot detect any
damage.
X
Start the engine as normal. The active bonnet func-
tion (pedestrian protec-
tion) has been trig-
gered. Your vehicle has been involved in
afrontal collision.
X Reset the triggered active bonnet (pedestrian protection)
(Y page 256). The NECK-PRO head
restraint
sonthe driv-
er's and front-
passenger seats have
been triggered. Your vehicle has been involved in
arear-end collision.
X Reset the NECK-PRO head restraint s(Ypage 257). 238
TroubleshootingPractical advice
*o
ptional
207_AKB; 2; 3, en-GB
mkalafa,
Version: 2.11.8.1 2009-07-23T10:23:49+02:00-Seite 238
Page 253 of 313

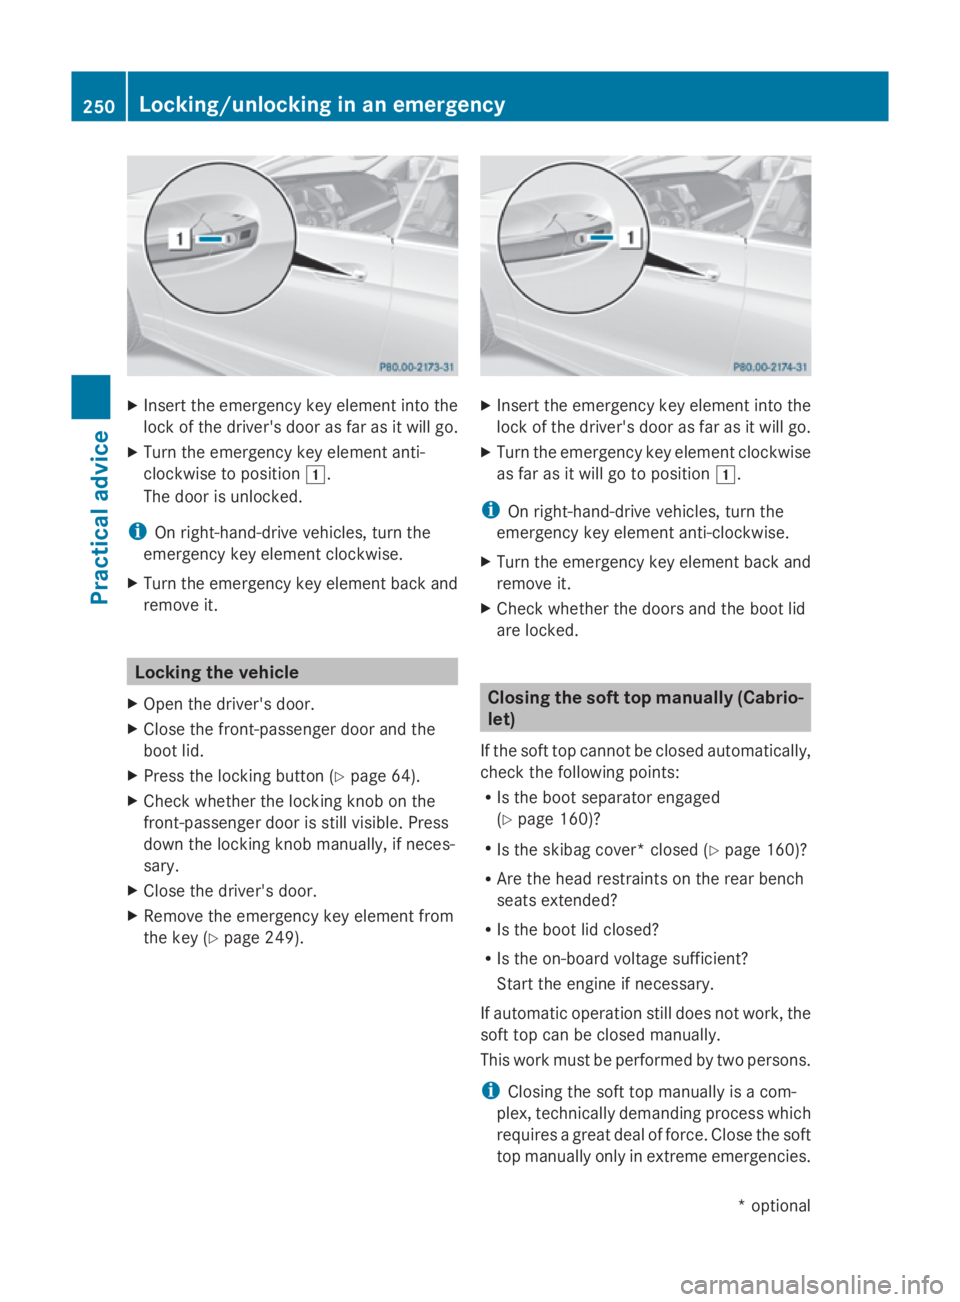
X
Insert the emergency key element into the
lock of the driver's door as far as it willg o.
X Turn the emergency key element anti-
clockwise to position 004A.
The door is unlocked.
i On right-hand-drive vehicles, turn the
emergency key element clockwise.
X Turn the emergency key element back and
remove it. Locking the vehicle
X Open the driver's door.
X Close the front-passenger door and the
boot lid.
X Press the locking button (Y page 64).
X Check whether the locking knob on the
front-passenger door is still visible. Press
down the locking knob manually,ifn eces-
sary.
X Close the driver's door.
X Remove the emergency key element from
the key (Y page 249). X
Insert the emergency key element into the
lock of the driver's door as far as it willg o.
X Turn the emergency key element clockwise
as far as it willgotop osition004A.
i On right-hand-drive vehicles, turn the
emergency key element anti-clockwise.
X Turn the emergency key element back and
remove it.
X Check whether the doors and the boot lid
are locked. Closing the soft top manually (Cabrio-
let)
If the soft top cannot be closed automatically,
check the following points:
R Is the boot separator engaged
(Y page 160)?
R Is the skibag cover* closed (Y page 160)?
R Are the head restraints on the rear bench
seats extended?
R Is the boot lid closed?
R Is the on-board voltage sufficient?
Start the engine if necessary.
If automatic operation still does not work, the
soft top can be closed manually.
This work must be performed by two persons.
i Closing the soft top manually is acom-
plex, technically demanding process which
requires agreat deal of force. Close the soft
top manually only in extreme emergencies. 250
Locking/unlocking in an emergencyPractical advice
*o
ptional
207_AKB; 2; 3, en-GB
mkalafa
,V ersion: 2.11.8.1
2009-07-23T10:23:49+02:00
-Seite 250