2009 MERCEDES-BENZ E-CLASS COUPE torque
[x] Cancel search: torquePage 18 of 313

Through-loading
................................ 167
Through-loading feature ...................169
Tightening torque .............................. 272
Time Setting (on-board computer) .......... 118
Setting the time (on-board com-
puter) ............................................. 118
TIREFIT kit
Storage location ............................ 207
Using ............................................. 264
Top Tether ............................................ 51
Total distanc erecorder .................... 110
Tourist mode see Intelligent Ligh tSystem
Tow-away protection ..........................59
Towing ................................................ 279
Towing atrailer
Folding in the bal lcoupling ............ 196
Folding out the bal lcoupling .......... 193
Towing eye
Fitting ............................................ 279
Removing ....................................... 280
Tow-starting ....................................... 279
Trailer 7-pin connector ............................. 197
Bulb failure indicator for LED
lamps ............................................. 197
Display message ...........218, 222, 225
Power supply ................................. 197
Trailer coupling
see Trailer tow hitch
Trailer loads
Technical data ............................... 304
Trailer tow hitch ................................ 193
Cleaning ......................................... 203
Trailer towing
Driving tips .................................... 194
ESP ®
................................................ 55
Mounting dimensions ....................303
Parking Guidance ........................... 143
Parktroni c...................................... 140
Transmission output (maximum)
Telephone/two-wa yradio .............. 285
Transmission positions ....................102
Transport (vehicle) ............................280
Trim strips Cleaning ......................................... 204 Trip computer
On-board computer .......................110
Trip meter .......................................... 110
Resetting (on-board computer) ......111
Turn signal
Display message .................... 222, 223
TV
Operating (on-board computer) .....114
Two-way radio
Installatio n..................................... 285
Type identification plate
see Vehicle identification plate ......286
Tyre grip ............................................. 192
Tyre pressure ................................... .186
Display message ............................ 213
Tyre pressure los swarning system
............................................................ 187
Tyres
Direction of rotatio n...................... 185
General notes ................................ 184
Technical data ....................... 297, 301
Tyre tread .......................................... .186 U
Unladen weight ................................. 291
Unlocking Emergency unlocking ..................... 249
From insid ethe vehicle (central
unlocking button) ............................. 64 V
Vanity mirror Sun viso r........................................ 172
Variable Speedtronic ........................133
Vehicle Emergency unlocking ............249, 250
Individua lsettings (on-board com-
puter) ............................................. 117
Leaving parked up .........................249
Towing ........................................... 279
Tow-starting ................................... 279
Transporting .................................. 280
Vehicle battery .................................. 273
Vehicle dimensions ...................291, 296
Vehicle electronics ...........................284 Index
15 207_AKB; 2; 3, en-GB
mkalafa,
Version: 2.11.8.1 2009-07-23T10:23:49+02:00-Seite 15
Page 58 of 313

ESP
®
trailer stabilisation If your trailer begin
stolurch, you can only
stabilise th evehicle/trailer combinatio nby
depressing th ebrak efirmly.
In this situation, ESP ®
assists you and can
detect when th etrailer begin stolurch.
ESP ®
slows th evehicle down by braking and
limiting th eengineo utput until th evehicle/
trailer combinatio nhas stabilised.
Traile rstabilisation is active above speeds of
about 65 km/h. G
Ris
kofa ccident
If road and weather condition sare poor,
trailer stabilisation will no tbeable to prevent
th et railer from swervin gand will thus be
unabl etoreducethe risk of an accident. Trail-
ers with ahigh centr eofgravity can tip over
before ESP ®
can detect this.
Traile rstabilisation does no twork if ESP ®
is
deactivate dordisable dbecause of amal-
function.
ETS (Electronic Traction Support) Tractio
ncontrol is part of ESP ®
.
Tractio ncontrol brakes th edrivew heels indi-
vidually if they spin .This enables you to pull
away and accelerate on slippery surfaces ,for
example, if th eroad surface is slippery on one
side.
Tractio ncontrol remains active when you
deactivate ESP ®
. G
Ris
kofa ccident
Tractio ncontrol canno treduc ethe risk of an
acciden tifyou driv etoo fast .Tractio ncontrol
canno toverride th elaws of physics.
Activating/deactivatin gESP® ESP
®
is activated automatically when the
engin eisrunning. It may be best to deactivate ESP
®
in th efol-
lowin gsituations:
R when usin gsnowc hains
R in deep snow
R on san dorgravel G
Ris
kofa ccident
Activate ESP ®
as soon as th esituations
describe dabov enol onger apply. ESP ®
will
otherwise no tbeable to stabilise th evehicle
if th evehicle start stoskidoraw heel starts
to spin.
If you deactivate ESP ®
:
R ESP ®
no longer improve sdriving stability.
R engin etorque is no tlimited and th edrive
wheels are able to spin .The spinning
wheels produce acuttin geffect for better
traction.
R traction control is still activated.
R ESP ®
still provide ssupport when you
brake.
i If ESP ®
is deactivate dand on eorm ore
wheels start to spin ,the 00C6 warning lamp
in th einstrumen tcluste rflashes. In such
situations ,ESP ®
will no tstabilise th evehi-
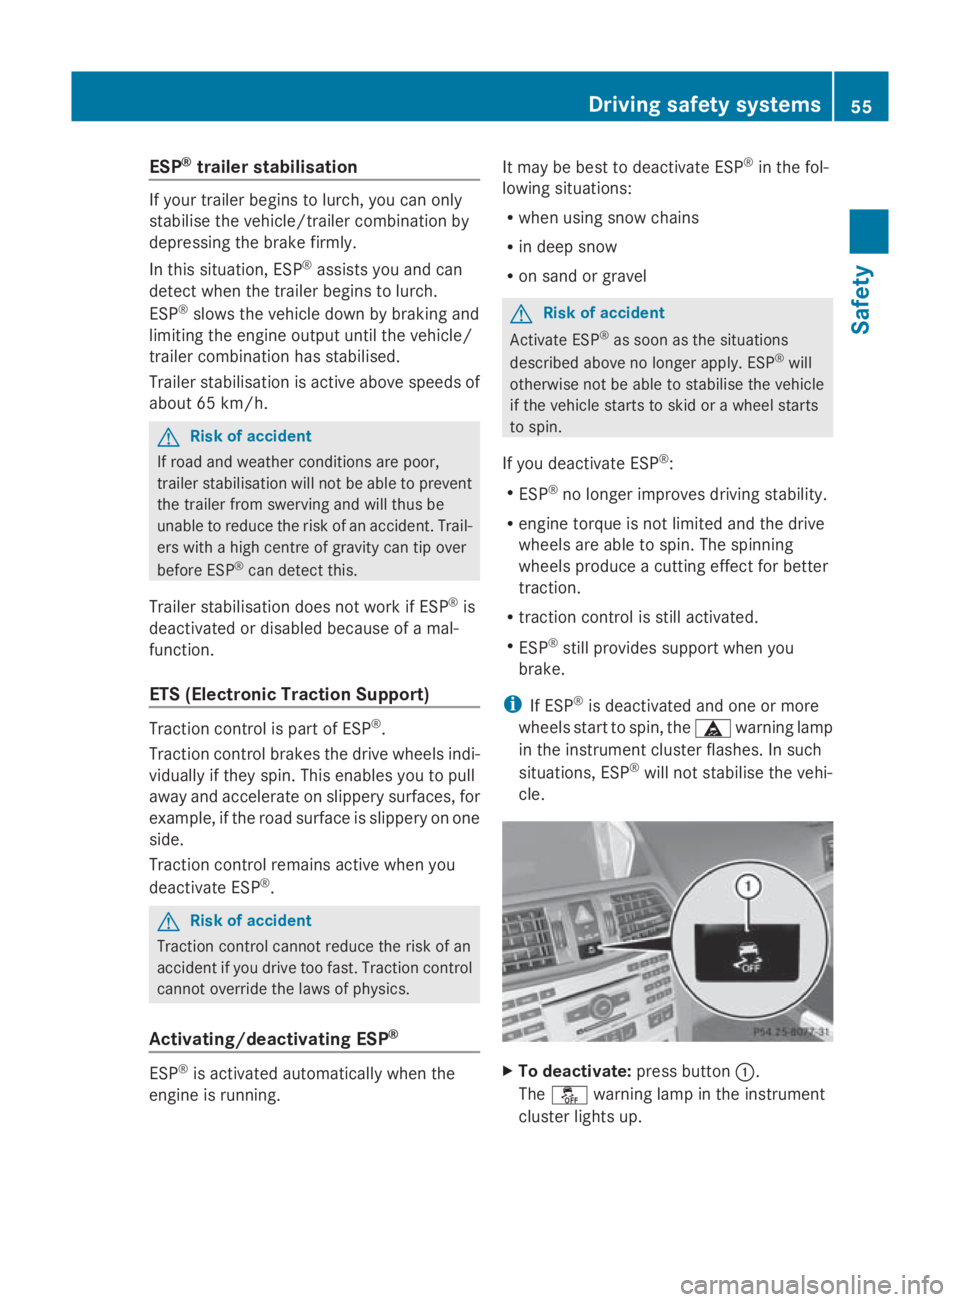
cle. X
To deactivate: pressbutton 0046.
The 00C7 warning lamp in th einstrument
cluste rlight sup. Driving safety systems
55Safety
207_AKB;2;3,en-GB
mkalafa, Version:2.11.8.1
2009-07-23T10:23:49+02:00
-Seite 55 Z
Page 192 of 313

X
Press the 0064button.
The tyre pressure values stored at the last
restart will continue to be monitored. Interchanging the wheels
G
Risk of accident
Interchange the fron tand rear wheels only if
they have the same dimensions :for example
size, offset ,etc.
After awheel is changed, have the tightening
torque checked at aspecialist workshop that
has the necessary specialist knowledge and
tools to carry out the work required.
Mercedes-Benz recommends that you use a
Mercedes-Benz Servic eCentre for this pur-
pose. In particular, work relevant to safety or
on safety-related systems must be carried out
at aq ualified specialist workshop.
The wheels could work loose if they are not
tightened to atorque of 130 Nm.
For safety reasons, Mercedes-Benz recom-
mends that you only use wheel bolts of the
correc tsize which have been approved for
Mercedes-Benz vehicles.
The wear patterns on the fronta nd rear tyres
differ, depending on the operating conditions.
Interchange the wheels before aclear wear
patter nhas formed on the tyres. Frontt yres
typically wear more on the shoulders and the
rear tyres in the centre.
On vehicles that have the same size fronta nd
rear wheels you can interchange the wheels
every 5,000 km to 10,00 0kmdepending on
the degree of tyre wear. Do not reverse the
direction of tyre rotation.
Clean the contact surfaces of the wheel and
the brake disc thoroughly every time awheel
is interchanged. Check the tyre pressure and,
if necessary, restart the tyre pressure loss
warning system*. Winter driving
Points to remember
Have your vehicle winterproofed at aqualified
specialist workshop, e.g. at aMercedes-Benz
Servic eCentre, at the onset of winter.
Observe the notes in the "Changing awheel"
section (Y page 189). Winter tyres
Use winter tyres at temperatures below
+7 ˚C and in wintry road conditions. Only
winter tyres displaying the 004Dsnowflake
symbol in addition to the M+S markin gpro-
vide optimum grip in wintry road conditions.
Only these tyres will allow the ABS and ESP
driving systems to function optimally in win-
ter, as these tyres have been designed spe-
cifically for driving on snow.
Use winter tyres of the same make and tread
on all wheels to maintain safe handling char-
acteristics. G
Risk of accident
Winter tyres with atread depth of less than
4mmm ust be replaced immediately. They are
no longer suitable for winter use and can no
longer provide sufficient grip. This could
cause you to lose control of your vehicle and
cause an accident.
Always observe the maximum permissible
speed specified for the winter tyres you have
fitted. If you fit winter tyres which have a
lower maximum permissible speed than that
of the vehicle, affix an appropriate warning
sign in the driver's field of vision. This can be
obtained at aqualified specialist workshop,
e.g. from aMercedes-Benz Servic eCentre.
Under these circumstances, you should also
restrict the maximum speed of the vehicle
using permanen tSpeedtronic 37
to the maxi-
mum permissible speed for the winter tyres
(Y page 135).
37 Only available for certain countries. Winter driving
189Operation
*optional
207_AKB; 2; 3, en-GB
mkalafa,
Version: 2.11.8.1 2009-07-23T10:23:49+02:00-Seite 189 Z
Page 275 of 313

X
Place the emergenc yspare wheel ontot he
centring pin and push it on. X
Tighten the wheel bolts until they are fin-
ger-tight.
X Unscrew the centring pin.
X Tighten the last wheel bolt until it is finger-
tight.
Lowering the vehicle X
Lower the vehicle. To do this, turn the crank
of the jack anti-clockwise until the vehicle
is once again standin gfirmly on the ground.
X Place the jack to one side. X
Tighten the wheel bolts evenly in across-
wise patter ninthe sequence indica-
ted (0046 to0086). The tightening torque is
130 Nm. G
Risk of accident
Have the tightening torque checked immedi-
ately after awheel is changed. The wheels
could work loose if they are not tightened to
at orque of 130 Nm.
X Turn the jack back to its initial position and
store it together with the rest of the vehicle
tool kit in the stowage well under the boot
floor.
Vehicles with the "Minispare" emergency
spare wheel*:
X Transport the faulty wheel in the boot.
i When you are driving with the "Minispare"
emergenc yspare wheel* fitted, the tyre
pressure loss warning system* cannot
function reliably. MOExtended run-flat system*
The MOExtended run-flat system may only be
used in conjunction with the activated tyre
pressure loss warning system.
! The maximum permissible distanc ewhich
can be driven in run-flat mode depends on
the load in the vehicle. It is 80 km if the
vehicle is partially laden and 30 km if fully
laden. 272
Flat tyrePractical advice
*o
ptional
207_AKB; 2; 3, en-GB
mkalafa,
Version: 2.11.8.1 2009-07-23T10:23:49+02:00-Seite 272